| Author |
 Topic Search Topic Search  Topic Options Topic Options
|
JC-WI 
Orange Level Access

Joined: 11 Sep 2009
Location: wisconsin
Points: 34621
|
 Post Options Post Options
") Thanks(0) Thanks(0)
 Quote Quote  Reply Reply
 Posted: 29 Jul 2010 at 10:58am Posted: 29 Jul 2010 at 10:58am |
"and a worn wire on the coil" - Did you put good wire back on and not some resistor wire?
"I replaced the plugs, plugwires, rotor, cap, points",
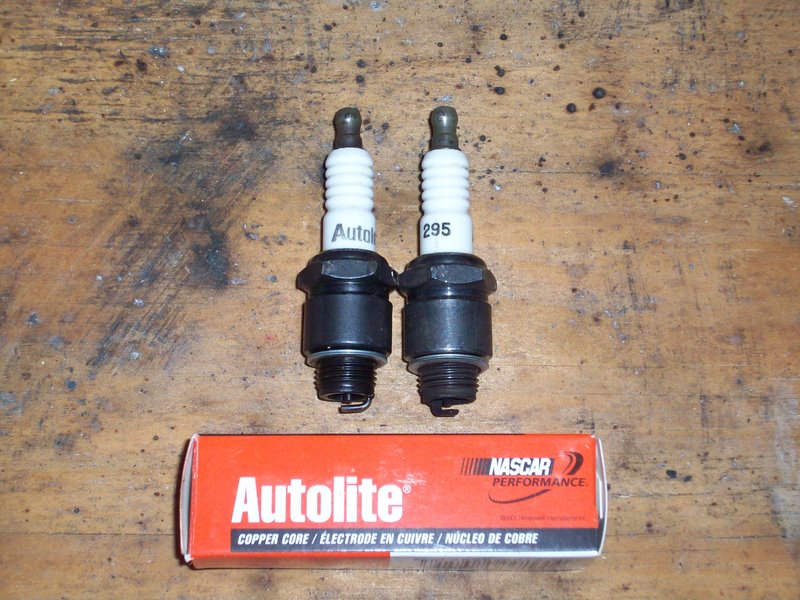
- 1. what plugs you put in? champs or AC or autolite? I use AC... champs -never!
2. did you connect the condensor up correctly in distributor cap?
3. did you check rotor in dist. for side to side slop/play?
4. did you work on this stuff with greasy /dirty fingers or use graphite grease or put fingers inside of cap/on rotor.
5. Have you reset the timing to the FIRE mark yet at IDLE?
6. Does it sound labored when it is just running?
7. As a general rule of thumb is this, when the tractor is being cranked by hand, the initial spark should be just after top dead center so the person cranking does not get killed trying to start those old beasts.
8.having oil come out the aircleaner is usually caused by fuel in cylinder and intake valve is open to allow compression or explosion to go out through intake system. - Can be caused by firing order wrong, or crossfire in the cap or rotor or through plug wires Or point contacts not making good conact..or poor connection/ground in dist. or coil. Also could be sticking valves... but don't think that is the case here.
9. what else did you do? pull distributor or set valves or ??? change coils or convert to 12 volts etc???
Something doesn't sound right and should be a simple thing such s the timing. Haven't for years used feeler gauges for plugs or points, just set them by sight and adjust timing by ear. Old timers said matchbook cover was close enough for point gapping. mmm, don't know if match book covers have gotten thinner since then or not.
10. Is your spark hot? Like when its running and pull a plug wire and it goes SNAP SNAP SNAP 3/4 inch sparks long blue /red /white color to them? Yellow short and thin is not good. Get on it and get it figured out.
Edited by JC(WI) - 29 Jul 2010 at 11:02am
|
 |
|
Sponsored Links
|
|
|
Gerald J.
Orange Level
Joined: 12 Sep 2009
Location: Hamilton Co, IA
Points: 5636
|
Post Options
Thanks(0)
Quote Reply
Posted: 29 Jul 2010 at 11:28am |
|
Yellow and thin spark is a sure sign of a bad condenser.
I&T covers rebuild, not daily care. Daily care items, like tuneups and oil changes are covered in the original owner's manual. The AC shop manual probably has ten times the information of the I&T manual and may be more accurate. Once I got the JD shop manual for my 4020 that is 1-1/2" thick, I use the I&T manual as a book mark, its too thin to be a door stop.
Gerald J.
|
|
braskyku
Bronze Level


Joined: 08 Jul 2010
Location: Kansas
Points: 15
|
Post Options
Thanks(0)
Quote Reply
Posted: 29 Jul 2010 at 9:06pm |
|
|
|
1955 WD45 schwartz front end
|
|
JimD
Orange Level
Joined: 11 Sep 2009
Location: Mounds, OK
Points: 2116
|
Post Options
Thanks(0)
Quote Reply
Posted: 29 Jul 2010 at 9:14pm |
I'm not going to bother telling you how to time the tractor again, but I will comment on your plugs. The one on the right is fowled. Your timing in severly retarded. You might ask some of them fellers that are so dead set on the timing light how to advance timing using the light. I don't even remember where mine is, or the last time I used it.
If you want to call my toll free number during business hours, I will be happy to go through timing the tractor with you by ear. You will need to be able to stand next to the distributor and talk to me on the phone. Have the 2 bolts just a little loose so you can turn the distributor when you call.
Or you can keep trying what hasn't worked so far. I'm not trying to be offensive, but we could have had you hapilly working a long time ago.
JImD
Edited by JimD - 29 Jul 2010 at 9:19pm
|
Owner of OKtractor.com PM for an instant response on parts. Open M-F 9-6 Central. We have new and used parts. 877-378-6543
|
|
JimD
Orange Level
Joined: 11 Sep 2009
Location: Mounds, OK
Points: 2116
|
Post Options
Thanks(0)
Quote Reply
Posted: 29 Jul 2010 at 9:16pm |
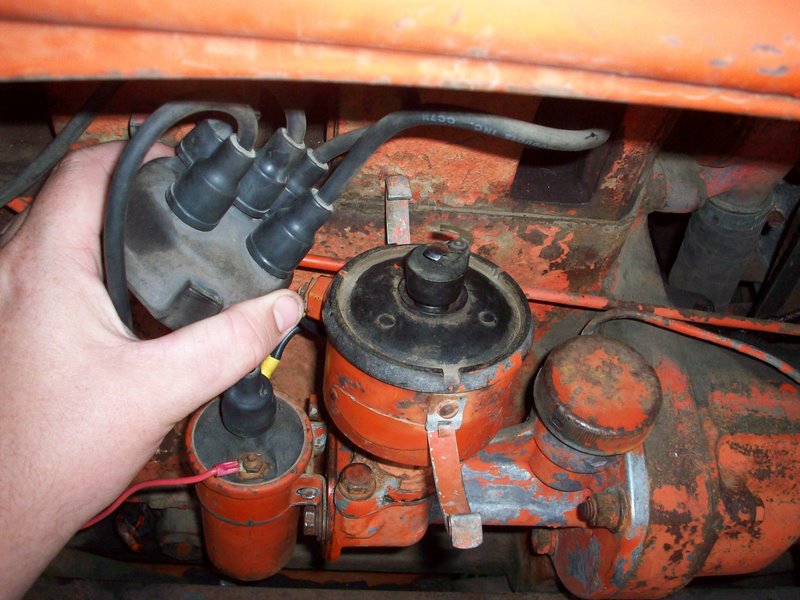
You also have some plug wires swapped. Switch out #'s 2 and 3. and let us know what you have.
JImD
|
Owner of OKtractor.com PM for an instant response on parts. Open M-F 9-6 Central. We have new and used parts. 877-378-6543
|
|
braskyku
Bronze Level
Joined: 08 Jul 2010
Location: Kansas
Points: 15
|
Post Options
Thanks(0)
Quote Reply
Posted: 29 Jul 2010 at 9:19pm |
|
Thanks for your help.
No, I didn't use a resistor wire. In the pictures you can see it. Its black with yellow ends.
I've double check to make sure everything is clean and tight.
Haven't tried timing at idle. That is my next try.
I wouldn't call it labor while running but more like.... not right.
I didn't do anything besides the tune up. I had ordered the parts 6 months ago and they were still laying around so I finally decided to put them on. Wish I never would have!
Spark is good and hot. Real blue and it bit me once while making sure.
So here's the plan
1. I've ordered a video from Steiner Tractor called how to tune up your wd45.
2. Do what the video says
3. If that doesn't work, time it at idle
4. if that doesn't work, time it to the other F at idle
5. if that doesn't work, start replacing one part at a time.
6. if that doesn't work, pull out hair
7. if that doesn't work, pay someone
|
|
1955 WD45 schwartz front end
|
|
braskyku
Bronze Level
Joined: 08 Jul 2010
Location: Kansas
Points: 15
|
Post Options
Thanks(0)
Quote Reply
Posted: 29 Jul 2010 at 9:44pm |
Hey Jim, Thanks for all of your help! I have carefully read all of the ideas and gone with what I figured was the safest bet. I'm sorry to say that while I know my way around a tractor I could know a lot more. Don't worry, you can't offend me. I really do appreciate all the support. I'm going to print out your instructions and give it a shot. There are a lot of ideas and info on here. You've been a big help! I honestly may take you up on the phone call. I still want to mess with it some more before I call in the reinforcements. Thanks again, David I named her Elvira and she cleaned this out last winter. 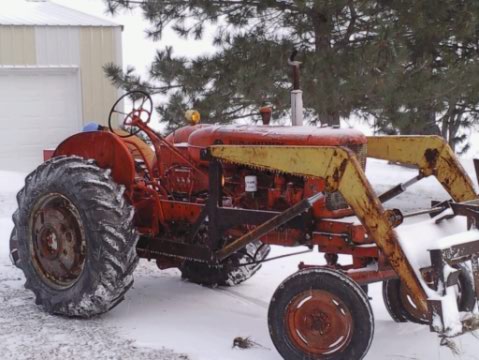  
|
|
1955 WD45 schwartz front end
|
|
braskyku
Bronze Level
Joined: 08 Jul 2010
Location: Kansas
Points: 15
|
Post Options
Thanks(0)
Quote Reply
Posted: 29 Jul 2010 at 10:22pm |
This is the wire that was replaced. You can see the black wire that replaced it too.  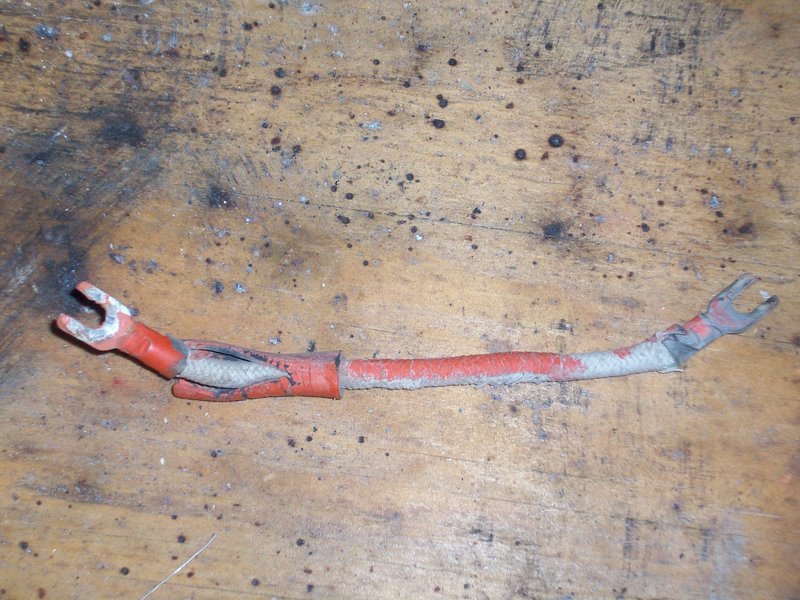
|
|
1955 WD45 schwartz front end
|
|
Jeff(WC)(MI)
Orange Level
Joined: 12 Sep 2009
Location: S.E. Michigan
Points: 376
|
Post Options
Thanks(0)
Quote Reply
Posted: 29 Jul 2010 at 10:37pm |
 braskyku wrote: braskyku wrote:
Thanks for your help.
No, I didn't use a resistor wire. In the pictures you can see it. Its black with yellow ends.
I've double check to make sure everything is clean and tight.
Haven't tried timing at idle. That is my next try.
I wouldn't call it labor while running but more like.... not right.
I didn't do anything besides the tune up. I had ordered the parts 6 months ago and they were still laying around so I finally decided to put them on. Wish I never would have!
Spark is good and hot. Real blue and it bit me once while making sure.
So here's the plan
1. I've ordered a video from Steiner Tractor called how to tune up your wd45.
2. Do what the video says
3. If that doesn't work, time it at idle
4. if that doesn't work, time it to the other F at idle
5. if that doesn't work, start replacing one part at a time.
6. if that doesn't work, pull out hair
7. if that doesn't work, pay someone
|
8. if that doesn't work, do what i did tonight, pull her right out! just kidding
|
|
JC-WI
Orange Level Access
Joined: 11 Sep 2009
Location: wisconsin
Points: 34621
|
Post Options
Thanks(0)
Quote Reply
Posted: 29 Jul 2010 at 11:02pm |
I just got in now and read these postings.
I have tell you, you don't know your way around Allis as good as you thought. Now this will be an embarressing experiance for you specially when you have shown your troubles to the whole wide web.
And now the lesson, go out and do what Jim D. told you to do, - switch plug wires 2 & 3 and then tell us what happened. The distributer looking down at it turns clockwise, and the fireing order is 1243.
Now, save your money, - "So here's the plan
1. I've ordered a video from Steiner Tractor called how to tune up your wd45.
2. Do what the video says" theres been more than enough advice given here to get you through. Now have a good night and put on your list of to do's things fist thing in the morning is changing plug wires. ;-)
|
|
Bob D. (La)
Orange Level Access
Joined: 12 Sep 2009
Location: Louisiana
Points: 25529
|
Post Options
Thanks(0)
Quote Reply
Posted: 30 Jul 2010 at 5:12am |
|
While your at it, don't feel bad if you have crossed a couple plug wires. I know how they are to be connected, but 3 or 4 years ago, time constraints, being overly tired, and just plain not being able to count to four I messed it up on my WD45, twice, before I finally opened my eyes and did it correctly. Have a good day.
|
|
When you find yourself in a hole,PUT DOWN THE SHOVEL!!!
|
|
CJohnS MI
Orange Level
Joined: 27 Jun 2010
Location: Lapeer MI
Points: 326
|
Post Options
Thanks(0)
Quote Reply
Posted: 30 Jul 2010 at 6:57am |
|
#2 & #3 plug wires are reversed.
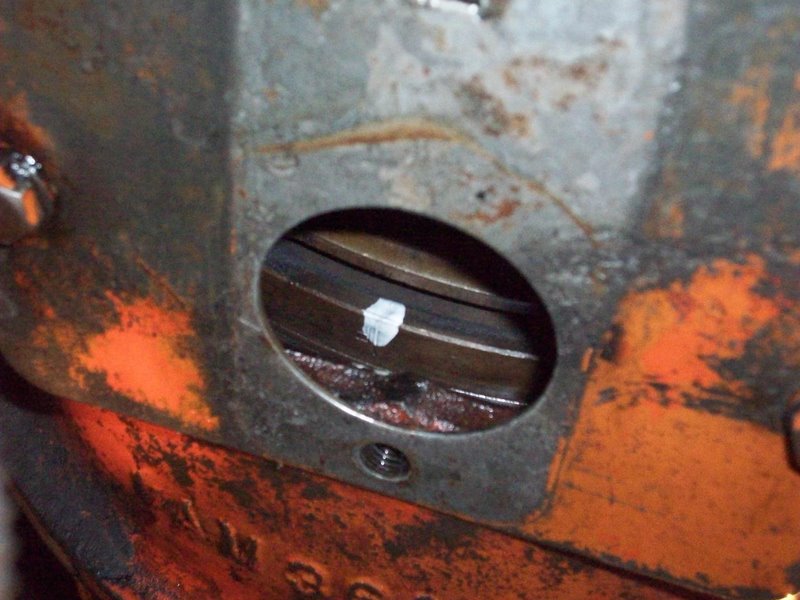
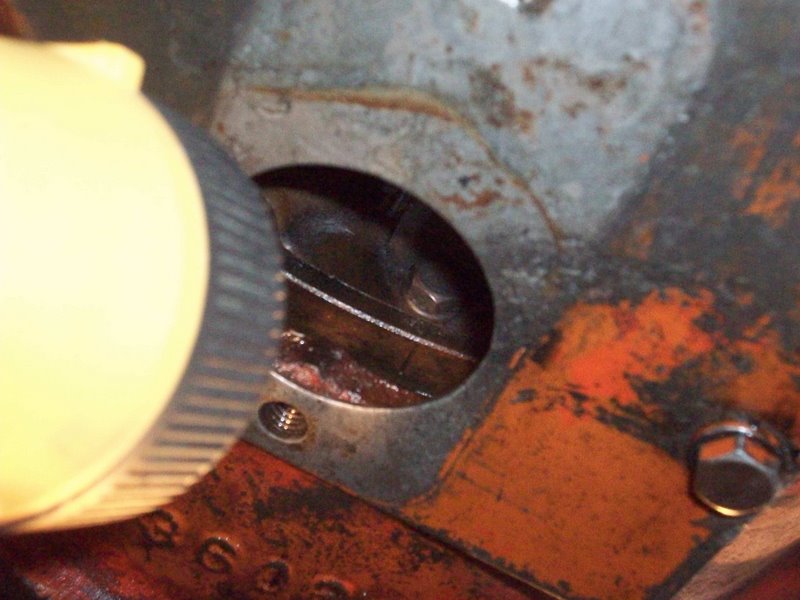
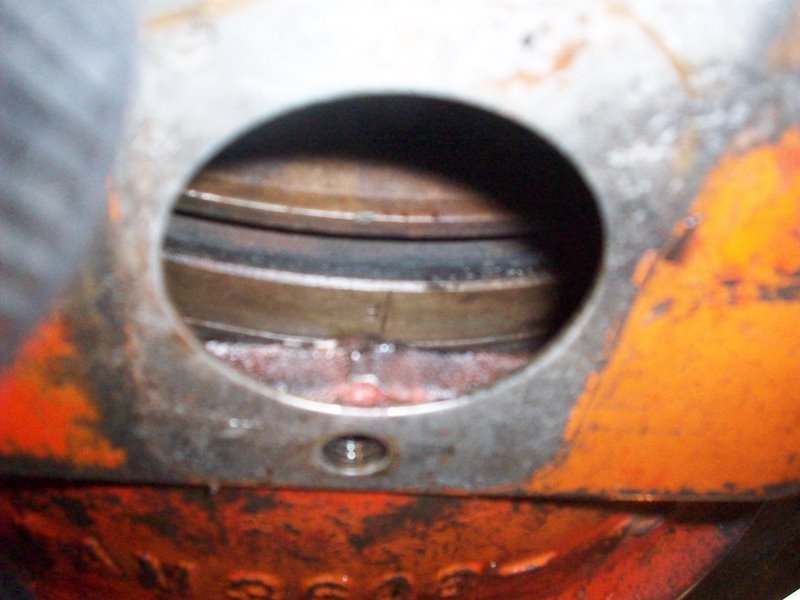
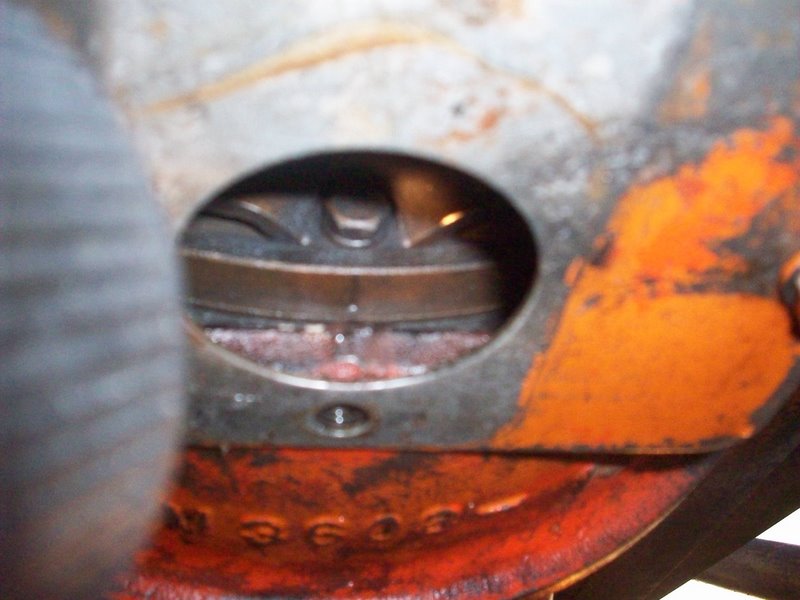
Thanks for those fantastic photos - they are perfectly done & can be used to help others in future. Especially the shot of flywheel timing mark.
C. John
|
|
Steve M C/IL
Orange Level
Joined: 01 Jul 2010
Location: shelbyville IL
Points: 691
|
Post Options
Thanks(0)
Quote Reply
Posted: 30 Jul 2010 at 9:50am |
|
Crossed wires from day one.Any time you belch back through the carb after haveing good running unit prior to repairs....
|
|
Jim Hancock
Orange Level

Joined: 11 Sep 2009
Location: EL Reno, Ok.
Points: 1112
|
Post Options
Thanks(0)
Quote Reply
Posted: 30 Jul 2010 at 10:30am |
Here's one for you: This one had us scrtching our heads for awhile. Basically, ran rough for a time when we were using it for about two hours on light duty, mostly a fast idle and would rev up but got us by just puttering around the place here. Parked it and shut the fuel off to run the carb out of fuel. Now it was running when we finished and stopped for the day.
Went to fire it up the next time about 3 weeks later and spent the next 8 hours or so over the next 3 days trying to get it to start. It would just pop on the last revolution-to give us hope to keep trying...Hmmmm...... We went through everything from fuel to electrics-still with the same result-pop!
Finally my buddy had the bright idea to get back to the basics--bring #1 on compression and see which way the rotor bug was pointing... you ready for this?????---- it was pointing to #4!!!! even though the plug wires were set right on the cap..1,2,4,3. Now why my 45 was even running 180 degrees off is flabbergasting to think of as I didn't have a clue that it even would.
After we set it back right and went from there, made the adjustments to the carb and timed it by ear, it'll now start within the 1st spin without the choke.
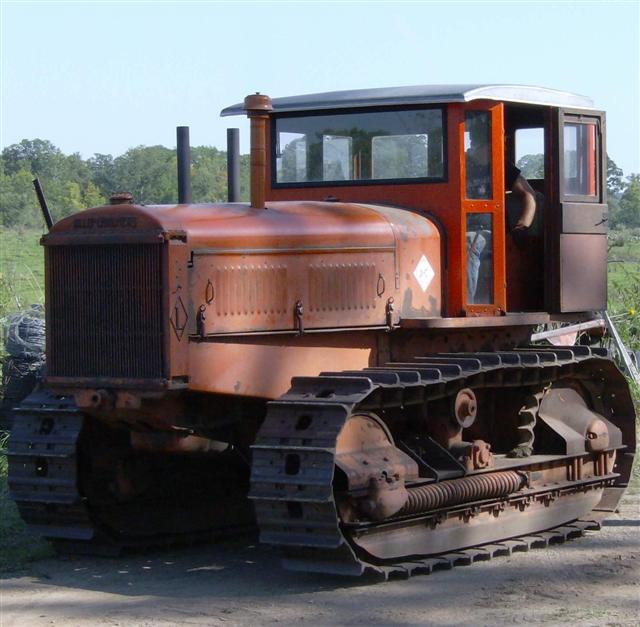
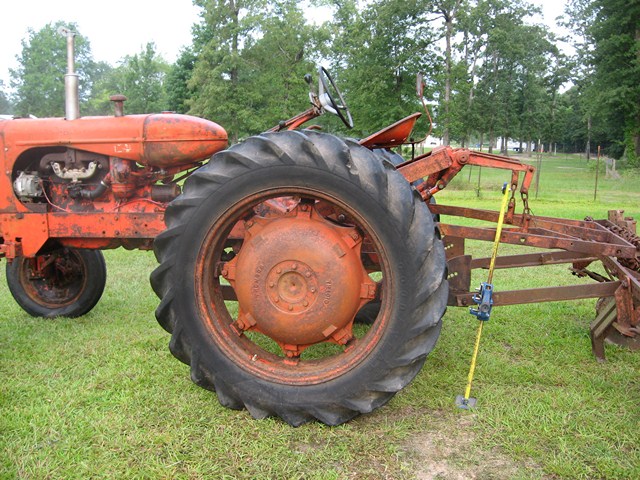
This is the tractor that has the loader on it that I'm having to repair the cylinder on.
So, be assured that you're not alone when things "appear" to go from good to "shoulda left it alone"! But what an education!!
|
|
George Davenport
Silver Level


Joined: 20 Sep 2009
Location: Trenton NC
Points: 127
|
Post Options
Thanks(0)
Quote Reply
Posted: 31 Jul 2010 at 10:32am |
|
Bump
|
|
Brian Jasper co. Ia
Orange Level
Joined: 11 Sep 2009
Location: Prairie City Ia
Points: 10508
|
Post Options
Thanks(0)
Quote Reply
Posted: 31 Jul 2010 at 11:58am |
Looking at your pictures Brasky, and if the distributor turns counter clockwise, your spark plug wires are in the correct order. Remember, 1,2,4,3, NOT 1,3,4,2. Crank the engine with the dist cap off to be sure of which way it turns. Looking at the pic of your points, they indicate counter clockwise rotation. Once you know which way it turns, find #1 compression stroke. You can use your thumb over the spark plug hole or a compression test gauge. Once you find that compression stroke, turn the engine to TDC (top dead center, piston all the way to the top). Look at where the rotor is pointing. That is where the #1 plug wire goes. From there, continue around the cap in firing order in the direction the dist spins. Now that we have the plug wires in the correct locations, it's time to "find a spark". To do that, I turn the switch on and stick a spark plug in the end of the coil wire and rotate the distributor very slowly until the points open while making sure the #1 post of the cap is over the tip of the rotor. The instant the spark jumps, stop turning the dist.
Now, repeat after me: "Ignition timing is set at idle speed only. The only exceptions to this rule are some large 2 cycle outboards." Above idle speed, the mechanical advance in the distributor advances the timing. If you set the F line in the center of the window above idle, your timing will be retarded (late) and the engine will lack power.
|
|
"Any man who thinks he can be happy and prosperous by letting the government take care of him better take a closer look at the American Indian." Henry Ford
|
|
Duey (IA)
Orange Level

Joined: 11 Sep 2009
Location: Forest City,IA
Points: 252
|
Post Options
Thanks(0)
Quote Reply
Posted: 31 Jul 2010 at 1:33pm |
|
These instruction are from the operating instructions
and repair manual for the WD45 tractor.
"Place No. I spark plug wire directly above rotor.
Proceed around distributor clockwise No. 2,4
and 3. Place coil wire in center. When
checking timing with timing light the spark
will occur when fire mark is in center of
inspection opening when engine is above
1000 R.P.M."
This indicates the fire mark is the advance mark
of an engine running faster than 1000 R.P.M.
when checked with a timing light.
Edited by Duey (IA) - 31 Jul 2010 at 1:34pm
|
|
Steve M C/IL
Orange Level
Joined: 01 Jul 2010
Location: shelbyville IL
Points: 691
|
Post Options
Thanks(0)
Quote Reply
Posted: 31 Jul 2010 at 1:49pm |
Clock wise rotation.The rotor even "tells" you that.The tang trails not leads.
|
|
Brian Jasper co. Ia
Orange Level
Joined: 11 Sep 2009
Location: Prairie City Ia
Points: 10508
|
Post Options
Thanks(0)
Quote Reply
Posted: 31 Jul 2010 at 4:38pm |
|
I stand corrected on the engine speed.
|
|
"Any man who thinks he can be happy and prosperous by letting the government take care of him better take a closer look at the American Indian." Henry Ford
|
|
braskyku
Bronze Level
Joined: 08 Jul 2010
Location: Kansas
Points: 15
|
Post Options
Thanks(0)
Quote Reply
Posted: 31 Jul 2010 at 5:05pm |
|
Hi again guys,
I am happy to say that this will be my last post about the topic. She is running like a sewing machine now!
In case you are curious what I did...
I removed the plug wires, plugs, distributer, rotor, dust cover, and points.
I regapped everything (which was perfect).
I cranked it over with the hand crank until I found the compression stroke on number one.
Then I crawled under her and my wife SLOWLY turned the hand crank until I could see the "mark" was dead center in the inspection port. I want to stress that IT IS NOT ***NOT*** the "F". The "F" did not work but the "mark" | was TDC. Disregard the "F".
I put the rotor on with the dust cover off.
Then I lined up the rotor with the Battery Lead Terminal. There is a wire that goes to/from the coil.
I rotated it until the points just broke. Then one more time which was 180 degrees from the first time the points broke. Tightened it down.
Next I put it all back together.
I made sure everything was tight.
Then I fired her up and....
Perfect!
No adjustments needed!
JimD, you will be happy to know that I never once touched the timing light this time. That one plugs was just a little dirty from greasy fingers. I wiped it off and it was just fine. Looking at those pictures again you were right, I did have the wires on for a counterclockwise rotation. That was surely part of the problem. However, I did switch them as suggested and it still wasn't right.
JC from Wisconsin, Don't worry... I don't feel like a fool. LOL!!! By the way, you wouldn't happen to be a German would you? You "sound" like one. :)
The rest of the fellas.... Thank you so much for all of the advice and support. Its a good feeling when she turned over and ran right. I did make sure it had power again. I ran her up the steepest hill on my property and it powered right up it.
Once again, Thank you everyone so much for all of the help!
Now, I'm off to the next project... Brakes.
|
|
1955 WD45 schwartz front end
|
|
Brian Jasper co. Ia
Orange Level
Joined: 11 Sep 2009
Location: Prairie City Ia
Points: 10508
|
Post Options
Thanks(0)
Quote Reply
Posted: 31 Jul 2010 at 9:27pm |
|
Glad to hear you got it straightened out. I got the book out and was surprised to see the above 1000 rpm thing. I've done it by ear so long, didn't realize that was the "correct" way to do it.
|
|
"Any man who thinks he can be happy and prosperous by letting the government take care of him better take a closer look at the American Indian." Henry Ford
|
|
Steve M C/IL
Orange Level
Joined: 01 Jul 2010
Location: shelbyville IL
Points: 691
|
Post Options
Thanks(0)
Quote Reply
Posted: 31 Jul 2010 at 11:09pm |
|
Isn't "F" for the timing light with engine at speed? FIRE!
|
|
CTuckerNWIL
Orange Level

Joined: 11 Sep 2009
Location: NW Illinois
Points: 22825
|
Post Options
Thanks(0)
Quote Reply
Posted: 01 Aug 2010 at 6:50am |
Yes, "When checking timing with timing light the spark
will occur when fire mark is in center of
inspection opening when engine is above
1000 R.P.M."
|
|
|
|
JC-WI
Orange Level Access
Joined: 11 Sep 2009
Location: wisconsin
Points: 34621
|
Post Options
Thanks(0)
Quote Reply
Posted: 01 Aug 2010 at 11:29am |
Braskyku,
Glad to hear you finally got it running.
But you did lose me in the "I lined up the rotor with the Battery Lead Terminal". With the engine on compression stroke and set at TDC, an points just ready to open, its going to be in the wrong position from what the factory set it at.... Your No. 1 plug wire should be sitting in the position of your pic just below the autolite sparkplug box pic. Is that where its at now? - But as long as you got spark at the right time, to the right cylinder, it really doesn't matter where they are on the cap.
Didn't say you would be a fool, just said it would be an "embarressing experiance" like in "oh dummy me". I've been there too.
Now if your talking about brakes on the WD45 and have never worked on them, and have not read up on them either, you will be back here again, and plenty of fellows will help with suggestions and experiances from their brake repairs. Like getting the pins out.... are they loose , if not better start soaking them with some kind of rust buster now.
Finally, Not german but just some sevede . LOL
|
|