| Author |
 Topic Search Topic Search  Topic Options Topic Options
|
captaindana 
Orange Level

Joined: 14 Sep 2009
Location: Fort Plain, NY
Points: 2580
|
 Post Options Post Options
") Thanks(0) Thanks(0)
 Quote Quote  Reply Reply
 Topic: D19 rear width adjustment Topic: D19 rear width adjustment
Posted: 21 Jan 2024 at 7:04am |
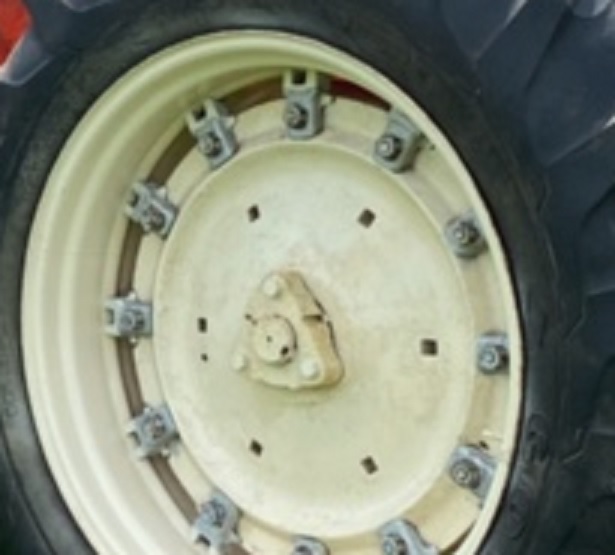
I’m not sure if I have ever moved the rim position like this set up. What is the procedure? I need to move them in so I can get her into my winter shop. Thanks. Dana 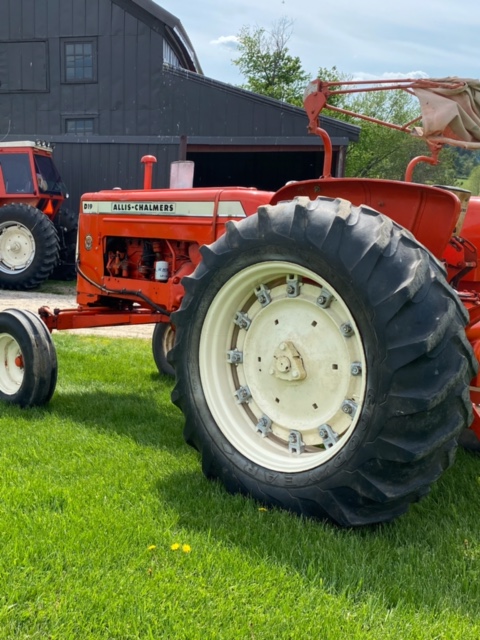
|
|
Blue Skies and Tail Winds
Dana
|
 |
|
Sponsored Links
|
|
|
PaulB
Orange Level
Joined: 12 Sep 2009
Location: Rocky Ridge Md
Points: 5164
|
Post Options
Thanks(0)
Quote Reply
Posted: 21 Jan 2024 at 7:16am |
|
I'm sure that the D19 OPERATORS manual has a detailed description of how to remove most of the rim clamps and reposition them on another bevel of the rim. you may have to put the rim/tires on opposite sides to get the spacing you desire.
|
|
If it was fun to pull in LOW gear, I could have a John Deere.
Real pullers don't have speed limits.
If you can't make it GO... make it SHINY
|
|
DanWi
Orange Level Access

Joined: 18 Sep 2009
Location: wttn
Points: 1946
|
Post Options
Thanks(0)
Quote Reply
Posted: 21 Jan 2024 at 7:18am |
|
Loosen all the blocks around the rim that hold it onto the center hub. To the last couple threads on the bolts or maybe even take out a section of blocks. Then move the rim into the next hump that fits in the blocks and tighten all the blocks back up evenly. Other way would be to remove center wedge and slide the whole thing in. Power adjust wheels were so much better.
Edited by DanWi - 21 Jan 2024 at 7:21am
|
|
darrel in ND
Orange Level

Joined: 22 Nov 2009
Location: Hebron, ND
Points: 8741
|
Post Options
Thanks(0)
Quote Reply
Posted: 21 Jan 2024 at 7:54am |
|
In the picture, I'm not seeing another bump on the outer rim for those clamps. Does however look like your cast center is clear out at the end of the axle. So I would move the cast center and all in on the axle. There are some special "pusher bolts" that you will need for that job. You pull out the three bolts holding the wedge in, then the pusher bolts go in and will push the wedge out, then you reposition it on the axle and put the regular bolts back in. After you take out the regular bolts, there will be threads for the pusher bolts that will need a super cleaning, then grease the threads on the bolts and inside the wedge, then just go around the to each bolt adding pressure by tightening them, little by little.
Darrel
|
|
DanWi
Orange Level Access
Joined: 18 Sep 2009
Location: wttn
Points: 1946
|
Post Options
Thanks(0)
Quote Reply
Posted: 21 Jan 2024 at 9:56am |
|
What width are you at and what do you have to get down to?
|
|
DiyDave
Orange Level Access

Joined: 11 Sep 2009
Location: Gambrills, MD
Points: 54465
|
Post Options
Thanks(0)
Quote Reply
Posted: 21 Jan 2024 at 4:38pm |
What Darrel said! X2... 
|
|
Source: Babylon Bee. Sponsored by BRAWNDO, its got what you need!
|
|
captaindana
Orange Level
Joined: 14 Sep 2009
Location: Fort Plain, NY
Points: 2580
|
Post Options
Thanks(0)
Quote Reply
Posted: 21 Jan 2024 at 4:54pm |
|
OM Lord I feel like a moron. Yes I sure know about the double bevel deal. I want to move the axel clamps. I’ve used pushers on my other bigger tractors. I have to find some pushers for this one! Thanks! Dana
|
|
Blue Skies and Tail Winds
Dana
|
|
steve(ill)
Orange Level Access

Joined: 11 Sep 2009
Location: illinois
Points: 88653
|
Post Options
Thanks(0)
Quote Reply
Posted: 21 Jan 2024 at 4:55pm |
|
|
|
Like them all, but love the "B"s.
|
|
DanWi
Orange Level Access
Joined: 18 Sep 2009
Location: wttn
Points: 1946
|
Post Options
Thanks(0)
Quote Reply
Posted: 21 Jan 2024 at 5:31pm |
|
Same push bolts as your 190
|
|
Travis2766
Silver Level

Joined: 26 Aug 2015
Location: Amherst, Wi
Points: 439
|
Post Options
Thanks(0)
Quote Reply
Posted: 21 Jan 2024 at 8:06pm |
|
Same as my 190xt, never slid them. I know it’s something to do with the three bolts on the axle wedge.
|
|
190XT Series III, D17 Series IV, D15 Series II, All Crop 66, Rotobaler.
|
|
only AC orange
Orange Level Access
Joined: 06 Dec 2014
Location: Eastern Indiana
Points: 554
|
Post Options
Thanks(0)
Quote Reply
Posted: 22 Jan 2024 at 7:27am |
|
I made 3 pusher bolts from grade 8 X 3/4 inch off the shelf hardware. Don't remember the length but had to cut threads up to as close to head as I could get them. Good Luck, my hub was rusted on and soaked with Blaster for a month prior to moving in.
|
|
SteveM C/IL
Orange Level Access
Joined: 12 Sep 2009
Location: Shelbyville IL
Points: 8684
|
Post Options
Thanks(0)
Quote Reply
Posted: 22 Jan 2024 at 1:45pm |
|
Helpful hint. Wheel jacked up off ground keyway on top....bolts torqued up...BFH applied to end of axle shaft.
|
|