| Author |
 Topic Search Topic Search  Topic Options Topic Options
|
ACinSC 
Orange Level

Joined: 16 Dec 2015
Location: South Carolina
Points: 2785
|
 Post Options Post Options
") Thanks(0) Thanks(0)
 Quote Quote  Reply Reply
 Topic: D 15 steering shaft bushing Topic: D 15 steering shaft bushing
Posted: 03 Apr 2023 at 3:43pm |
|
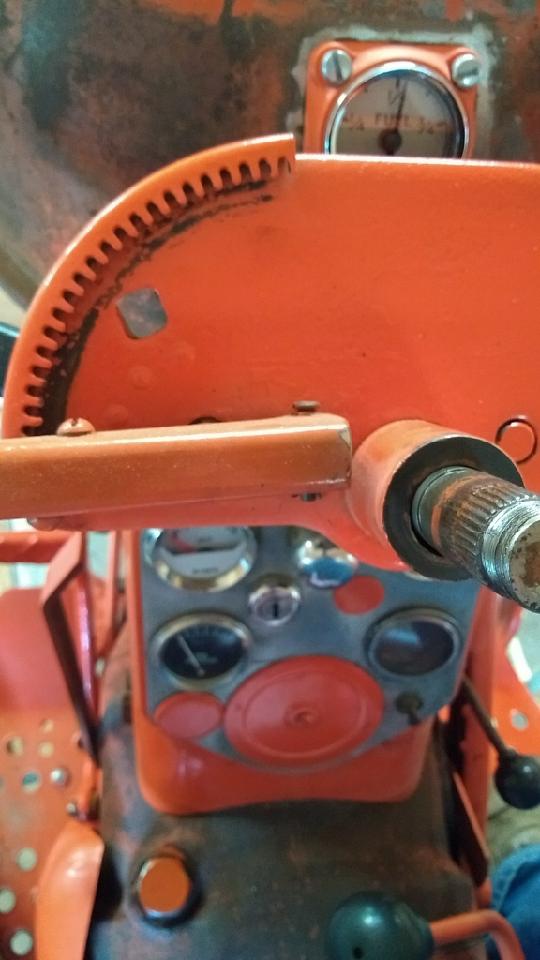
My steering wheel has a good bit of play in this bushing #70228255 . Looks like if I pull the steering wheel maybe I can put a new one on top of the old worn bushing , and just drive the old one down some ? Am I dreaming or is this do-able ? Guess the shaft could also be worn out ? Thanks !
Edited by ACinSC - 03 Apr 2023 at 6:39pm
|
 |
|
Sponsored Links
|
|
|
IBWD MIke
Orange Level

Joined: 08 Apr 2012
Location: Newton Ia.
Points: 3804
|
Post Options
Thanks(0)
Quote Reply
Posted: 04 Apr 2023 at 8:43am |
|
Both will likely be worn. I've replaced the bushing on some WD 45's. One I welded the shaft up and filed it back round. It is kind of a job but not as bad as you might think. If a person had a lathe.....
|
|
ACinSC
Orange Level
Joined: 16 Dec 2015
Location: South Carolina
Points: 2785
|
Post Options
Thanks(0)
Quote Reply
Posted: 04 Apr 2023 at 9:35am |
|
Thanks Mike, I was just wondering if there was a easy way to replace that bushing. Now that I think about it I seem to remember you can't get to it from the top? Thanks again
|
|
steve(ill)
Orange Level Access

Joined: 11 Sep 2009
Location: illinois
Points: 82043
|
Post Options
Thanks(0)
Quote Reply
Posted: 04 Apr 2023 at 10:00am |
|
I have made new bushings and just set on top of old... or pushed them down a short distance... on several "B" tractors.... i assume yours is similar... take off the steering wheel and look.. tell you real quick.
|
|
Like them all, but love the "B"s.
|
|
ACinSC
Orange Level
Joined: 16 Dec 2015
Location: South Carolina
Points: 2785
|
Post Options
Thanks(0)
Quote Reply
Posted: 04 Apr 2023 at 11:09am |
|
Yeah Steve , that's what I was thinking . Seems the control lever assembly covers that bearing now that I think about it . I'll pull the steering wheel soon and have a look . Thanks !
Edited by ACinSC - 04 Apr 2023 at 5:45pm
|
|
steve(ill)
Orange Level Access
Joined: 11 Sep 2009
Location: illinois
Points: 82043
|
Post Options
Thanks(0)
Quote Reply
Posted: 04 Apr 2023 at 12:35pm |
|
On the B, the steering column is the same size as a piece of steel conduit ( 1.5 inch ??)... There are two dimples in the column ( punch mark from outside).. and the bushing slides down the tube and gets STUCK at the dimples.. that positions it.
|
|
Like them all, but love the "B"s.
|
|
ACinSC
Orange Level
Joined: 16 Dec 2015
Location: South Carolina
Points: 2785
|
Post Options
Thanks(0)
Quote Reply
Posted: 04 Apr 2023 at 1:00pm |
|
Just looked and don't see any dimples . Could be covered with paint ? I'll pull the wheel and see what I find . Thanks Steve !
|
|
ACinSC
Orange Level
Joined: 16 Dec 2015
Location: South Carolina
Points: 2785
|
Post Options
Thanks(0)
Quote Reply
Posted: 06 Apr 2023 at 11:17am |
|
Pulled my steering wheel today . Still can't quite see how to replace this bushing ? Fav son should post some pics soon . Any help is much appreciated . Thanks !
|
|
WeisAC2
Bronze Level

Joined: 02 Feb 2017
Location: Aiken SC
Points: 112
|
Post Options
Thanks(0)
Quote Reply
Posted: 06 Apr 2023 at 11:31am |
|
|
|
Model 70
Bronze Level
Joined: 09 Jan 2021
Location: Minnesota
Points: 146
|
Post Options
Thanks(0)
Quote Reply
Posted: 06 Apr 2023 at 6:47pm |
|
Best way to do it is take the tank off,remove the universal joints,pull the upper bushing out,take a 1 inch piece of pipe and drive the bottom bushing out also, then replace both of them. Couple hour job and pretty simple.
|
|
Model 70
Bronze Level
Joined: 09 Jan 2021
Location: Minnesota
Points: 146
|
Post Options
Thanks(0)
Quote Reply
Posted: 06 Apr 2023 at 6:51pm |
|
Oh forgot to mention,once you remove the universal joints pull the shaft out to get at the bushings. Slide hammer pulls the top one out pretty easily. Grease up the ID of new bushings after installing. Shaft will fit tight at first but once you rotate it as you install it they will loosen up.
|
|
Model 70
Bronze Level
Joined: 09 Jan 2021
Location: Minnesota
Points: 146
|
Post Options
Thanks(0)
Quote Reply
Posted: 06 Apr 2023 at 6:54pm |
|
I’d also replace the universal joints also if you want to fix it up right. Joints are cheap.
|
|
ACinSC
Orange Level
Joined: 16 Dec 2015
Location: South Carolina
Points: 2785
|
Post Options
Thanks(0)
Quote Reply
Posted: 07 Apr 2023 at 8:25am |
|
Thanks Scott, good info !
|
|
Model 70
Bronze Level
Joined: 09 Jan 2021
Location: Minnesota
Points: 146
|
Post Options
Thanks(0)
Quote Reply
Posted: 07 Apr 2023 at 10:40am |
|
Grind the ends of the pins holding joints to shaft flush,drill a pilot hole through them 1/8” or better and they will pound right out.that’s how I do it anyway. May have roll pins in it if it’s been apart before.
|
|
ACinSC
Orange Level
Joined: 16 Dec 2015
Location: South Carolina
Points: 2785
|
Post Options
Thanks(0)
Quote Reply
Posted: 07 Apr 2023 at 10:49am |
|
Thanks again , Scott ! Guess once the gas tank is off things are easier to get to ?
Edited by ACinSC - 07 Apr 2023 at 10:53am
|
|
Model 70
Bronze Level
Joined: 09 Jan 2021
Location: Minnesota
Points: 146
|
Post Options
Thanks(0)
Quote Reply
Posted: 07 Apr 2023 at 1:00pm |
|
Absolutely. Makes it really simple.
|
|
ACinSC
Orange Level
Joined: 16 Dec 2015
Location: South Carolina
Points: 2785
|
Post Options
Thanks(0)
Quote Reply
Posted: 07 Apr 2023 at 1:09pm |
|
With my glasses on and a flashlight I can now see the bushing . Tried to knock it down a little like Steve said with no luck . Plan to pull the tank , remove the u-joint and steering shaft . Guess they make a slide hammer/puller that will fit inside the old 7/8" I.D. bush ? When that's out I can knock out the lower bush . THANKS Scott , Steve and Mike !!
|
|
Model 70
Bronze Level
Joined: 09 Jan 2021
Location: Minnesota
Points: 146
|
Post Options
Thanks(0)
Quote Reply
Posted: 07 Apr 2023 at 6:34pm |
|
Once you remove the shaft you will more than likely be able to bust the old upper bushing with a small chisel. Remove both pins on lowest joint by bell housing. The joint under the tank just remove the upper pin and tap it off the upper shaft.
|
|
ACinSC
Orange Level
Joined: 16 Dec 2015
Location: South Carolina
Points: 2785
|
Post Options
Thanks(0)
Quote Reply
Posted: 07 Apr 2023 at 7:36pm |
|
Sounds good Scott. Have small chisels but no slide hammer. Thanks for the help
|
|
steve(ill)
Orange Level Access
Joined: 11 Sep 2009
Location: illinois
Points: 82043
|
Post Options
Thanks(0)
Quote Reply
Posted: 07 Apr 2023 at 7:51pm |
AC... dont think i was much help... On the B-C the shaft is attached SOLID at the gear box and extends up the hollow tube with a bushing at the top.. It is easily pushed down to install new.... and the shaft is tapered with a KEY way for the wheel..
Appears your D15 has a short shaft with U-joint with a bushing at the bottom and top.. That would allow a LOT more WIGGLE due to the short shaft and two bushings.. Looks like Scott has the plan.. Guess we BOTH learned something !!
Edited by steve(ill) - 07 Apr 2023 at 7:52pm
|
|
Like them all, but love the "B"s.
|
|
Model 70
Bronze Level
Joined: 09 Jan 2021
Location: Minnesota
Points: 146
|
Post Options
Thanks(0)
Quote Reply
Posted: 07 Apr 2023 at 8:47pm |
|
Glad I could help out. I’ve learned a ton on this site from everyone that it’s great to be able to share a few ideas.
|
|
ACinSC
Orange Level
Joined: 16 Dec 2015
Location: South Carolina
Points: 2785
|
Post Options
Thanks(0)
Quote Reply
Posted: 08 Apr 2023 at 6:48am |
|
Thanks again for the help guys!
|
|
ACinSC
Orange Level
Joined: 16 Dec 2015
Location: South Carolina
Points: 2785
|
Post Options
Thanks(0)
Quote Reply
Posted: 08 Apr 2023 at 1:05pm |
|
Drained my gas tank today . Just my luck it was half full , about 8 gallons . I've replaced the lower u-joint and it does have roll pins in it , upper u-joint looks O. E . Hope to pull the tank soon and go from there . Again Thanks for the help and Happy Easter !!
|
|
Model 70
Bronze Level
Joined: 09 Jan 2021
Location: Minnesota
Points: 146
|
Post Options
Thanks(0)
Quote Reply
Posted: 08 Apr 2023 at 2:04pm |
|
Making good progress.
|
|
ACinSC
Orange Level
Joined: 16 Dec 2015
Location: South Carolina
Points: 2785
|
Post Options
Thanks(0)
Quote Reply
Posted: 10 Apr 2023 at 11:54am |
|
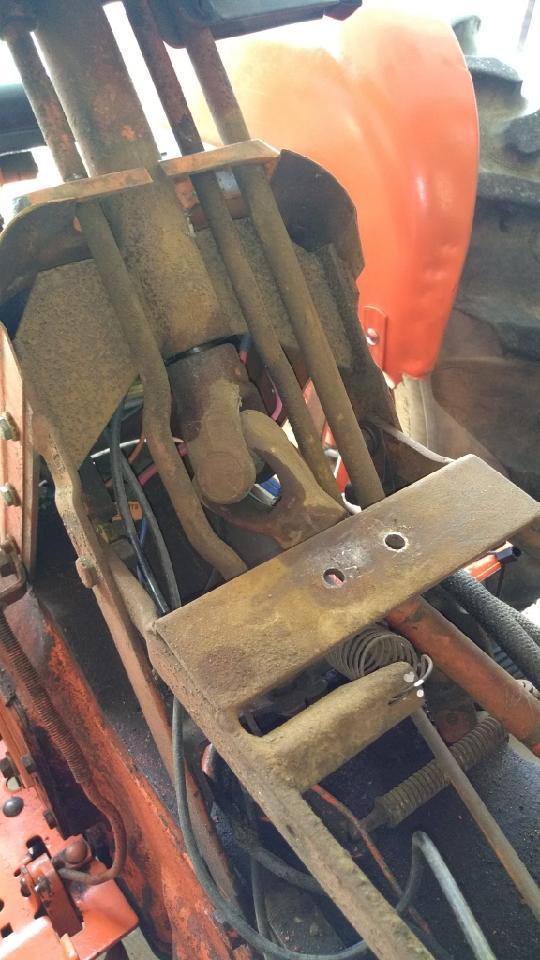
Pulled my gas tank . I'm wondering if I remove the lower u-joint if the steering shaft with upper u-joint will pull down and out ? Be nice to have it out and on the workbench . Thanks !!
|
|
WeisAC2
Bronze Level
Joined: 02 Feb 2017
Location: Aiken SC
Points: 112
|
Post Options
Thanks(0)
Quote Reply
Posted: 10 Apr 2023 at 2:27pm |
|
|
|
ACinSC
Orange Level
Joined: 16 Dec 2015
Location: South Carolina
Points: 2785
|
Post Options
Thanks(0)
Quote Reply
Posted: 10 Apr 2023 at 2:41pm |
|
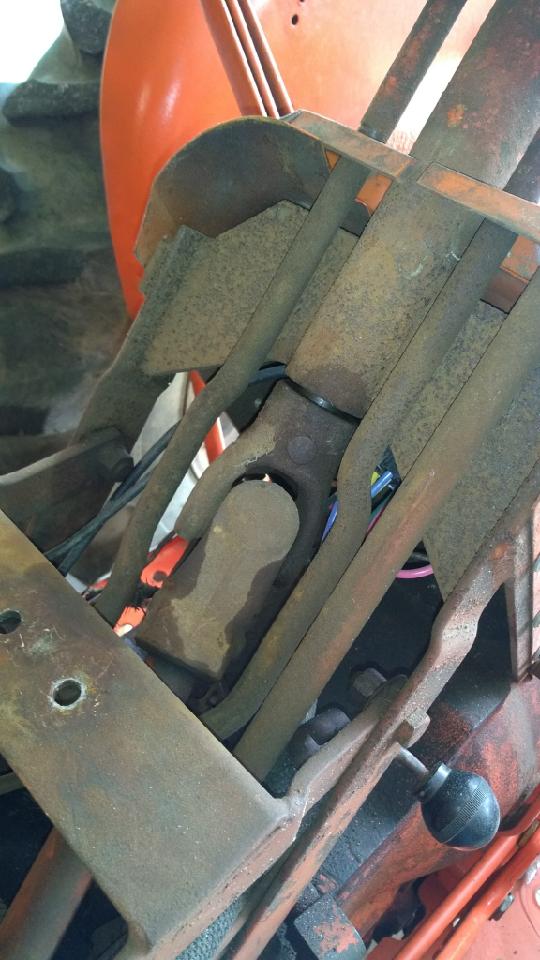
Fav son posted some pics of the upper u-joint . It looks original to me , but I don't feel any play in it . The bushing above it is quite worn though . Thanks !
Edited by ACinSC - 10 Apr 2023 at 2:44pm
|
|
Model 70
Bronze Level
Joined: 09 Jan 2021
Location: Minnesota
Points: 146
|
Post Options
Thanks(0)
Quote Reply
Posted: 10 Apr 2023 at 4:51pm |
|
I believe you have to split the upper and lower shaft to get them both out. There’s not quite enough bend to pull both shafts out while they are connected. Just drive the upper pin out on upper universal joint Leave the upper joint connected to lower shaft. Then both shafts will come completely out. Universal joints are 20 bucks at Agco. I always replace them regardless. But that’s just my opinion. 👍🏻
|
|
ACinSC
Orange Level
Joined: 16 Dec 2015
Location: South Carolina
Points: 2785
|
Post Options
Thanks(0)
Quote Reply
Posted: 10 Apr 2023 at 7:48pm |
|
Yeah Scott, not much wiggle room. Thanks again
|
|
Model 70
Bronze Level
Joined: 09 Jan 2021
Location: Minnesota
Points: 146
|
Post Options
Thanks(0)
Quote Reply
Posted: 10 Apr 2023 at 8:11pm |
|
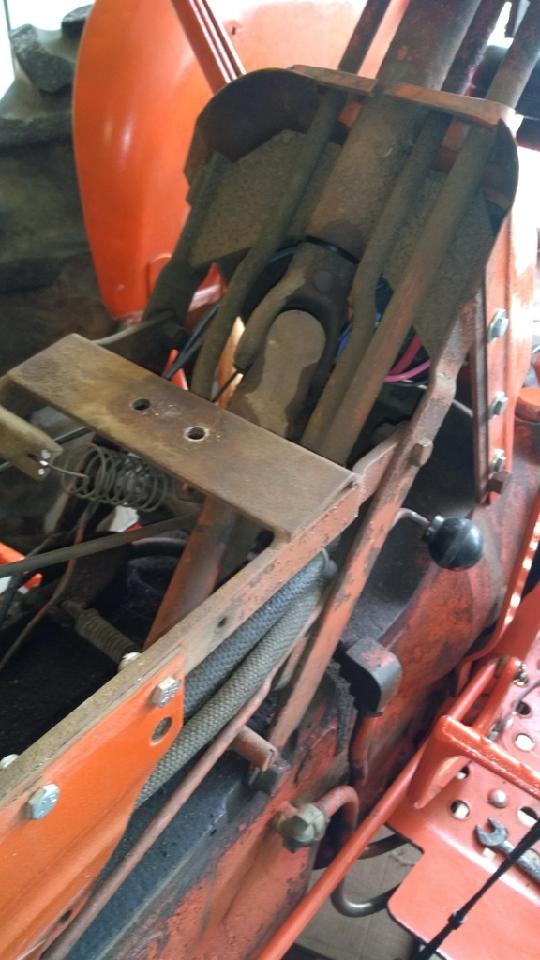
In your second pic ones you remove bottom u-joint,grind the head off of that upper solid drift pin. Drill a pilot hole through it and drive pin out and I’d almost bet you can tap that upper joint right off the upper that. Then remove both shafts and then remove the bushings. You may not need to drill a pilot hole. I always do cause I don’t have any luck pounding them out solid. I suppose heat would work but it only takes a couple minutes to drill it with a good bit.
|
|