| Author |
 Topic Search Topic Search  Topic Options Topic Options
|
55allis 
Orange Level

Joined: 30 Jun 2020
Location: Griswold Iowa
Points: 1114
|
 Post Options Post Options
 Thanks(0) Thanks(0)
 Quote Quote  Reply Reply
 Posted: 07 Nov 2021 at 9:21pm Posted: 07 Nov 2021 at 9:21pm |
|
Looking good!!!
|
 |
|
Sponsored Links
|
|
 |
plummerscarin 
Orange Level Access

Joined: 22 Jun 2015
Location: ia
Points: 3981
|
 Post Options Post Options
 Thanks(0) Thanks(0)
 Quote Quote  Reply Reply
 Posted: 08 Nov 2021 at 6:35am Posted: 08 Nov 2021 at 6:35am |
|
Doing great. Keep it up
|
 |
Jtaylor 
Bronze Level

Joined: 11 Oct 2021
Location: Barrie, Ontario
Points: 194
|
 Post Options Post Options
 Thanks(0) Thanks(0)
 Quote Quote  Reply Reply
 Posted: 09 Nov 2021 at 6:44am Posted: 09 Nov 2021 at 6:44am |
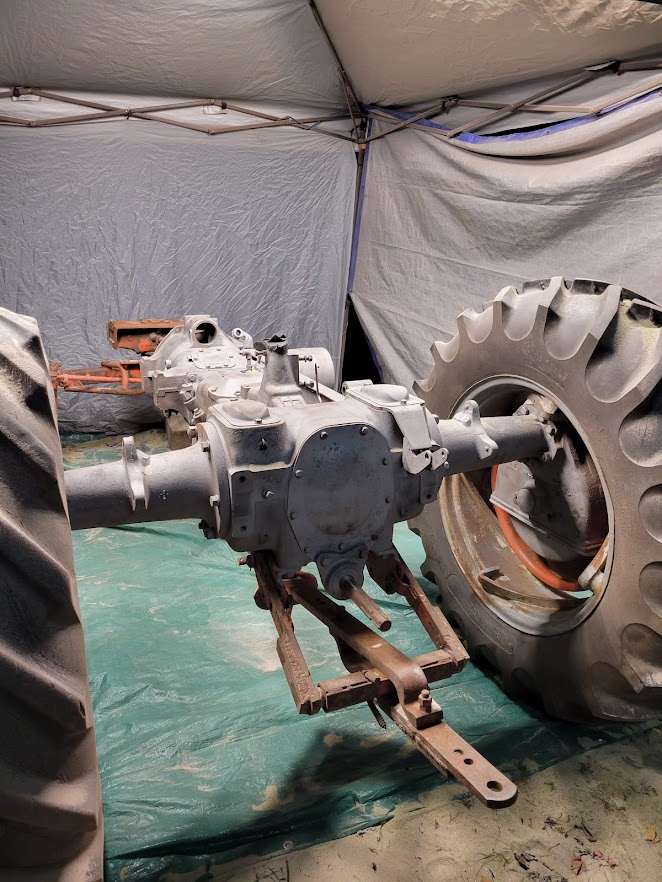
Made some more progress on the tractor last night sandblasting. almost finished the back half anyways.
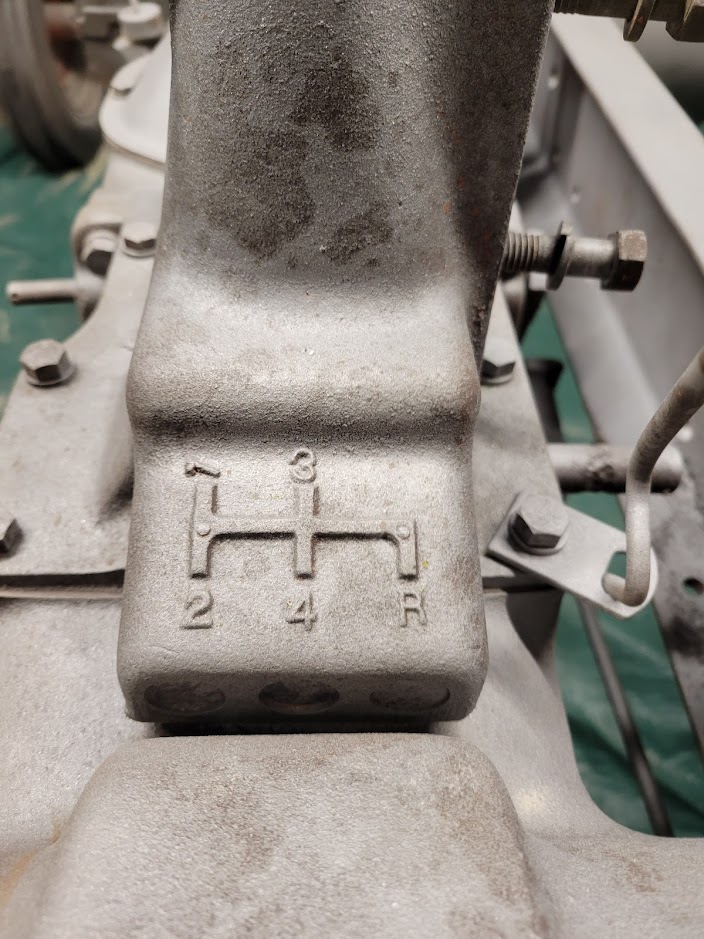
and, after sandblasting the crud off the shift tower, take a look at the twisted number "1". You could say its a "one-off" 
Now, I just need to get the correct Primer, What does everyone suggest? looking at painting in the springtime with PPG 60080 single stage (MTX) or the vansickle paint if i can get down to the USA sometime soon..
Edited by Jtaylor - 09 Nov 2021 at 12:15pm
|
 |
Eric B 
Orange Level


Joined: 09 Feb 2012
Location: British Columbi
Points: 984
|
 Post Options Post Options
 Thanks(0) Thanks(0)
 Quote Quote  Reply Reply
 Posted: 09 Nov 2021 at 12:04pm Posted: 09 Nov 2021 at 12:04pm |
|
Looking good!!!
|
|
Currently- WD,WC,3WF's,2 D14's B. Previously- I 600,TL745,200,FL9,FR12,H3,816 LBH. Earth has no sorrow that Heaven cannot heal!
|
 |
Ed (Ont) 
Orange Level


Joined: 08 Nov 2009
Location: New Lowell, Ont
Points: 1507
|
 Post Options Post Options
 Thanks(0) Thanks(0)
 Quote Quote  Reply Reply
 Posted: 09 Nov 2021 at 2:06pm Posted: 09 Nov 2021 at 2:06pm |
|
That number “1” is pretty unique. Wonder how many went down the line like that?
|
 |
Sugarmaker 
Orange Level


Joined: 12 Jul 2013
Location: Albion PA
Points: 8571
|
 Post Options Post Options
 Thanks(0) Thanks(0)
 Quote Quote  Reply Reply
 Posted: 09 Nov 2021 at 3:40pm Posted: 09 Nov 2021 at 3:40pm |
Yes I like the number "1" also! I have never seen one like that. Very rare and expensive unit you have there! The cleaning is coming along nicely! Keep at it! There are a lot of nooks and crannies to get the protective coatings off of. I have found most of them and daubed some paint on places no one will ever see. Its going to look real good in PO#1! Thanks for the update! Regards, Chris
|
|
D17 1958 (NFE), WD45 1954 (NFE), WD 1952 (NFE), WD 1950 (WFE), Allis F-40 forklift, Allis CA, Allis D14, Ford Jubilee, Many IH Cub Cadets, 32 Ford Dump, 65 Comet.
|
 |
Jtaylor 
Bronze Level

Joined: 11 Oct 2021
Location: Barrie, Ontario
Points: 194
|
 Post Options Post Options
 Thanks(0) Thanks(0)
 Quote Quote  Reply Reply
 Posted: 10 Nov 2021 at 7:49am Posted: 10 Nov 2021 at 7:49am |
Well, Let the money spending commence!
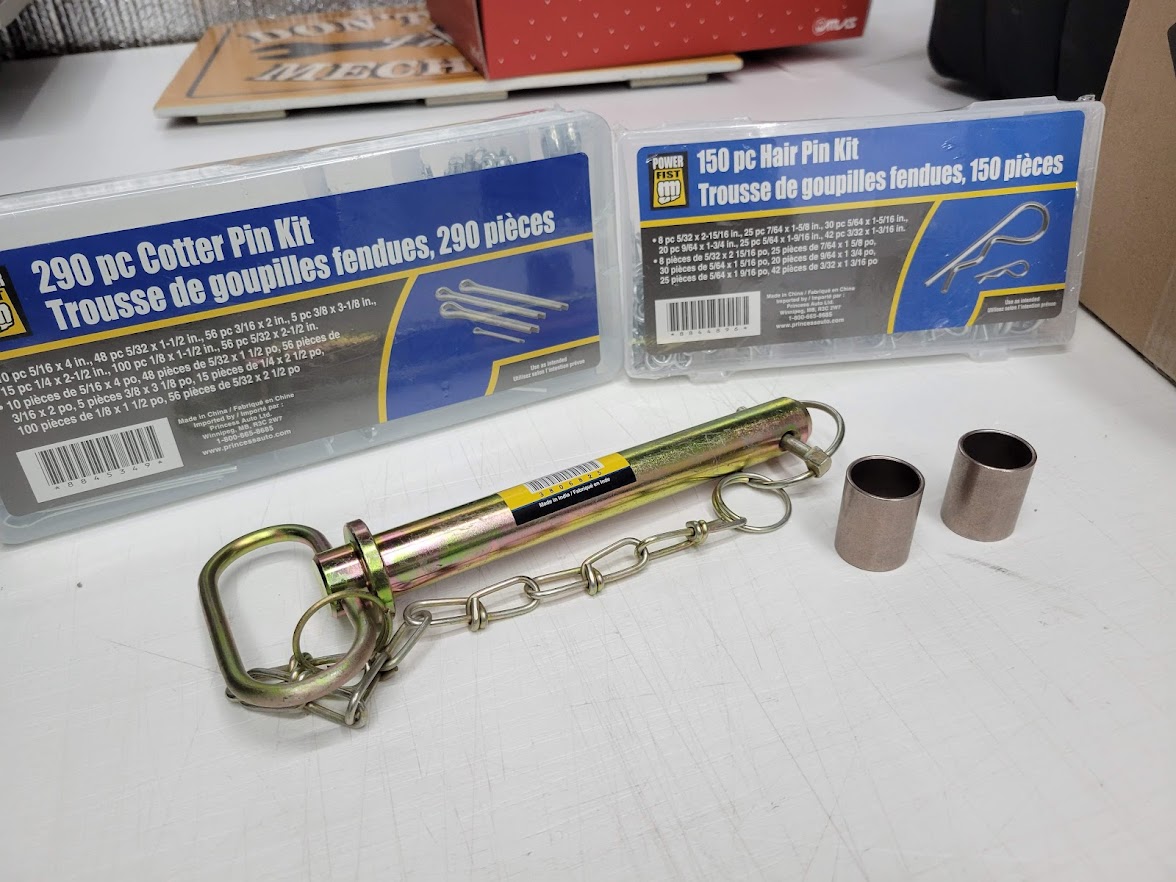
here was my cheap pickup from Princess Auto (canadian harbor freight). Cotter pin kit, "R" clip kit and the pin for $30. Cant beat that!
The pin was suggested by a local farmer for the replacement hand clutch. He suggested to cut down one of these pins and drill a hole for the cotter pin as a replacement for the transmission mounted pivot. at $10.99, it was a much cheaper (and shorter) option than 7/8 cold rolled steel ($55 here for 4 ft)
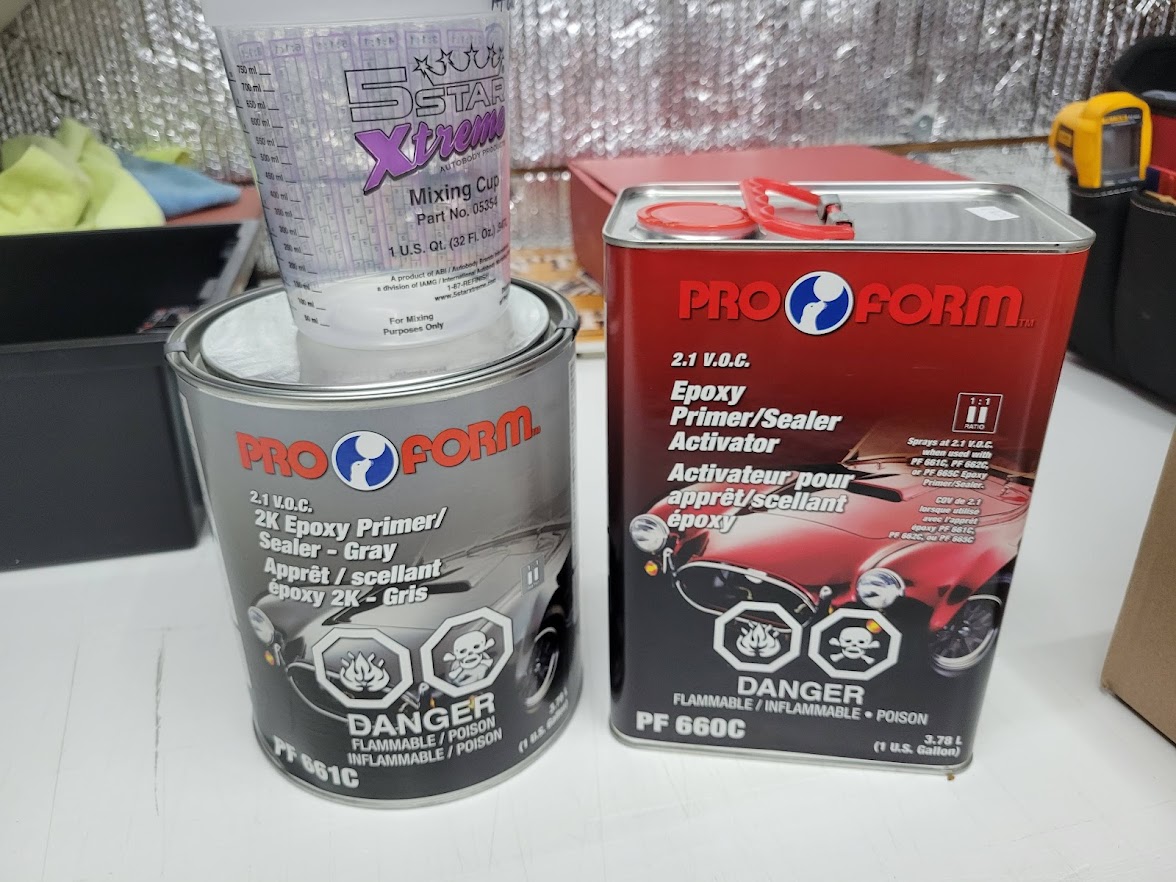
We also picked up the primer required for the cast iron. the local paint expert suggested epoxy primer since it will be sitting until springtime for paint. this was quite expensive but well worth it for the correct paint finish. $232.50 for 2 usable gallons. mixing at 1:1
|
 |
IBWD MIke 
Orange Level


Joined: 08 Apr 2012
Location: Newton Ia.
Points: 4135
|
 Post Options Post Options
 Thanks(0) Thanks(0)
 Quote Quote  Reply Reply
 Posted: 10 Nov 2021 at 8:49am Posted: 10 Nov 2021 at 8:49am |
Nice.
That cotter-pin kit should be required before being allowed to farm. Don't know how many nasty scratches I've had from some rusty nail bent to work as a c-pin!
|
 |
Jtaylor 
Bronze Level

Joined: 11 Oct 2021
Location: Barrie, Ontario
Points: 194
|
 Post Options Post Options
 Thanks(0) Thanks(0)
 Quote Quote  Reply Reply
 Posted: 15 Nov 2021 at 8:14am Posted: 15 Nov 2021 at 8:14am |
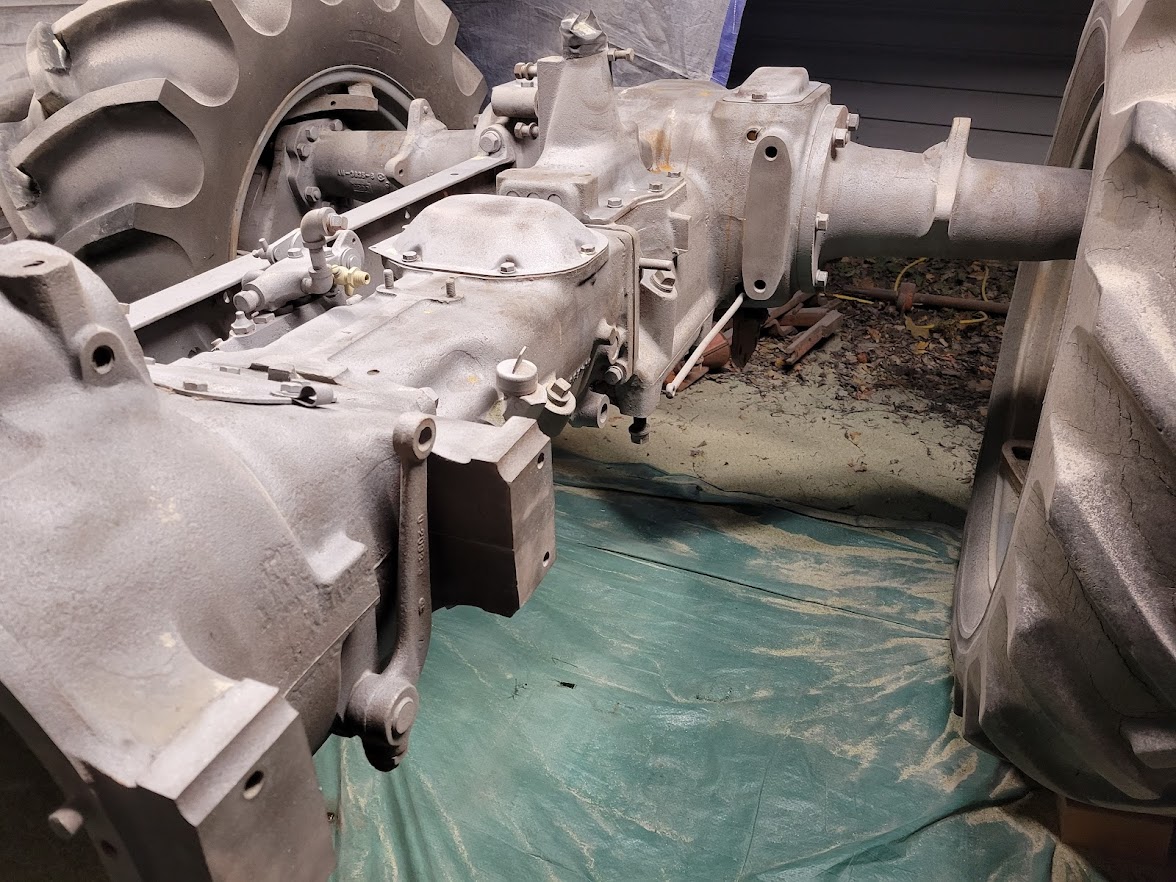
Well, I am finished for the time being on the sandblasting side of things. here is how it turned out.
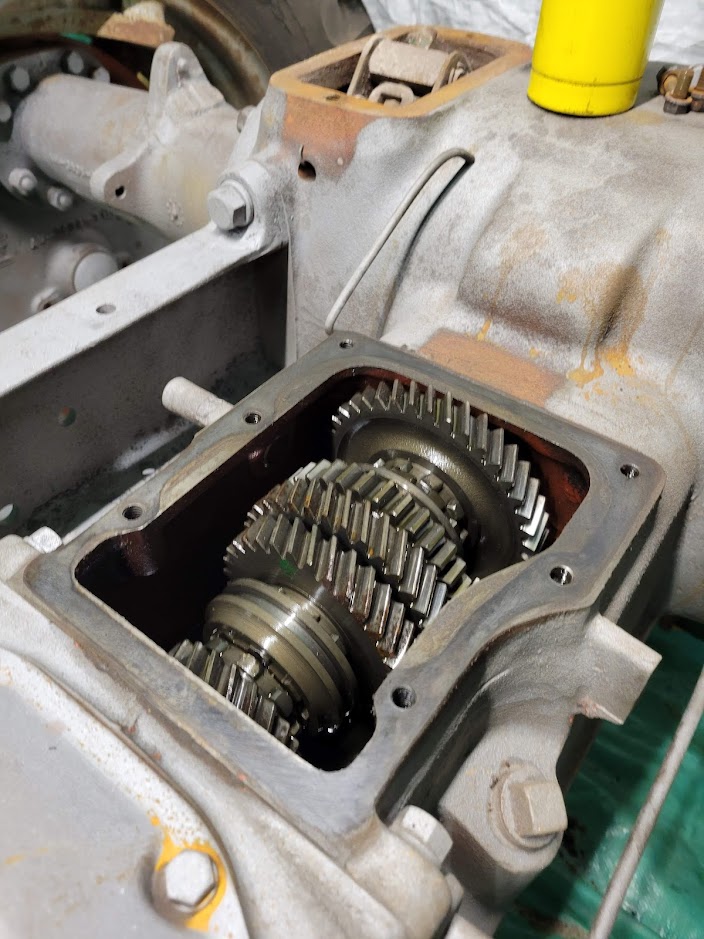
I have started on the repairs to the transmission shift forks (that are bent) so i have removed the cover and set it on the bench for the time being.
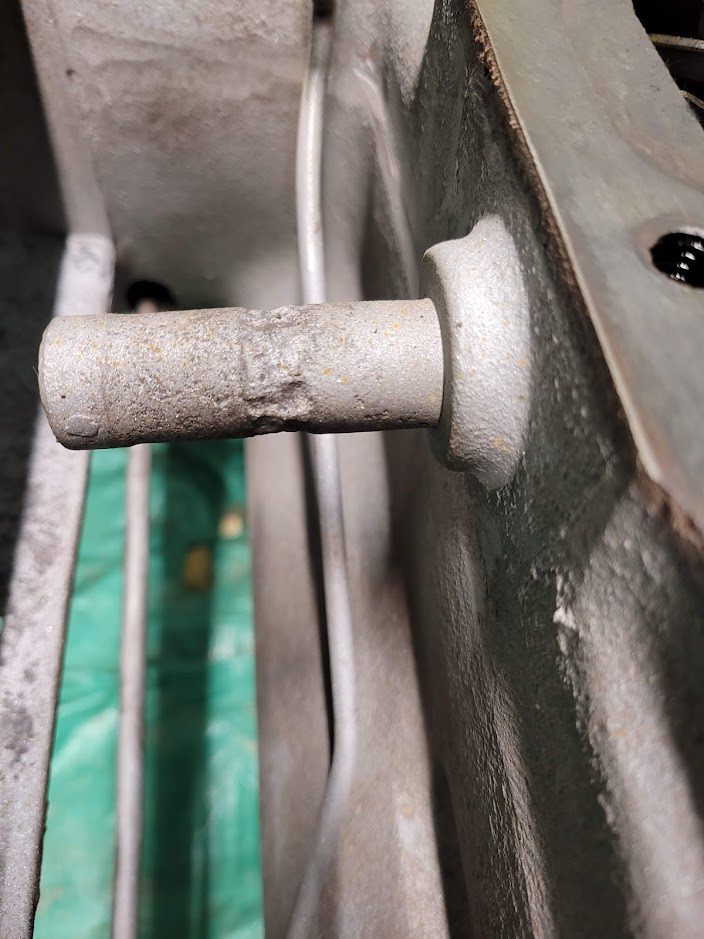
I also wanted to replace the hand clutch shaft while the cover was off. I got my punch set and a couple of rather large hammers ready. I heated it up with map gas as hot as i was comfortable with and started to pound the shaft out from the inside. no luck! didnt even move a tiny bit.. it looks like i will have to get things a lot warmer for it to expand enough. any tips from the ones who have replaced it before? it is beyond repair in my books and would rather it be replaced with new than repaired.
|
 |
Sugarmaker 
Orange Level


Joined: 12 Jul 2013
Location: Albion PA
Points: 8571
|
 Post Options Post Options
 Thanks(0) Thanks(0)
 Quote Quote  Reply Reply
 Posted: 17 Nov 2021 at 8:33pm Posted: 17 Nov 2021 at 8:33pm |
Justin, Sandblasting for clean up looks good. I did one pin replacement and did not do a good job. The hole in the case was wollowed out. I attempted to drill it and put in another pin. I did not have the tools to do it right and it still iss loose and leaks. I assume this pin really needs to be pressed out and in for a correct job. I have welded up several of them to my satisfaction and hand worked them back close to round. Mush better than they were in the worn state. And then also re bushed the handle. Took out 90% of the slop.
Keep at it!
Regards, Chris
|
|
D17 1958 (NFE), WD45 1954 (NFE), WD 1952 (NFE), WD 1950 (WFE), Allis F-40 forklift, Allis CA, Allis D14, Ford Jubilee, Many IH Cub Cadets, 32 Ford Dump, 65 Comet.
|
 |
DaveKamp 
Orange Level Access

Joined: 12 Apr 2010
Location: LeClaire, Ia
Points: 6089
|
 Post Options Post Options
 Thanks(0) Thanks(0)
 Quote Quote  Reply Reply
 Posted: 18 Nov 2021 at 7:58am Posted: 18 Nov 2021 at 7:58am |
Hi Justin- GREAT WORK!!!
On that pin... either lay filler across it with a MIG, then follow up with a 4" angle grinder and a flap-disk to hand-form it back to round, or grind it DOWN to a slightly smaller OD, and make a sleeve that will slip over. Drill a hole in the sleeve about where the deepest divot is, then fill INTO the hole, which will not only fill the void, it will also secure the sleeve...
Then dress the hole you welded shut to round and smooth.
Do re-bush the inside of the lever.
Take the guys' advise on the hand clutch, and while you're in there, make certain that none of the pins can migrate loose and fall into the PTO gear housing. Don't ask me how I know... 
|
|
Ten Amendments, Ten Commandments, and one Golden Rule solve most every problem. Citrus hand-cleaner with Pumice does the rest.
|
 |
Jtaylor 
Bronze Level

Joined: 11 Oct 2021
Location: Barrie, Ontario
Points: 194
|
 Post Options Post Options
 Thanks(0) Thanks(0)
 Quote Quote  Reply Reply
 Posted: 18 Nov 2021 at 2:01pm Posted: 18 Nov 2021 at 2:01pm |
We have success!
The pin was removed. a couple of good hits with the hammer and it started to move.
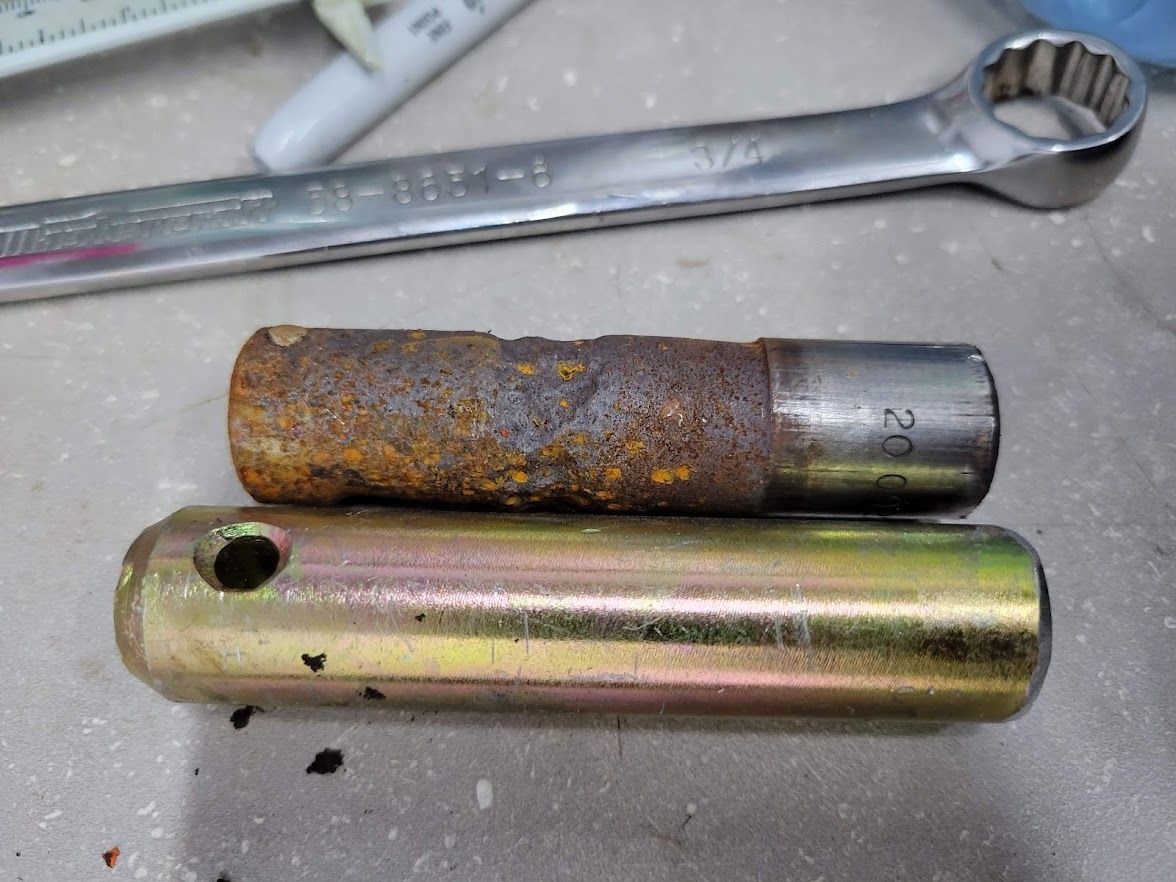
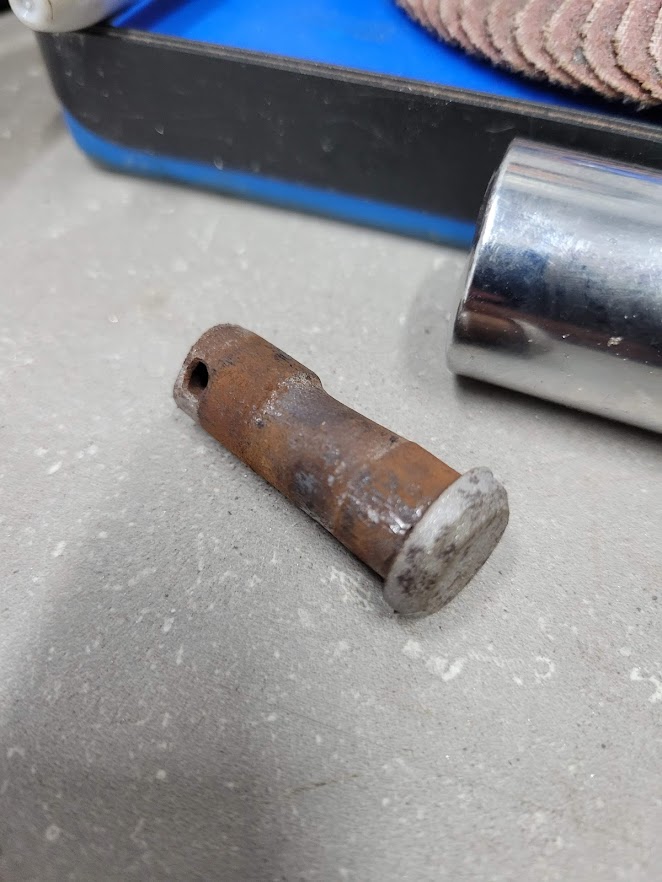
Here is a side by side comparison of the original pin and the new pin that i made up.
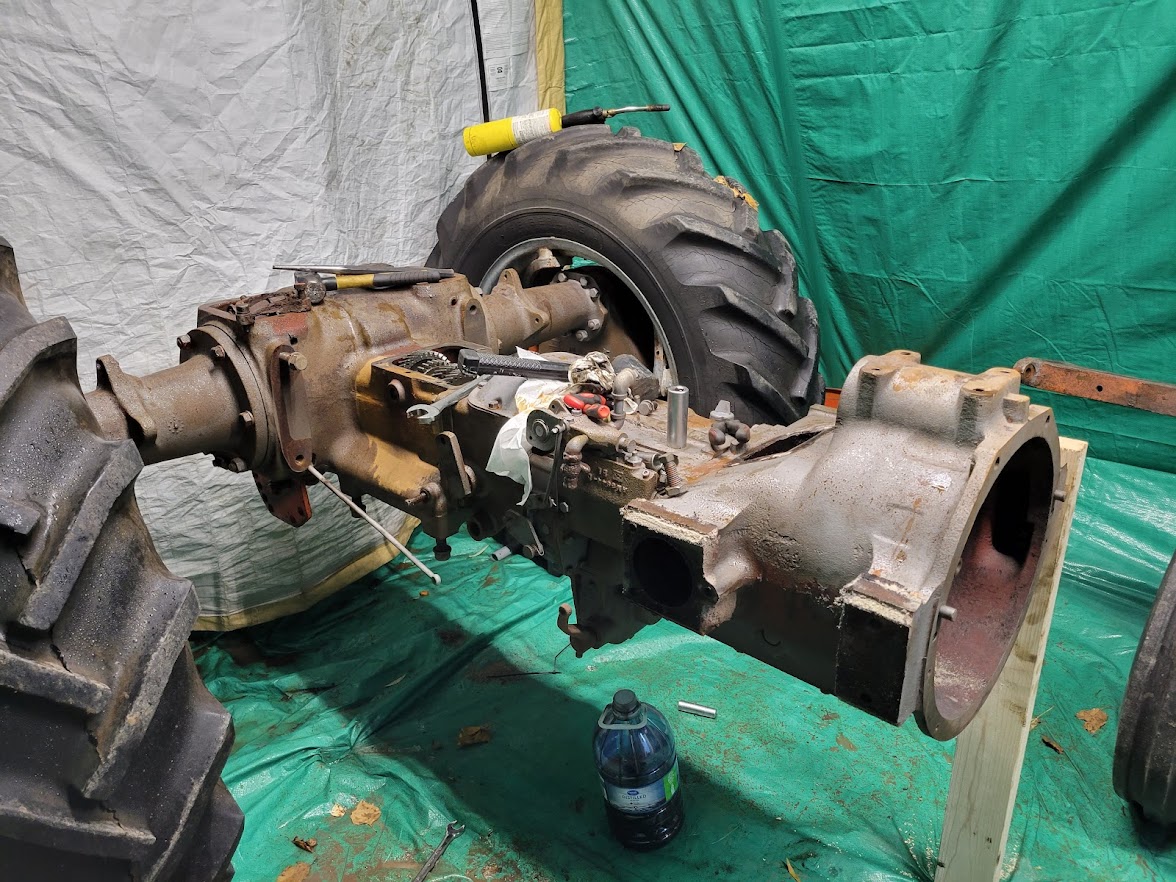
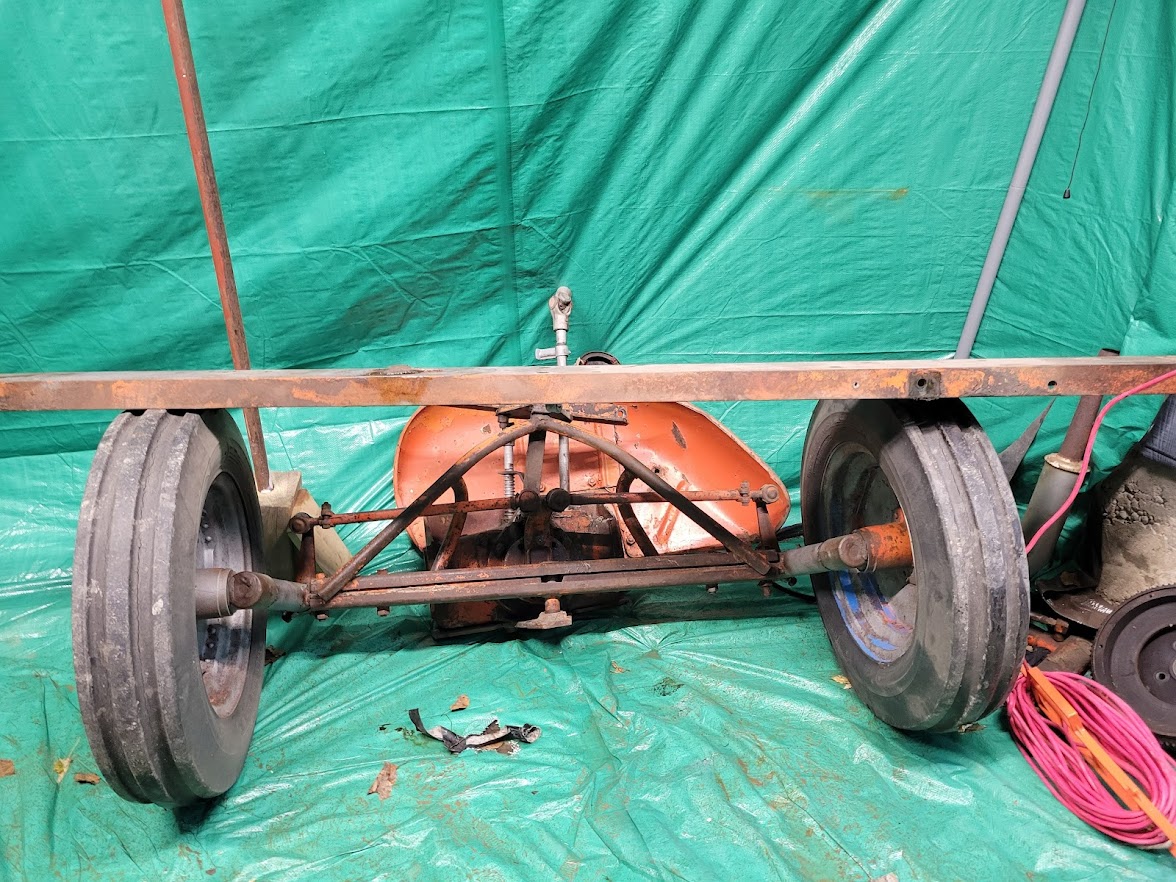
I ultimately had to finish splitting the tractor in half to get the new pin in place correctly. that required removal of the pulley and removing the front end to set aside. here is some not very pretty photos of that process.
I will be disassembling the front end at some point, although this was just fine for the time being.
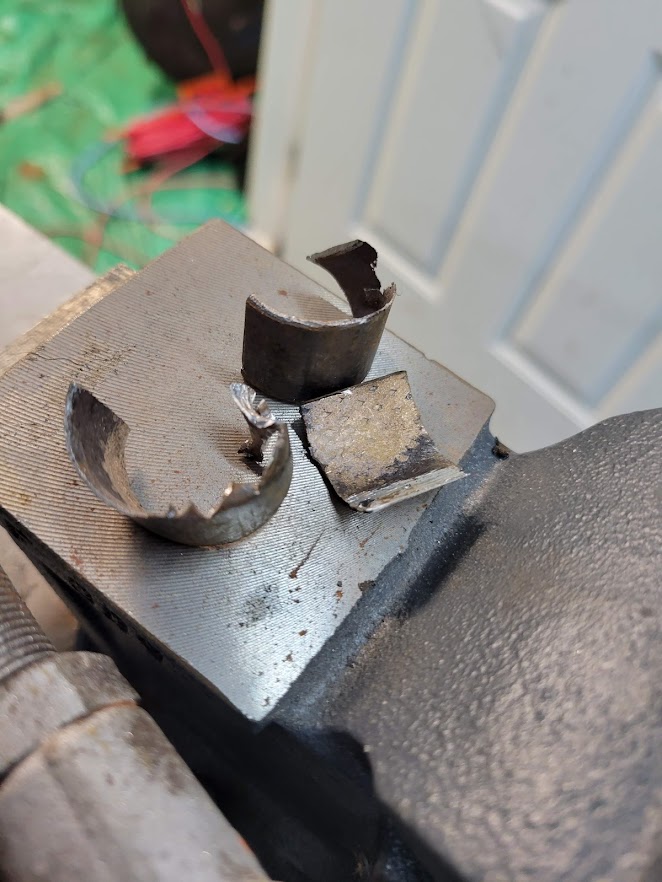
I started on removal of the bushings for the clutch handle. they came out as expected.
Might just have to repair these pins prior to reinstallation. they are quite worn. hand clutch linkage pins.
I have also purchased the paint required. That was quite expensive but it is the correct color and finish type. I look forward to laying that down ASAP.
Thanks everyone for the input! very helpful!
|
 |
ac hunter 
Orange Level


Joined: 05 Jan 2011
Location: OHIO
Points: 1065
|
 Post Options Post Options
 Thanks(0) Thanks(0)
 Quote Quote  Reply Reply
 Posted: 19 Nov 2021 at 7:05am Posted: 19 Nov 2021 at 7:05am |
|
We enjoy watching your progress. Thanks for the updates and pictures. Good work.
|
 |
Jtaylor 
Bronze Level

Joined: 11 Oct 2021
Location: Barrie, Ontario
Points: 194
|
 Post Options Post Options
 Thanks(0) Thanks(0)
 Quote Quote  Reply Reply
 Posted: 19 Nov 2021 at 8:47am Posted: 19 Nov 2021 at 8:47am |
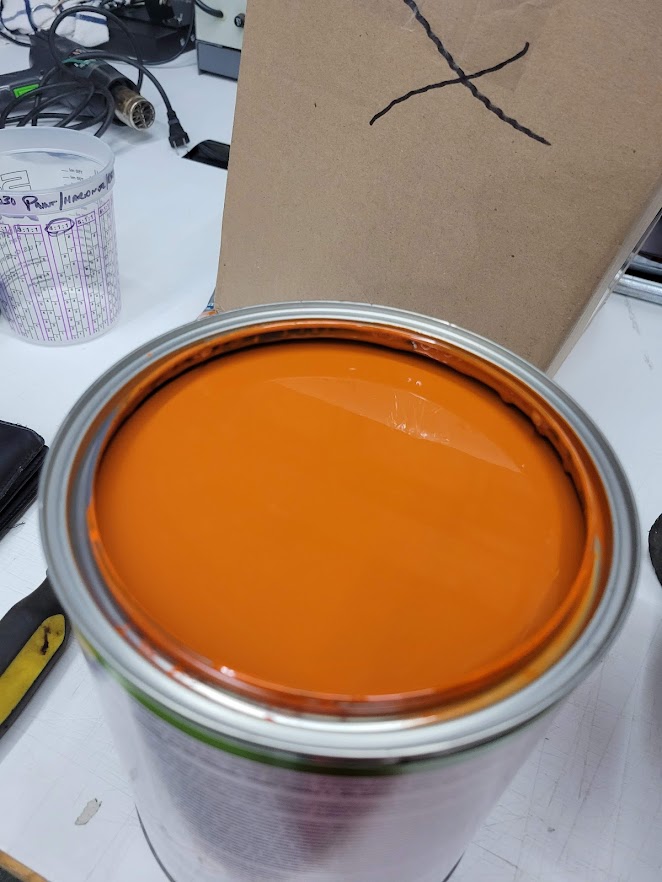
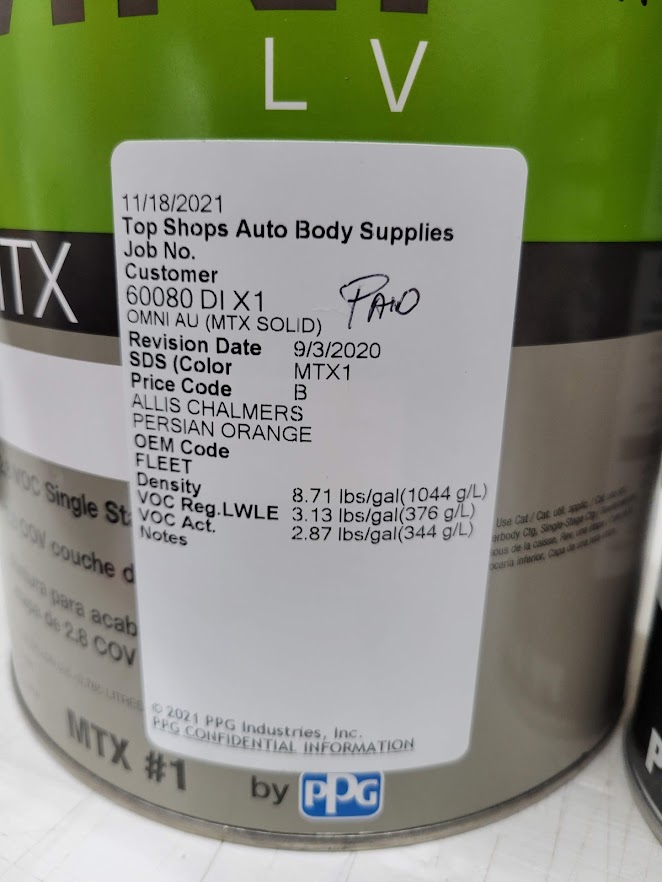
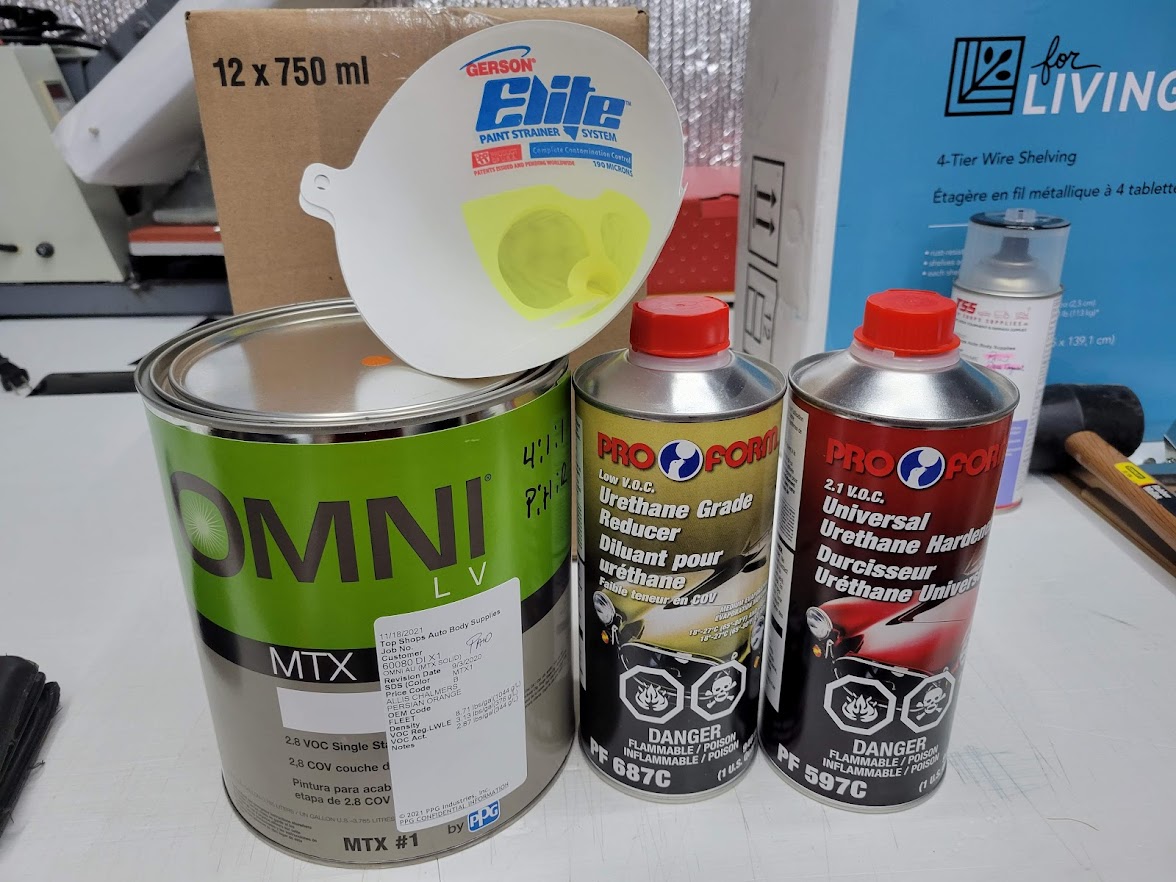
And.... We have paint! I spent the extra money on PPG MTX paint. Code was 60080 Allis Persian Orange. Looks very close actually. I am pleased with the color.
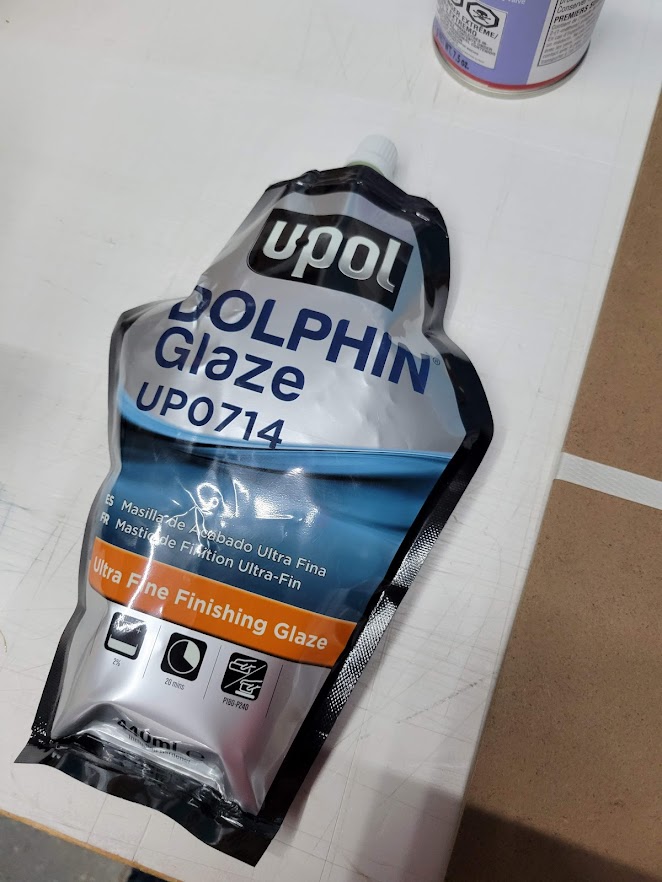
And, As recommended by the body shop, this will be used as the final skim coat on the frame rails and tin. just to make things smooth and nice.
|
 |
Sugarmaker 
Orange Level


Joined: 12 Jul 2013
Location: Albion PA
Points: 8571
|
 Post Options Post Options
 Thanks(0) Thanks(0)
 Quote Quote  Reply Reply
 Posted: 20 Nov 2021 at 5:44pm Posted: 20 Nov 2021 at 5:44pm |
Justin, Looks like your work is progressing nicely! Paint looks proper too! Stay at it. Do you have the weather to get it in primer? I spent a lot of time on some of mine and could have spent double that! Regards, Chris
|
|
D17 1958 (NFE), WD45 1954 (NFE), WD 1952 (NFE), WD 1950 (WFE), Allis F-40 forklift, Allis CA, Allis D14, Ford Jubilee, Many IH Cub Cadets, 32 Ford Dump, 65 Comet.
|
 |
Jtaylor 
Bronze Level

Joined: 11 Oct 2021
Location: Barrie, Ontario
Points: 194
|
 Post Options Post Options
 Thanks(0) Thanks(0)
 Quote Quote  Reply Reply
 Posted: 22 Nov 2021 at 9:27am Posted: 22 Nov 2021 at 9:27am |
 Sugarmaker wrote: Sugarmaker wrote:
Justin, Looks like your work is progressing nicely! Paint looks proper too! Stay at it. Do you have the weather to get it in primer? I spent a lot of time on some of mine and could have spent double that! Regards, Chris |
Thanks! I have some heat where needed for the primer to work correctly. should be good here in the next few days to get it primed and prepped for paint.
|
 |
Jtaylor 
Bronze Level

Joined: 11 Oct 2021
Location: Barrie, Ontario
Points: 194
|
 Post Options Post Options
 Thanks(0) Thanks(0)
 Quote Quote  Reply Reply
 Posted: 22 Nov 2021 at 9:31am Posted: 22 Nov 2021 at 9:31am |
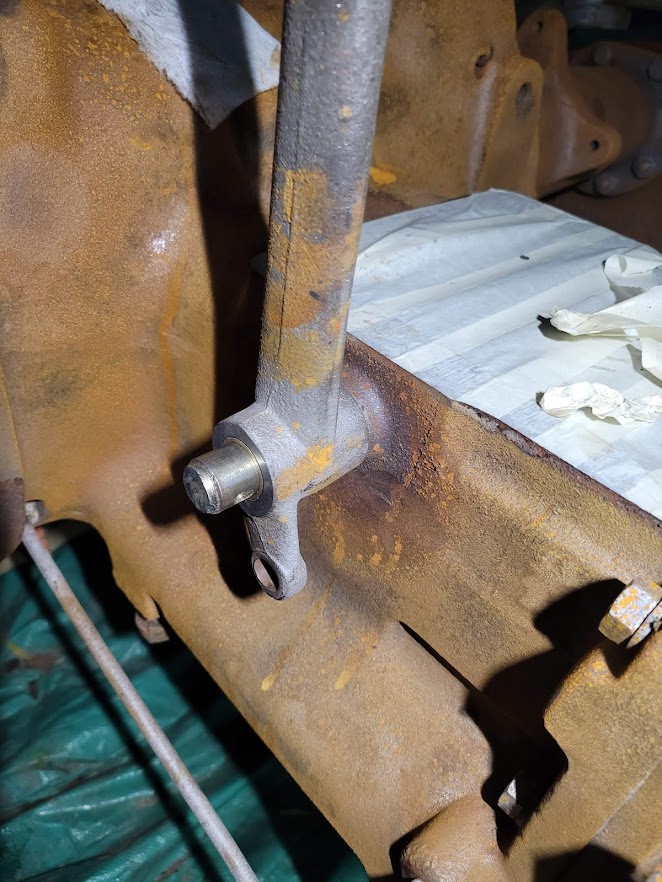
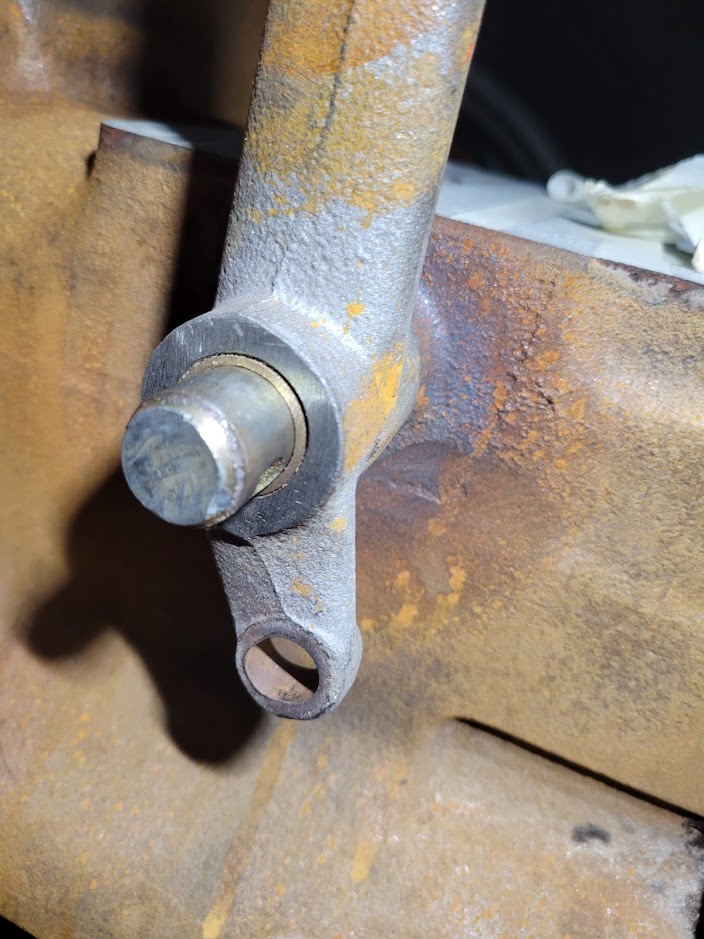
A little more progress with the pre-primer prep.
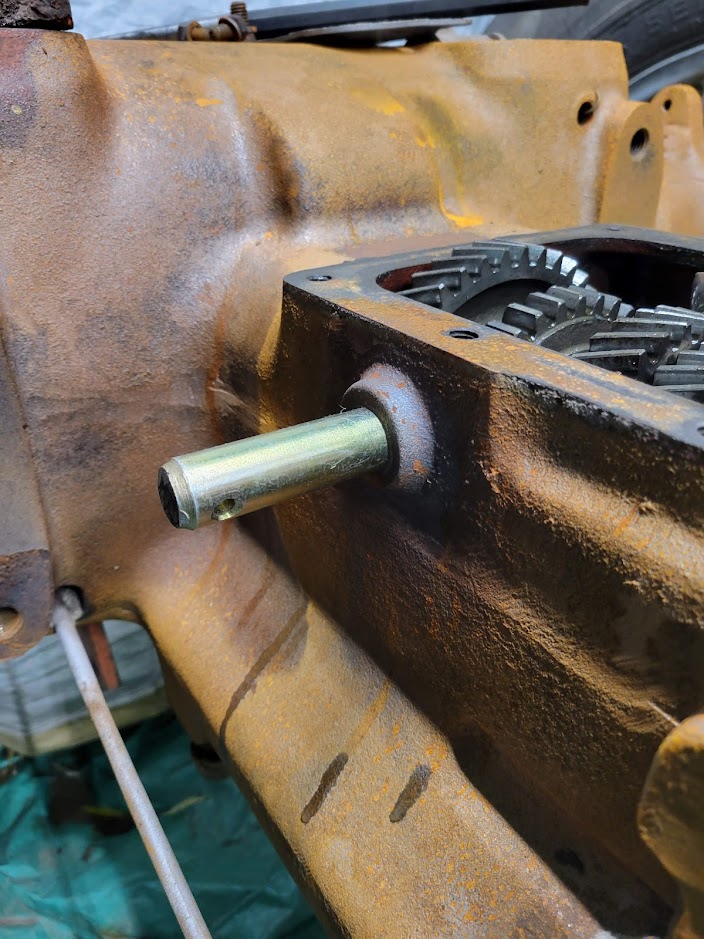
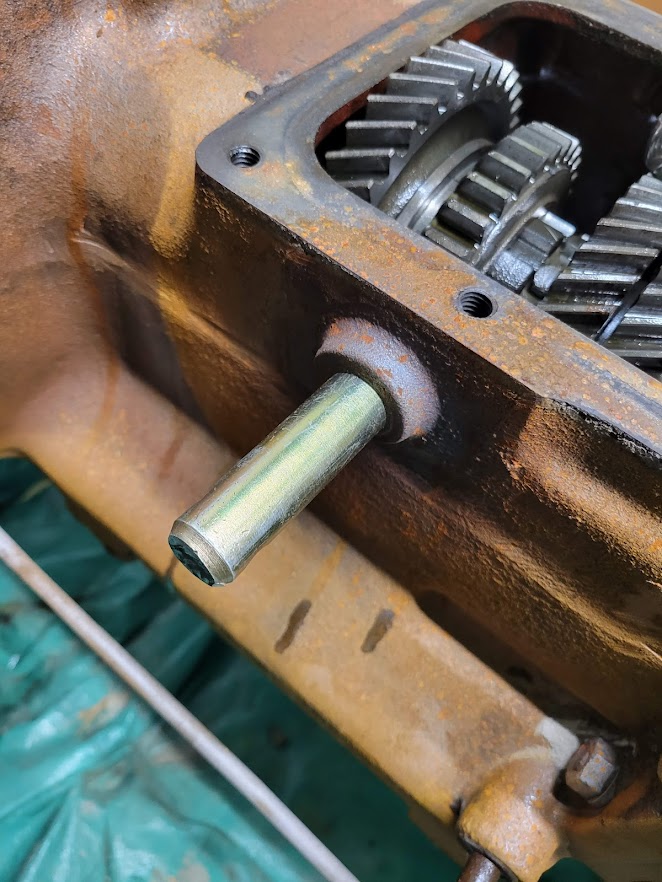
Got the hand clutch pivot pin installed into the frame of the tractor. freezing this pin and heating the casting made this a 10 minute project. its even the correct length!
I also plugged away with cleaning some remaining gunk from the small hard to reach areas. brake cleaned all the areas i needed to and got the unit much closer to primer.
|
 |
55allis 
Orange Level


Joined: 30 Jun 2020
Location: Griswold Iowa
Points: 1114
|
 Post Options Post Options
 Thanks(0) Thanks(0)
 Quote Quote  Reply Reply
 Posted: 25 Nov 2021 at 11:54am Posted: 25 Nov 2021 at 11:54am |
|
Most brake cleaners will leave a residue that will make the primer not stick. I tried it once on a different tractor I was painting and it peeled later on.
|
 |
Jtaylor 
Bronze Level

Joined: 11 Oct 2021
Location: Barrie, Ontario
Points: 194
|
 Post Options Post Options
 Thanks(0) Thanks(0)
 Quote Quote  Reply Reply
 Posted: 25 Nov 2021 at 1:02pm Posted: 25 Nov 2021 at 1:02pm |
 55allis wrote: 55allis wrote:
Most brake cleaners will leave a residue that will make the primer not stick. I tried it once on a different tractor I was painting and it peeled later on.
|
The plan was to use the brake cleaner to remove the gunk, then as requested by the proform folks was to lacquer thinner the whole chassis prior to priming. they say that is the best combo for my application. they also recommend to off gas the cast iron for about 1 day after the lacquer thinner.
|
 |
Sugarmaker 
Orange Level


Joined: 12 Jul 2013
Location: Albion PA
Points: 8571
|
 Post Options Post Options
 Thanks(0) Thanks(0)
 Quote Quote  Reply Reply
 Posted: 27 Nov 2021 at 5:48pm Posted: 27 Nov 2021 at 5:48pm |
J, Pivot pin looks great! Your almost there. Prep is the biggest part of the project. Stay at it! Fresh paint is a great accomplishment! Regards, Chris
|
|
D17 1958 (NFE), WD45 1954 (NFE), WD 1952 (NFE), WD 1950 (WFE), Allis F-40 forklift, Allis CA, Allis D14, Ford Jubilee, Many IH Cub Cadets, 32 Ford Dump, 65 Comet.
|
 |
Jtaylor 
Bronze Level

Joined: 11 Oct 2021
Location: Barrie, Ontario
Points: 194
|
 Post Options Post Options
 Thanks(0) Thanks(0)
 Quote Quote  Reply Reply
 Posted: 29 Nov 2021 at 9:35am Posted: 29 Nov 2021 at 9:35am |
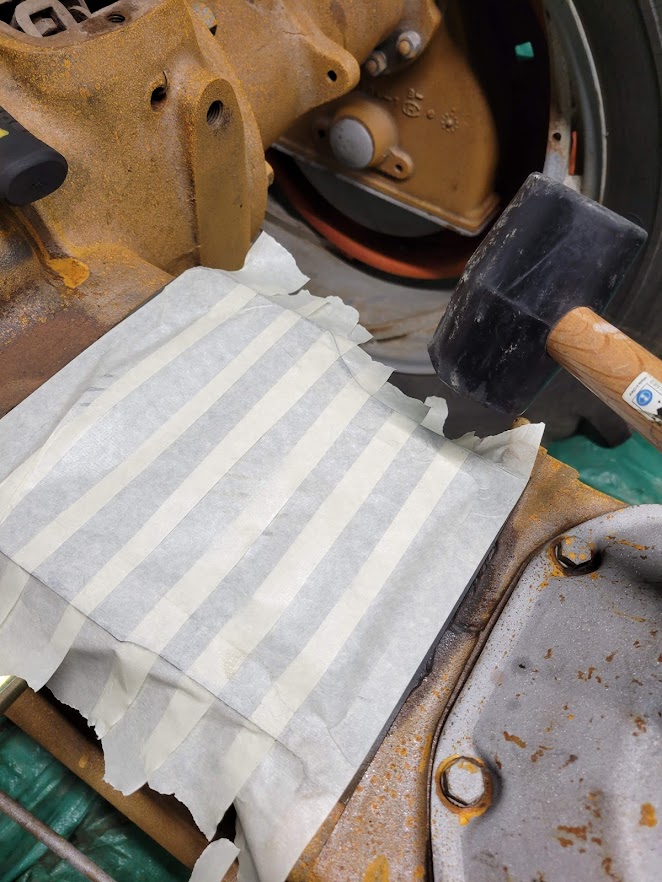
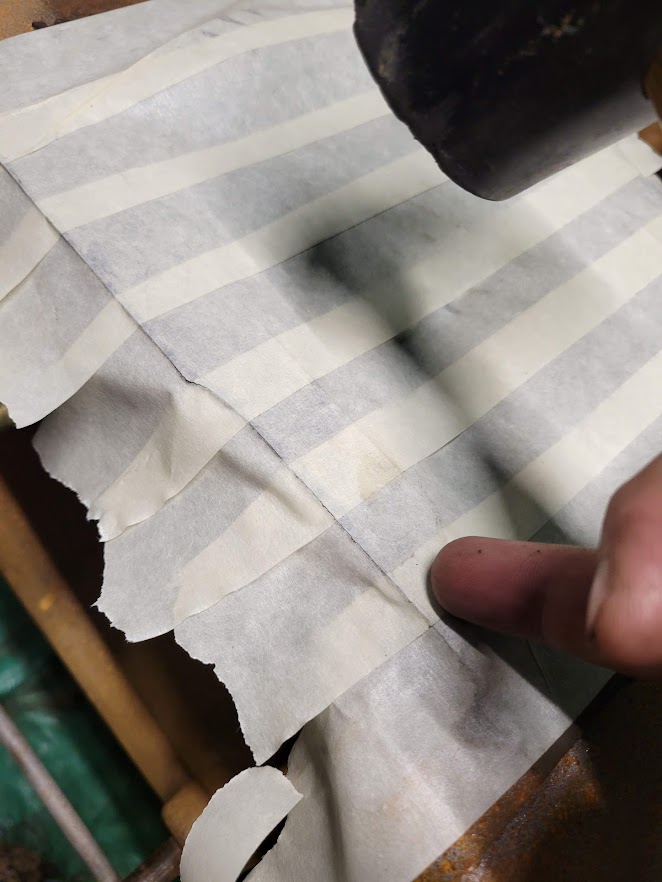
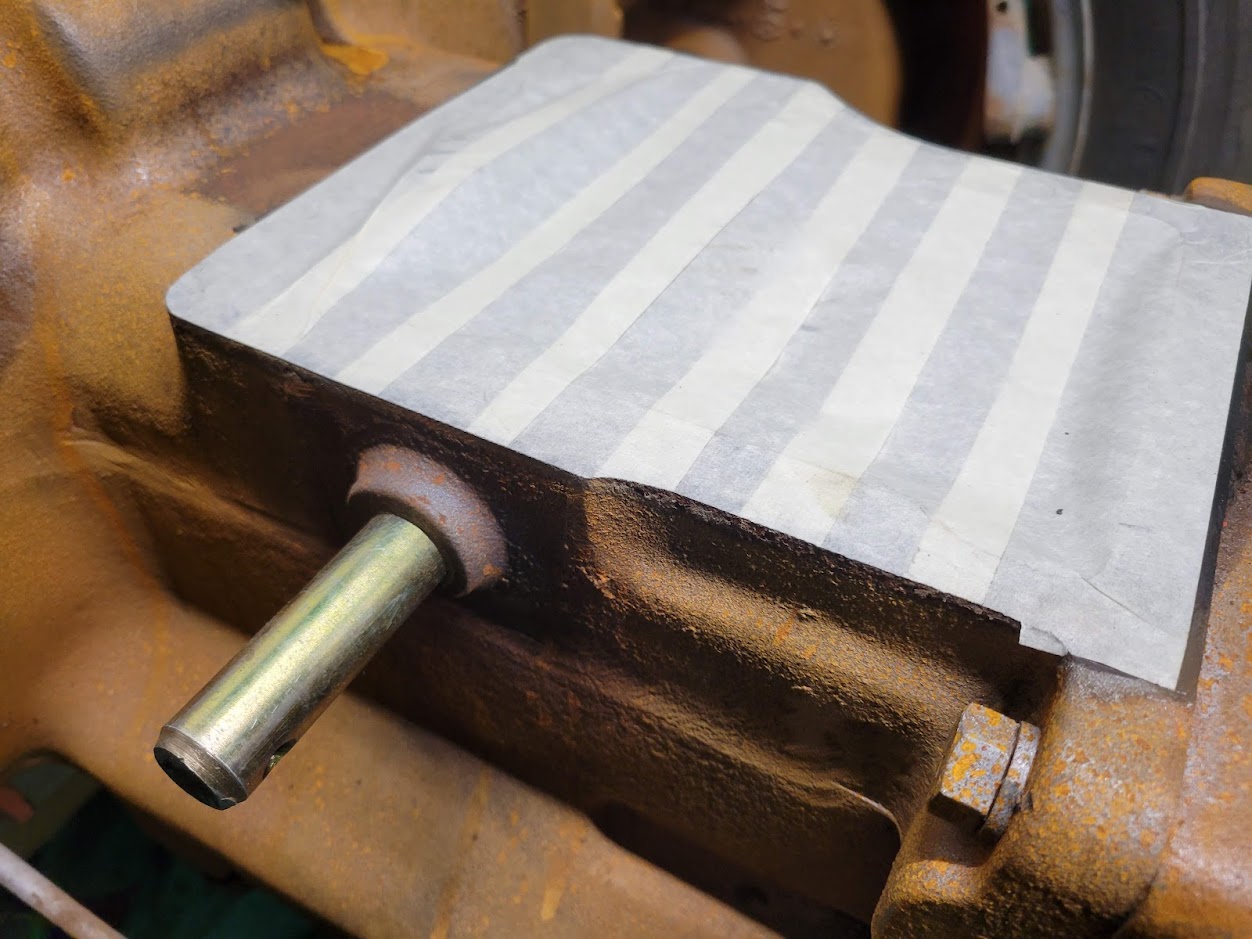
Well, Some slow progress on the tractor as of lately. working away at cleaning all the push and pull rods for external linkages, i started masking the top covers in preperation for some primer and paint. After looking more and more, I did Notice a couple of bolts i needed to remove prior to paint and thought about removing the brake anchor pins and relining the brakes (i'm already this far, might as well re-do those also)
here is a cool tip i learned back in the days when i was painting day in and day out. We used to mask all gasket surfaces with traditional tape, overhang the edges and use a standard rubber mallet at a 45* angle to the sharp gasket edges. it seals the edges with the tape adhesive and pinches the tape causing it to be cut perfectly to the edges. much, much easier than cutting with a knife.
|
 |
plummerscarin 
Orange Level Access

Joined: 22 Jun 2015
Location: ia
Points: 3981
|
 Post Options Post Options
 Thanks(0) Thanks(0)
 Quote Quote  Reply Reply
 Posted: 29 Nov 2021 at 11:51am Posted: 29 Nov 2021 at 11:51am |
|
Great tip, thanks
|
 |
IBWD MIke 
Orange Level


Joined: 08 Apr 2012
Location: Newton Ia.
Points: 4135
|
 Post Options Post Options
 Thanks(0) Thanks(0)
 Quote Quote  Reply Reply
 Posted: 29 Nov 2021 at 1:15pm Posted: 29 Nov 2021 at 1:15pm |
|
Don't remember where I learned that at but do it the same way, very slick.
|
 |
Jtaylor 
Bronze Level

Joined: 11 Oct 2021
Location: Barrie, Ontario
Points: 194
|
 Post Options Post Options
 Thanks(0) Thanks(0)
 Quote Quote  Reply Reply
 Posted: 01 Dec 2021 at 7:04am Posted: 01 Dec 2021 at 7:04am |
Placed the order for the majority of the replacement chassis parts. I did also order the engine rebuild kit so I had one ready to prep the block at the local machine shop.
here is the start of the list. I pick it up this weekend in New york.
check out that total! not including the majority of engine components or other front end parts
|
 |
AC720Man 
Orange Level


Joined: 10 Oct 2016
Location: Shenandoah, Va
Points: 5249
|
 Post Options Post Options
 Thanks(0) Thanks(0)
 Quote Quote  Reply Reply
 Posted: 01 Dec 2021 at 7:11am Posted: 01 Dec 2021 at 7:11am |
|
Unfortunately it’s very easy to put more into them than what they are worth. It’s a passion of AC love that makes us do it lol. You will have a nice show piece when your done and your doing it the right way, all in.
|
|
1968 B-208, 1976 720 (2 of them)Danco brush hog, single bottom plow,52" snow thrower, belly mower,rear tine tiller, rear blade, front blade, 57"sickle bar,1983 917 hydro, 1968 7hp sno-bee, 1968 190XTD
|
 |
Jtaylor 
Bronze Level

Joined: 11 Oct 2021
Location: Barrie, Ontario
Points: 194
|
 Post Options Post Options
 Thanks(0) Thanks(0)
 Quote Quote  Reply Reply
 Posted: 03 Dec 2021 at 6:20am Posted: 03 Dec 2021 at 6:20am |
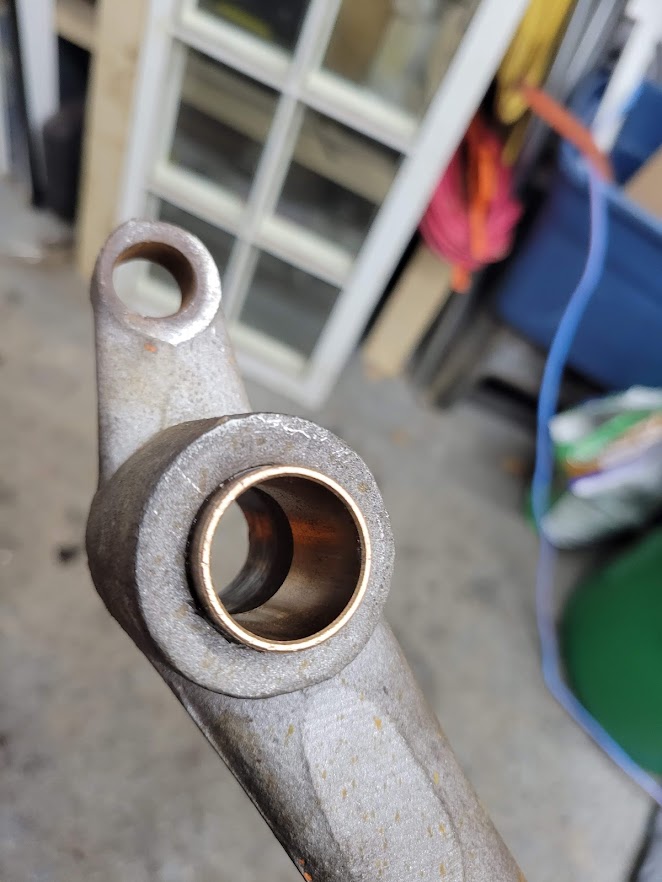
Finally received my new hand clutch bushings. these were on order for a while and finally came in. 7/8ID X 1"OD. had to be cut down to size after it was pressed into the hand clutch handle.
after it was pressed in and cut down, they were test fitted onto the new hand clutch pin. fit perfectly! still need to fill the worn section for the clevis to the linkage rod. I have a new 1/2" clevis bushing ready to go. once installed this piece will be ready for paint.
I have a handful of parts ready to be primed and painted. I am working away at the smaller pieces now getting them all cleaned of old paint, chasing threads and getting all the parts and pieces ready to go prior to priming or painting.
|
 |
Sugarmaker 
Orange Level


Joined: 12 Jul 2013
Location: Albion PA
Points: 8571
|
 Post Options Post Options
 Thanks(0) Thanks(0)
 Quote Quote  Reply Reply
 Posted: 03 Dec 2021 at 7:46am Posted: 03 Dec 2021 at 7:46am |
Justin, Thats what you have to do. Keep hitting at each little piece. I must say you did a way better job on the hand clutch rebuild than I have done on some of mine. You will be pleased each time you use it. Remember the orange wind chimes! There are 183 spterate parts other than the engine components! Your doing great. You will probably have parts all over the house? Maybe even hanging on the Christmas tree?:) Thanks for the update on the Allis! Is the bare metal treated? Or is that some light surface rust? Regards, Chris
Edited by Sugarmaker - 03 Dec 2021 at 7:48am
|
|
D17 1958 (NFE), WD45 1954 (NFE), WD 1952 (NFE), WD 1950 (WFE), Allis F-40 forklift, Allis CA, Allis D14, Ford Jubilee, Many IH Cub Cadets, 32 Ford Dump, 65 Comet.
|
 |
Jtaylor 
Bronze Level

Joined: 11 Oct 2021
Location: Barrie, Ontario
Points: 194
|
 Post Options Post Options
 Thanks(0) Thanks(0)
 Quote Quote  Reply Reply
 Posted: 03 Dec 2021 at 7:56am Posted: 03 Dec 2021 at 7:56am |
 Sugarmaker wrote: Sugarmaker wrote:
Justin, Thats what you have to do. Keep hitting at each little piece. I must say you did a way better job on the hand clutch rebuild than I have done on some of mine. You will be pleased each time you use it. Remember the orange wind chimes! There are 183 spterate parts other than the engine components! Your doing great. You will probably have parts all over the house? Maybe even hanging on the Christmas tree?:) Thanks for the update on the Allis! Is the bare metal treated? Or is that some light surface rust? Regards, Chris
|
Tons of parts EVERYWHERE! none on the Christmas tree though!
i am working away at things, Just plugging away. the more i get painted at the same time the less cleaning of the paint gun i have to do right!? haha.
That is bare metal at the moment, I really want to get it sealed up but waiting for the best time to do so. I may have put the cart before the horse on sandblasting but nothing a little surface prep can't handle.
|
 |
ac hunter 
Orange Level


Joined: 05 Jan 2011
Location: OHIO
Points: 1065
|
 Post Options Post Options
 Thanks(0) Thanks(0)
 Quote Quote  Reply Reply
 Posted: 03 Dec 2021 at 9:41am Posted: 03 Dec 2021 at 9:41am |
I agree with AC720, you can't do a proper restoration without getting more $$ involved that it is likely worth but you will end up with a tractor you can be very proud of. We redid the WD my dad purchased new in 1950. I took the engine to a local rebuilder I have used for other work. When I dropped it off he said he would call me and let me know what it needed. In a few days he said "it needs everything", and it did. Had almost $4,000 in just the engine but it runs a whole lot better now and we ended up with a dandy looking tractor. Keep up the good work and keep sharing pictures, etc.
|
 |
Jtaylor 
Bronze Level

Joined: 11 Oct 2021
Location: Barrie, Ontario
Points: 194
|
 Post Options Post Options
 Thanks(0) Thanks(0)
 Quote Quote  Reply Reply
 Posted: 07 Dec 2021 at 9:12am Posted: 07 Dec 2021 at 9:12am |
Baby steps in this update. been working away at different parts and pieces.
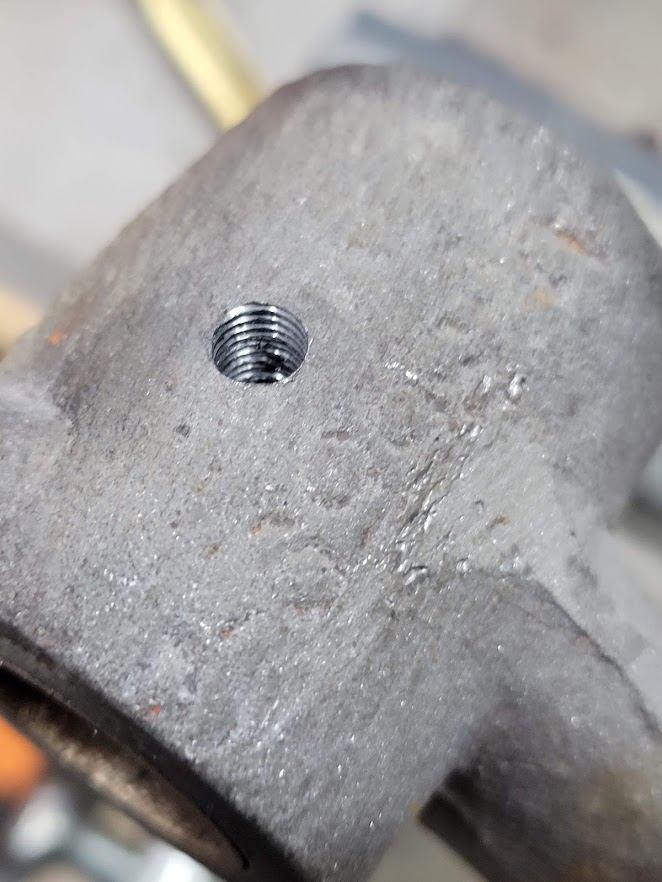
here is the hole i drilled and tapped for 1/4"-28 thread for a grease fitting on the hand clutch. I have since installed the fitting and tested. works well.
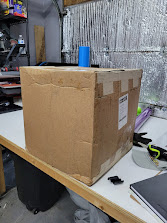
I also received my package from DJS tractor. Great bunch of folks there. everything was shipped well. super packaged and no damages from anything i ordered.
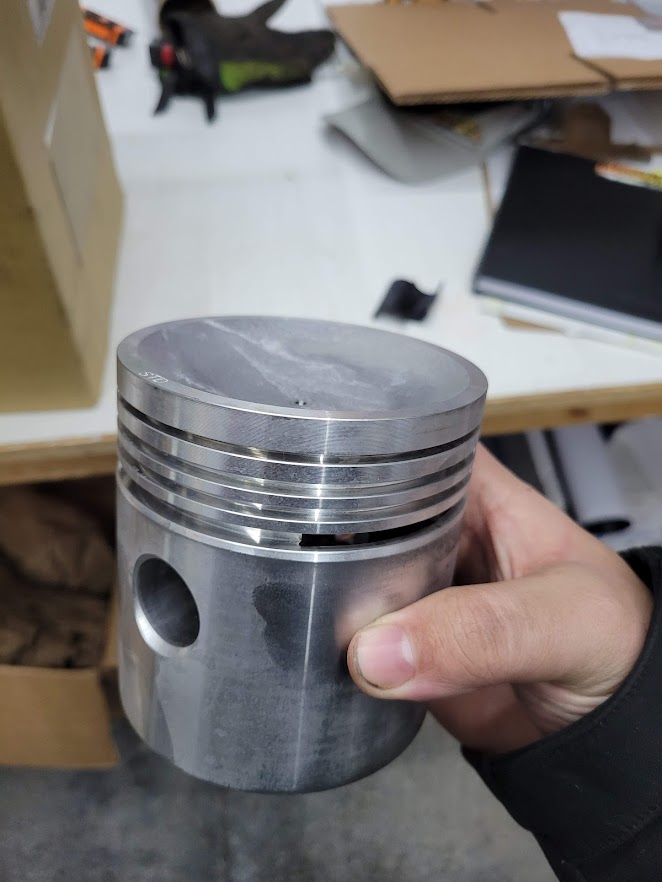
and, The Dish pistons i ordered with the rebuild kit. These are WD45 & D17 pistons. should work well with a WD45 crankshaft once i find one.
|
 |


 Topic Options


 Post Options
 Thanks(0)






 Sugarmaker wrote: