| Author |
 Topic Search Topic Search  Topic Options Topic Options
|
plummerscarin 
Orange Level Access

Joined: 22 Jun 2015
Location: ia
Points: 3374
|
 Post Options Post Options
") Thanks(0) Thanks(0)
 Quote Quote  Reply Reply
 Posted: 13 Mar 2021 at 10:42pm Posted: 13 Mar 2021 at 10:42pm |
Pulley and front cover are next. 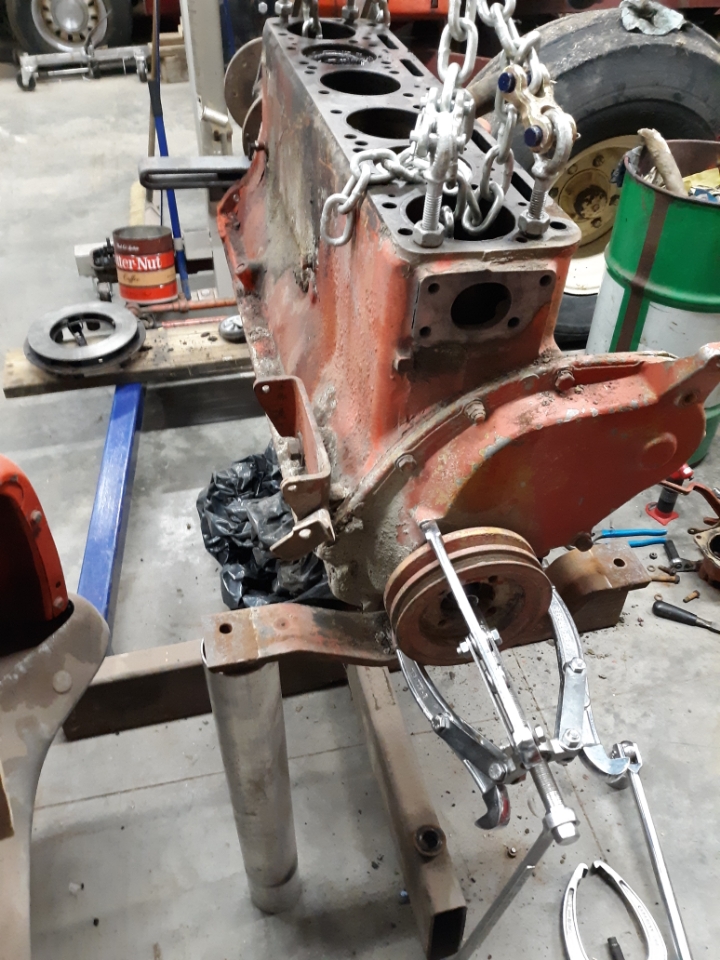 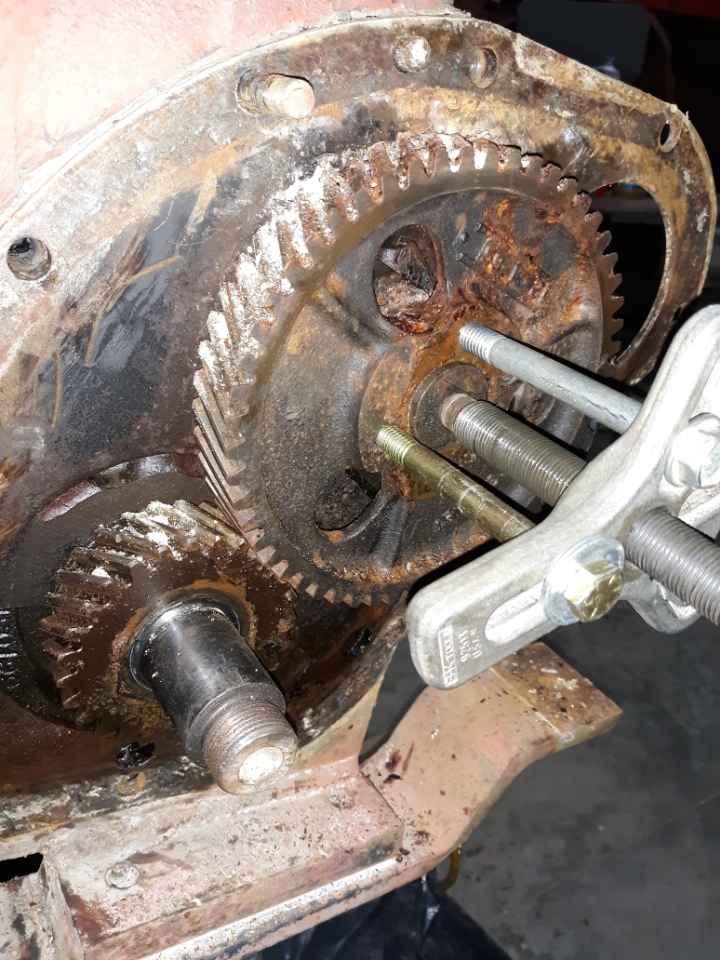 This engine is stuck so I removed the cam sprocket which allowed me to turn it to push the lifters in to their bores and pull camshaft out. The red stuff in the catch pan is ATF/acetone mix. I poured it into the cylinders to help break things loose but it leaked through the rings into the pan. I also swilled it around the lifters before I moved them. I've been squirting everything with some sort of penetrating oil all along disassembly. 
Edited by plummerscarin - 13 Mar 2021 at 10:44pm
|
 |
|
Sponsored Links
|
|
|
plummerscarin
Orange Level Access
Joined: 22 Jun 2015
Location: ia
Points: 3374
|
Post Options
Thanks(0)
Quote Reply
Posted: 16 Mar 2021 at 4:33pm |
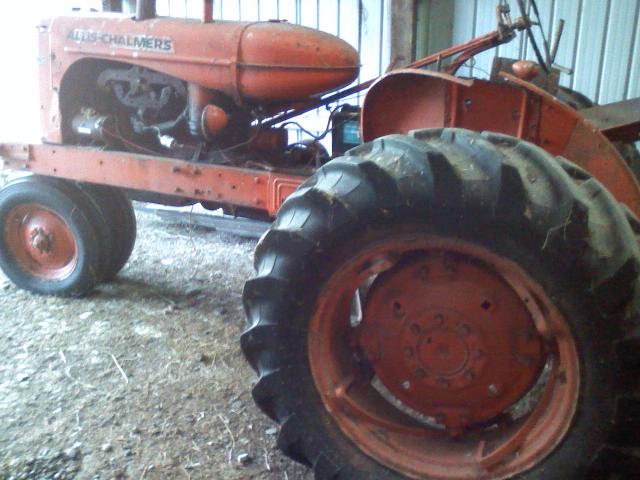
Cam and crankshaft out. Taking them in to be cleaned up. Kinda worried about the camshaft as it looks crusty. 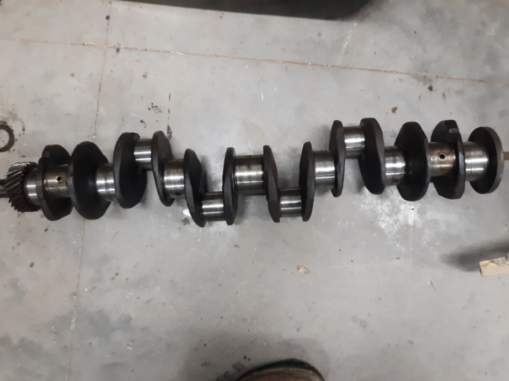 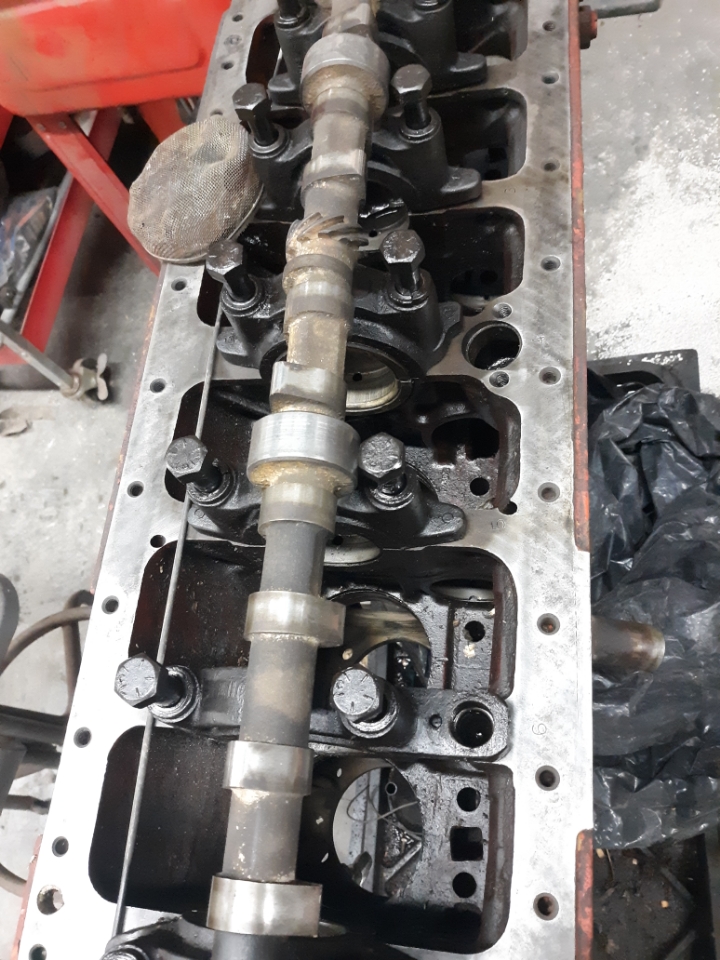 Getting pistons and sleeves out was a m#$%. Did I mention this engine was stuck? After the crankshaft came out I found the rods were stuck on wrist pins. They needed to move to clear the sleeves so I soaked them in ATF/acetone for a week. Did not seem very effective at penetrating. A friend swears by fogging oil so I gave that a try. Seemed to work better. 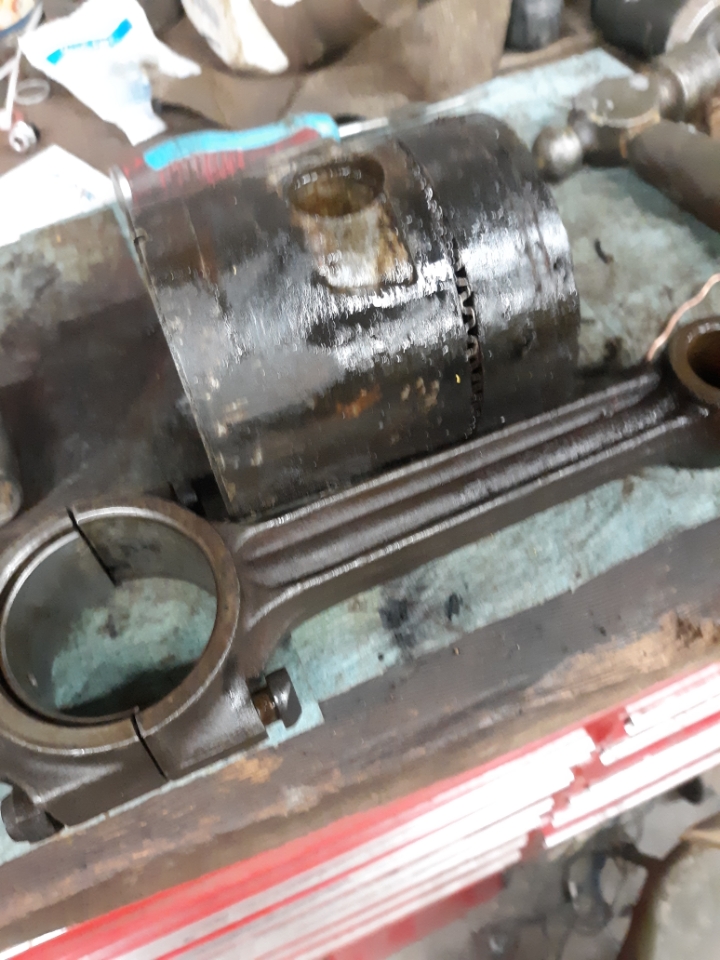
|
|
plummerscarin
Orange Level Access
Joined: 22 Jun 2015
Location: ia
Points: 3374
|
Post Options
Thanks(0)
Quote Reply
Posted: 16 Mar 2021 at 4:44pm |
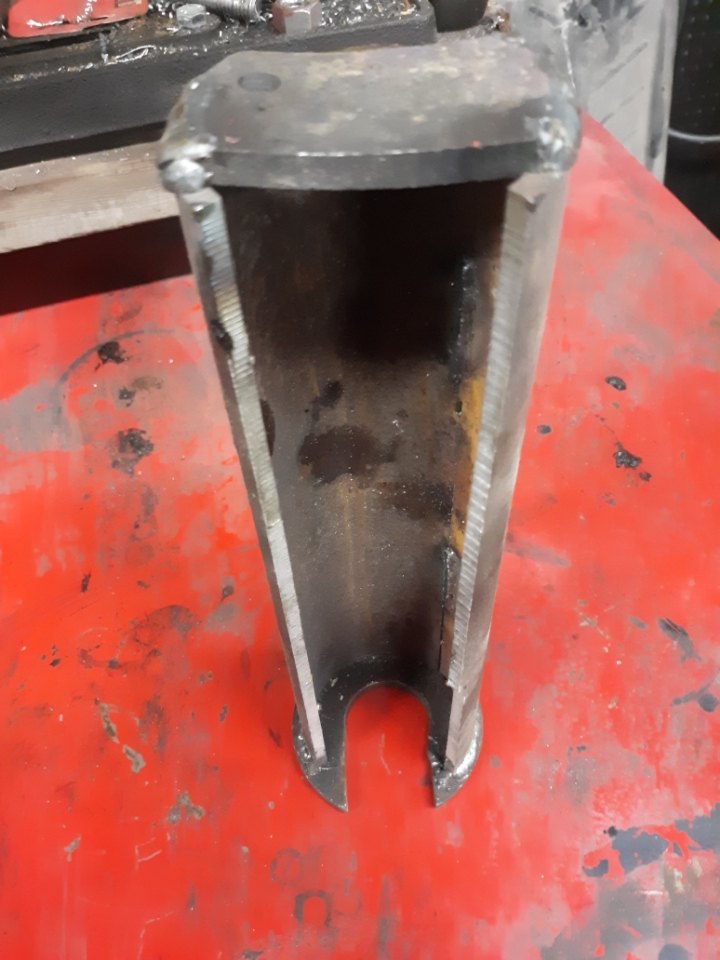 I made a driver to get pistons out of the sleeves as a wooden stick wasn't strong enough. It pushes on the piston at flat area of the pin boss and clears the rod. Some came out and some brought sleeve along with it so put them in press to separate them.  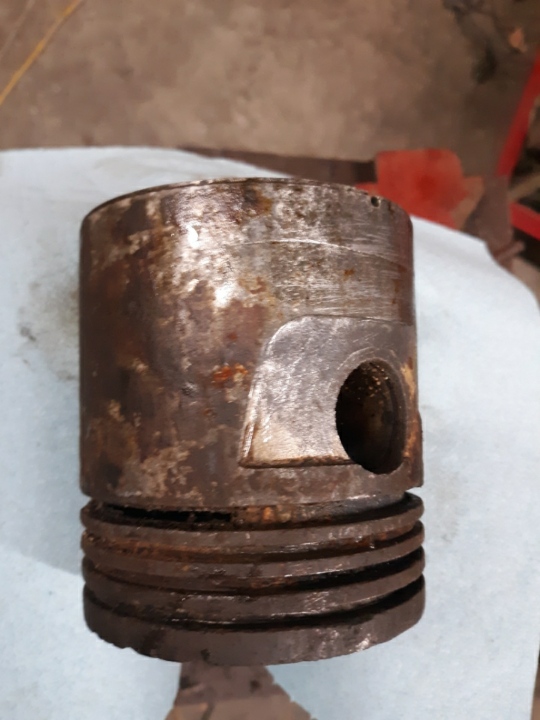 I'm sure it was not salvageable but I see it did crack one. Until This Old Tony makes me a sleeve puller I came up with this idea 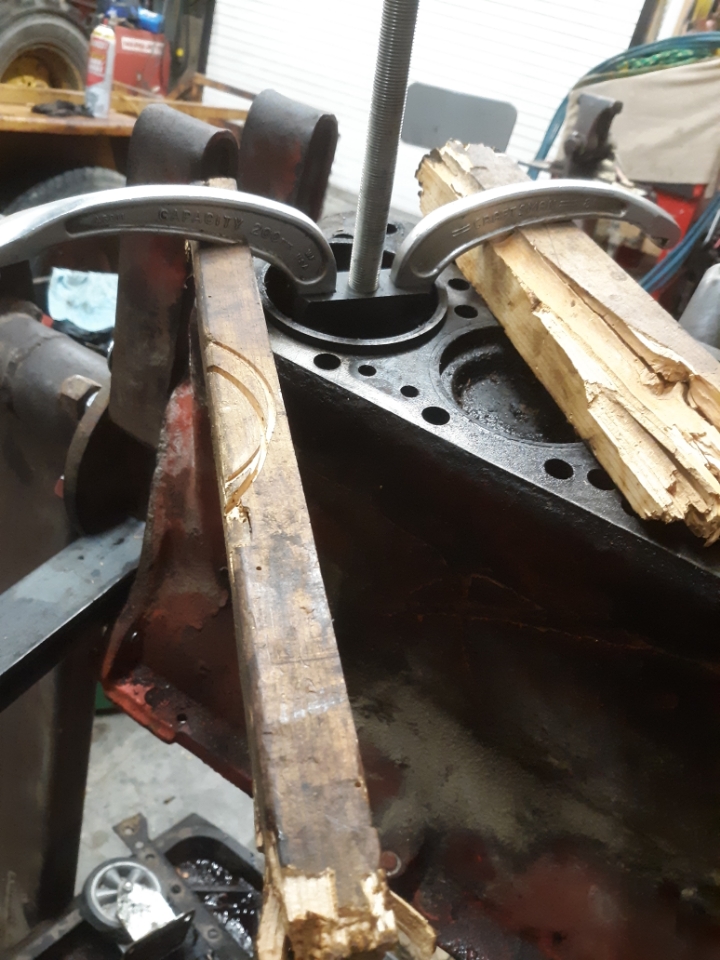
|
|
Strokendiesel002
Silver Level


Joined: 04 Apr 2019
Location: 53158
Points: 252
|
Post Options
Thanks(0)
Quote Reply
Posted: 17 Mar 2021 at 12:08am |
|
You have your hands full now!
I bent 2 of my rods during teardown if I remember correctly. Maybe it was just 1, either way, I remember buying a couple 😆
I didn't have much luck with the ATF and acetone myself, but it was rather cold when I started my venture. Hoping hat a good cleaning of that cam will bring good news and looking forward to the next steps
|
|
Sugarmaker
Orange Level
Joined: 12 Jul 2013
Location: Albion PA
Points: 8236
|
Post Options
Thanks(0)
Quote Reply
Posted: 17 Mar 2021 at 6:33am |
Wow! That is going to require some love and attention too! Thanks for the pictures. Regards. Chris
|
|
D17 1958 (NFE), WD45 1954 (NFE), WD 1952 (NFE), WD 1950 (WFE), Allis F-40 forklift, Allis CA, Allis D14, Ford Jubilee, Many IH Cub Cadets, 32 Ford Dump, 65 Comet.
|
|
plummerscarin
Orange Level Access
Joined: 22 Jun 2015
Location: ia
Points: 3374
|
Post Options
Thanks(0)
Quote Reply
Posted: 17 Mar 2021 at 9:09am |
|
Diesel,
Yeah that is why I made the driver so I could push on the piston and leave the rod alone
|
|
wjohn
Orange Level

Joined: 19 Jan 2010
Location: KS
Points: 1913
|
Post Options
Thanks(0)
Quote Reply
Posted: 17 Mar 2021 at 10:26pm |
I found that the camshaft journals were worn too small on my WD, so I went with a used cam and had it reground. That amount of wear doesn't seem to be common but definitely measure those journals while you have it out. As I understand the journal-bushing clearance is critical for oil pressure.
You might consider having the cam reground depending on how bad your lobes and tappets look. That cost me about $150 last year including shipping both ways. I resurfaced the tappets/lifters myself with my valve grinder but they would've added a couple bucks each to the cost if I had paid a shop.
|
|
1939 B, 1940 B, 1941 WC, 1951 WD, 1952 CA, 1956 WD-45
|
|
plummerscarin
Orange Level Access
Joined: 22 Jun 2015
Location: ia
Points: 3374
|
Post Options
Thanks(0)
Quote Reply
Posted: 23 Mar 2021 at 3:29pm |
I'm going to check with my engine guy on the cam when it goes in for cleanup. Couple shots of the deck after minor cleaning. 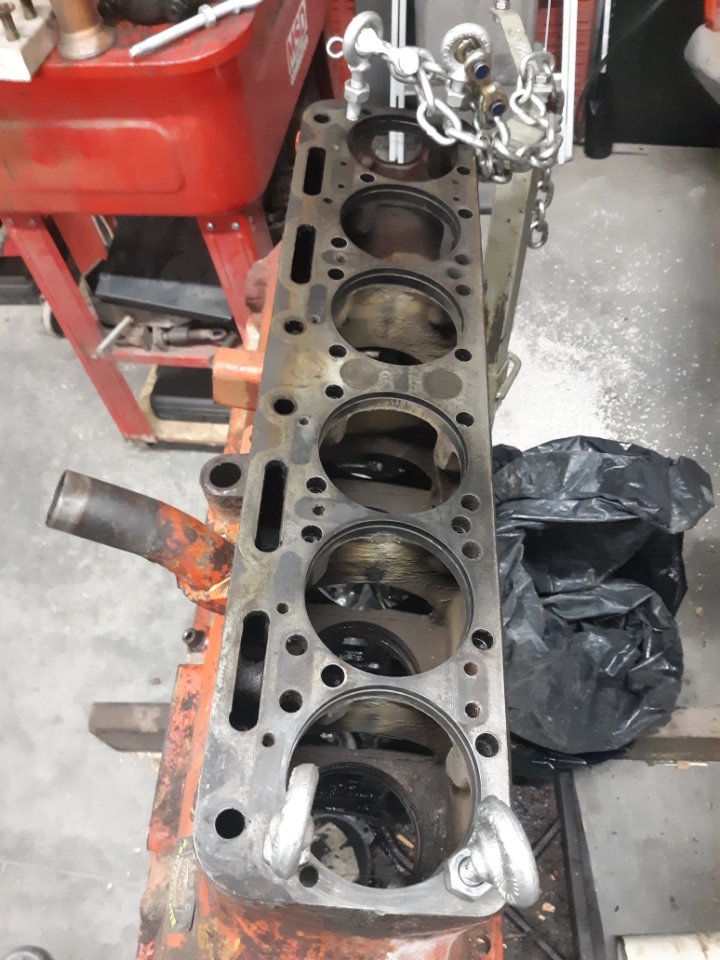 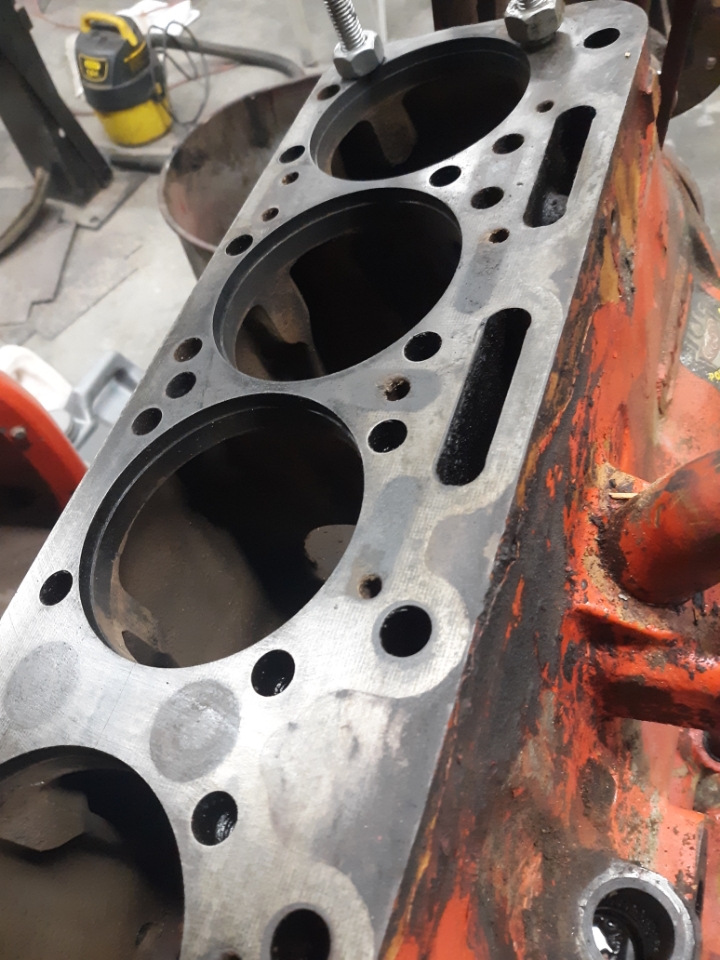 I think they look pretty good Service manual calls for bore depth at .249"-.251" 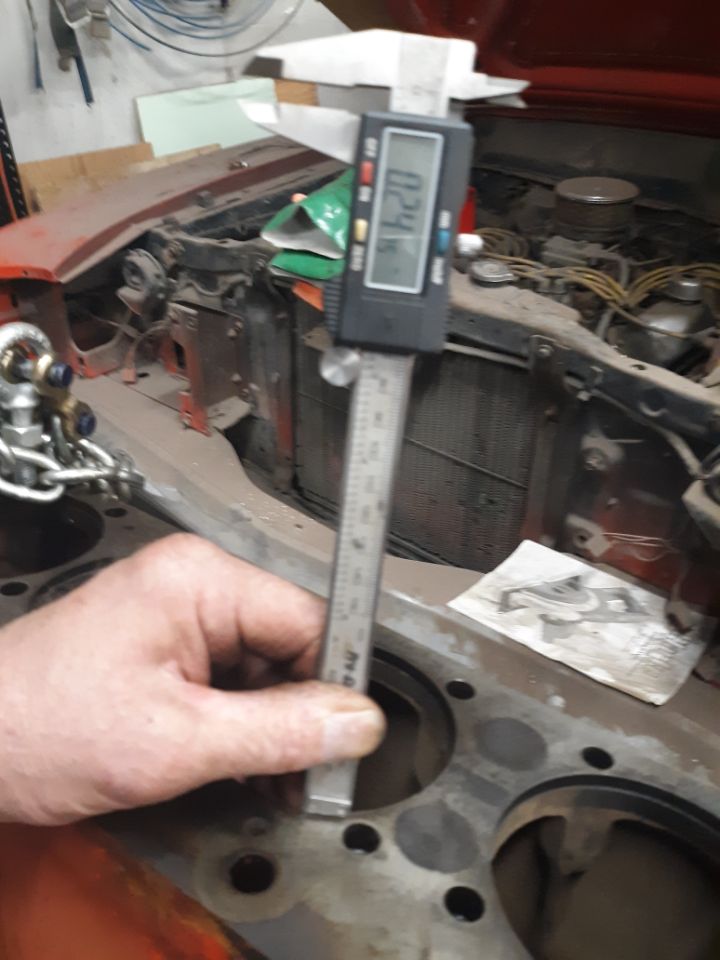  Granted it is not a dedicated depth micrometer but I think it's reasonable to believe it falls within spec? The accuracy of this caliper is rated at .001 either way.
|
|
plummerscarin
Orange Level Access
Joined: 22 Jun 2015
Location: ia
Points: 3374
|
Post Options
Thanks(0)
Quote Reply
Posted: 23 Mar 2021 at 3:37pm |
Checking runout on the pushrods 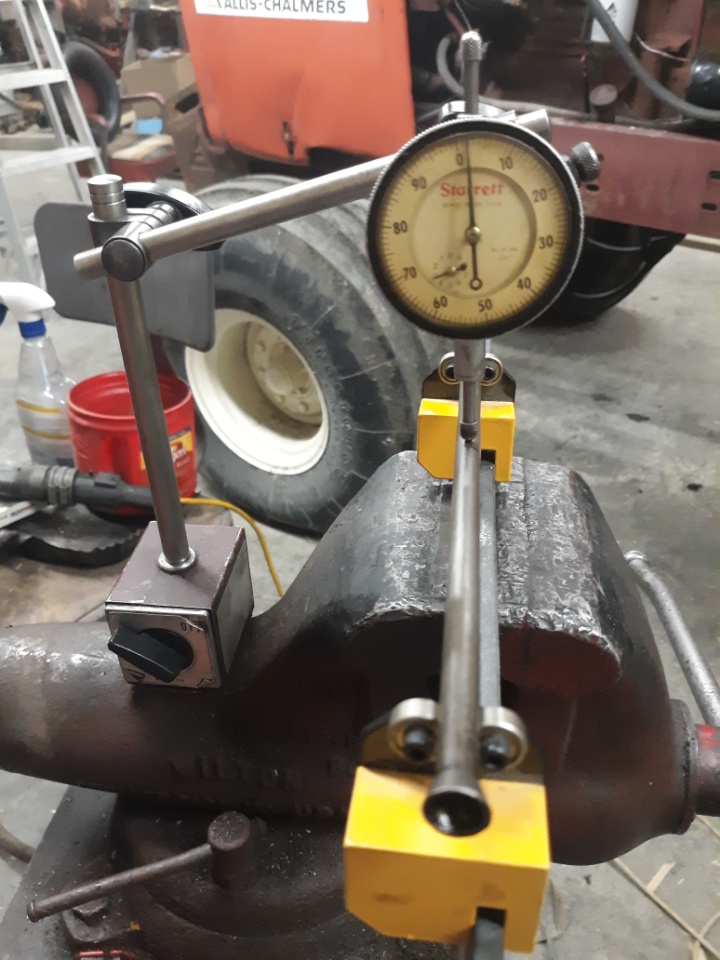 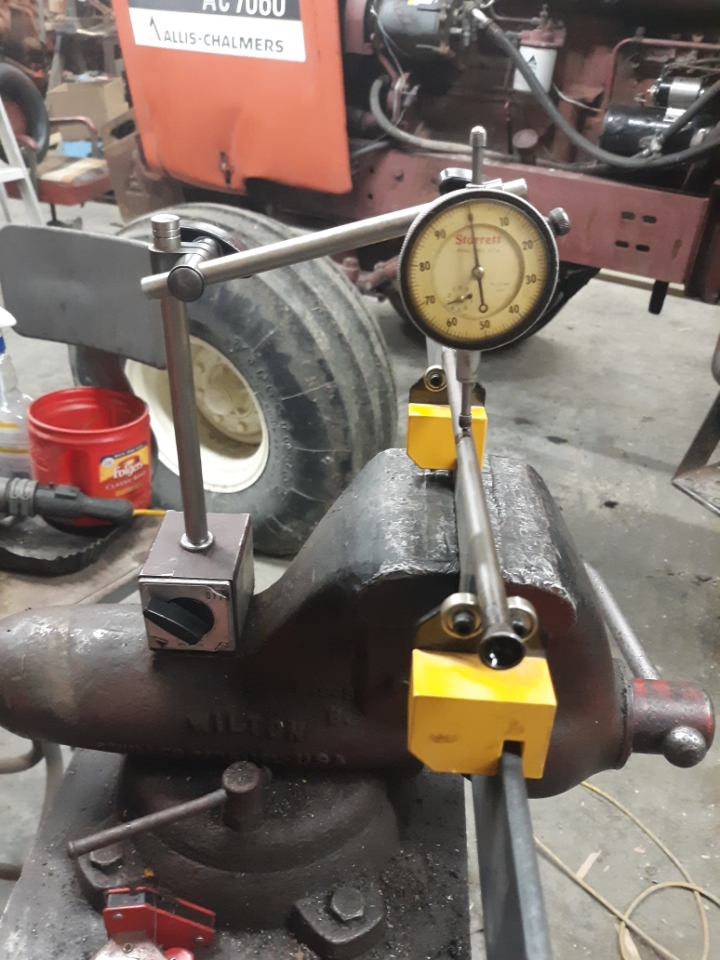 This was the best one at .002" The worst is .130" 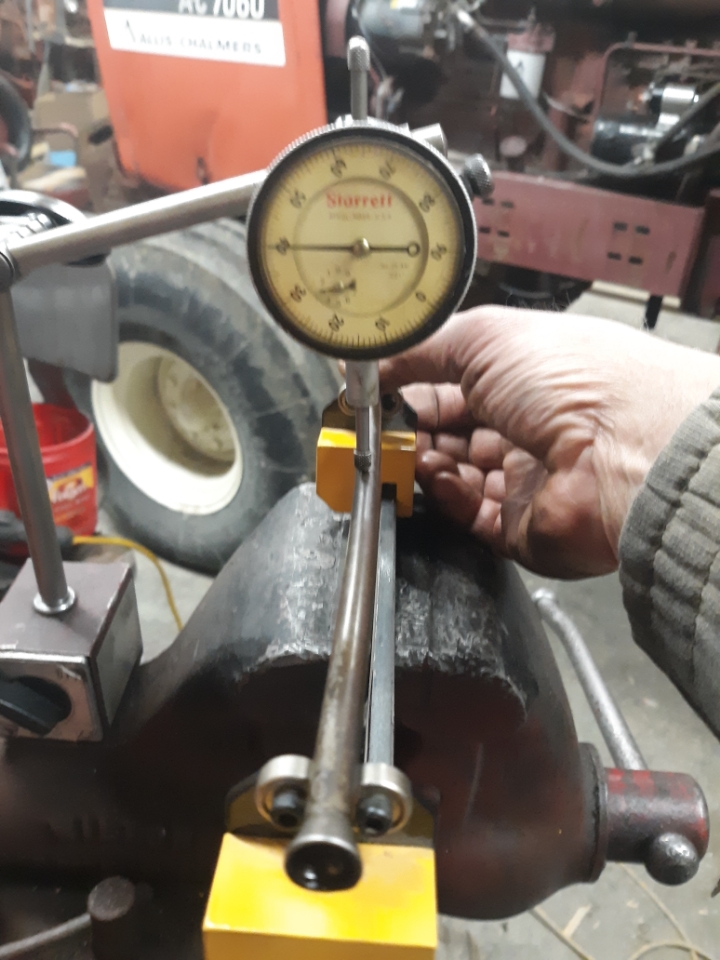 Notice dial indicator off to the side at half rotation. The service manual does not give specs for runout. What is an acceptable amount?
|
|
plummerscarin
Orange Level Access
Joined: 22 Jun 2015
Location: ia
Points: 3374
|
Post Options
Thanks(0)
Quote Reply
Posted: 24 Mar 2021 at 8:18pm |
Here's a shot of the front cam bushing. From my understanding they are lubricated by oil drainage from the valvetrain. 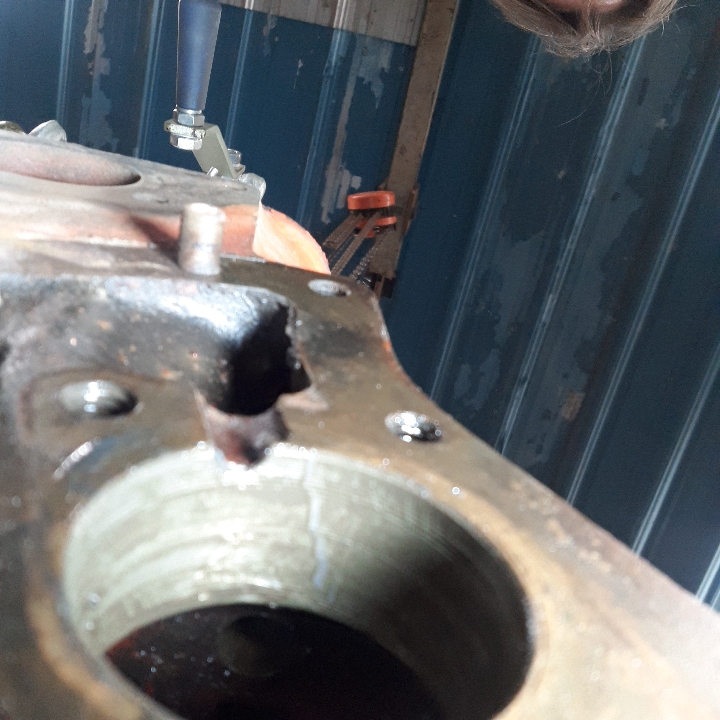 Some grooves in there not looking good. Possibly has something to do with the loose nut on the oiling tube on the head. By loose I mean threads had not engaged. 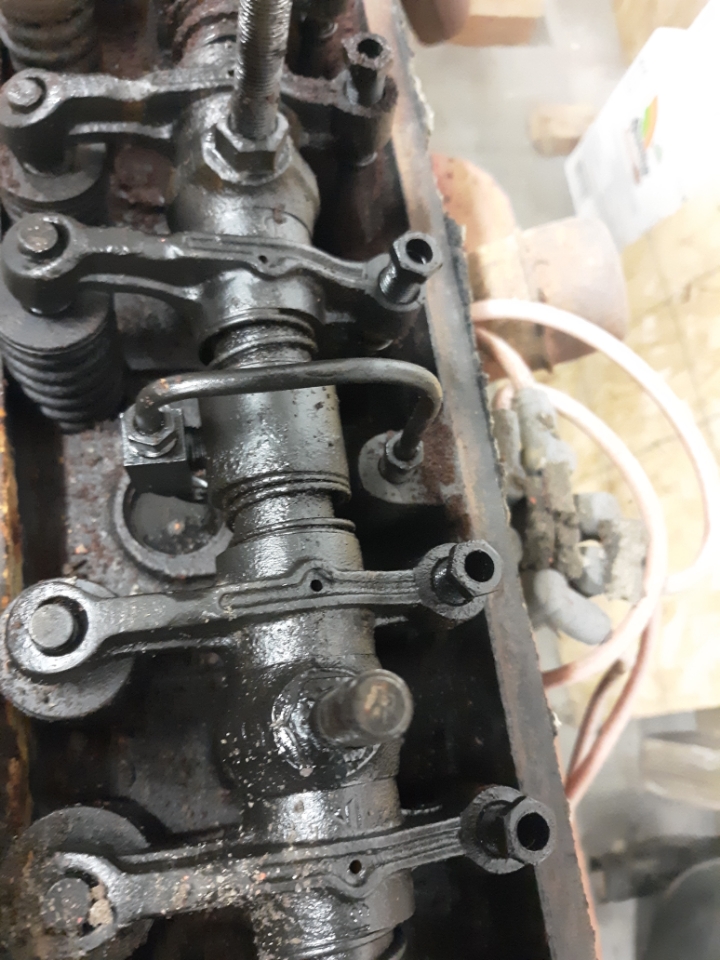 The block, crank, cam,lifters, and flywheel are now at the engine shop. Thanks to Alex09 for the NOS cam bushings that will be installed and the flywheel is getting prepped for the clutch that's on its way back from Rick.
|
|
Sugarmaker
Orange Level
Joined: 12 Jul 2013
Location: Albion PA
Points: 8236
|
Post Options
Thanks(0)
Quote Reply
Posted: 25 Mar 2021 at 6:42am |
Plummerscarin, The work your doing reminds me of each of the three tractors I have done. They were not diesel so that was easier. Also had one engine stuck bad and it was a lot of work to get it apart. It was worth it though as the block from that tractor is in my WD45 now. Your pictures and details are good. Your right the elements and time have not been kind to the tractor and components. I hope you can find all the parts for your engine. I know that some of the items are getting hard to locate. I found a 45 D a couple years ago, wonder if it is still in the weeds?? Keep the great pictures coming. I for one like the details, like removing the broken bolt! Those things will help others with there projects too. So what is the total plan for the tractor? Full refurb, clean and paint?? Will be a great looking tractor when done! And your Dad's, Doesn't get much better than that! Regards, Chris
|
|
D17 1958 (NFE), WD45 1954 (NFE), WD 1952 (NFE), WD 1950 (WFE), Allis F-40 forklift, Allis CA, Allis D14, Ford Jubilee, Many IH Cub Cadets, 32 Ford Dump, 65 Comet.
|
|
plummerscarin
Orange Level Access
Joined: 22 Jun 2015
Location: ia
Points: 3374
|
Post Options
Thanks(0)
Quote Reply
Posted: 25 Mar 2021 at 8:38am |
|
Chris,
Thanks for the kind words and encouragement. My plan is to go through everything as noted, time and weather has not been kind to it. I believe all of it needs checked over and repair/replace as needed. Plenty of other seals have/are leaking. With the engine in the shop, I have started on the steering. Pretty sure the bushings in the spindles are shot. Hopefully not the spindles. Have also gotten a seal kit and tie rod boots from Alex09. I know there is a nut under the giant frost plug that holds the gear in. How does that come off without destroying it? I plan to repaint it when all is said and done. However, since this is far from original, I plan to use PO2 or corporate orange as my preferred color. Also the front wheels are off a GM vehicle of some sort for the larger tires and I have this wild idea of finding the correct centers and see if they will fit in the hoops of the wider rims. Crazy?
|
|
IBWD MIke
Orange Level

Joined: 08 Apr 2012
Location: Newton Ia.
Points: 3642
|
Post Options
Thanks(0)
Quote Reply
Posted: 25 Mar 2021 at 11:39am |
What size are the tires that are on it now? I have a pair of Buick wheels that came on one of the 45's with wide tires but they are 15's. That would negate the center swap.
Where about in Iowa are you located?
|
|
plummerscarin
Orange Level Access
Joined: 22 Jun 2015
Location: ia
Points: 3374
|
Post Options
Thanks(0)
Quote Reply
Posted: 25 Mar 2021 at 9:05pm |
|
Hmmm, yep. Mine are 7.5Lx15. So much for that idea. Will keep options open. Sad part is the tread is really good but the sidewalls have seen better days and they do hold air. Push comes to shove I'll use em if necessary. Much bigger things to worry about.
I live north of Cedar Rapids
|
|
DaveKamp
Orange Level Access
Joined: 12 Apr 2010
Location: LeClaire, Ia
Points: 5725
|
Post Options
Thanks(0)
Quote Reply
Posted: 26 Mar 2021 at 8:45am |
there's no reason why one cannot mate factory centers to non-factory wheels...
What you do, is just cut enough of the center (Hub engagement area) from one, and remove the rim-area from the other, such that the inners overlap. Then weld them with beads and rosettes.
|
|
Ten Amendments, Ten Commandments, and one Golden Rule solve most every problem. Citrus hand-cleaner with Pumice does the rest.
|
|
plummerscarin
Orange Level Access
Joined: 22 Jun 2015
Location: ia
Points: 3374
|
Post Options
Thanks(0)
Quote Reply
Posted: 26 Mar 2021 at 12:21pm |
|
That’s a good idea. I had envisioned the entire center would fit inside the hoop.
|
|
DaveKamp
Orange Level Access
Joined: 12 Apr 2010
Location: LeClaire, Ia
Points: 5725
|
Post Options
Thanks(0)
Quote Reply
Posted: 26 Mar 2021 at 12:31pm |
Sometimes you can, but stopping just-short, but using the original center helps locate, and provides good support.
doubling centers works well...it does make the wheel heavier, as it's twice-as-thick... but that's not a problem for a tractor. To cut the circle nice, cut a couple of pieces of plywood to make a filler for the center, fit it, then find center with a protractor, drill it, and make a trammel to guide your torch. If you need it to be very precise, re-use the appropriate center on a vertically-supported rod to spin the assembled pieces, and a finger or dial indicator to get them located, then clamp and weld the rosettes first (They'll pull the faces together when shrinking, rather than skew them). Follow up with the fillet beads.
|
|
Ten Amendments, Ten Commandments, and one Golden Rule solve most every problem. Citrus hand-cleaner with Pumice does the rest.
|
|
plummerscarin
Orange Level Access
Joined: 22 Jun 2015
Location: ia
Points: 3374
|
Post Options
Thanks(0)
Quote Reply
Posted: 26 Mar 2021 at 5:51pm |
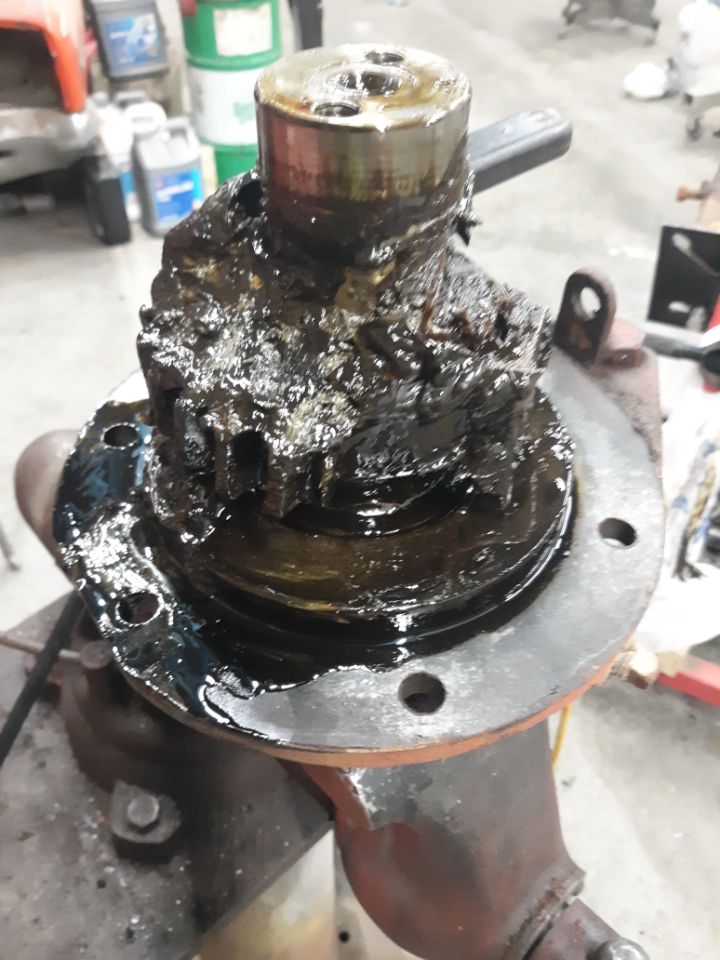
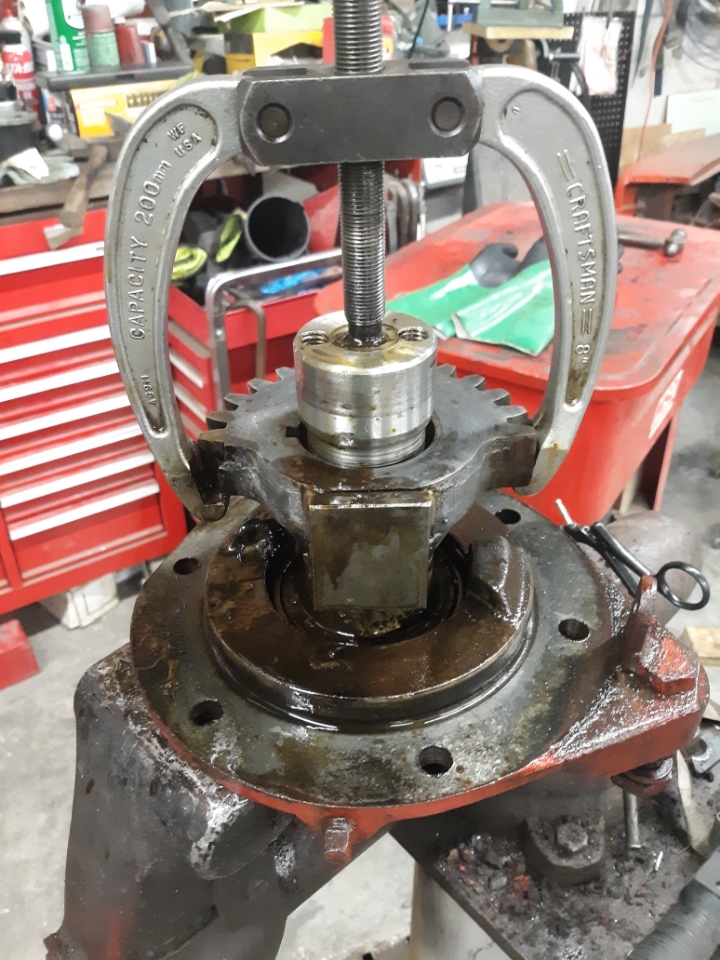
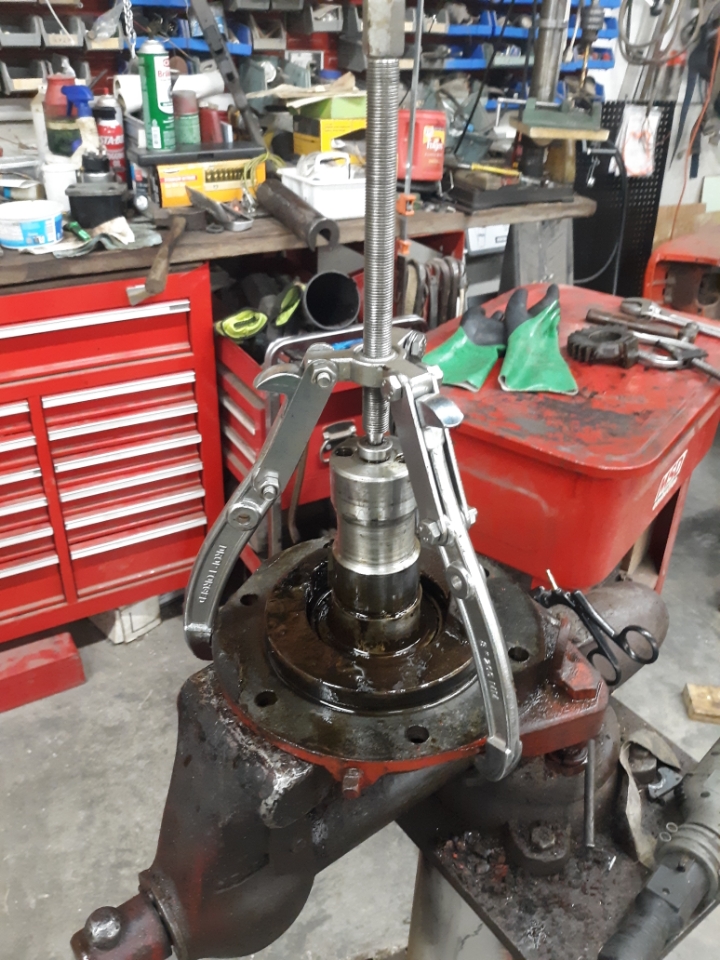
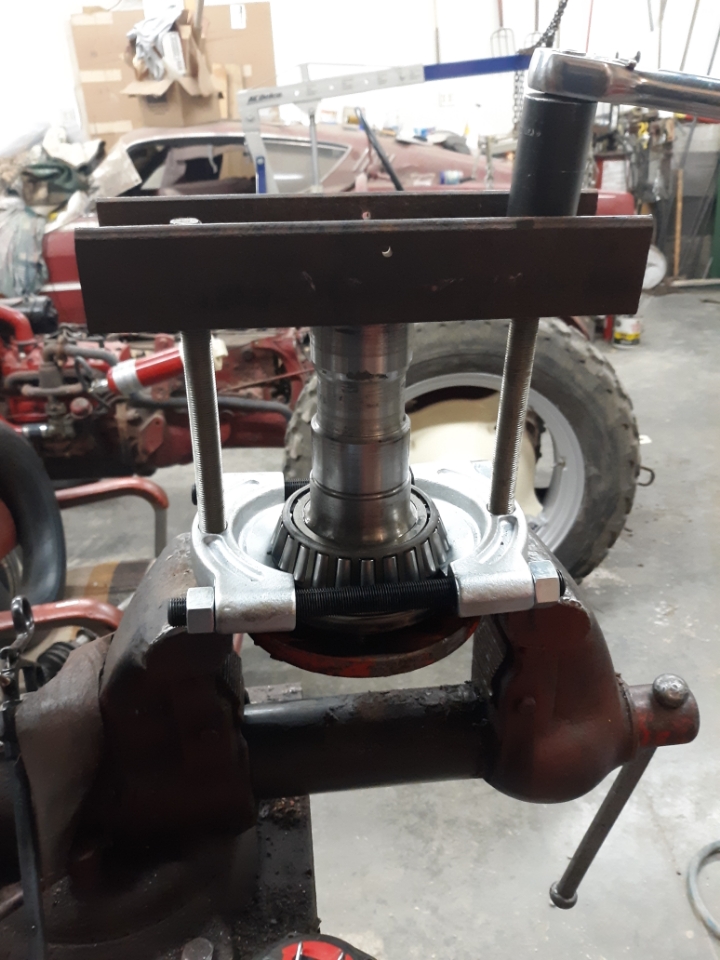
Finished the tear down on the steering box. Didn't know how to get top cover off so I went after with a chisel and small hammer  I worked two sides and it finally popped loose. I see a ridge on it like a stop so as not to go too far. 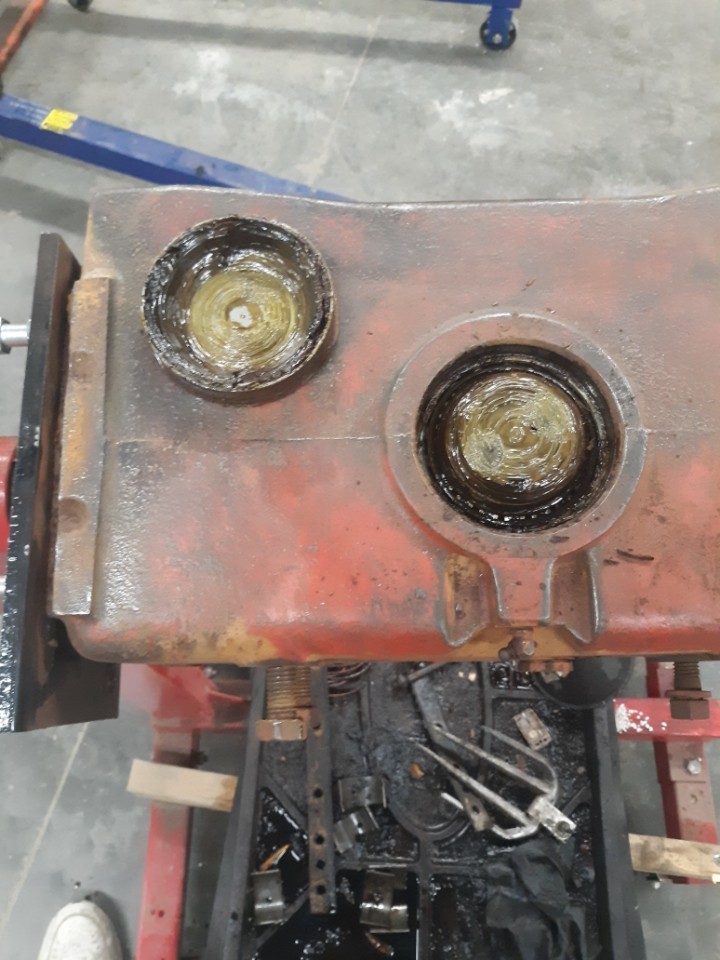 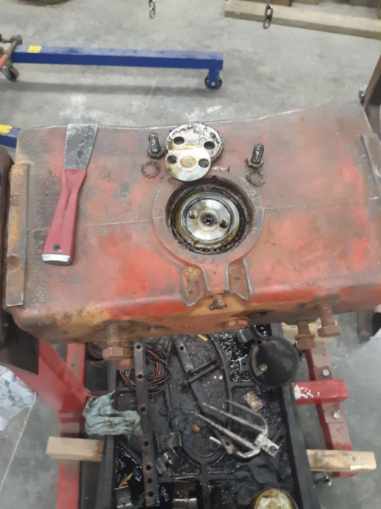 For the most part it was prettclean inside. I was concerned after all this time it might be rusty and crusty in there. Remember I had mentioned I could not steer the thing. In the end the problem was a seized U-joint on the steering shaft. However it had been leaking so I wanted to clean it up and put new seals in it.
|
|
plummerscarin
Orange Level Access
Joined: 22 Jun 2015
Location: ia
Points: 3374
|
Post Options
Thanks(0)
Quote Reply
Posted: 31 Mar 2021 at 2:51pm |
|
|
|
Sugarmaker
Orange Level
Joined: 12 Jul 2013
Location: Albion PA
Points: 8236
|
Post Options
Thanks(0)
Quote Reply
Posted: 31 Mar 2021 at 8:24pm |
Plummer, I dont remember seeing inside one of these before on here so this is good stuff. Heavy duty for sure compared to a std WD series tractor front end. My guess is the heavier engine would drive this design? Good documentation! Regards, Chris |
|
D17 1958 (NFE), WD45 1954 (NFE), WD 1952 (NFE), WD 1950 (WFE), Allis F-40 forklift, Allis CA, Allis D14, Ford Jubilee, Many IH Cub Cadets, 32 Ford Dump, 65 Comet.
|
|
plummerscarin
Orange Level Access
Joined: 22 Jun 2015
Location: ia
Points: 3374
|
Post Options
Thanks(0)
Quote Reply
Posted: 13 Apr 2021 at 10:07pm |
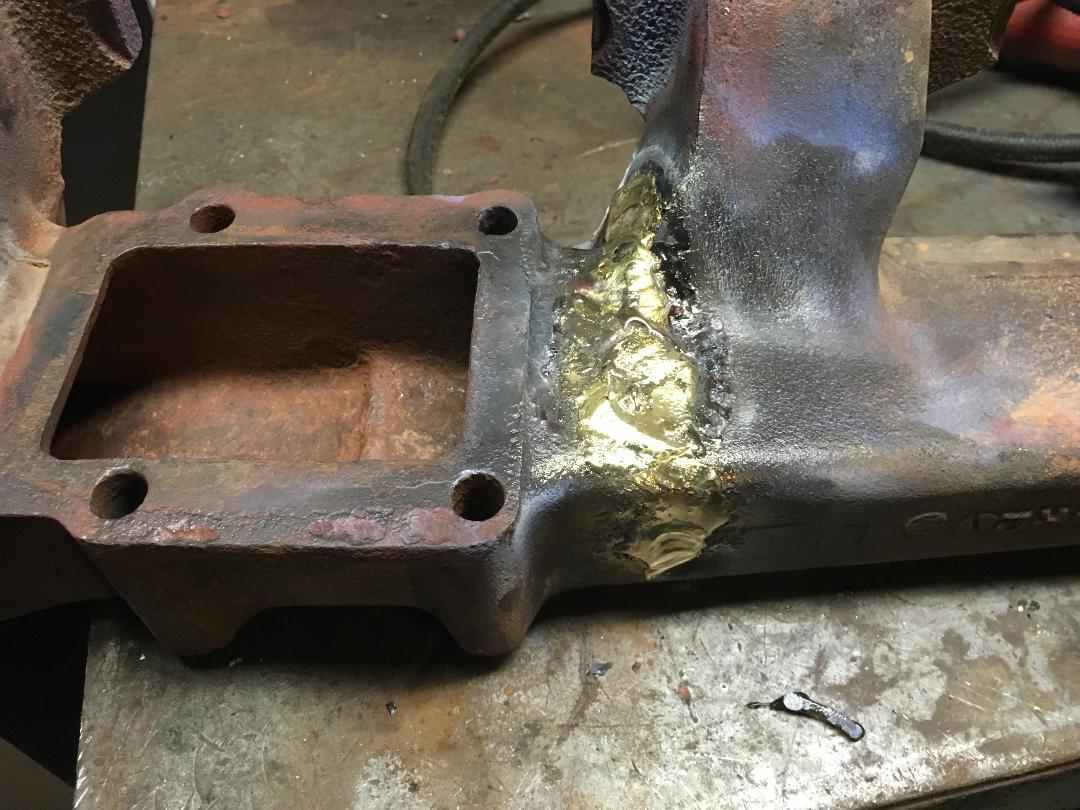
Still waiting for engine to come back from shop and some other steering box parts so I thought I'd clean the manifold. 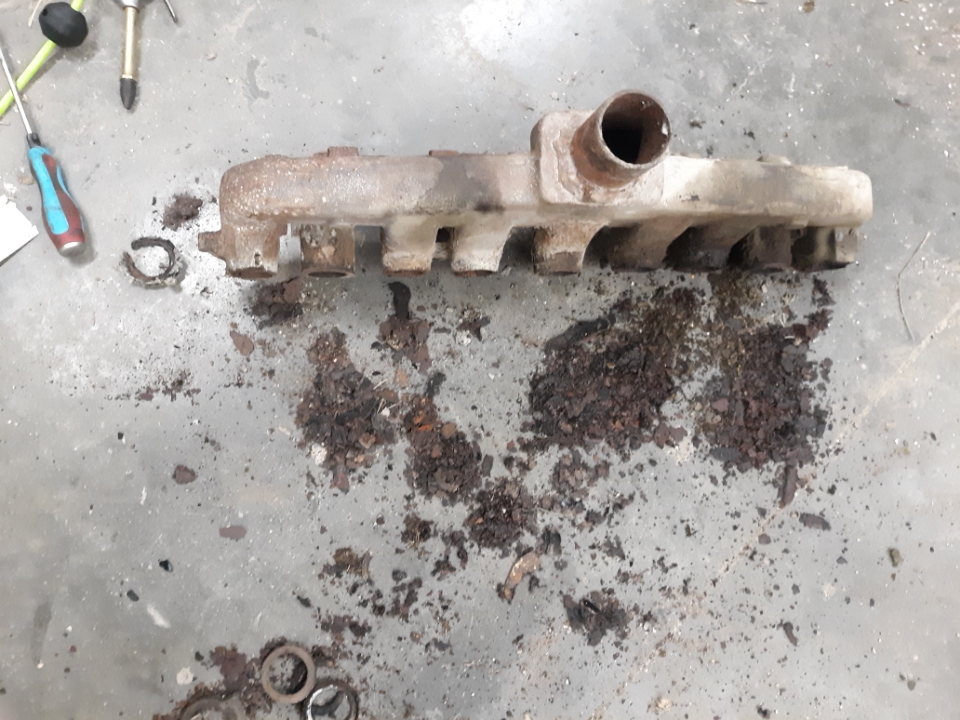 After an hour in the blast cabinet I found a crack and the ports are worn really bad 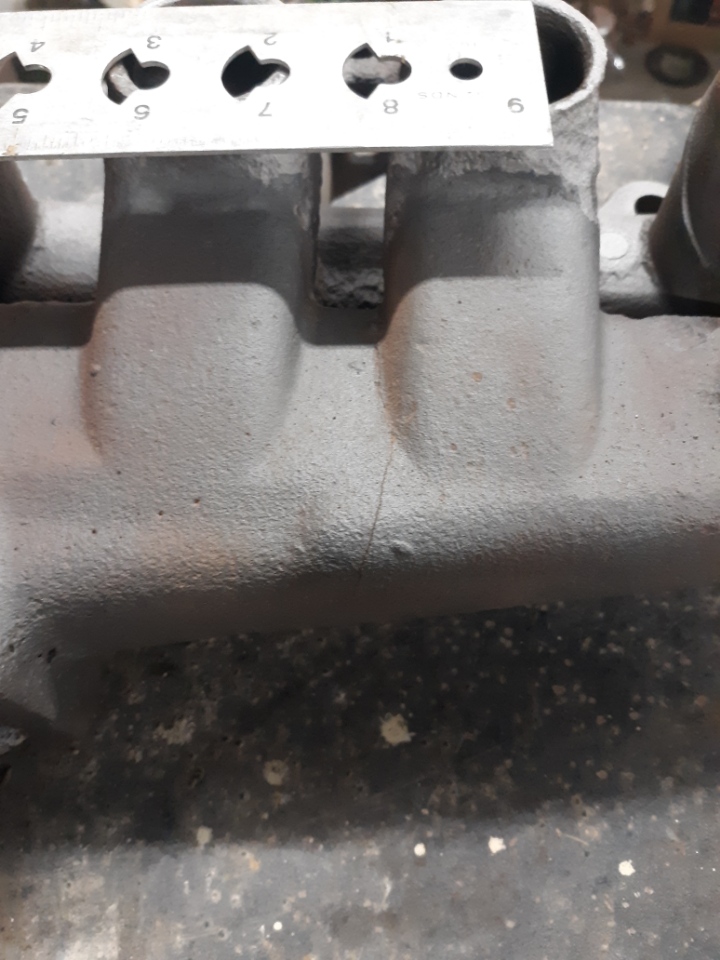 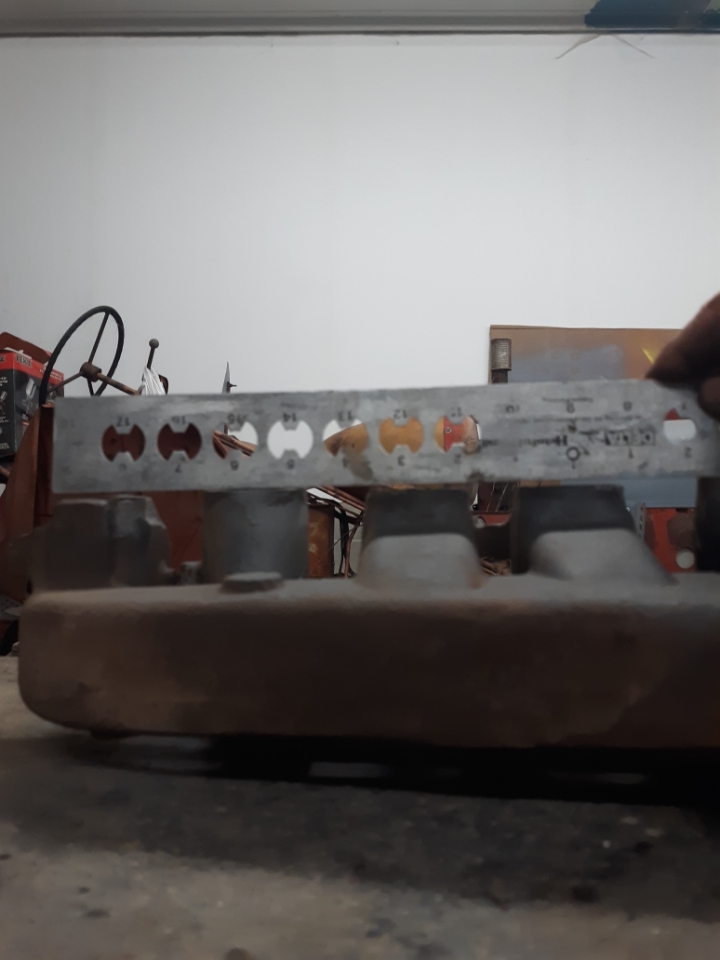  I may be ahead to find a better one to use
|
|
Sugarmaker
Orange Level
Joined: 12 Jul 2013
Location: Albion PA
Points: 8236
|
Post Options
Thanks(0)
Quote Reply
Posted: 14 Apr 2021 at 7:14am |
Plummer, Good luck in hour search. Hope some one has a good one for you. If Don Bradley was still with us he would be the guy to call. Try Tony's Tractors. Thanks for the update. Now maybe you could weld or braze that crack too. The mating face may be able to be machined flat again too. I had several of my gas manifolds machined flat to fit the head. Keep hitting at it! Your Dad would be happy with your progress! Regards, Chris
|
|
D17 1958 (NFE), WD45 1954 (NFE), WD 1952 (NFE), WD 1950 (WFE), Allis F-40 forklift, Allis CA, Allis D14, Ford Jubilee, Many IH Cub Cadets, 32 Ford Dump, 65 Comet.
|
|
IBWD MIke
Orange Level
Joined: 08 Apr 2012
Location: Newton Ia.
Points: 3642
|
Post Options
Thanks(0)
Quote Reply
Posted: 14 Apr 2021 at 9:02am |
As Sugarmaker said, you may be able to salvage that manifold. A trip across the mill to clean up the ports and a little brazing on the crack....
Here's a picture of the manifold for my 756, had a crack worse than the one you pictured. After a call the the junkyard knocked my socks off, thought I'd try to fix this one! Had to use the rosebud to get the heat needed. While i'm happy with the result, it is not on the tractor yet. Pretty sure it will be fine but time will be the ultimate judge.
|
|
plummerscarin
Orange Level Access
Joined: 22 Jun 2015
Location: ia
Points: 3374
|
Post Options
Thanks(0)
Quote Reply
Posted: 14 Apr 2021 at 9:40am |
|
Thanks for the support. I have not given up the idea of brazing. Perhaps would be a good place to improve those skills. I have watched several YouTube vids on the subject and just need to get out and try. Steiner lists them in their catalog if all else fails.
Mike, did you grind a vee in the crack before filling?
Edited by plummerscarin - 14 Apr 2021 at 9:41am
|
|
IBWD MIke
Orange Level
Joined: 08 Apr 2012
Location: Newton Ia.
Points: 3642
|
Post Options
Thanks(0)
Quote Reply
Posted: 14 Apr 2021 at 2:42pm |
Mike, did you grind a vee in the crack before filling?[/QUOTE]
Just a little. The big thing with brazing is cleanliness. I wire brushed it, a lot. Then blast it with brake clean.
You should have seen the look on the parts-man's face when I asked for the gasket between the halves. Told him it was already apart and bolts removed.
|
|
plummerscarin
Orange Level Access
Joined: 22 Jun 2015
Location: ia
Points: 3374
|
Post Options
Thanks(0)
Quote Reply
Posted: 01 Oct 2021 at 12:35pm |
|
Not a lot to report today other than to freshen up this thread. I try to do something on it three or four times a week so it doesn’t stall. All I’ve managed lately is to get all the wheel clamps cleaned up. The ones that were really rusted up got a dip in an electrolysis bath. After 3 days, all the rust had turned black, most of the paint lifted off and very little effort was needed to turn the locks. Thanks Sugarmaker for that inspiration. The steering U-joint is rebuilt and spindles have very little wear but will be getting new bushings. Carburetor is soaking in cleaner.
All for now, thanks
|
|
IBWD MIke
Orange Level
Joined: 08 Apr 2012
Location: Newton Ia.
Points: 3642
|
Post Options
Thanks(0)
Quote Reply
Posted: 02 Oct 2021 at 7:40am |
|
Update on the manifold a couple of posts back. So far so good! Have about 30 hours on her now. Did a little discing with it in August at the local power show, got her pretty warm in the early going. I think the rings were reseating? After a few rounds she cooled down.
|
|
plummerscarin
Orange Level Access
Joined: 22 Jun 2015
Location: ia
Points: 3374
|
Post Options
Thanks(0)
Quote Reply
Posted: 12 Nov 2021 at 6:41pm |
Some carburetor work recently. Soaked each part in cleaner for a week to get the goo off and finally the first sash of color. It is Van Sickle PO2. Not the brand intended for the whole project so hopefully it doesn't glow too badly when the rest is painted. The black mark next to the float is the goo oozing out it. New float backordered to 12/31, so I will try to resolder this one. Not out anything trying. 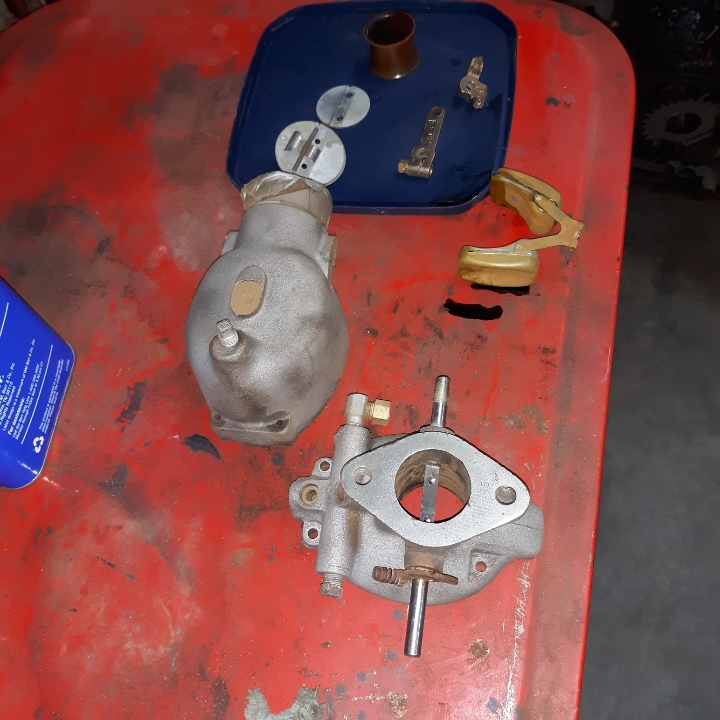 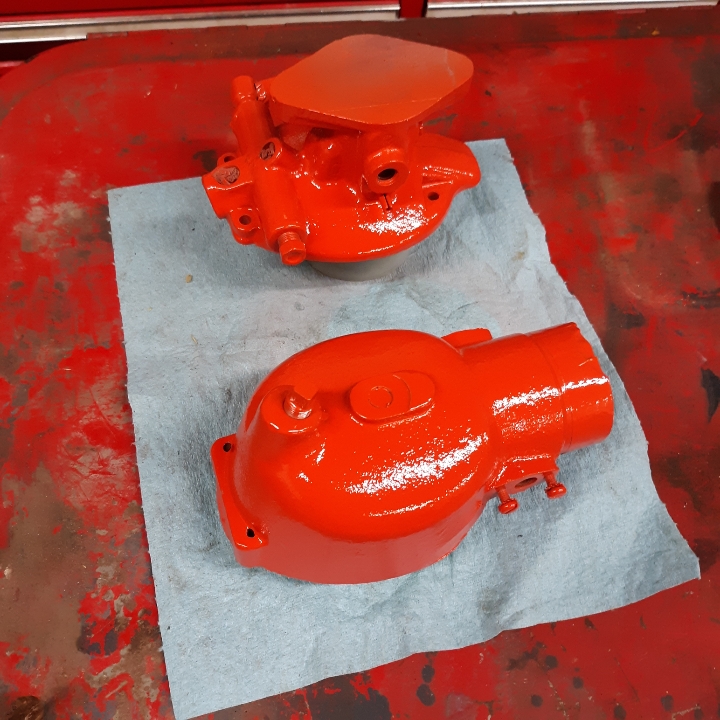
|
|
ACinSC
Orange Level
Joined: 16 Dec 2015
Location: South Carolina
Points: 2721
|
Post Options
Thanks(0)
Quote Reply
Posted: 12 Nov 2021 at 7:24pm |
|
Looks good !
|
|
IBWD MIke
Orange Level
Joined: 08 Apr 2012
Location: Newton Ia.
Points: 3642
|
Post Options
Thanks(0)
Quote Reply
Posted: 13 Nov 2021 at 10:00am |
|
Plummer, what model M/S is that? Might have a float around here somewhere.
Edited by IBWD MIke - 13 Nov 2021 at 10:00am
|
|