Dad's WD project
Printed From: Unofficial Allis
Category: Allis Chalmers
Forum Name: Farm Equipment
Forum Description: everything about Allis-Chalmers farm equipment
URL: https://www.allischalmers.com/forum/forum_posts.asp?TID=178756
Printed Date: 24 Aug 2025 at 2:44am
Software Version: Web Wiz Forums 11.10 - http://www.webwizforums.com
Topic: Dad's WD project
Posted By: plummerscarin
Subject: Dad's WD project
Date Posted: 02 Mar 2021 at 10:45pm
Well I started another project. This time it is a WD my dad repowered with a 262. He had found a WD diesel complete but not running. His BIL in southern Mo. ran a dealership and found a gas engine to swap in. Dad passed in '89 but I kept the tractor. It was smoking pretty bad then and then just sat till now. Engine is stuck. One rear rim was shot but I was able to salvage a piece to repair a rim for uncle's 170 and the complete tire/rim is also on the 170 for now. Planning to post more pictures and of course look for advice along the way. |
Replies:
Posted By: Sugarmaker
Date Posted: 03 Mar 2021 at 6:19am
|
Now that looks like a project for sure! Will be watching! These are the best ones! Family ones! Regards, Chris ------------- D17 1958 (NFE), WD45 1954 (NFE), WD 1952 (NFE), WD 1950 (WFE), Allis F-40 forklift, Allis CA, Allis D14, Ford Jubilee, Many IH Cub Cadets, 32 Ford Dump, 65 Comet. |
Posted By: IBWD MIke
Date Posted: 03 Mar 2021 at 9:09am
|
That'll keep you busy awhile! Good luck with the old girl. I talked to a fellow at an auction last fall that had put a 4 cylinder diesel of some sort in a WD. He was picking my mind about how to get it finished, mentioned this forum. He's not on the net and I'm not much help with early diesels..... Maybe I'll run into him again some day?
|
Posted By: FloydKS
Date Posted: 03 Mar 2021 at 9:43am
|
how fast was it going backwards to bend that fender? just curious... Yes looks like a nice start to a good 'fun' project. ------------- Holding a grudge is like taking poison and expecting the other person to die |
Posted By: plummerscarin
Date Posted: 03 Mar 2021 at 12:45pm
Lol. The tractor wasn't moving, but the tree that hit it was doing 140 during the Derecho. 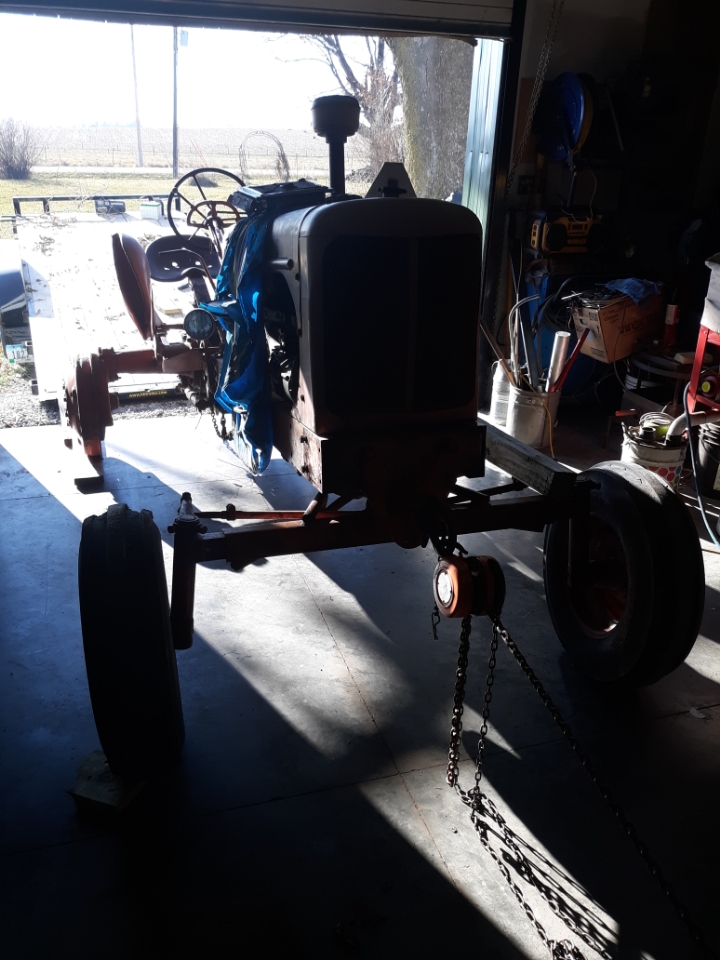 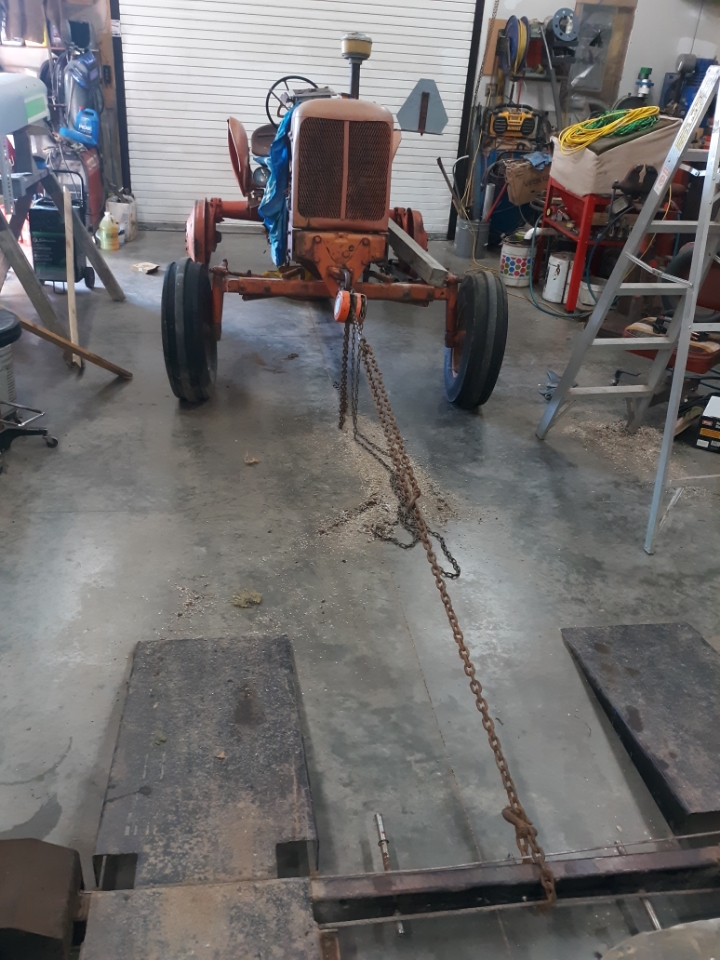 Here it's being dragged in off the tilt trailer. Since the tires are off, I removed the snap coupler set up so it would roll on the wheels. I put 2xs underneath to prevent them from gouging the floor and new trailer deck. In another thread there was discussion about hoists. Here I'm using a chain fall anchored to the lift to pull in. Funny, just yesterday I saw Ian on Full Custom Garage do this very thing.That's 3 time in 6 months I've had to do this. Now considering an anchor on the back wall with a winch should work better. |
Posted By: Sugarmaker
Date Posted: 04 Mar 2021 at 7:07am
|
Its starting to look better already! Thanks for posting your progress! Regards, Chris ------------- D17 1958 (NFE), WD45 1954 (NFE), WD 1952 (NFE), WD 1950 (WFE), Allis F-40 forklift, Allis CA, Allis D14, Ford Jubilee, Many IH Cub Cadets, 32 Ford Dump, 65 Comet. |
Posted By: dakotawc
Date Posted: 04 Mar 2021 at 7:15am
| I've seen a couple like that over the years. How did they compare to a wd45 gas powerwise? |
Posted By: plummerscarin
Date Posted: 04 Mar 2021 at 8:34am
| I was just a teen then but from my recollection, Dad wanted to pull the 3 bottom slat plow in 3rd gear which the WD45 struggled with. I remember right off the bat the transmission would pop out of third so that got fixed as well. My favorite time with it was plowing after dark and seeing the muffler glowing red. |
Posted By: plummerscarin
Date Posted: 04 Mar 2021 at 12:57pm
Rear wheels off and on the skates to spin 180 and to the right.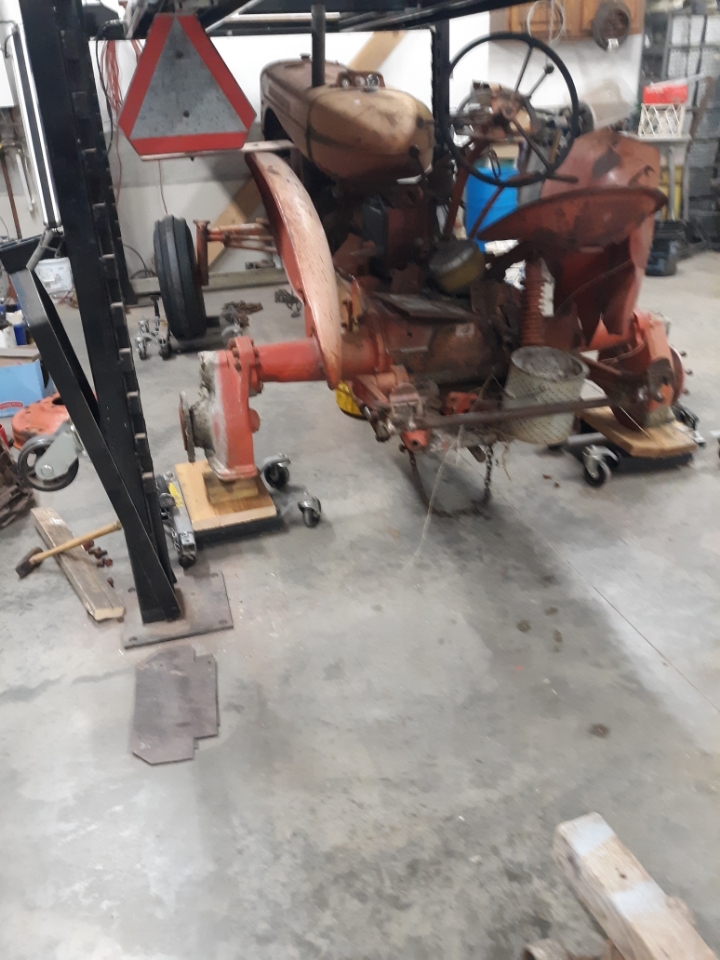  In position for tear down My stepson says this is where the magic happens. He redid a Nova here and is where the 170 got an engine overhaul and new clutch. |
Posted By: Sugarmaker
Date Posted: 04 Mar 2021 at 8:05pm
|
The magic area! Nice! Looking good on the start of this project. Regards, Chris ------------- D17 1958 (NFE), WD45 1954 (NFE), WD 1952 (NFE), WD 1950 (WFE), Allis F-40 forklift, Allis CA, Allis D14, Ford Jubilee, Many IH Cub Cadets, 32 Ford Dump, 65 Comet. |
Posted By: ac hunter
Date Posted: 05 Mar 2021 at 7:20am
| Will be interesting to see your progress. Keep the reports and pictures coming. |
Posted By: WF owner
Date Posted: 05 Mar 2021 at 8:06am
| I would love a magic area, where I could wave a wand and it was fixed.... |
Posted By: Steve in NJ
Date Posted: 05 Mar 2021 at 2:19pm
|
Oh shoot! I thought that was those new style foldable fenders, so when you get in a tight spot, ya just fold em' in.... No? Anyway, great project. Best thing is it was your Dad's. That's really great!! If you need a special built wiring system for that when the time comes, let me know. I can work with ya on a new harness for the ole' girl...... Steve@B&B ------------- 39'RC, 43'WC, 48'B, 49'G, 50'WF, 65 Big 10, 67'B-110, 75'716H, 2-620's, & a Motorhead wife |
Posted By: plummerscarin
Date Posted: 05 Mar 2021 at 3:07pm
|
Thank you Steve. Yes this harness is looking a little crusty and completely wrapped in electrical tape. One thing I dislike about draining coolant is it can be such a messy process. I found a bit of copper tubing that I cut to fit the drain valve and routed to a bucket below. 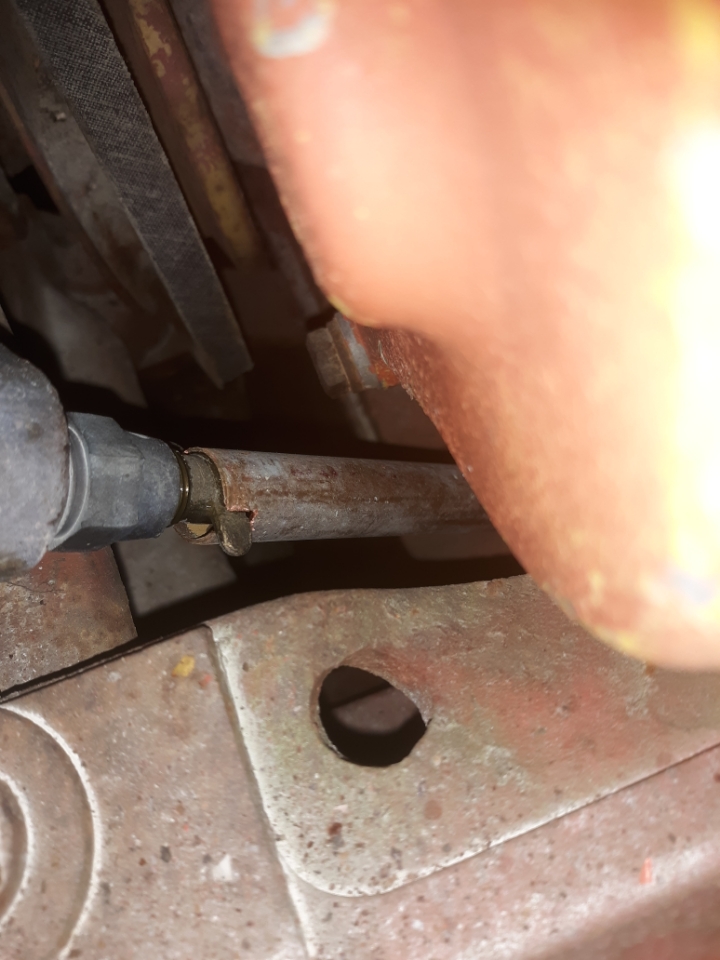 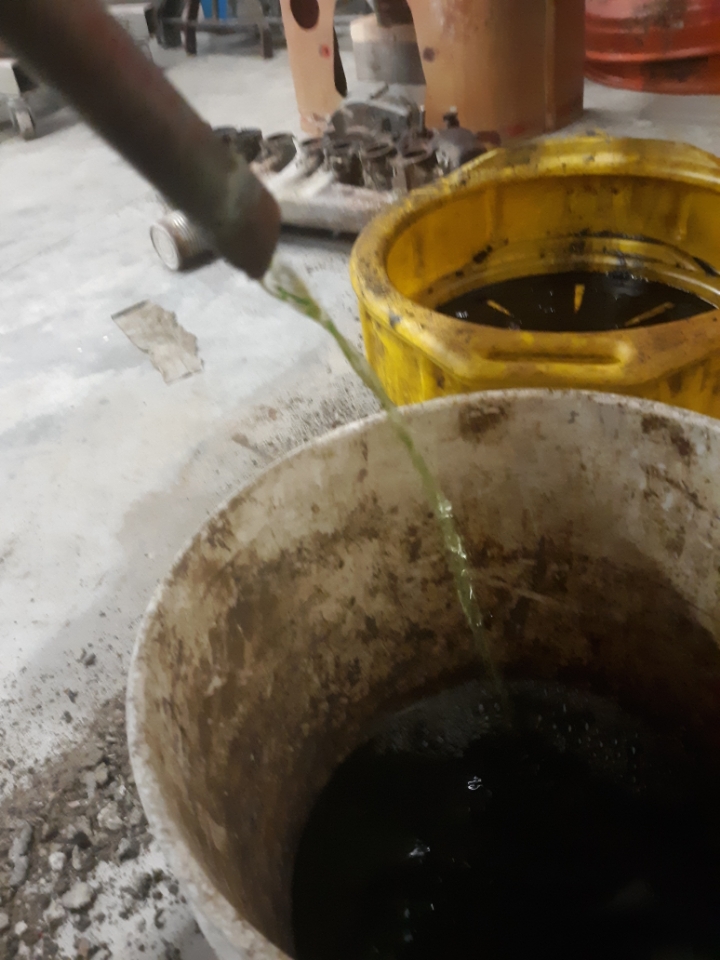 Or maybe you guys already figured this out. I was surprised how clean this coolant looked.  I also fabbed one to drain 7XXX's |
Posted By: Sugarmaker
Date Posted: 05 Mar 2021 at 7:41pm
|
That is a neat idea! thanks! Now to remember it! Regards, Chris ------------- D17 1958 (NFE), WD45 1954 (NFE), WD 1952 (NFE), WD 1950 (WFE), Allis F-40 forklift, Allis CA, Allis D14, Ford Jubilee, Many IH Cub Cadets, 32 Ford Dump, 65 Comet. |
Posted By: DaveKamp
Date Posted: 07 Mar 2021 at 3:57pm
Dang... here, I saw that first picture, and was hopin' that by the time I got to the bottom of the thread, I'd see it with the tracks back on!  ------------- Ten Amendments, Ten Commandments, and one Golden Rule solve most every problem. Citrus hand-cleaner with Pumice does the rest. |
Posted By: plummerscarin
Date Posted: 07 Mar 2021 at 4:00pm
| Lol. Took me a while to figure that one out. Was there a conversion. Seen em on Fords |
Posted By: plummerscarin
Date Posted: 07 Mar 2021 at 7:51pm
Teardown begins. Started with the head to assess cylinders. 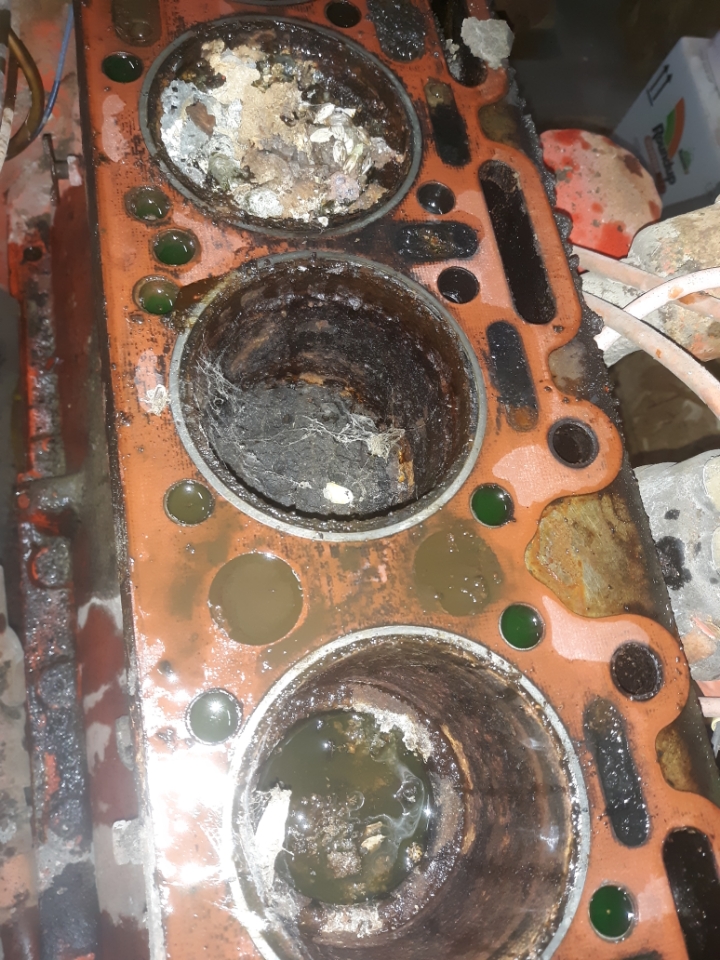 Not good. But had little hope. Some of it is my fault as I had the plugs out for some time. Was pouring lubricants in there hoping to loosen this stuck engine. No luck. It was smoking pretty good last it ran so figured sleeves would need replacement. 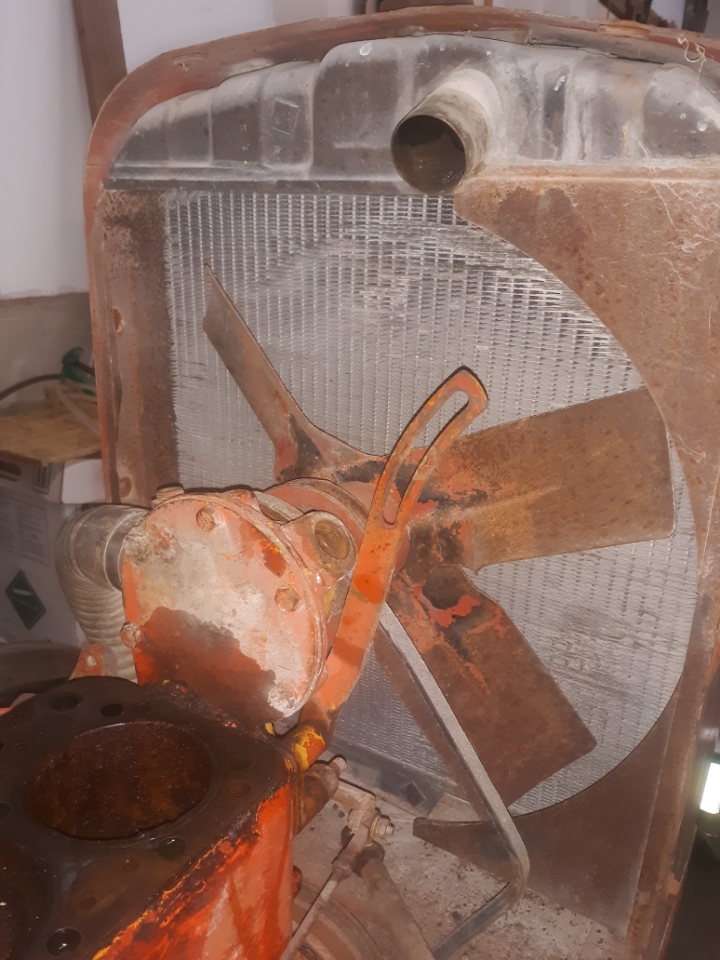 Someone cut the fan shroud so I will need to repair that. |
Posted By: plummerscarin
Date Posted: 07 Mar 2021 at 8:03pm
There's a big dent in the bypass tube for the cooling system. I'll just put it in the vise and tap a ⅝ rod through and push the dent out. 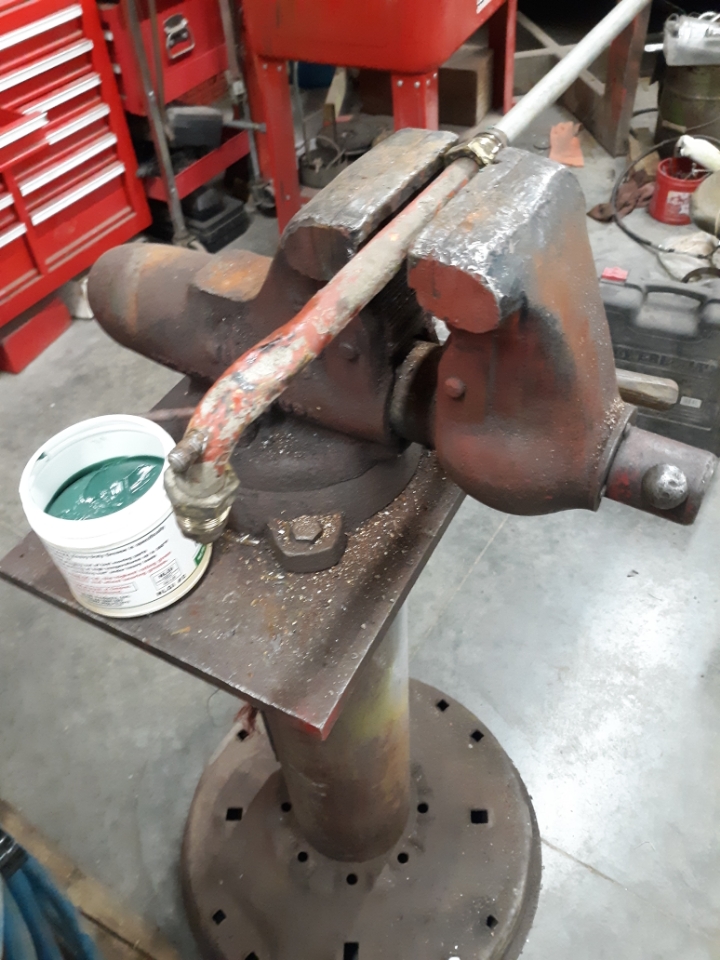 Ok what just happened? 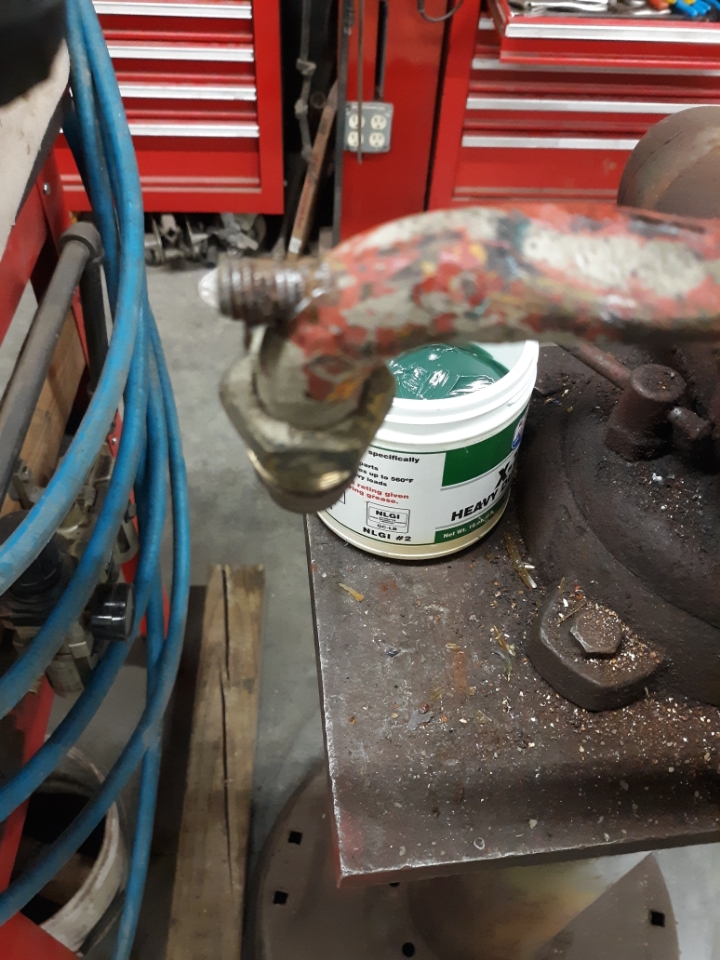 That's not the rod.  Please tell me this is not someone's diabolical plan to restrict flow in the bypass. Unless someone has one, I guess I will try to braze this shut. |
Posted By: SteveM C/IL
Date Posted: 07 Mar 2021 at 8:16pm
| Maybe who ever flattened the tube stuck that in there to keep from total crush?....but had it lodged and couldn't remove it? |
Posted By: plummerscarin
Date Posted: 09 Mar 2021 at 6:52am
|
Yeah, I don't know maybe. Would there be need to restrict flow there?. Anyway time to the rails and steering off to remove engine. I cut and drilled some 3" channel to support the torque tube once the rails are off. Had a devil of a time separating the frame from the steering box. I used pry bar at the end w/ pressure as I tapped(well, hammered) on the rail to get them apart. In hindsight maybe a large cold chisel would have been better as a wedge? Now to the steering shaft u-joint. I could not steer this thing at all and figured moisture had gotten to the gear box. 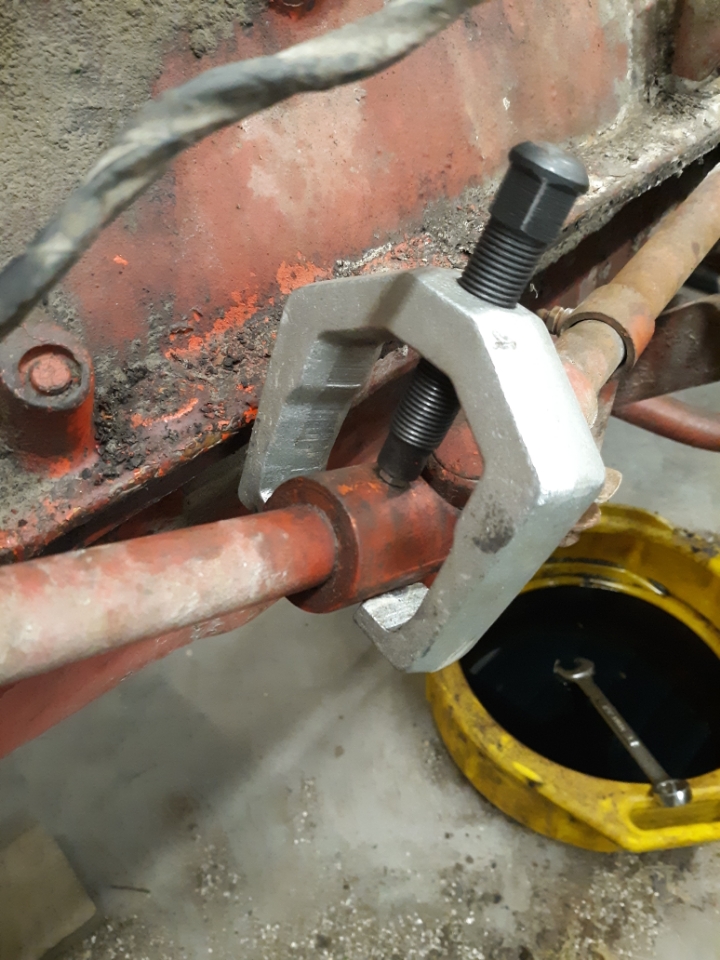 Much easier to get to shaft pin. It's a solid pin not a roll pin and stuck good. Using a separator tool to drive out the with a series of nuts and bolts as drive pins.  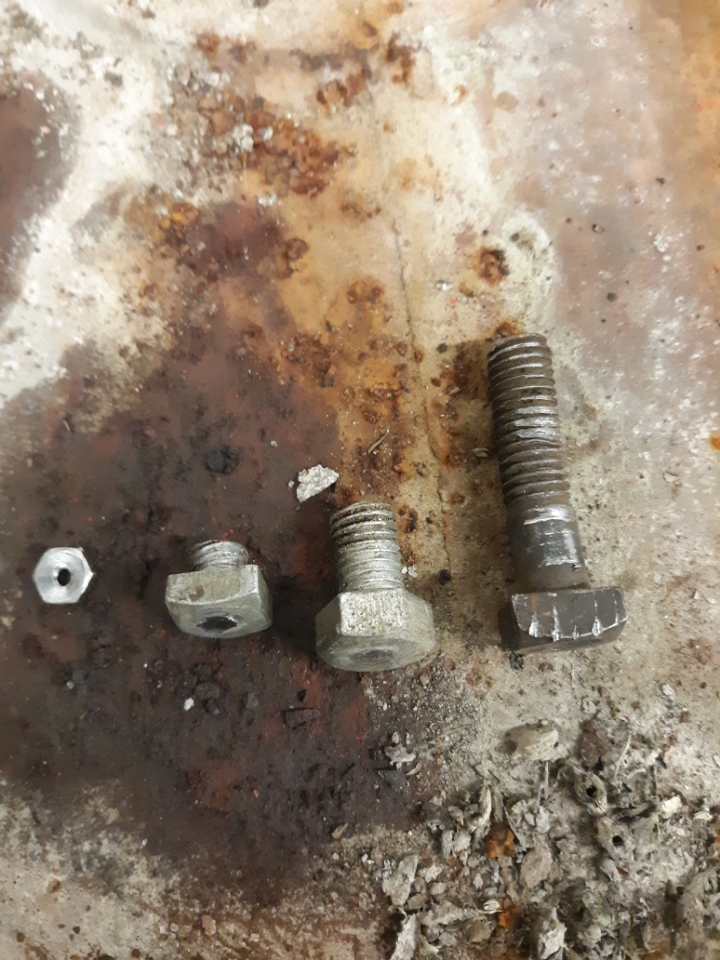 Turns the gear box works fine. The u-joint is seized up. There is no grease zerk in it or the shaft support bushing. |
Posted By: Strokendiesel002
Date Posted: 09 Mar 2021 at 9:14am
| Great progress so far! Sorry to see that someone sabotaged the bypass line, I really like the coolant drain tube, gonna have to borrow that idea! |
Posted By: plummerscarin
Date Posted: 10 Mar 2021 at 8:58am
More progress  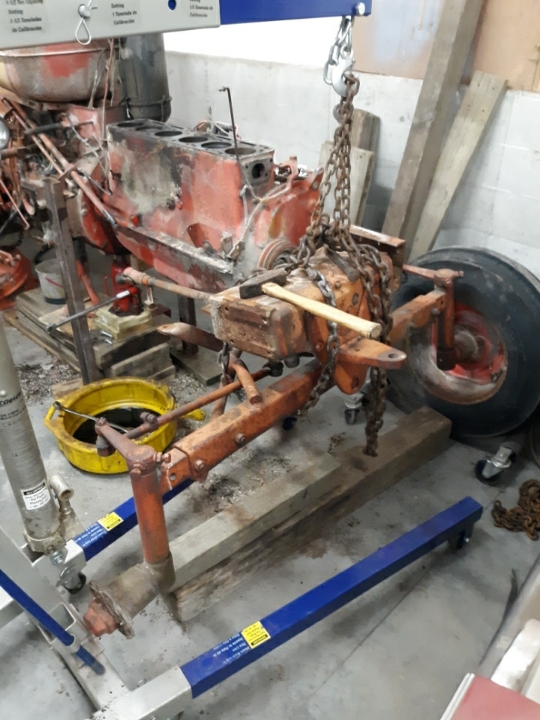
|
Posted By: plummerscarin
Date Posted: 10 Mar 2021 at 11:21pm
Engine out. Flywheel from a WD45D.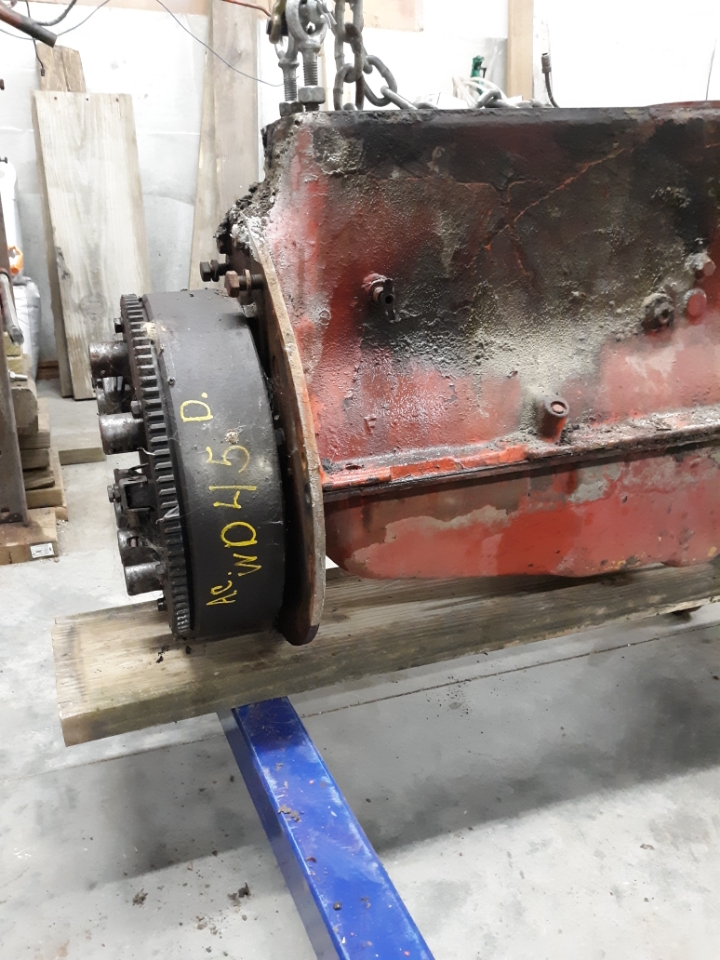 Cutch apart. I see stress cracks in the pressure plate and although there seems to be plenty of material on the clutch disc, I think it is saturated with oil. Way back when I was trying to pull start it I could tell the clutch was slipping. I know the rear seals were leaking cuz it was dripping out the inspection hole back when I was rolling it inside. 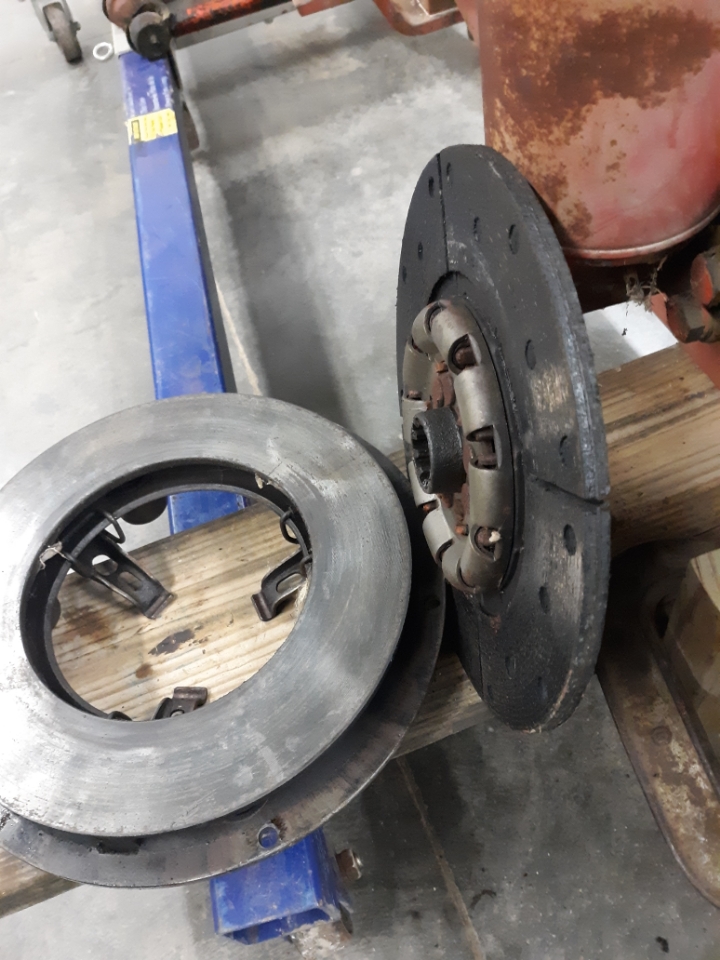 Needed a 3 jaw puller to remove plate from back engine 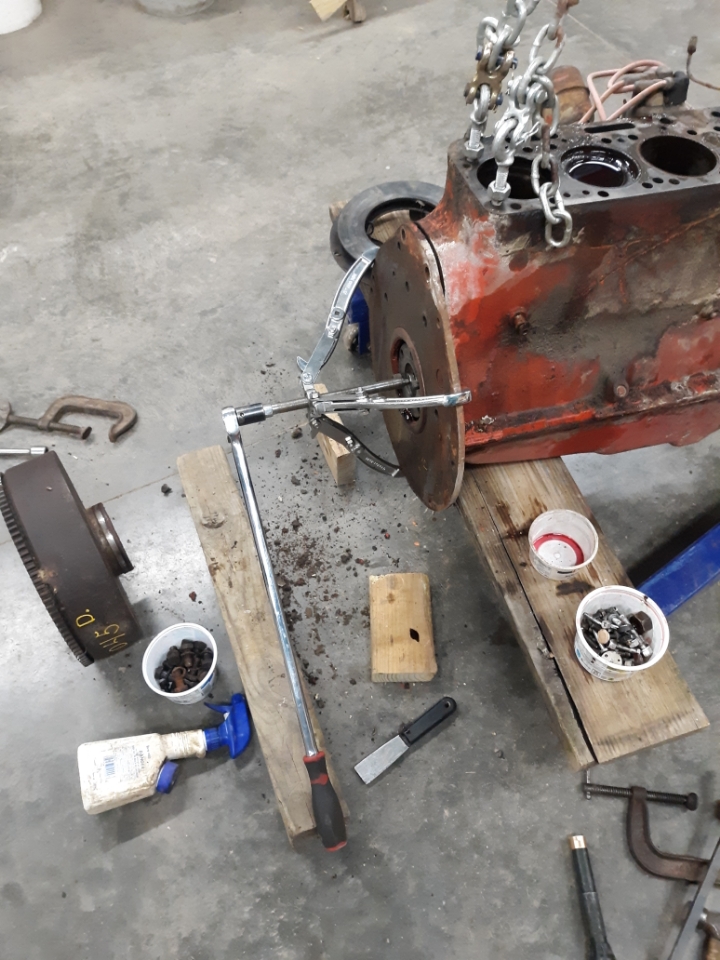 That flywheel is HEAVY!! |
Posted By: Steve in NJ
Date Posted: 11 Mar 2021 at 6:31am
|
Send that PP & clutch assy off to Rick. He'll take care of that puppy! Steve@B&B ------------- 39'RC, 43'WC, 48'B, 49'G, 50'WF, 65 Big 10, 67'B-110, 75'716H, 2-620's, & a Motorhead wife |
Posted By: Strokendiesel002
Date Posted: 11 Mar 2021 at 8:55am
| Busy night! Great job! |
Posted By: Sugarmaker
Date Posted: 12 Mar 2021 at 5:31am
|
Wow! You have been busy! Lots of parts and piece. Looks like everything needs touched. I am going to get popcorn! Regards, Chris ------------- D17 1958 (NFE), WD45 1954 (NFE), WD 1952 (NFE), WD 1950 (WFE), Allis F-40 forklift, Allis CA, Allis D14, Ford Jubilee, Many IH Cub Cadets, 32 Ford Dump, 65 Comet. |
Posted By: plummerscarin
Date Posted: 12 Mar 2021 at 6:51am
|
Everything needs attention yes. The price you pay for wear and tear and then leave it sit so long I thought it might be a good idea to hang the steering box on a stand.  Engine on Dad's home built stand 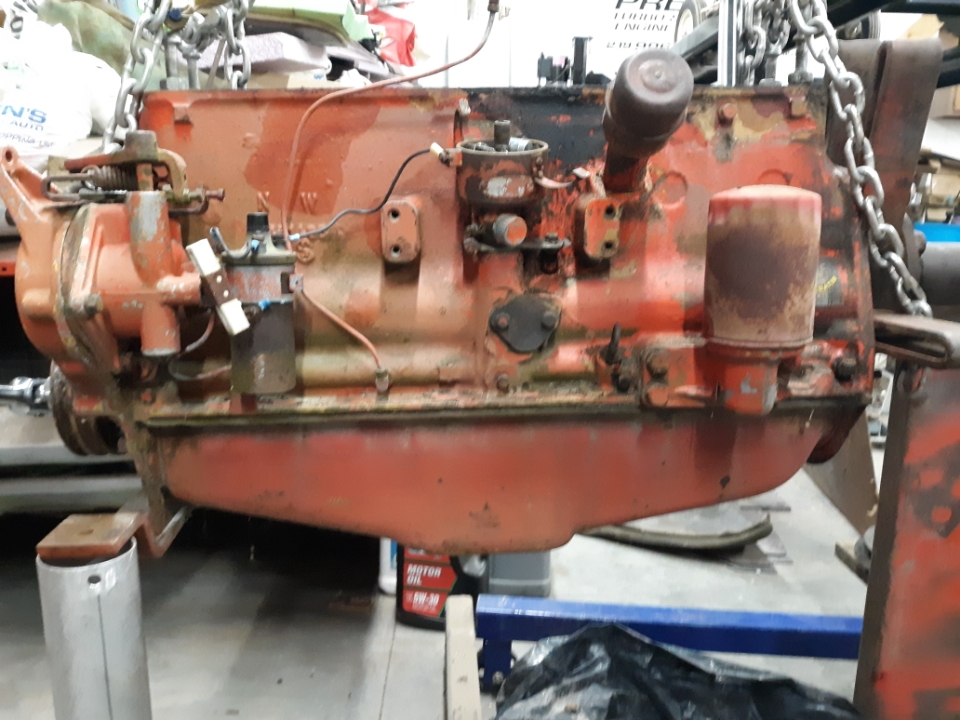 Taking lots of pictures for reference later Interesting timing mark. Unique to this engine? I do have a service manual 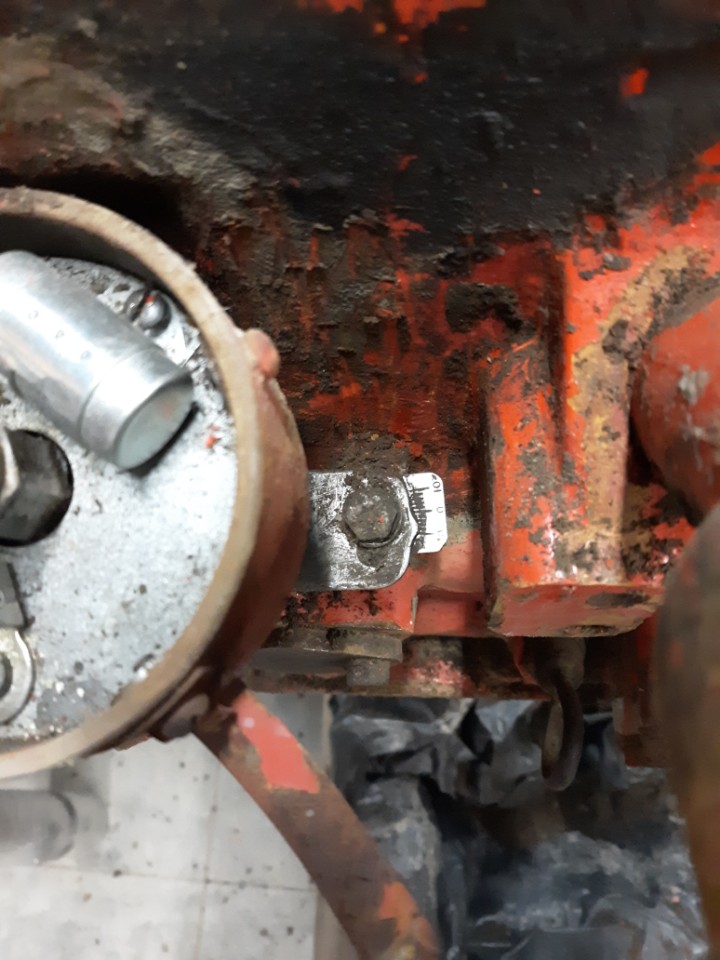
|
Posted By: plummerscarin
Date Posted: 12 Mar 2021 at 8:06pm
The ignition coil bracket is bolted the aluminum governor cover and yes a bolt broke off in the cover. Removed the cover to get to governor and it is crusty.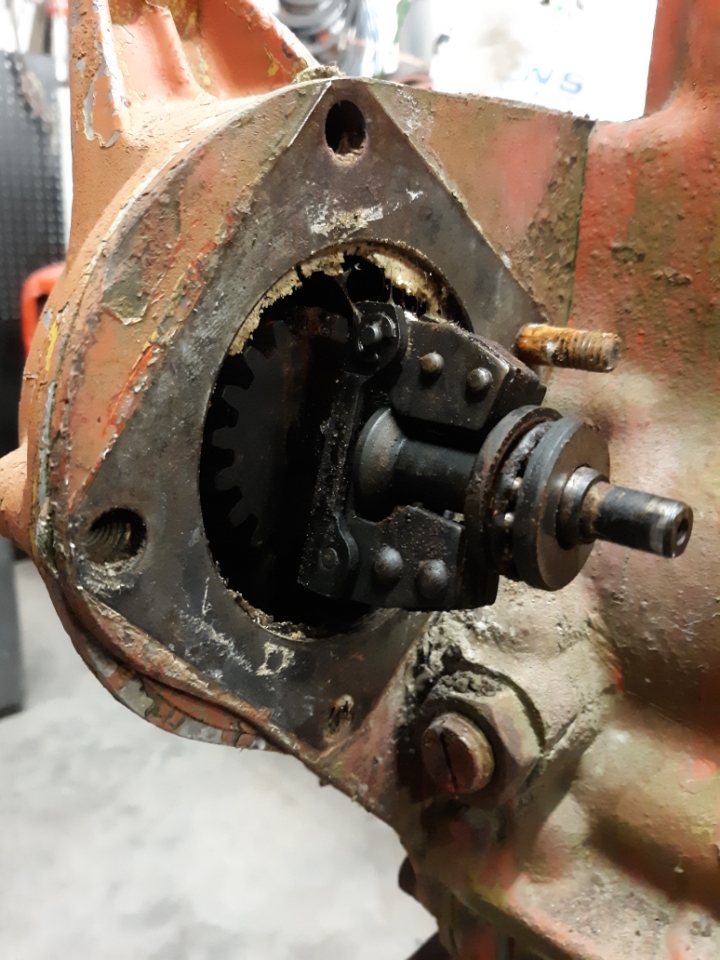 Looks like a cage bearing will need a close look. 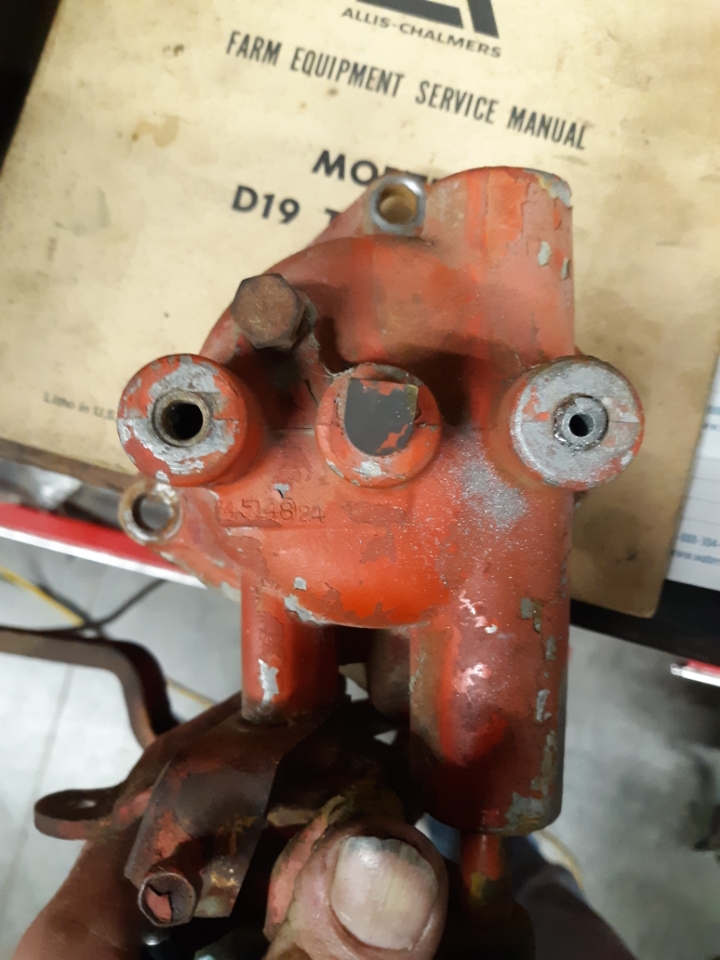 I held a nut over the broken bolt and used a transfer puch try center punching the bolt. Reasonably to drill and use an easy out. The easy out was a fail so I welded a washer and nut to it. 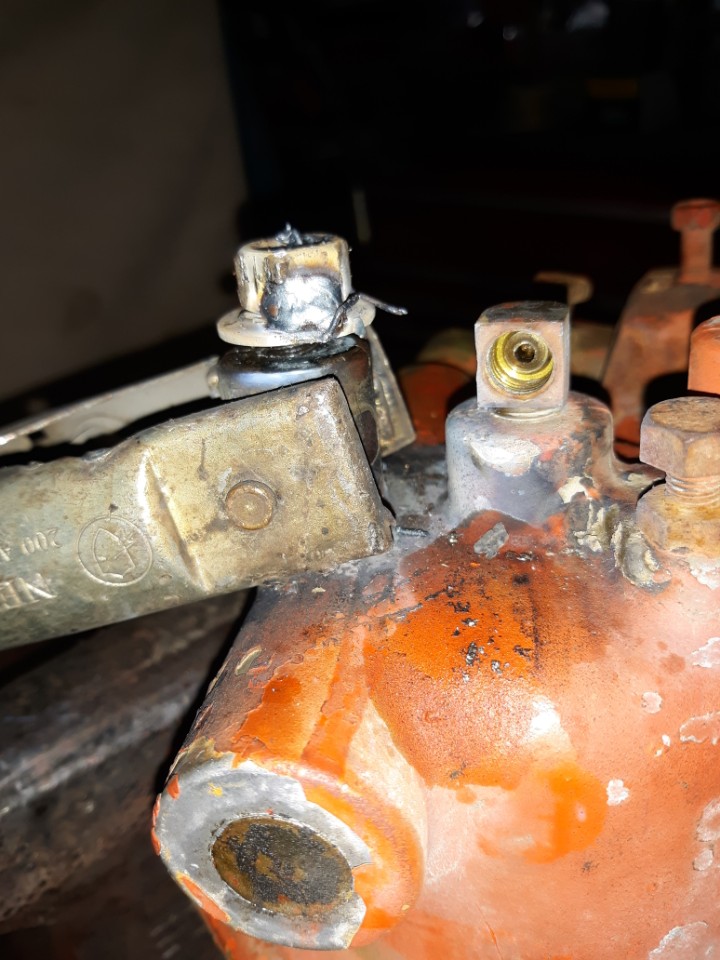 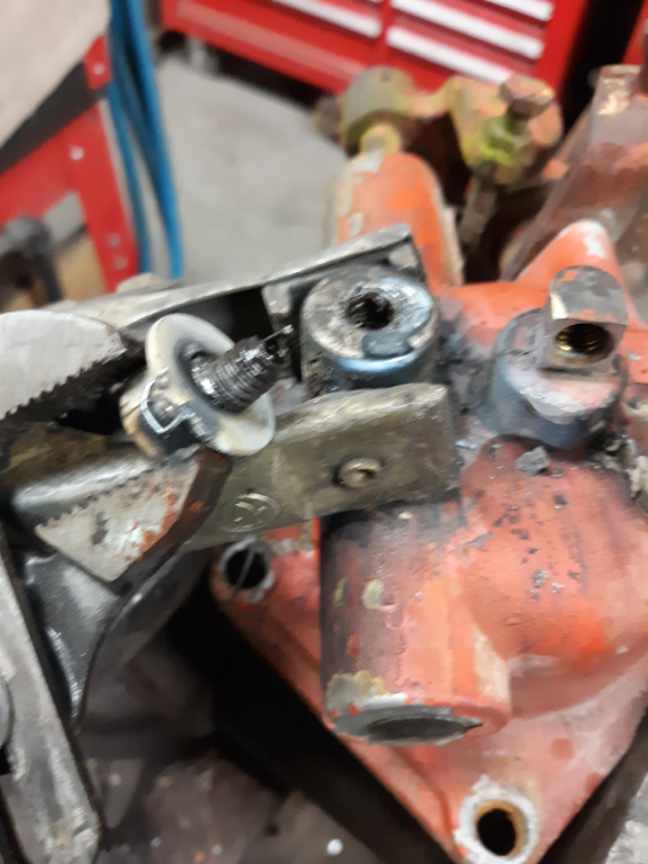 That process has worked several times for me. But I was concerned initially because I didn't want to hurt the aluminum. |
Posted By: Dirt Farmer
Date Posted: 12 Mar 2021 at 10:32pm
| Have tried many ways of removing broken bolts but never thought of welding a washer to the broken bolt then a nut to the challenge or using a nut to help find the center to punch a starting point through. Goes to show you are never to old or experienced to learn something new. Thanks for the tips, good luck with the project and keep the pictures coming. |
Posted By: plummerscarin
Date Posted: 13 Mar 2021 at 10:42pm
Pulley and front cover are next.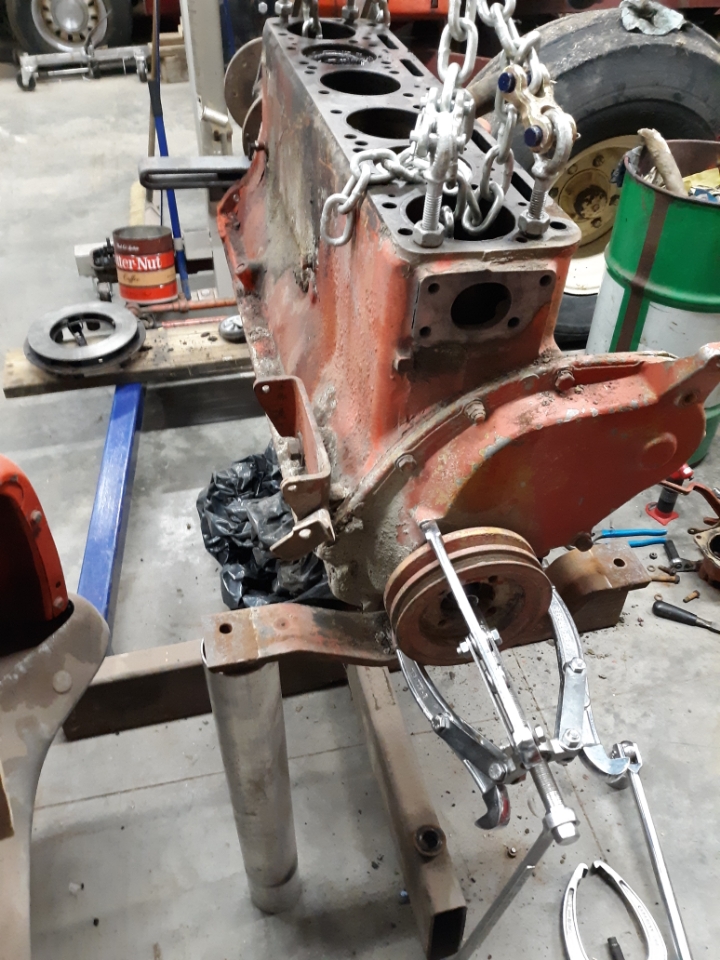 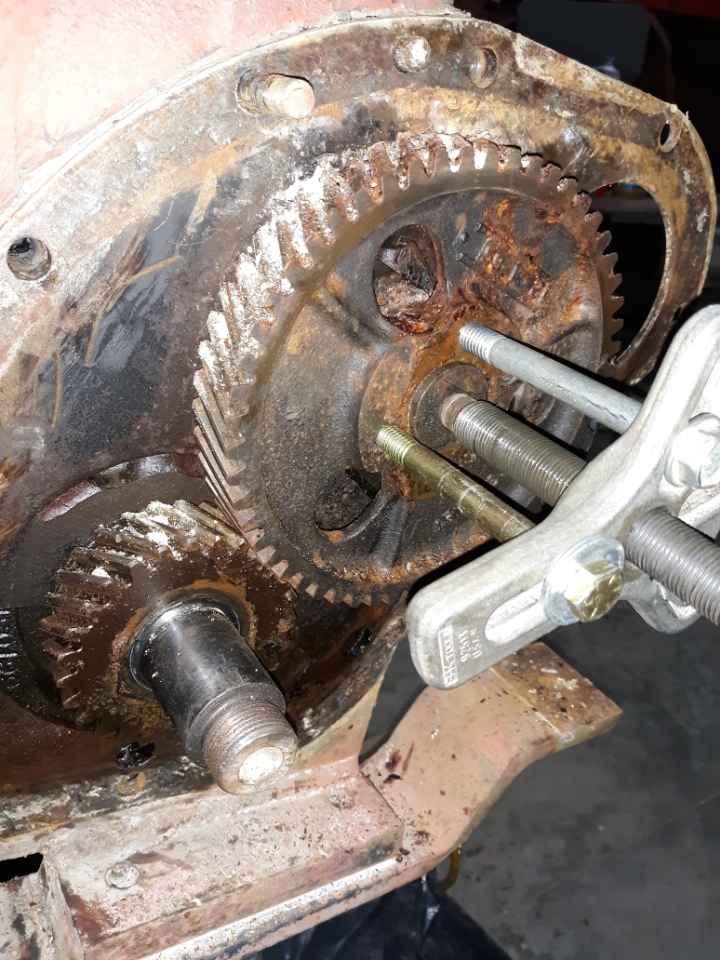 This engine is stuck so I removed the cam sprocket which allowed me to turn it to push the lifters in to their bores and pull camshaft out. The red stuff in the catch pan is ATF/acetone mix. I poured it into the cylinders to help break things loose but it leaked through the rings into the pan. I also swilled it around the lifters before I moved them. I've been squirting everything with some sort of penetrating oil all along disassembly. 
|
Posted By: plummerscarin
Date Posted: 16 Mar 2021 at 4:33pm
Cam and crankshaft out. Taking them in to be cleaned up. Kinda worried about the camshaft as it looks crusty. 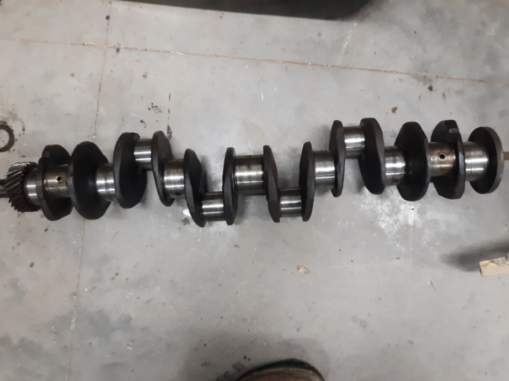 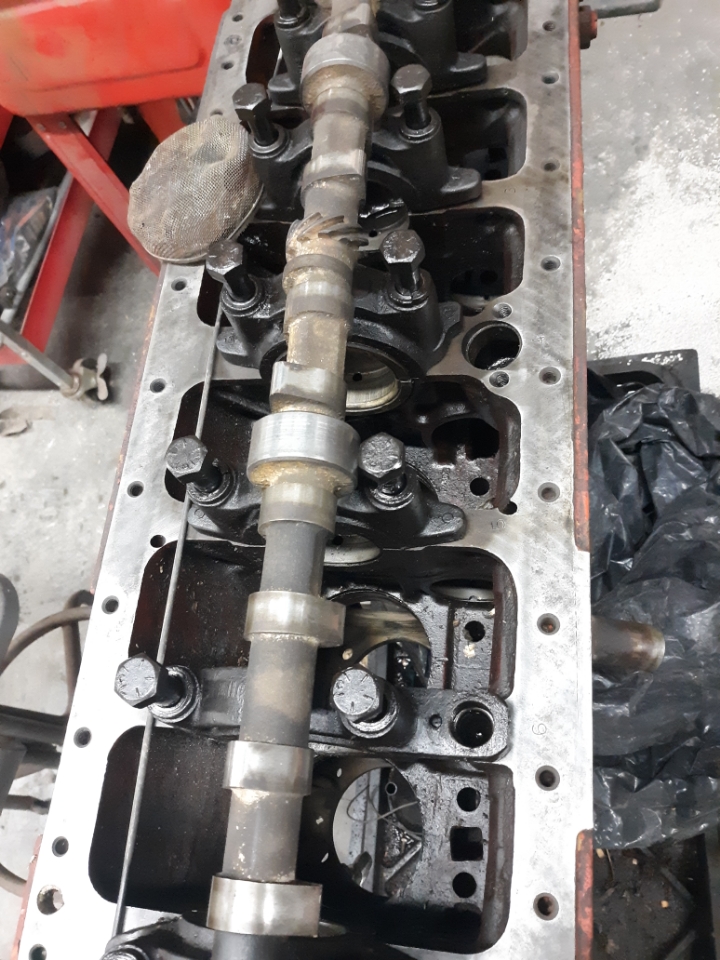 Getting pistons and sleeves out was a m#$%. Did I mention this engine was stuck? After the crankshaft came out I found the rods were stuck on wrist pins. They needed to move to clear the sleeves so I soaked them in ATF/acetone for a week. Did not seem very effective at penetrating. A friend swears by fogging oil so I gave that a try. Seemed to work better. 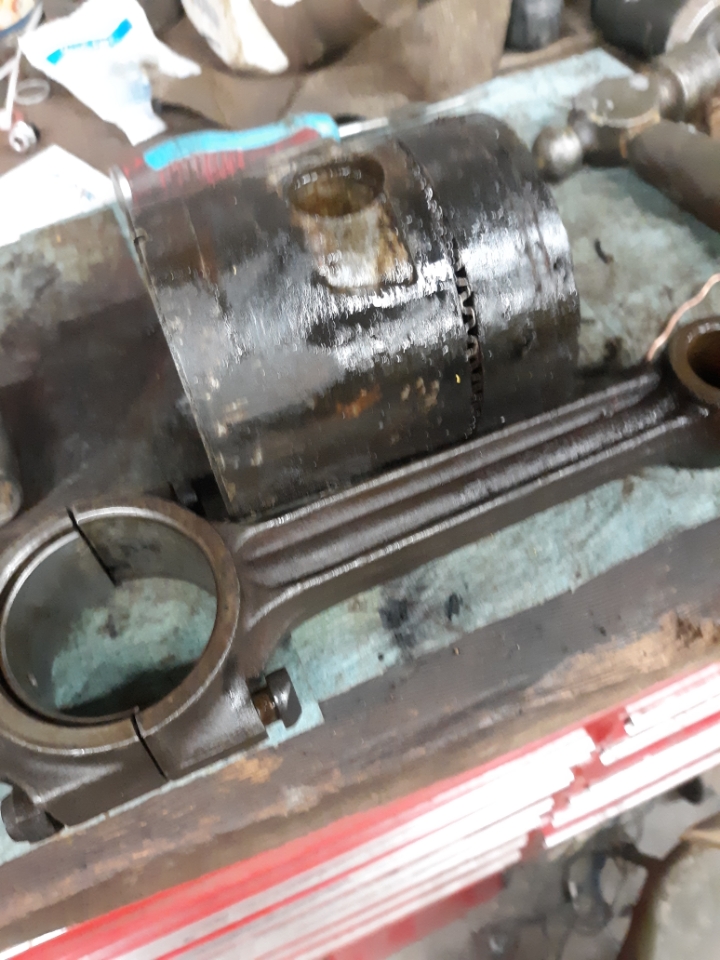
|
Posted By: plummerscarin
Date Posted: 16 Mar 2021 at 4:44pm
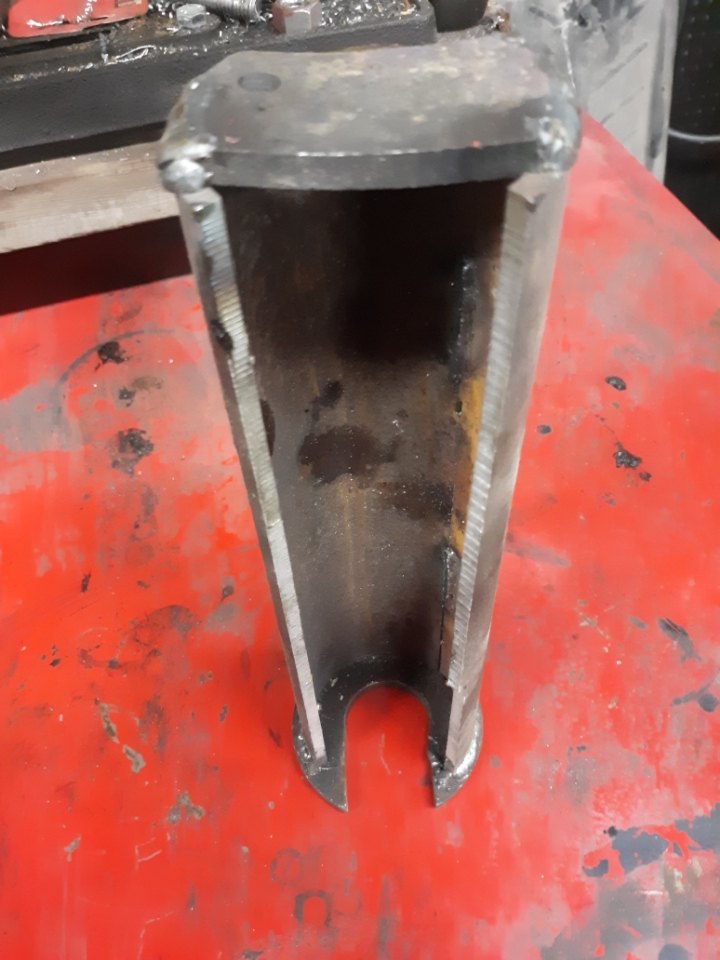 I made a driver to get pistons out of the sleeves as a wooden stick wasn't strong enough. It pushes on the piston at flat area of the pin boss and clears the rod. Some came out and some brought sleeve along with it so put them in press to separate them.  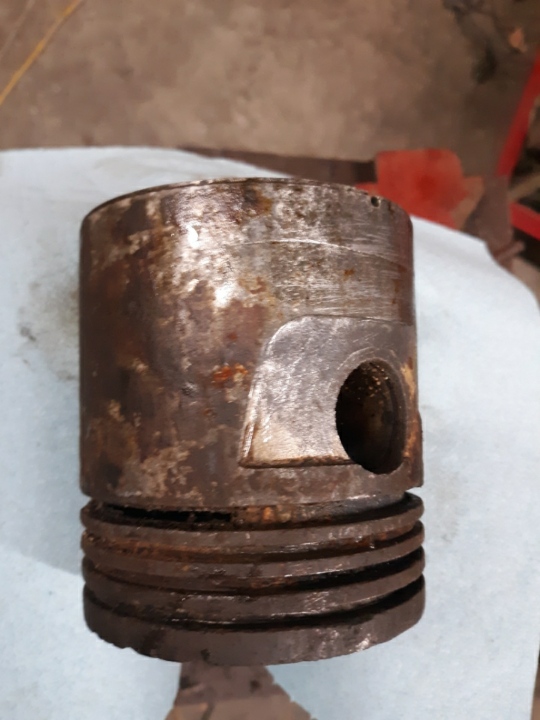 I'm sure it was not salvageable but I see it did crack one. Until This Old Tony makes me a sleeve puller I came up with this idea 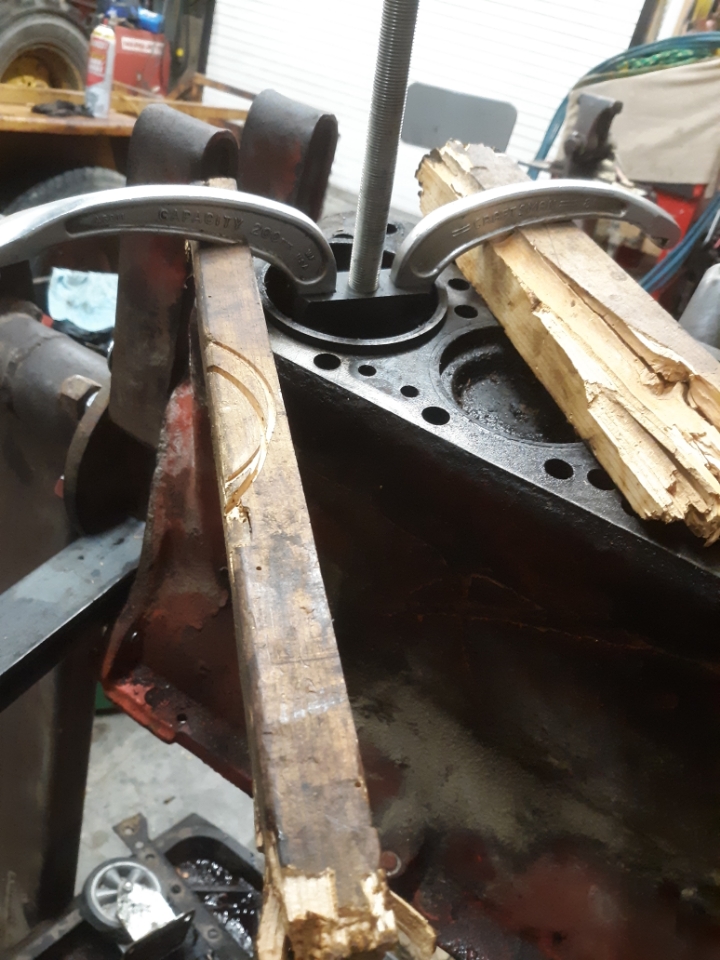
|
Posted By: Strokendiesel002
Date Posted: 17 Mar 2021 at 12:08am
|
You have your hands full now! I bent 2 of my rods during teardown if I remember correctly. Maybe it was just 1, either way, I remember buying a couple 😆 I didn't have much luck with the ATF and acetone myself, but it was rather cold when I started my venture. Hoping hat a good cleaning of that cam will bring good news and looking forward to the next steps |
Posted By: Sugarmaker
Date Posted: 17 Mar 2021 at 6:33am
|
Wow! That is going to require some love and attention too! Thanks for the pictures. Regards. Chris ------------- D17 1958 (NFE), WD45 1954 (NFE), WD 1952 (NFE), WD 1950 (WFE), Allis F-40 forklift, Allis CA, Allis D14, Ford Jubilee, Many IH Cub Cadets, 32 Ford Dump, 65 Comet. |
Posted By: plummerscarin
Date Posted: 17 Mar 2021 at 9:09am
|
Diesel, Yeah that is why I made the driver so I could push on the piston and leave the rod alone |
Posted By: wjohn
Date Posted: 17 Mar 2021 at 10:26pm
|
I found that the camshaft journals were worn too small on my WD, so I went with a used cam and had it reground. That amount of wear doesn't seem to be common but definitely measure those journals while you have it out. As I understand the journal-bushing clearance is critical for oil pressure. You might consider having the cam reground depending on how bad your lobes and tappets look. That cost me about $150 last year including shipping both ways. I resurfaced the tappets/lifters myself with my valve grinder but they would've added a couple bucks each to the cost if I had paid a shop. ------------- 1939 B, 1940 B, 1941 WC, 1951 WD, 1952 CA, 1956 WD-45 |
Posted By: plummerscarin
Date Posted: 23 Mar 2021 at 3:29pm
|
I'm going to check with my engine guy on the cam when it goes in for cleanup. Couple shots of the deck after minor cleaning. 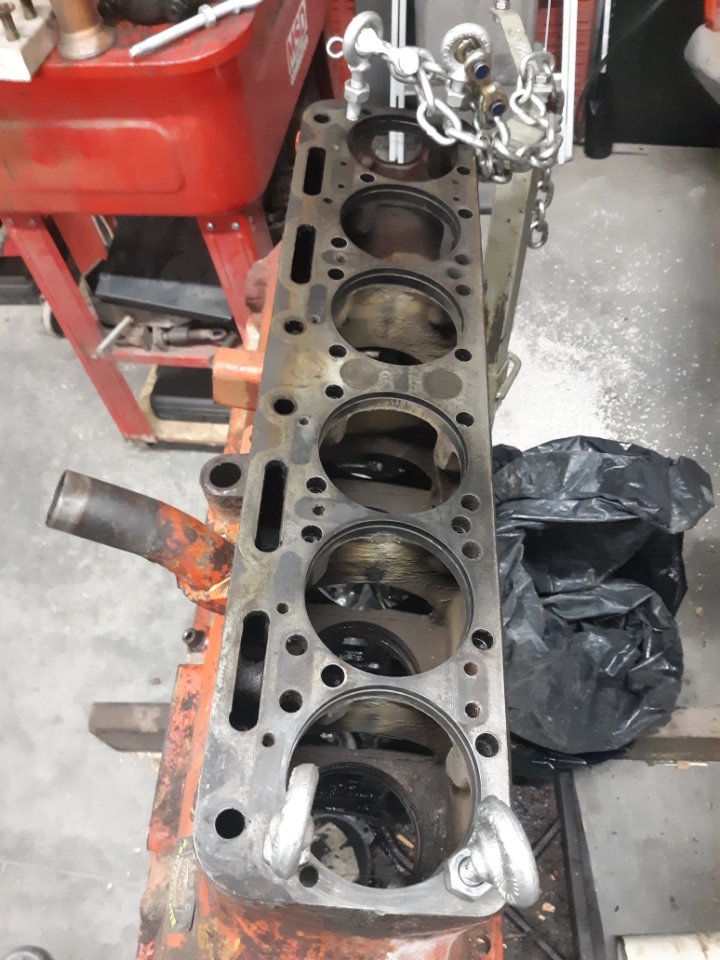 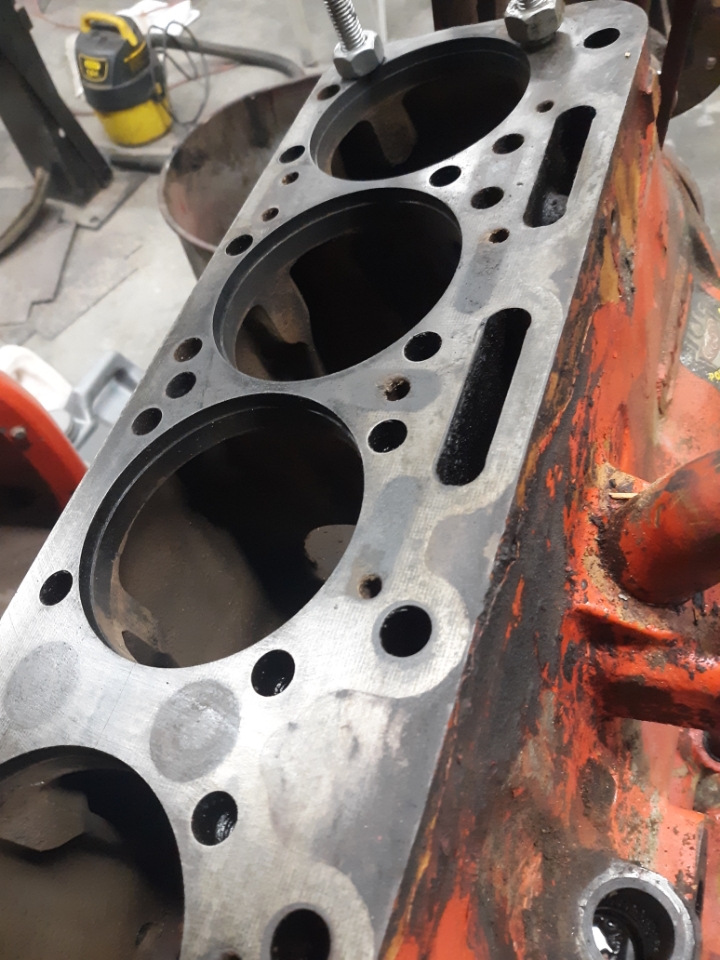 I think they look pretty good Service manual calls for bore depth at .249"-.251" 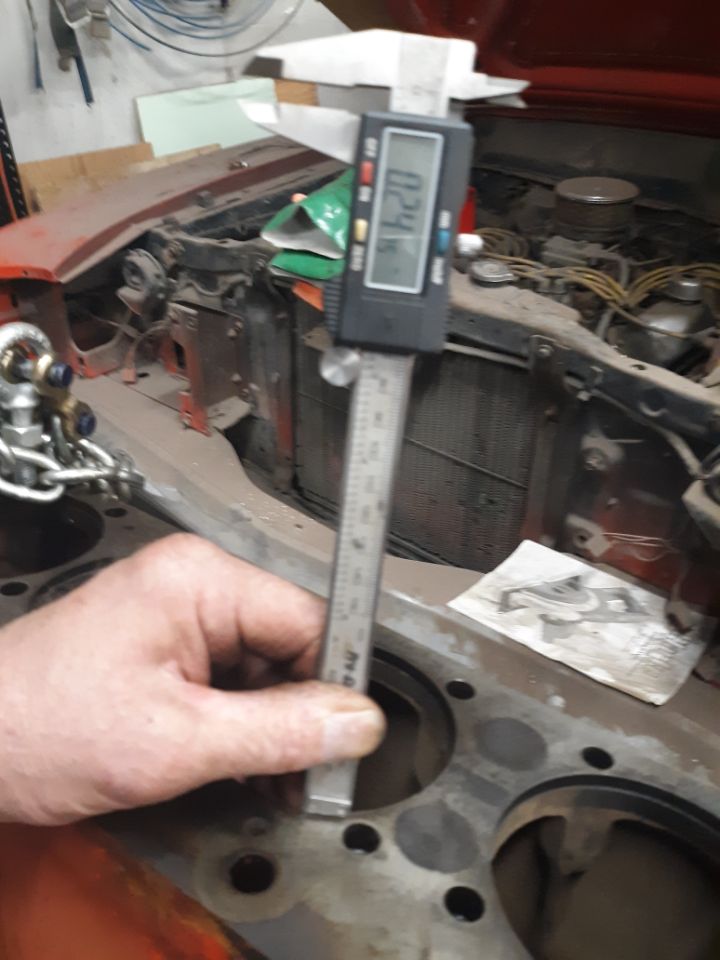  Granted it is not a dedicated depth micrometer but I think it's reasonable to believe it falls within spec? The accuracy of this caliper is rated at .001 either way. |
Posted By: plummerscarin
Date Posted: 23 Mar 2021 at 3:37pm
Checking runout on the pushrods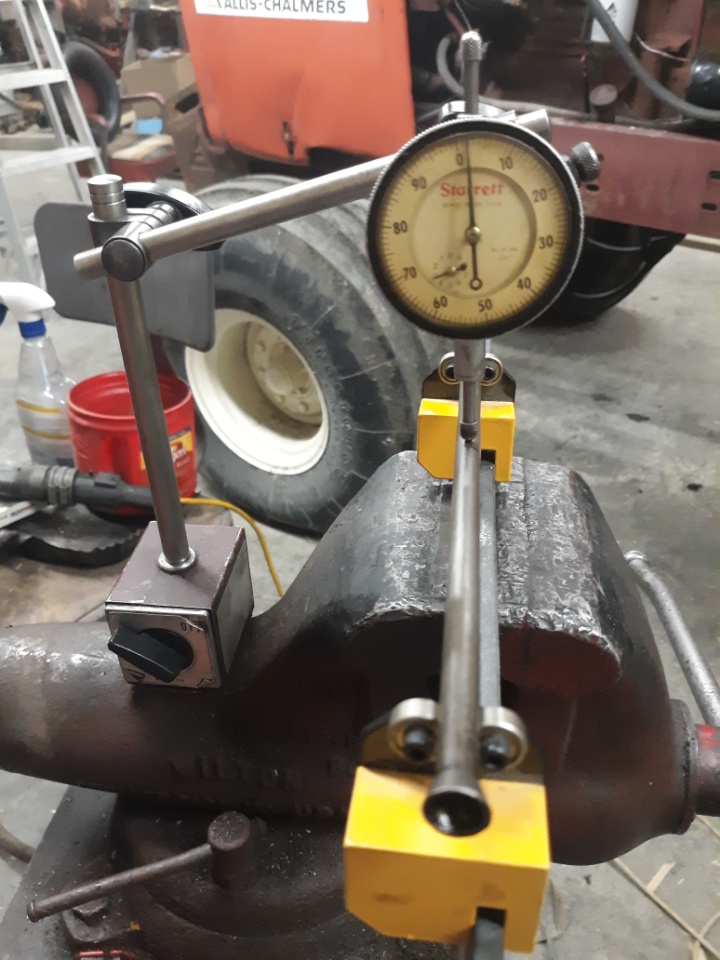 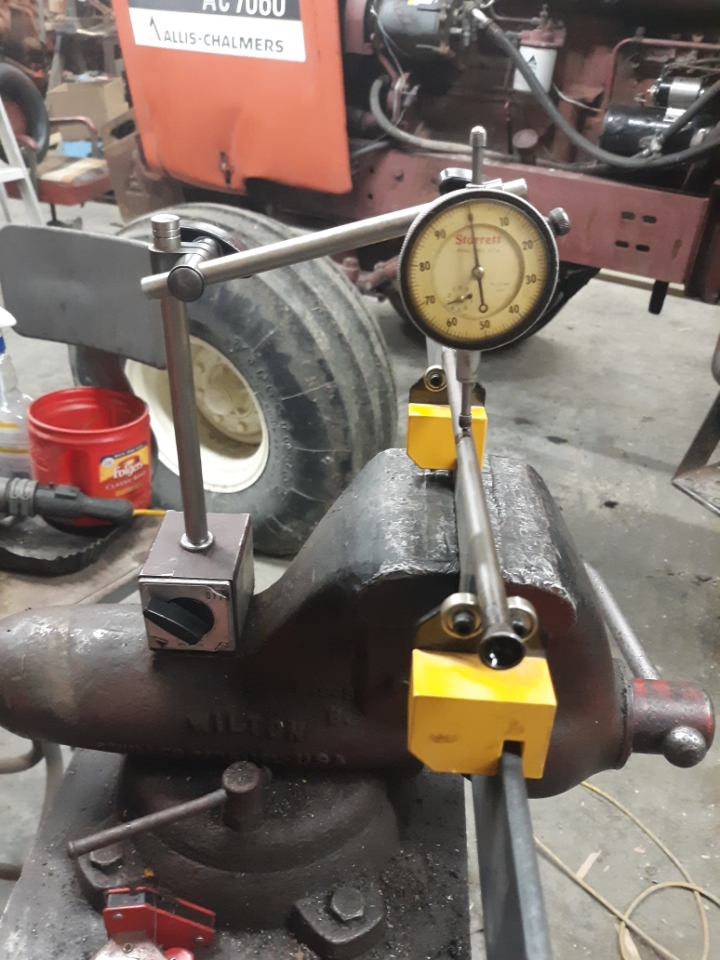 This was the best one at .002" The worst is .130" 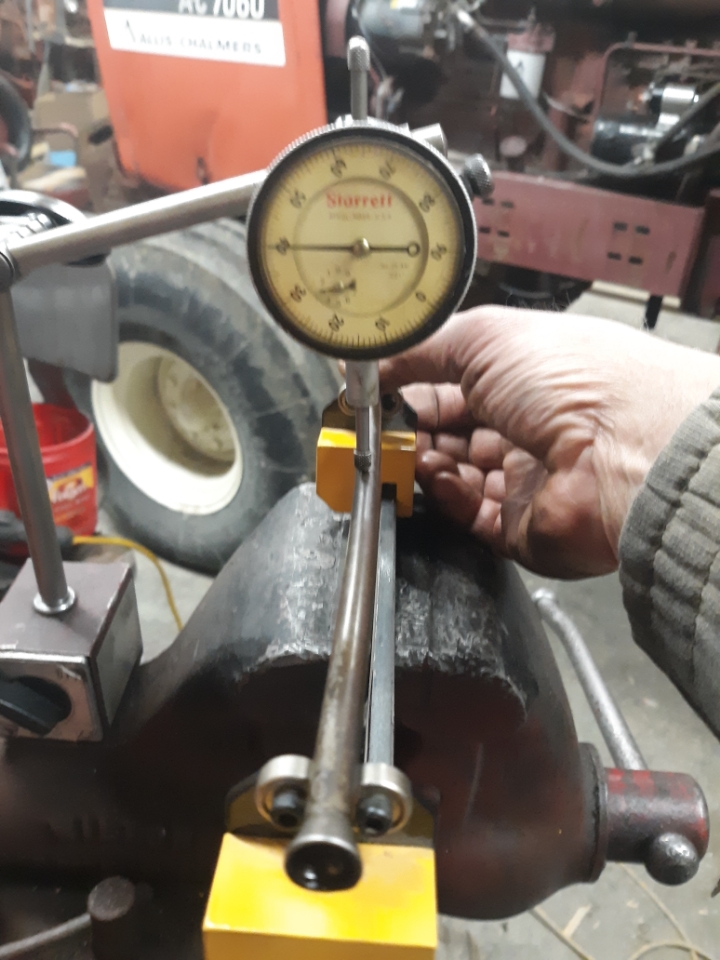 Notice dial indicator off to the side at half rotation. The service manual does not give specs for runout. What is an acceptable amount? |
Posted By: plummerscarin
Date Posted: 24 Mar 2021 at 8:18pm
Here's a shot of the front cam bushing. From my understanding they are lubricated by oil drainage from the valvetrain.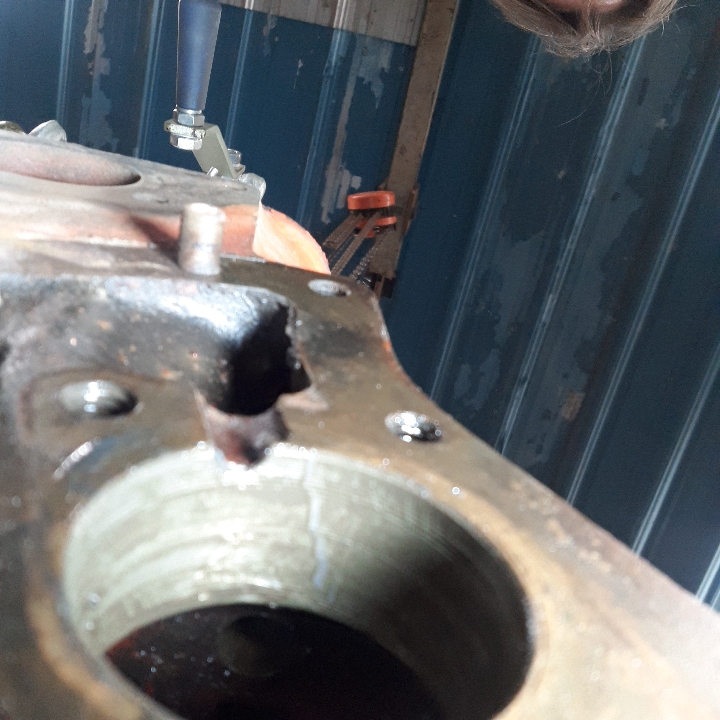 Some grooves in there not looking good. Possibly has something to do with the loose nut on the oiling tube on the head. By loose I mean threads had not engaged. 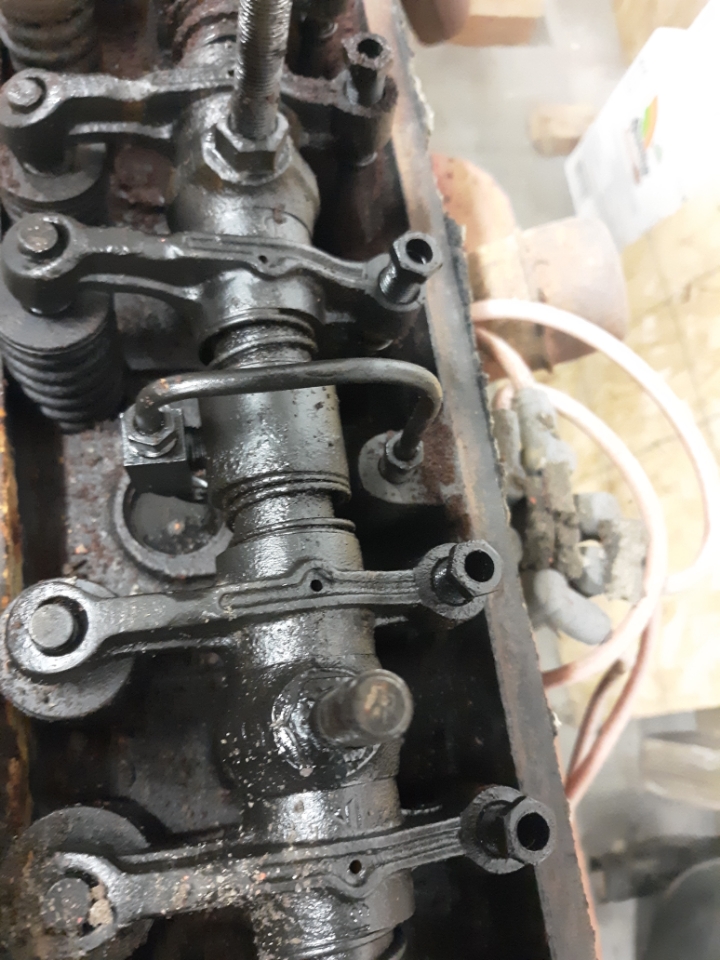 The block, crank, cam,lifters, and flywheel are now at the engine shop. Thanks to Alex09 for the NOS cam bushings that will be installed and the flywheel is getting prepped for the clutch that's on its way back from Rick. |
Posted By: Sugarmaker
Date Posted: 25 Mar 2021 at 6:42am
|
Plummerscarin, The work your doing reminds me of each of the three tractors I have done. They were not diesel so that was easier. Also had one engine stuck bad and it was a lot of work to get it apart. It was worth it though as the block from that tractor is in my WD45 now. Your pictures and details are good. Your right the elements and time have not been kind to the tractor and components. I hope you can find all the parts for your engine. I know that some of the items are getting hard to locate. I found a 45 D a couple years ago, wonder if it is still in the weeds?? Keep the great pictures coming. I for one like the details, like removing the broken bolt! Those things will help others with there projects too. So what is the total plan for the tractor? Full refurb, clean and paint?? Will be a great looking tractor when done! And your Dad's, Doesn't get much better than that! Regards, Chris ------------- D17 1958 (NFE), WD45 1954 (NFE), WD 1952 (NFE), WD 1950 (WFE), Allis F-40 forklift, Allis CA, Allis D14, Ford Jubilee, Many IH Cub Cadets, 32 Ford Dump, 65 Comet. |
Posted By: plummerscarin
Date Posted: 25 Mar 2021 at 8:38am
|
Chris, Thanks for the kind words and encouragement. My plan is to go through everything as noted, time and weather has not been kind to it. I believe all of it needs checked over and repair/replace as needed. Plenty of other seals have/are leaking. With the engine in the shop, I have started on the steering. Pretty sure the bushings in the spindles are shot. Hopefully not the spindles. Have also gotten a seal kit and tie rod boots from Alex09. I know there is a nut under the giant frost plug that holds the gear in. How does that come off without destroying it? I plan to repaint it when all is said and done. However, since this is far from original, I plan to use PO2 or corporate orange as my preferred color. Also the front wheels are off a GM vehicle of some sort for the larger tires and I have this wild idea of finding the correct centers and see if they will fit in the hoops of the wider rims. Crazy? |
Posted By: IBWD MIke
Date Posted: 25 Mar 2021 at 11:39am
|
What size are the tires that are on it now? I have a pair of Buick wheels that came on one of the 45's with wide tires but they are 15's. That would negate the center swap. Where about in Iowa are you located?
|
Posted By: plummerscarin
Date Posted: 25 Mar 2021 at 9:05pm
|
Hmmm, yep. Mine are 7.5Lx15. So much for that idea. Will keep options open. Sad part is the tread is really good but the sidewalls have seen better days and they do hold air. Push comes to shove I'll use em if necessary. Much bigger things to worry about. I live north of Cedar Rapids |
Posted By: DaveKamp
Date Posted: 26 Mar 2021 at 8:45am
|
there's no reason why one cannot mate factory centers to non-factory wheels... What you do, is just cut enough of the center (Hub engagement area) from one, and remove the rim-area from the other, such that the inners overlap. Then weld them with beads and rosettes. ------------- Ten Amendments, Ten Commandments, and one Golden Rule solve most every problem. Citrus hand-cleaner with Pumice does the rest. |
Posted By: plummerscarin
Date Posted: 26 Mar 2021 at 12:21pm
| That’s a good idea. I had envisioned the entire center would fit inside the hoop. |
Posted By: DaveKamp
Date Posted: 26 Mar 2021 at 12:31pm
|
Sometimes you can, but stopping just-short, but using the original center helps locate, and provides good support. doubling centers works well...it does make the wheel heavier, as it's twice-as-thick... but that's not a problem for a tractor. To cut the circle nice, cut a couple of pieces of plywood to make a filler for the center, fit it, then find center with a protractor, drill it, and make a trammel to guide your torch. If you need it to be very precise, re-use the appropriate center on a vertically-supported rod to spin the assembled pieces, and a finger or dial indicator to get them located, then clamp and weld the rosettes first (They'll pull the faces together when shrinking, rather than skew them). Follow up with the fillet beads. ------------- Ten Amendments, Ten Commandments, and one Golden Rule solve most every problem. Citrus hand-cleaner with Pumice does the rest. |
Posted By: plummerscarin
Date Posted: 26 Mar 2021 at 5:51pm
Finished the tear down on the steering box. Didn't know how to get top cover off so I went after with a chisel and small hammer  I worked two sides and it finally popped loose. I see a ridge on it like a stop so as not to go too far. 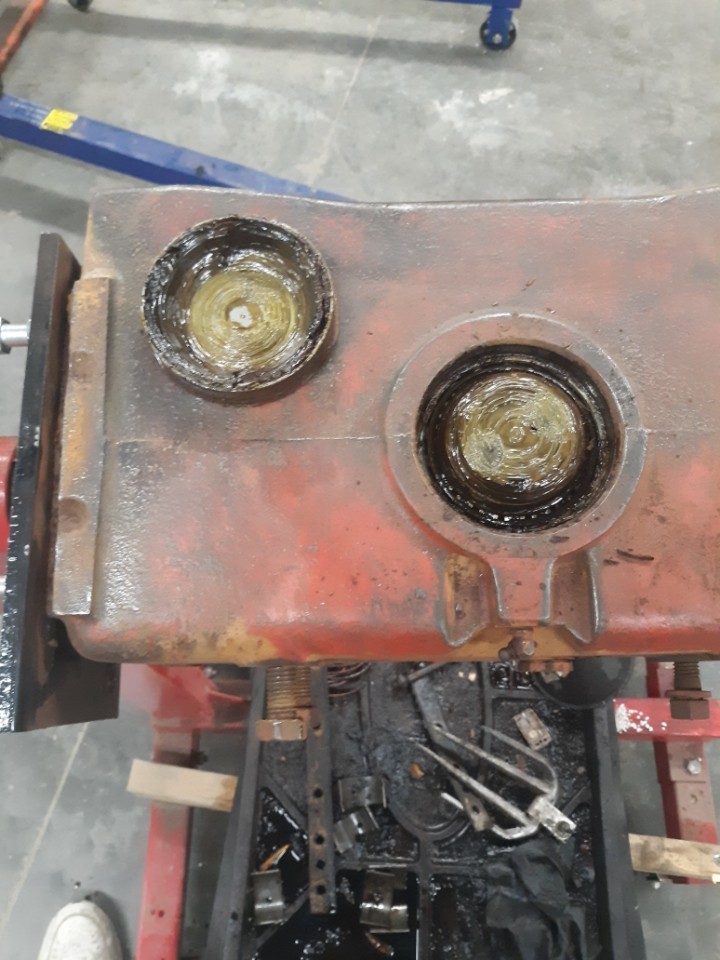 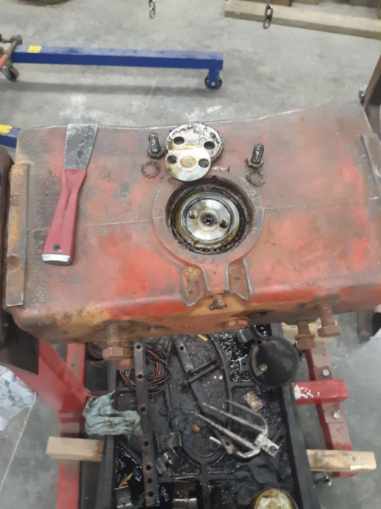 For the most part it was prettclean inside. I was concerned after all this time it might be rusty and crusty in there. Remember I had mentioned I could not steer the thing. In the end the problem was a seized U-joint on the steering shaft. However it had been leaking so I wanted to clean it up and put new seals in it. |
Posted By: plummerscarin
Date Posted: 31 Mar 2021 at 2:51pm
More disassembly 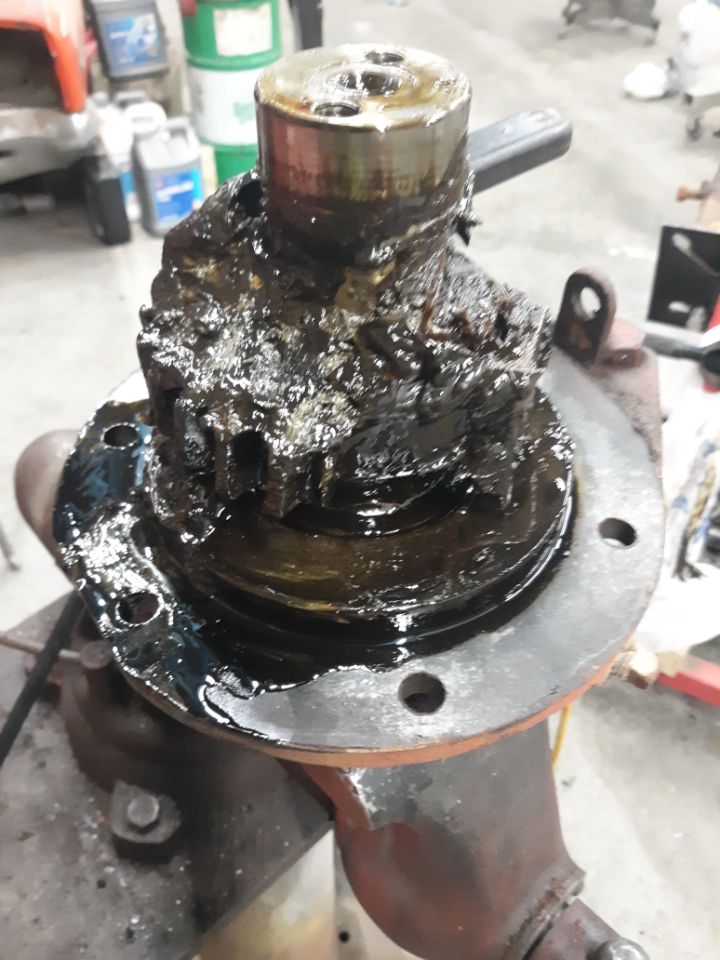 Plenty of grease in there. Using several different pullers and heat to get steering parts separated. 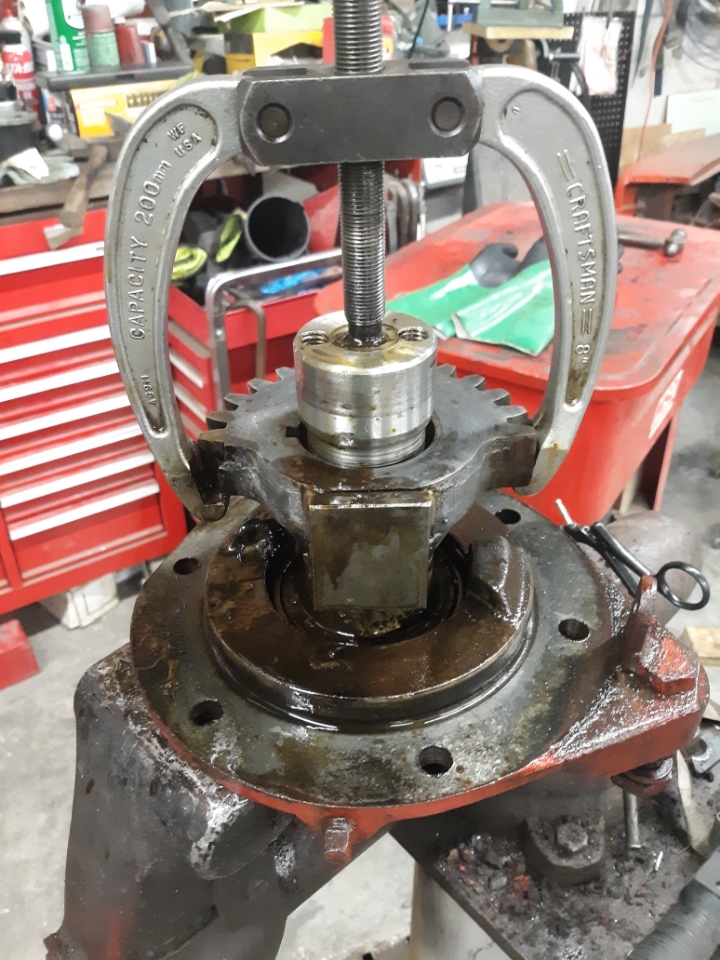 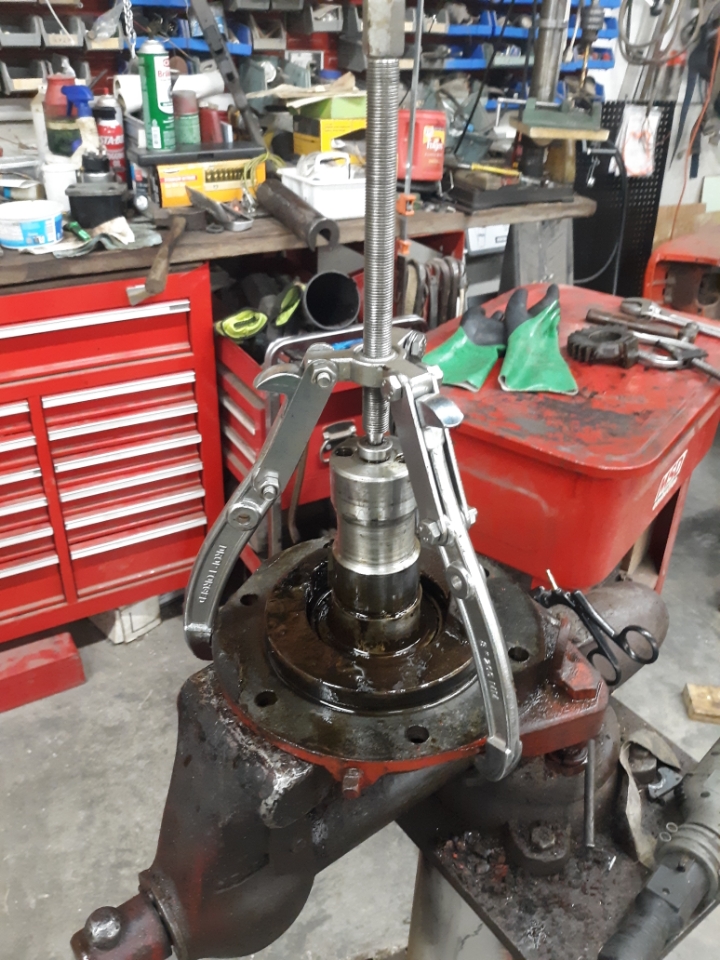 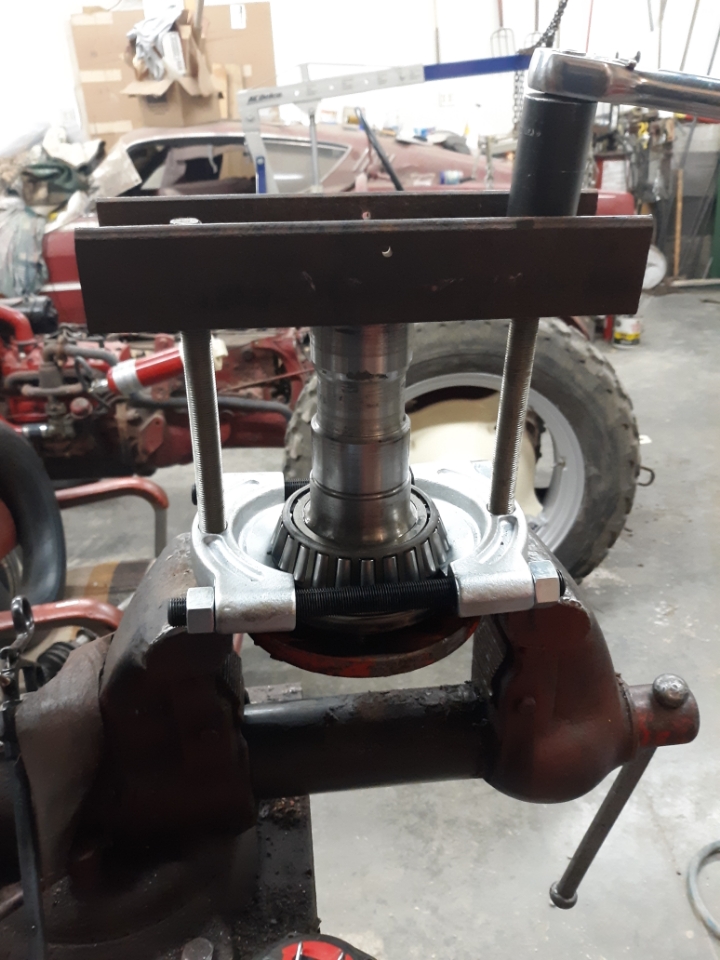 Finally got to that bottom seal. Appears to be spring reinforced leather. Looks expensive. 
|
Posted By: Sugarmaker
Date Posted: 31 Mar 2021 at 8:24pm
|
Plummer, I dont remember seeing inside one of these before on here so this is good stuff. Heavy duty for sure compared to a std WD series tractor front end. My guess is the heavier engine would drive this design? Good documentation! Regards, Chris ------------- D17 1958 (NFE), WD45 1954 (NFE), WD 1952 (NFE), WD 1950 (WFE), Allis F-40 forklift, Allis CA, Allis D14, Ford Jubilee, Many IH Cub Cadets, 32 Ford Dump, 65 Comet. |
Posted By: plummerscarin
Date Posted: 13 Apr 2021 at 10:07pm
Still waiting for engine to come back from shop and some other steering box parts so I thought I'd clean the manifold. 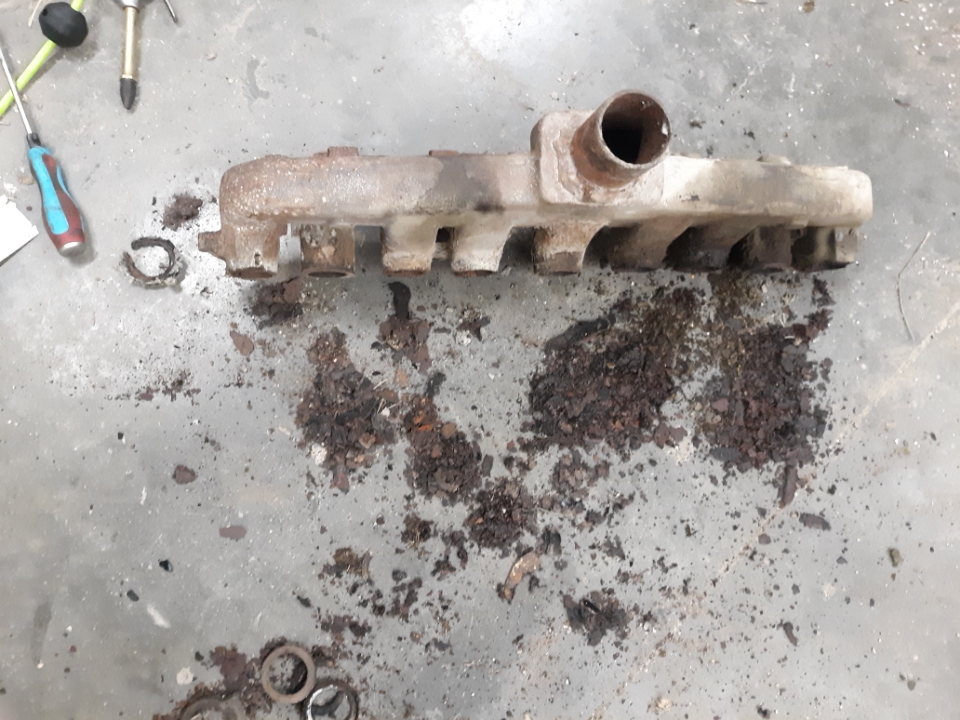 After an hour in the blast cabinet I found a crack and the ports are worn really bad 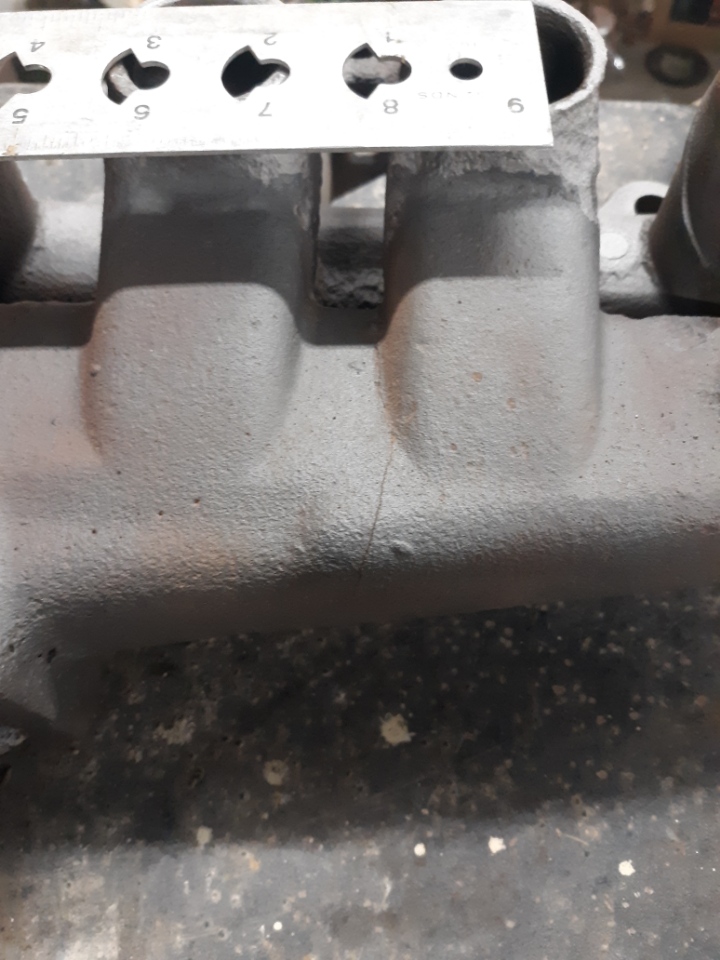 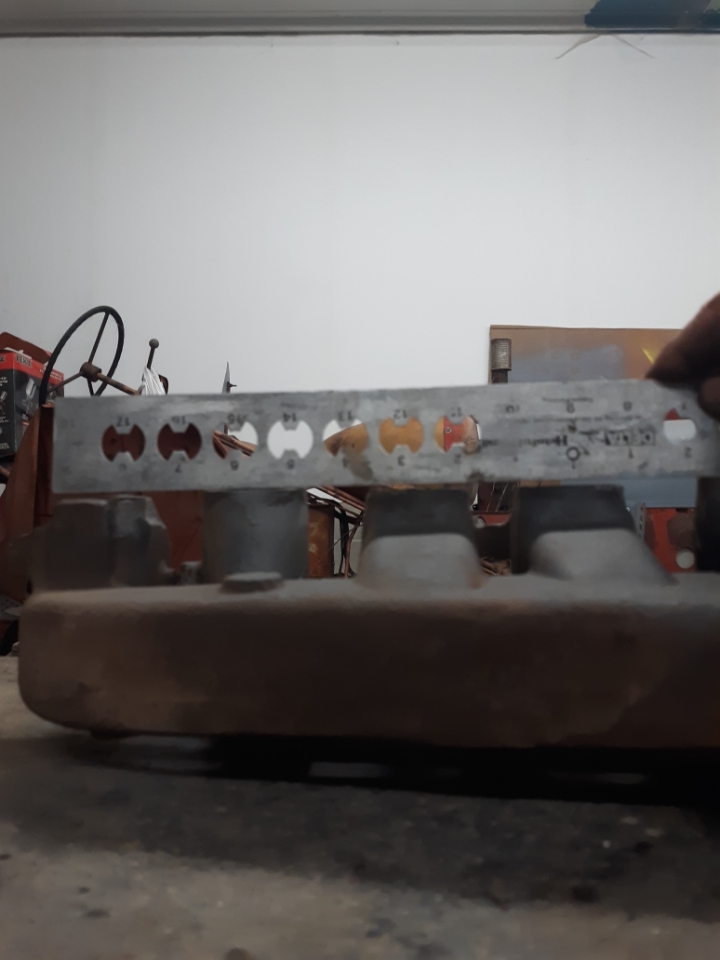  I may be ahead to find a better one to use |
Posted By: Sugarmaker
Date Posted: 14 Apr 2021 at 7:14am
|
Plummer, Good luck in hour search. Hope some one has a good one for you. If Don Bradley was still with us he would be the guy to call. Try Tony's Tractors. Thanks for the update. Now maybe you could weld or braze that crack too. The mating face may be able to be machined flat again too. I had several of my gas manifolds machined flat to fit the head. Keep hitting at it! Your Dad would be happy with your progress! Regards, Chris ------------- D17 1958 (NFE), WD45 1954 (NFE), WD 1952 (NFE), WD 1950 (WFE), Allis F-40 forklift, Allis CA, Allis D14, Ford Jubilee, Many IH Cub Cadets, 32 Ford Dump, 65 Comet. |
Posted By: IBWD MIke
Date Posted: 14 Apr 2021 at 9:02am
|
As Sugarmaker said, you may be able to salvage that manifold. A trip across the mill to clean up the ports and a little brazing on the crack.... Here's a picture of the manifold for my 756, had a crack worse than the one you pictured. After a call the the junkyard knocked my socks off, thought I'd try to fix this one! Had to use the rosebud to get the heat needed. While i'm happy with the result, it is not on the tractor yet. Pretty sure it will be fine but time will be the ultimate judge. 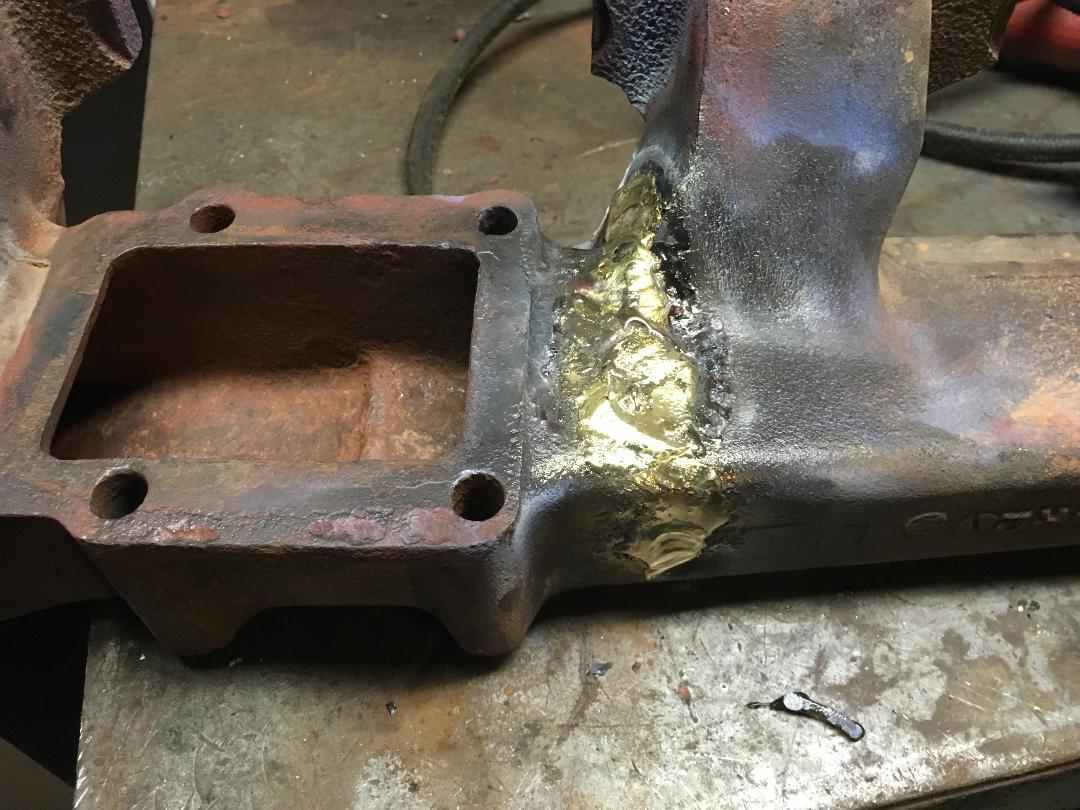 |
Posted By: plummerscarin
Date Posted: 14 Apr 2021 at 9:40am
|
Thanks for the support. I have not given up the idea of brazing. Perhaps would be a good place to improve those skills. I have watched several YouTube vids on the subject and just need to get out and try. Steiner lists them in their catalog if all else fails. Mike, did you grind a vee in the crack before filling? |
Posted By: IBWD MIke
Date Posted: 14 Apr 2021 at 2:42pm
|
Mike, did you grind a vee in the crack before filling?[/QUOTE] Just a little. The big thing with brazing is cleanliness. I wire brushed it, a lot. Then blast it with brake clean. You should have seen the look on the parts-man's face when I asked for the gasket between the halves. Told him it was already apart and bolts removed.
|
Posted By: plummerscarin
Date Posted: 01 Oct 2021 at 12:35pm
|
Not a lot to report today other than to freshen up this thread. I try to do something on it three or four times a week so it doesn’t stall. All I’ve managed lately is to get all the wheel clamps cleaned up. The ones that were really rusted up got a dip in an electrolysis bath. After 3 days, all the rust had turned black, most of the paint lifted off and very little effort was needed to turn the locks. Thanks Sugarmaker for that inspiration. The steering U-joint is rebuilt and spindles have very little wear but will be getting new bushings. Carburetor is soaking in cleaner. All for now, thanks |
Posted By: IBWD MIke
Date Posted: 02 Oct 2021 at 7:40am
|
Update on the manifold a couple of posts back. So far so good! Have about 30 hours on her now. Did a little discing with it in August at the local power show, got her pretty warm in the early going. I think the rings were reseating? After a few rounds she cooled down. |
Posted By: plummerscarin
Date Posted: 12 Nov 2021 at 6:41pm
Some carburetor work recently. Soaked each part in cleaner for a week to get the goo off and finally the first sash of color. It is Van Sickle PO2. Not the brand intended for the whole project so hopefully it doesn't glow too badly when the rest is painted. The black mark next to the float is the goo oozing out it. New float backordered to 12/31, so I will try to resolder this one. Not out anything trying.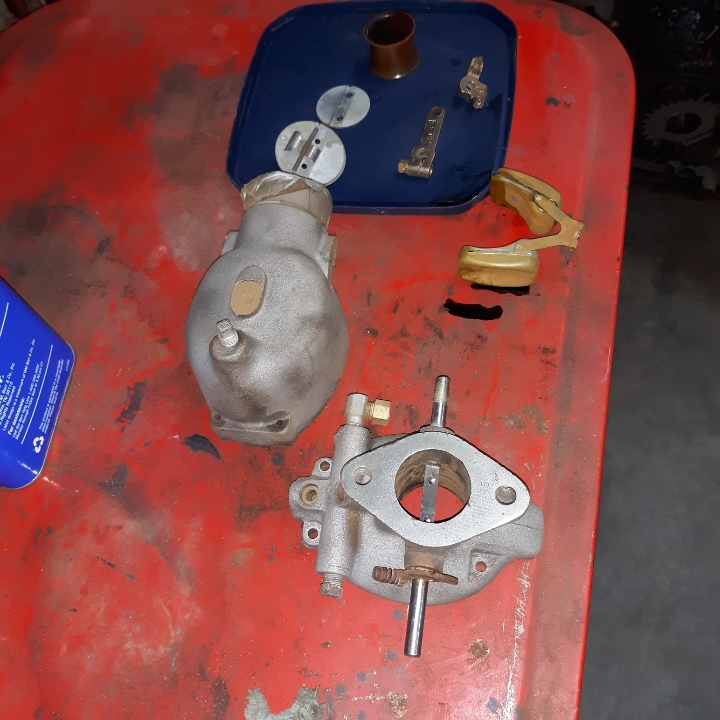 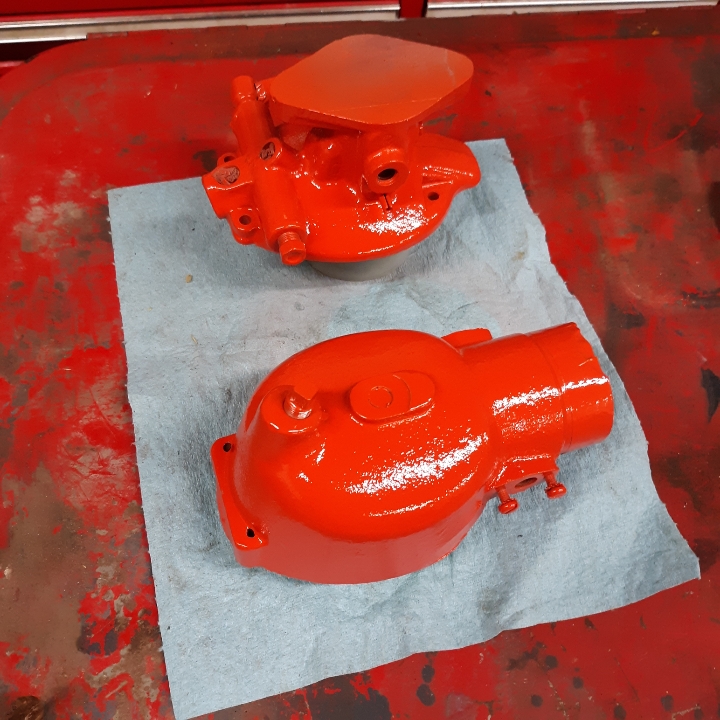
|
Posted By: ACinSC
Date Posted: 12 Nov 2021 at 7:24pm
| Looks good ! |
Posted By: IBWD MIke
Date Posted: 13 Nov 2021 at 10:00am
|
Plummer, what model M/S is that? Might have a float around here somewhere. |
Posted By: plummerscarin
Date Posted: 13 Nov 2021 at 10:39am
| Tag says TSXU839. Not having much success. Is very difficult to get solder to harden at just moment of no pressure coming out this little vessel. It appears to have a tiny hole on the sides which I believe could be a vent during assembly then soldered shut as the last step. All this effort could be a lost cause as there is a crack in one of the sides and could end up being too heavy for proper adjustment when all said and done. So yeah if you have a good one let me know |
Posted By: IBWD MIke
Date Posted: 14 Nov 2021 at 6:55am
|
Plummer, I do have some spares, they are from TSX464's. If someone can confirm that they are the same as your's, I'll send you one. I think they are the same but not 100% sure, Mike. |
Posted By: plummerscarin
Date Posted: 14 Nov 2021 at 7:35am
| The TSXU 839 is described as a universal replacement for 47 different models according to Robert's Carburetor web site. The 464 is not listed. In the Steiner catalog these two models appear different. The 839 has a larger scallop to clear the venturi. One possible idea. Compatible? Maybe. I will keep plugging on this till it's fixed or wrecked. Will keep you posted. |
Posted By: IBWD MIke
Date Posted: 14 Nov 2021 at 9:18am
|
I have one found, let me know if you need it. |
Posted By: plummerscarin
Date Posted: 21 Nov 2021 at 7:51am
|
Block, crank, cam, and lifters finally came back from engine shop for cleanup. Here's a tip, when they ask you how soon you need it give them a deadline. Otherwise they will not find the time. I don't fault them though as I have been guilty of the same thing when asked by others to help with a project of theirs. Crank is turned .010" under and cam was heavily stained from sitting idle so long I had them look it over. Flywheel not ready yet. Time to order the engine kit. Hope supply delays haven't affected that. |
Posted By: Sugarmaker
Date Posted: 21 Nov 2021 at 10:02am
|
Plummer, Thanks for the tip! I have a engine in the machine shop for the 32 truck. Told him I didnt need till next spring. I think I should call and keep it moving along. I want to have the engine in next spring and need time to assemble. Soldering a float doesn't sound like any fun! I found a carb guy out in CA that had a bunch of stuff for the carb on the F40 forklift. Now that you have this block back you can go to town on the assembly work. Keep us posted! Have a great Thanksgiving! Regards, Chris ------------- D17 1958 (NFE), WD45 1954 (NFE), WD 1952 (NFE), WD 1950 (WFE), Allis F-40 forklift, Allis CA, Allis D14, Ford Jubilee, Many IH Cub Cadets, 32 Ford Dump, 65 Comet. |
Posted By: plummerscarin
Date Posted: 10 Dec 2021 at 9:19pm
|
Not much progress on the float but took apart front wheel hubs. One bearing fell apart upon removal and a race has some major pitting. Likely from sitting so long and the dust seal in poor condition. Picked up new bearings except 2 which are backordered  
|
Posted By: plummerscarin
Date Posted: 18 Dec 2021 at 9:06pm
Some wheel hub bearing parts are on backorder so went back to the steering box. Have cleaned out the nasty old grease and beginning reassembly. On the AGCO parts book it seems some of these gaskets are NLA? I pulled the gasket making idea from Jtaylor's thread and started on my own. 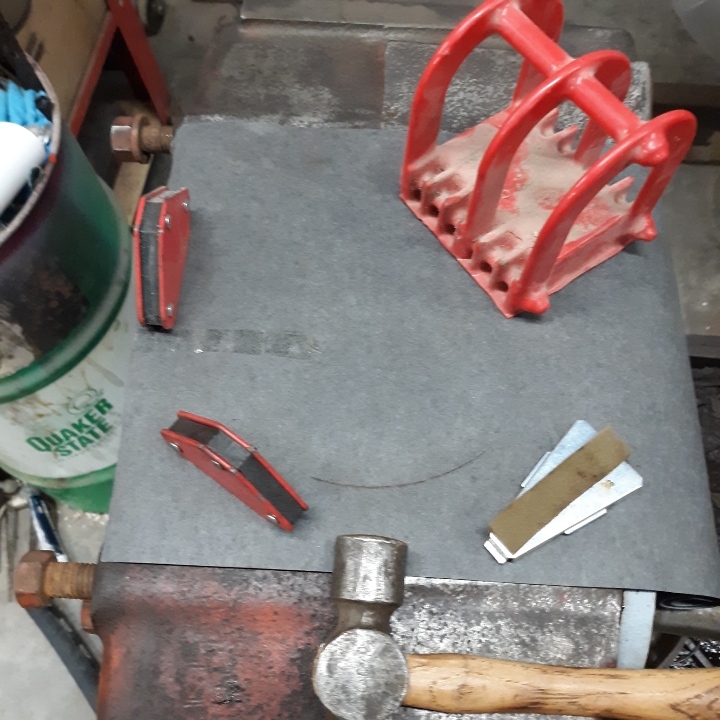 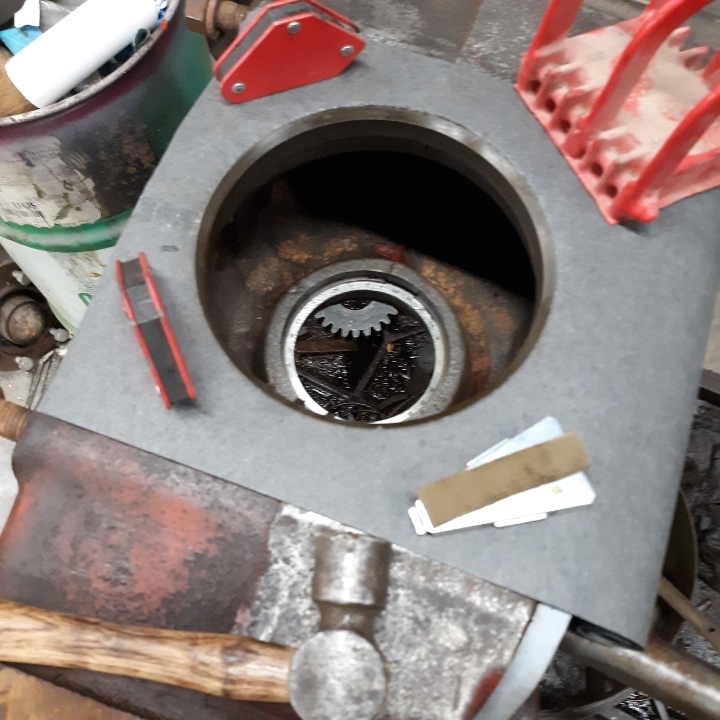 Did not have a small soft hammer so used a small ball peen with a light touch. Think it worked real well. Have a number of gaskets to make. |
Posted By: Sugarmaker
Date Posted: 19 Dec 2021 at 6:19am
|
plummer, Very nice. Yes I find a lot of mine in a roll of gasket material too! Keep moving on it! Any reassembly work is going in the right direction for sure! Regards, Chris ------------- D17 1958 (NFE), WD45 1954 (NFE), WD 1952 (NFE), WD 1950 (WFE), Allis F-40 forklift, Allis CA, Allis D14, Ford Jubilee, Many IH Cub Cadets, 32 Ford Dump, 65 Comet. |
Posted By: plummerscarin
Date Posted: 02 Jan 2022 at 8:34pm
I found that using the round end of the ball peen hammer works before punching out the bolt holes Reassembly of the steering. 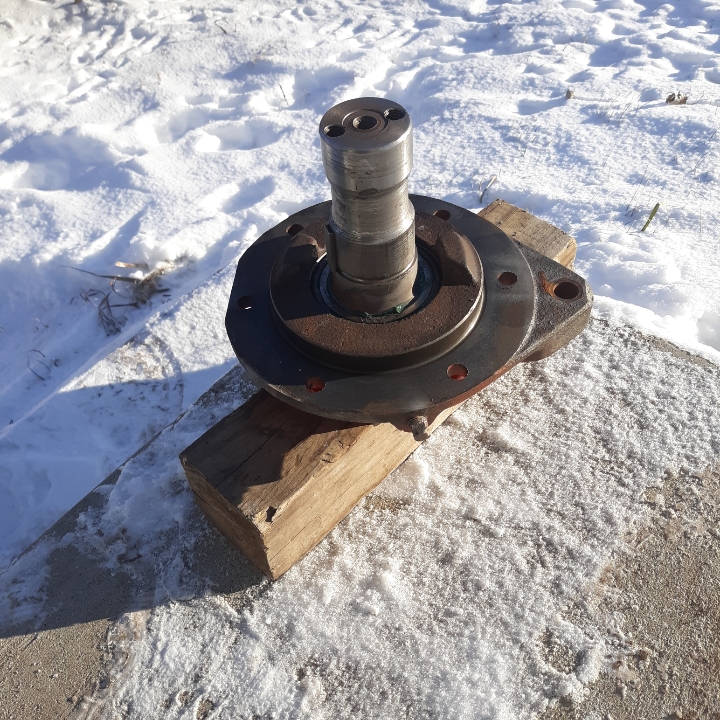 Sorry, I forgot to snap a picture of the new seal and bottom bearing. The seal was installed first then a clean and repacked bearing was driven on. It is a .003" interference fit. Next, the bottom plate with bearing race carefully set on and started with a mallet and wood block. Once started, I turned it over and used a brass drft through the spindle bolt holes to complete setting the seal in the housing. Turn over again and set it outside to chill. One benefit of sub zero temps. Again the sprocket is a .003" interference fit but this time I heated it to 250 degrees and then set it on the cold shaft where a few light taps with 2 hammers simultaneously on each side set the sprocket in place. 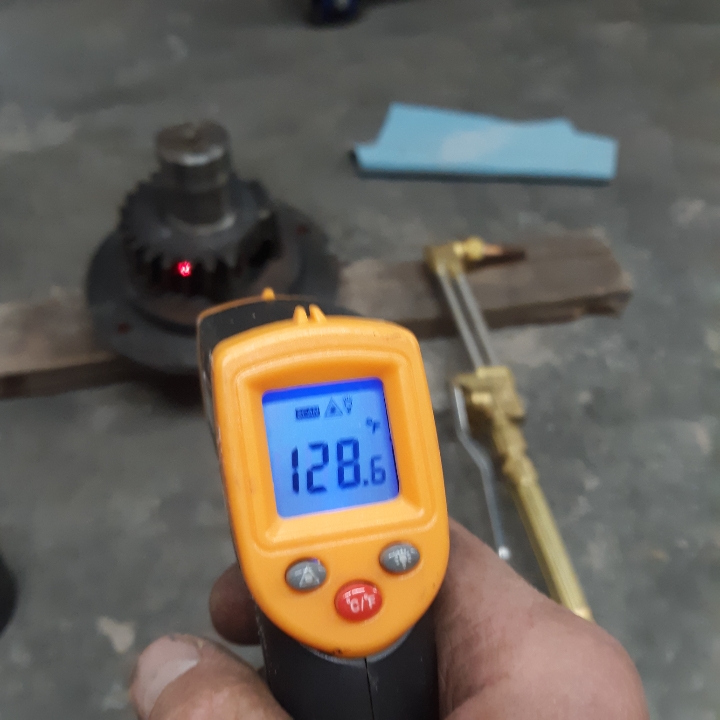 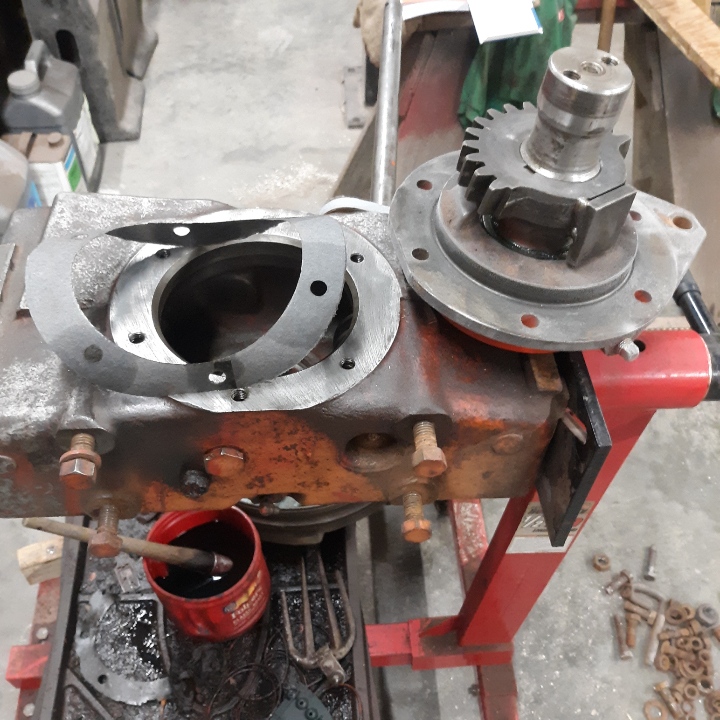
|
Posted By: ihscout
Date Posted: 03 Jan 2022 at 12:02am
|
Yeah I was hopin to see the tracks project too ------------- '40 AC B - My Pappy always told me "Use your head for something other than a tack hammer!" I did. It makes a great 16 pound sledge hammer. |
Posted By: plummerscarin
Date Posted: 04 Jun 2022 at 9:26pm
| I see it's been a while since posting on this. Many things to do. Still blasting and cleaning a few small parts. Started on teardown of front axle. Was dreading this as afraid it would be as difficult as the 7XXX,s have been. Remarkably, it was an easy push with the Porta Power and the spindle assembly is out of the axle tube. Will be replacing the spindle bushings |
Posted By: IBWD MIke
Date Posted: 05 Jun 2022 at 6:42am
|
Plummer, did you ever get the carb straightened out? I've got a float sitting here. |
Posted By: plummerscarin
Date Posted: 05 Jun 2022 at 12:51pm
| Not yet. The brass on this is very weak with a number of cracks in them. May very be interested in yours. |
Posted By: wjohn
Date Posted: 05 Jun 2022 at 2:43pm
|
Ha, I've been having a rough go trying to stay focused on my own WD that I tore apart 2 years ago. At least I'm in good company. The steering parts for these tractors are almost always in need of attention at this age. ------------- 1939 B, 1940 B, 1941 WC, 1951 WD, 1952 CA, 1956 WD-45 |
Posted By: plummerscarin
Date Posted: 05 Jun 2022 at 6:08pm
| The U-joint on the steering shaft was seized up and the only thing preventing me from turning the wheel. Took the box apart as seals were leaking. New parts ready to go in after I finish prepping the case for paint. |
Posted By: IBWD MIke
Date Posted: 06 Jun 2022 at 7:30am
|
I took a lot of slop out of the steering of both 45's with a new u-joint and pins in the shafts. Made oversize pins out of drill rod for one of them, don't remember which. |
Posted By: plummerscarin
Date Posted: 20 Jun 2022 at 6:26am
| That's a good idea. No slop in mine. I had to use a press to get the pins out. Picked up a couple nice fenders from orange knight and a carb foat from DJs at the Amana show. And a really nice polo shirt |
Posted By: plummerscarin
Date Posted: 02 Oct 2022 at 8:06am
|
Another update today. Still plugging along slowly. More tin parts blasted and in primer. Started engine assembly last night. New cam bearings were installed at the engine shop and I mic'ed them and the cam journals and found them to be in spec. Set up the dial indicator on the cam lobes. Each are .001" less than original lift except #6 exhaust which is. 003" less but doubt that is a problem for this project. Also checked standout on new sleeves. .002" protruding on all of them. Slowly but surely |
Posted By: Kenny L.
Date Posted: 02 Oct 2022 at 8:17am
|
Plummer, we need pictures, and yes these project can take forever but stay at it. |
Posted By: plummerscarin
Date Posted: 03 Oct 2022 at 10:24pm
This was my set up to check lift on the cam lobes  Sleeve O rings were next. Instructions say the non black silicone seal goes closest to crankshaft. Service manual says liquid soap for lubricant and kit instructions call for liquid soap or veggie oil. I went the soap route lightly watered down to keep from getting sticky 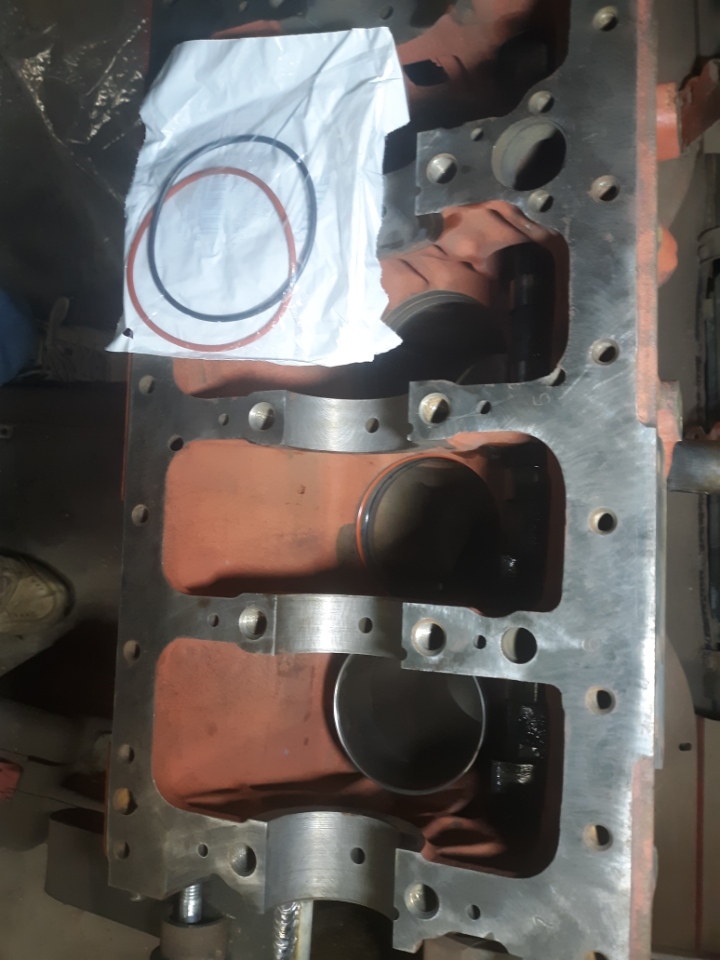 Sleeves are in. My low buck depth gauge shows .002" stand out from the deck. 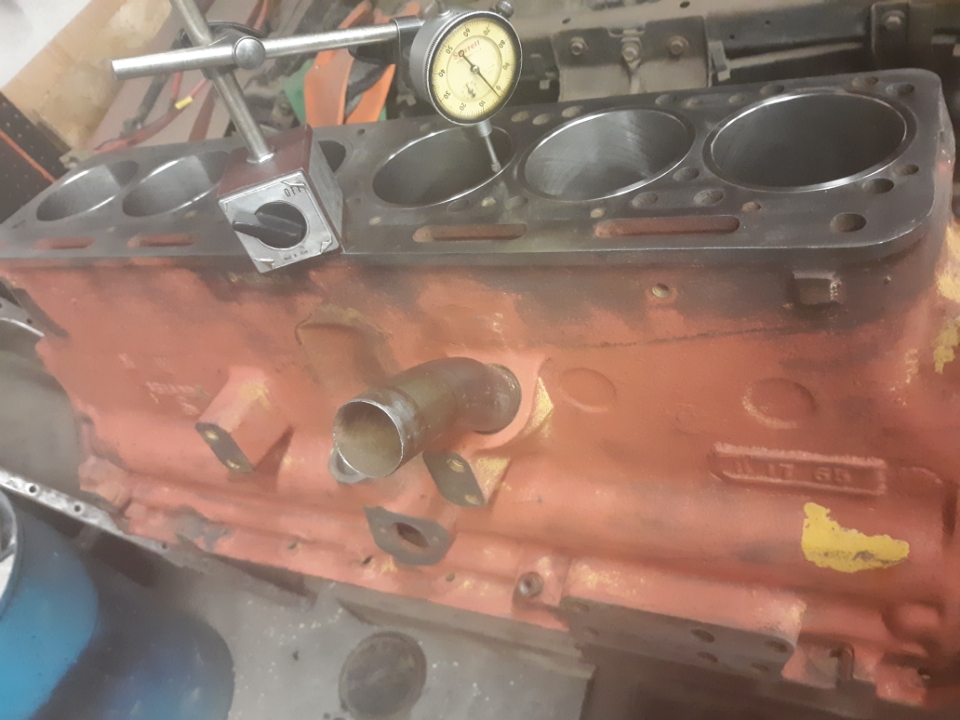
|
Posted By: Sugarmaker
Date Posted: 04 Oct 2022 at 7:24am
|
plummer, Good work! Keep hitting at it! I know if Don Bradley was still here he would be helping you too! Thanks for the update! Regards, Chris ------------- D17 1958 (NFE), WD45 1954 (NFE), WD 1952 (NFE), WD 1950 (WFE), Allis F-40 forklift, Allis CA, Allis D14, Ford Jubilee, Many IH Cub Cadets, 32 Ford Dump, 65 Comet. |
Posted By: plummerscarin
Date Posted: 14 Oct 2022 at 9:41pm
Found time this week to get the crankshaft in. Have read engine build stories and watch gearhead shows and the builders always use micrometers to measure bearing clearance. So I got the sets I have to see how it compares to Plastigage 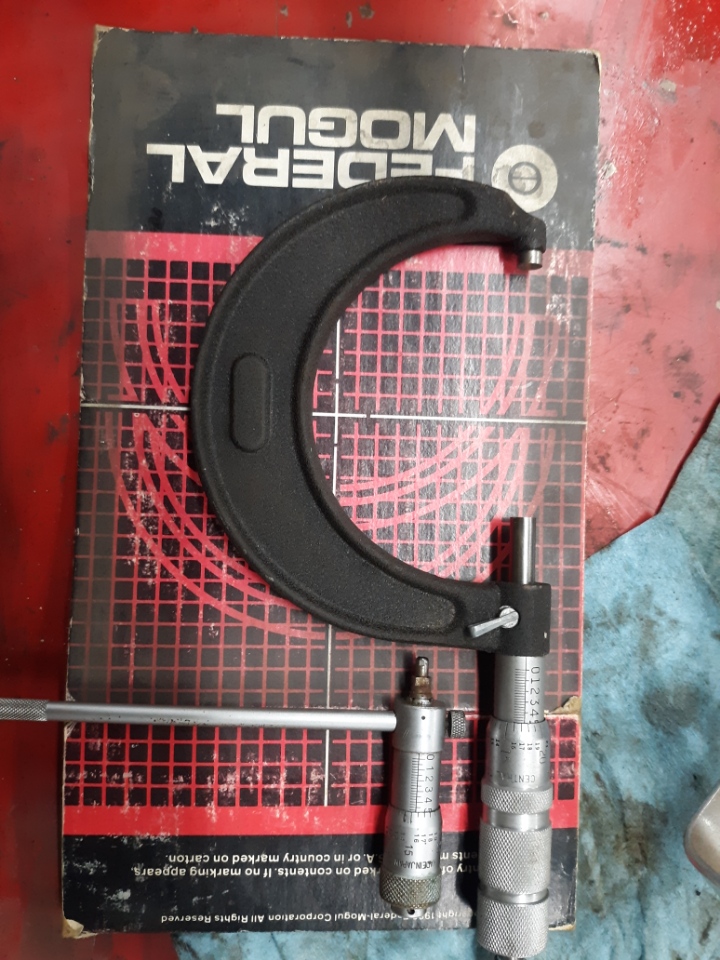 From my limited experience it appears to be just under .002" clearance 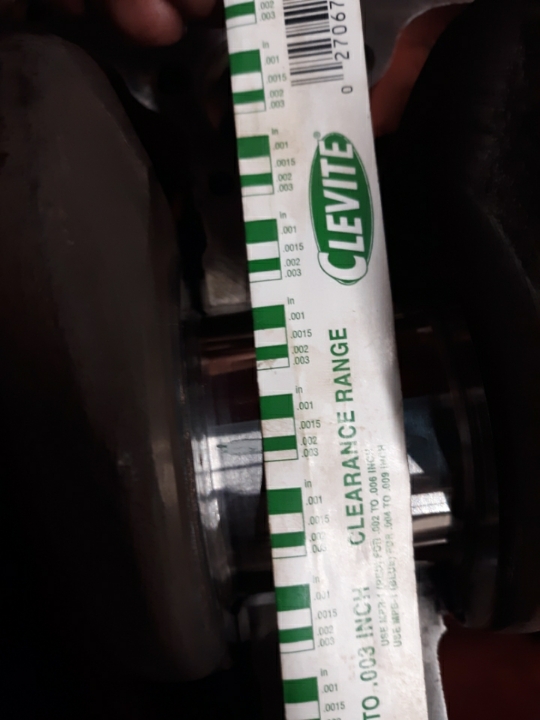 Crankshaft is in. I checked for free rotation after each main cap was torqued. Crankshaft moves easily and checked end play which measures out to .003" 
|
Posted By: steve(ill)
Date Posted: 14 Oct 2022 at 10:08pm
|
NICE... CLEAN.. Well done !! ------------- Like them all, but love the "B"s. |
Posted By: IBWD MIke
Date Posted: 15 Oct 2022 at 6:25am
X-2!
|
") steve(ill) wrote:
steve(ill) wrote:Posted By: plummerscarin
Date Posted: 13 Dec 2022 at 1:27pm
| Little has happened since the last post. I began working with the rods and pistons. The engine kit I got has new wrist pins and bushings which require pressing out the old ones then press in the new ones and hone the bushings to size for the the new pins. I don’t have that ability here so have sent those out. In the meantime I have begun assembling pistons and rings. |
Posted By: plummerscarin
Date Posted: 17 Dec 2022 at 11:54pm
The pistons are now ready for the rods when they get back 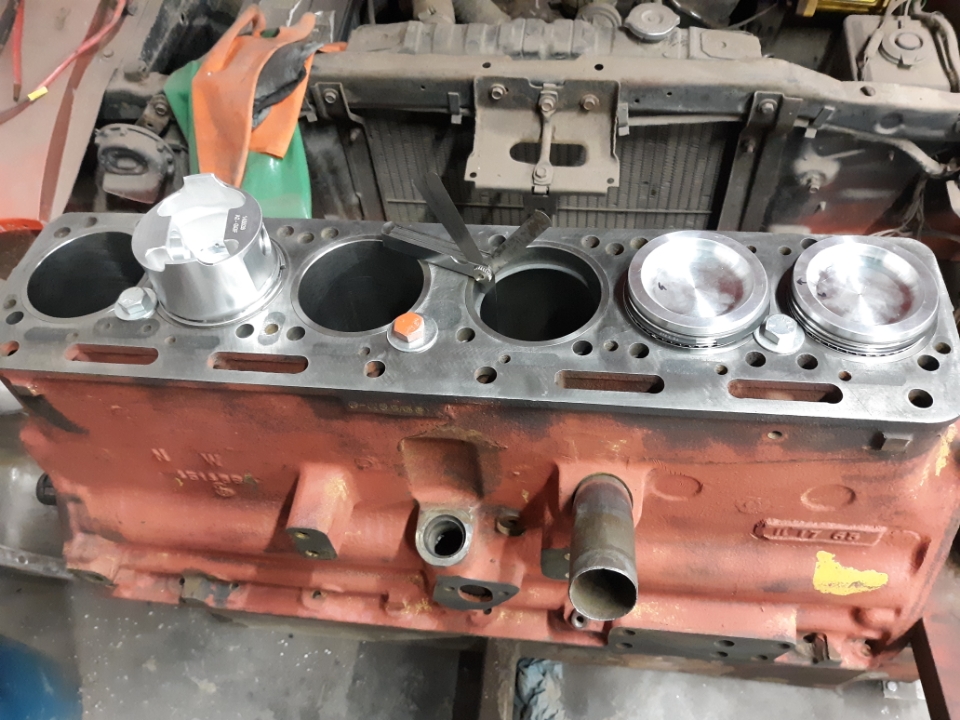 New pistons and rings are different than the old ones. Only 2 compression rings vs 3 on the old set. The book called for .007" gap on the rings while the instructions with the new says .016". This according to the math of bore diameter x .0045 for "street" applications. These rings are file to fit. Not having a gauge to set rings square in the bore, I used and old ring in the oil groove for fitting gaps. For grins I checked the gap on an old ring. .075". 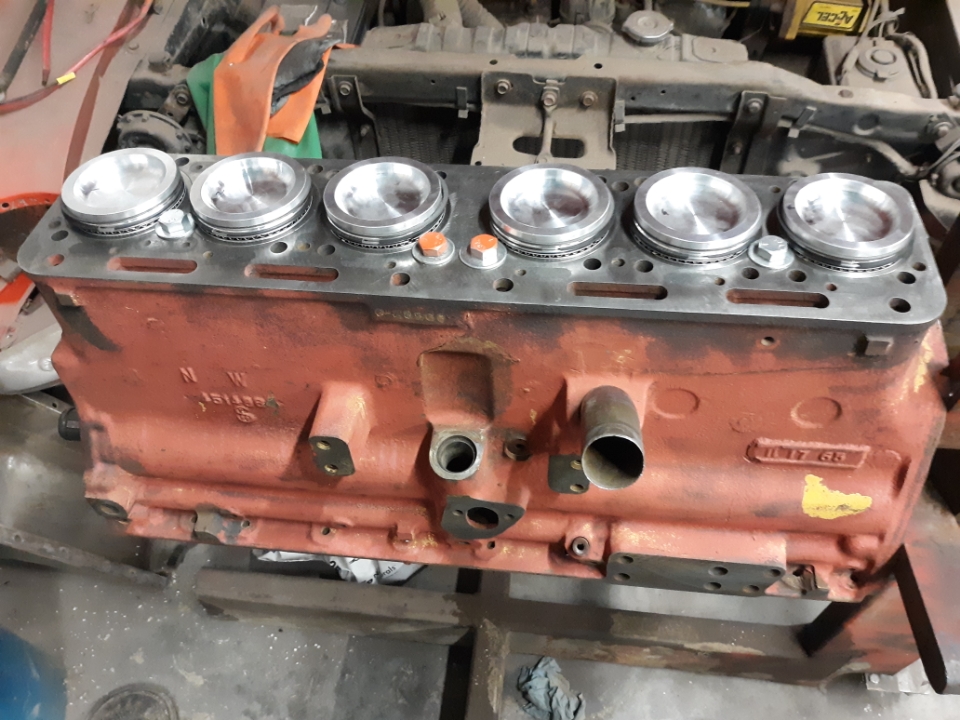 |
Posted By: Pat the Plumber CIL
Date Posted: 18 Dec 2022 at 10:19am
|
Looking Good Aaron. Keep after it . You are going to be extremely happy when it fires up for the first time. ------------- You only need to know 3 things to be a plumber;Crap rolls down hill,Hot is on the left and Don't bite your fingernails 1964 D-17 SIV 3 Pt.WF,1964 D-15 Ser II 3pt.WF ,1960 D-17 SI NF,1956 WD 45 WF. |
Posted By: plummerscarin
Date Posted: 08 Jan 2023 at 10:30pm
Got the cam gear installed finally. Had been soaking in the parts washer for months but it just didn't cut through 30 years of gunk turned to varnish. Cleaned with a scuff pad, wire brushes and a pick. 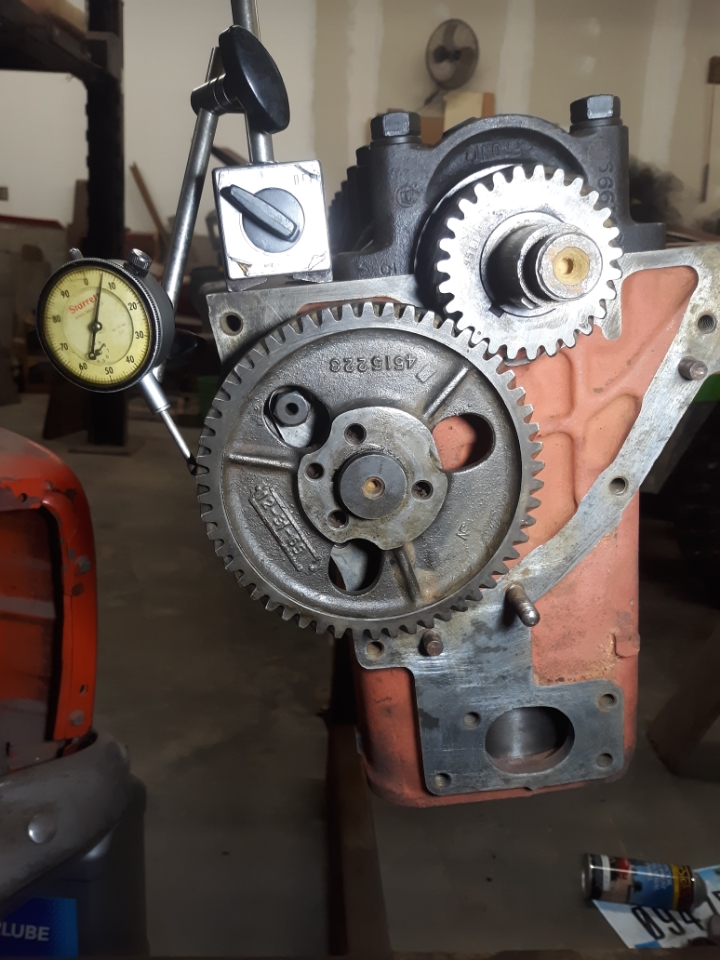 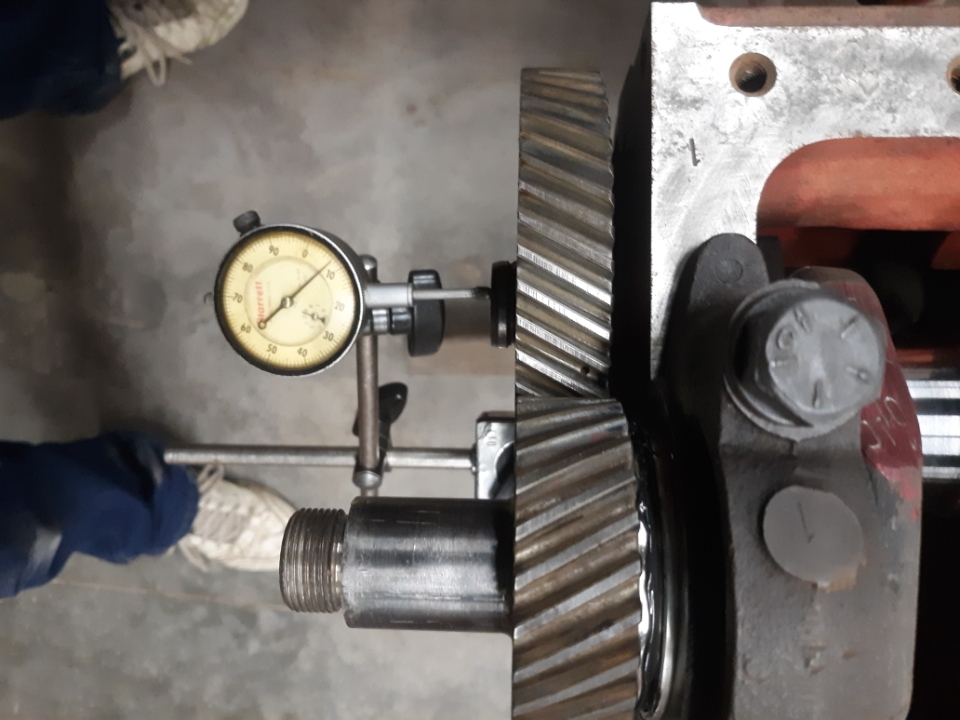 Backlash measures in at .007" Book calls for a max of .005 and replace when exceeds .008. Endplay comes in at .007" Still waiting on my rods to come back. Took a while to figure out how to press the gear back on the cam. In hindsight I didn't really need to take it off. So I hung the end of the cam from a bearing separator on the arbor press and pushed the gear on with the help of a socket. Beats heating it in this case. Granted, it's not much progress but there are many things keeping me busy I cannot find in the service manual a torque spec for the cam thrust plate bolts. These are hollow and a 7/16 bolt. Is there a torque value or maybe something like 40ft/lb? |
Posted By: Kenny L.
Date Posted: 09 Jan 2023 at 4:21pm
|
Looking good, I look in my factory service manual and didn't find any torque spec either so hoping someone will chime in, kept plugging way and thanks for the pictures. |
Posted By: plummerscarin
Date Posted: 23 Mar 2023 at 11:17pm
The rods came back from machine shop at last. New pin bushings installed and honed to fit new wrist pins. 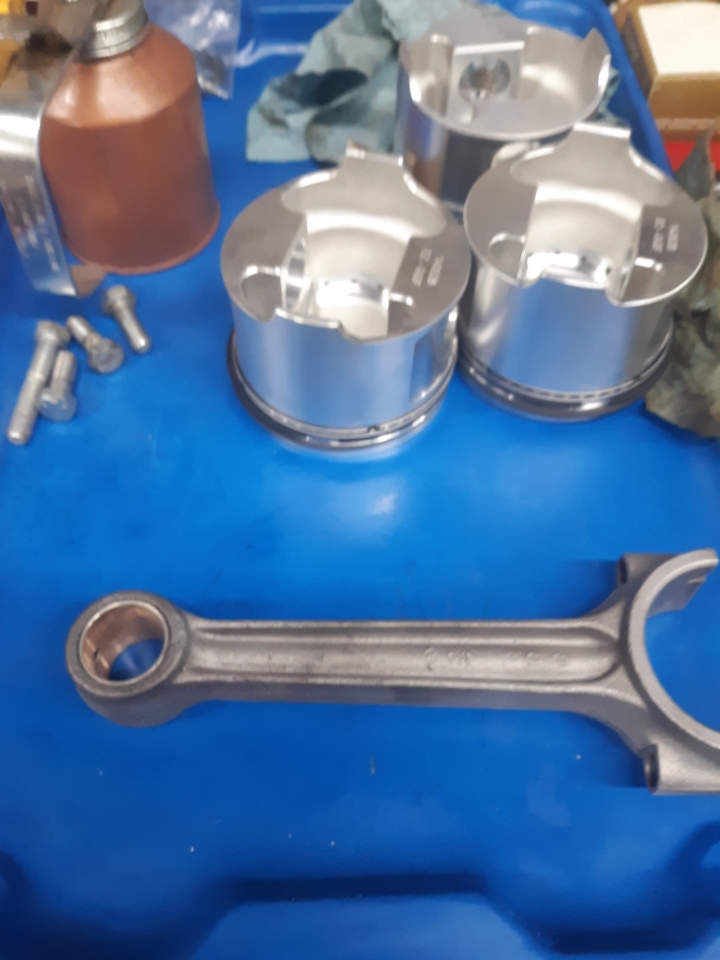 Got the rods and pistons assembled and installed tonight  Rod side clearance is .004" 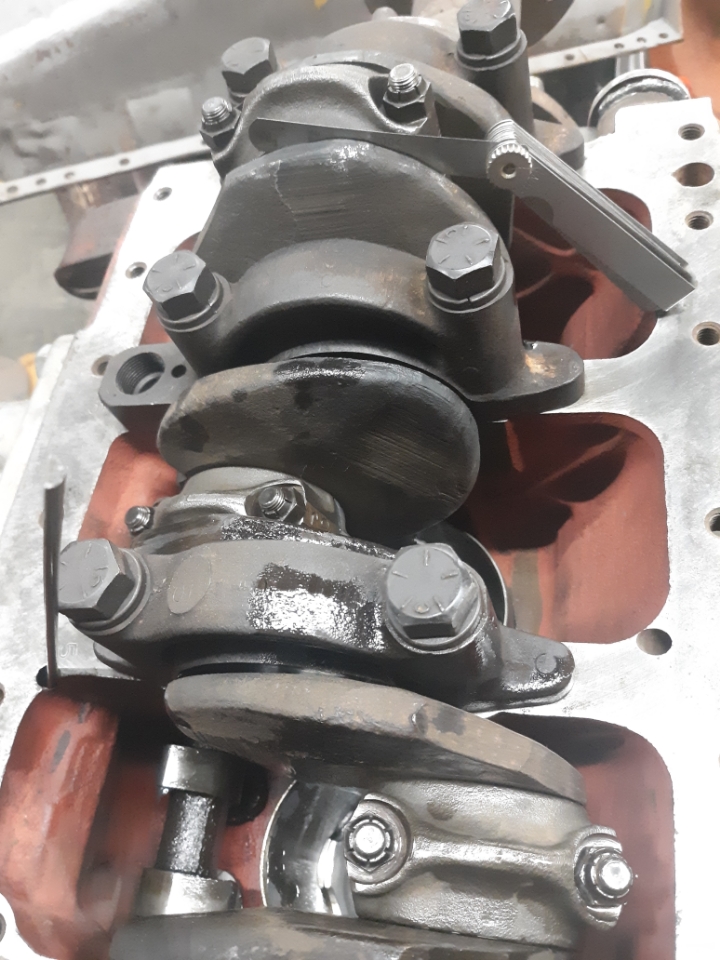 Have also been cleaning parts and have in primer. I started in on the brakes as well. Naturally the pins are stuck pretty good. I have some end mill bits so I decided to fab a pin puller using the drill press. A cross slide vise would be nice to have but managed without it. The bar stock is from some kind of brace off a McCormick something. Seems heavy enough 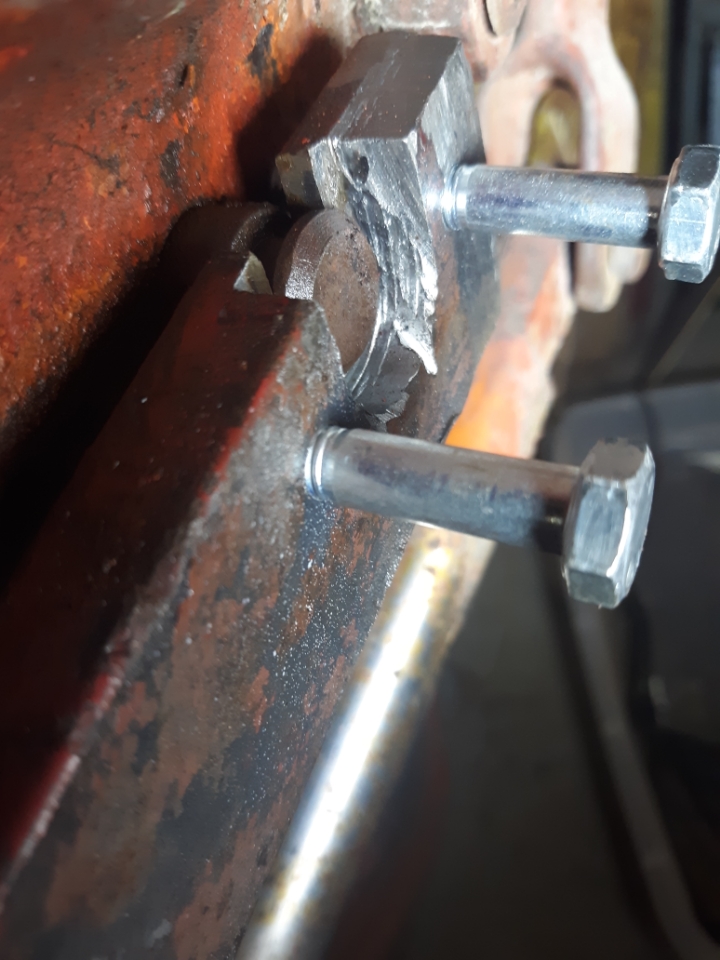 Remarkably, the pin was moving but I got a little overzealous and the head of the pin is starting to separate. I plan to weld it up a bit and keep at it with a bit more patience and plenty of lube. And maybe some heat. |
Posted By: Kenny L.
Date Posted: 24 Mar 2023 at 2:28am
|
Looking good and the pictures are great, you're getting there |
Posted By: IBWD MIke
Date Posted: 24 Mar 2023 at 9:45am
|
Good to see you're making progress on this! I happen to have a cross-slide vise I would part with.....
|
Posted By: plummerscarin
Date Posted: 27 Mar 2023 at 10:02pm
Set the fuel tank outside and set up the electrolysis to remove rust inside the tank 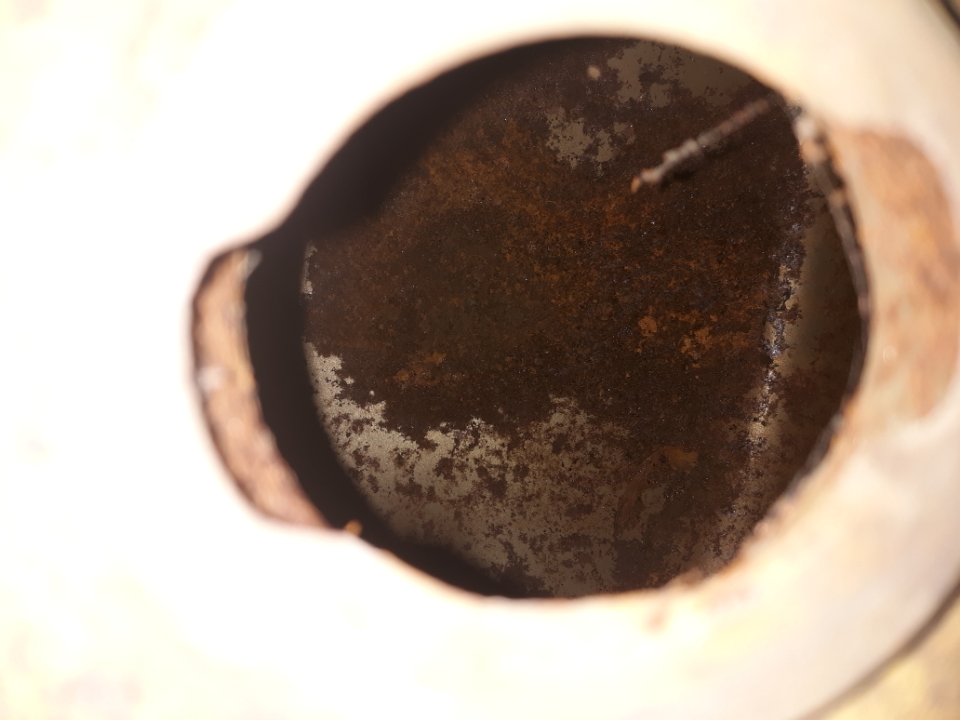 A view inside the tank. After 24 hours there does not appear to be much rust collected on the anode yet but can see plenty of gas bubbles so it is doing something. May not be as bad as I thought. Gonna leave it cook another day and drain it. Will get it clean dry then plan to seal it. Mike, I just might take you up on that cross slide |
Posted By: AC720Man
Date Posted: 27 Mar 2023 at 10:36pm
|
When I replaced my brakes a few months ago on my D17 I put a large punch in through hole and banged on the pin after I soaked it with Kroil. It came loose with little effort when I put my puller n it. ------------- 1968 B-208, 1976 720 (2 of them)Danco brush hog, single bottom plow,52" snow thrower, belly mower,rear tine tiller, rear blade, front blade, 57"sickle bar,1983 917 hydro, 1968 7hp sno-bee, 1968 190XTD |
Posted By: plummerscarin
Date Posted: 29 Mar 2023 at 10:09pm
Here's the electrolysis setup on the gas tank 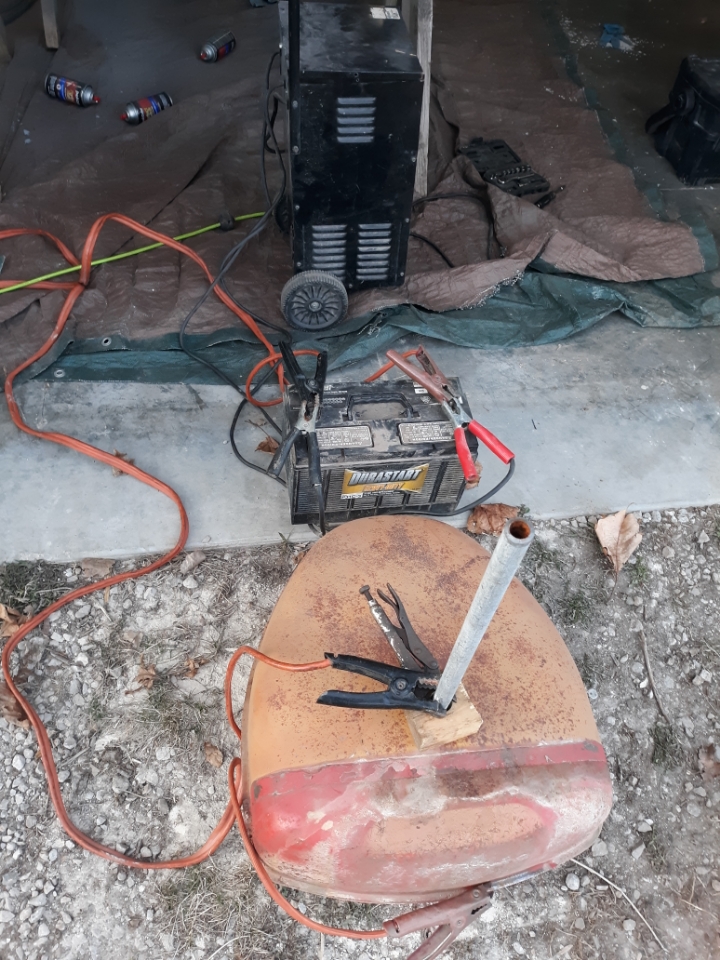 Not much on the anode. It's a steel pipe that had the galvanized coating ground off. Plenty of rust came out when I drained and rinsed it 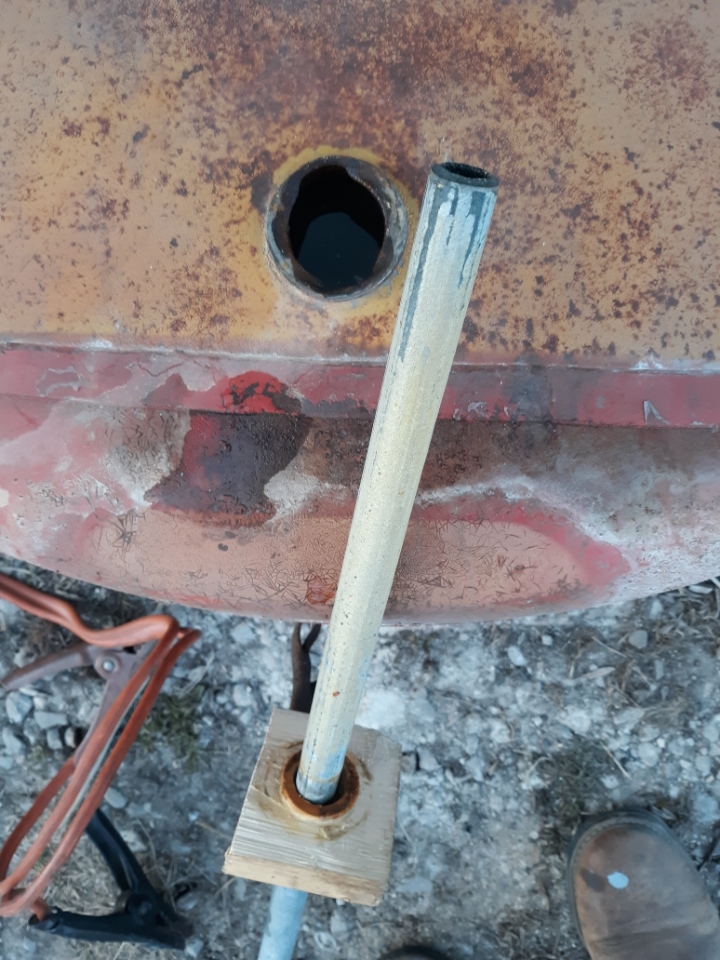 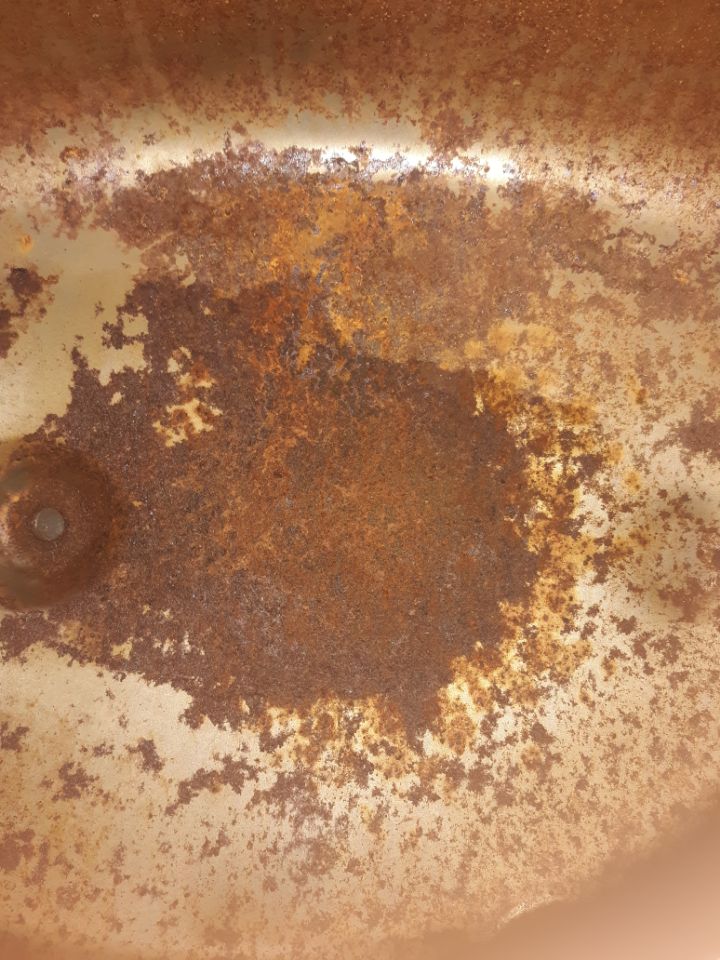 Will be sealing this soon |
Posted By: IBWD MIke
Date Posted: 30 Mar 2023 at 9:27am
|
I made a similar setup when I did the tank for WD Grandpa. Worked good. |
Posted By: plummerscarin
Date Posted: 01 Apr 2023 at 11:29pm
Eureka!! Got one brake pin out tonight. Welded that pin top 3 times. Moved the pin in and out multiple times keeping the penetrating oil to it. Once I was able to rotate the pin it came quite easily. 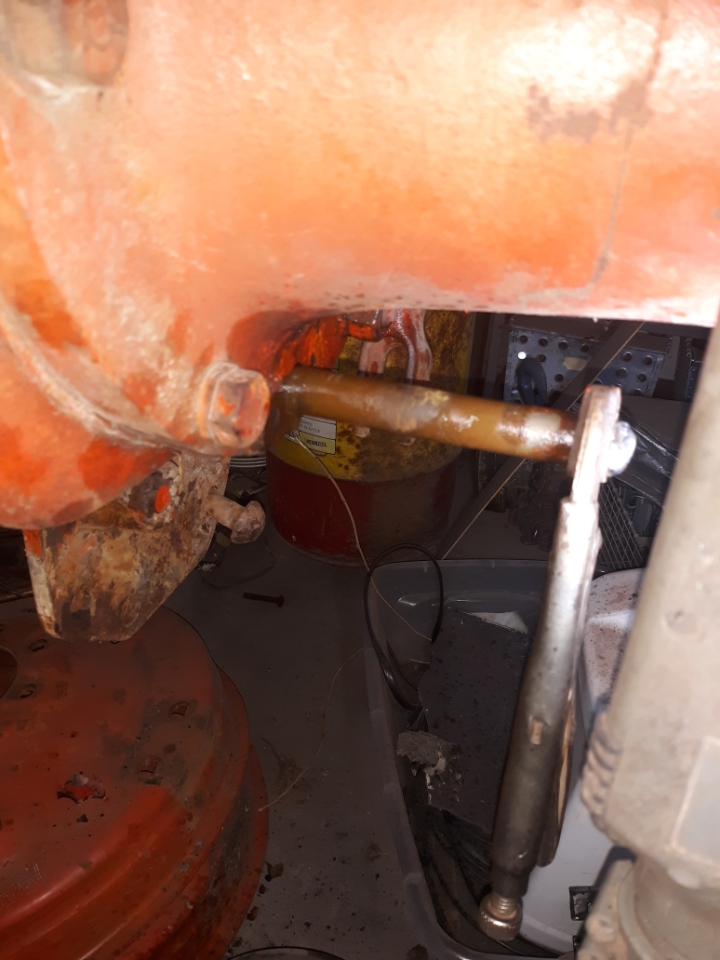 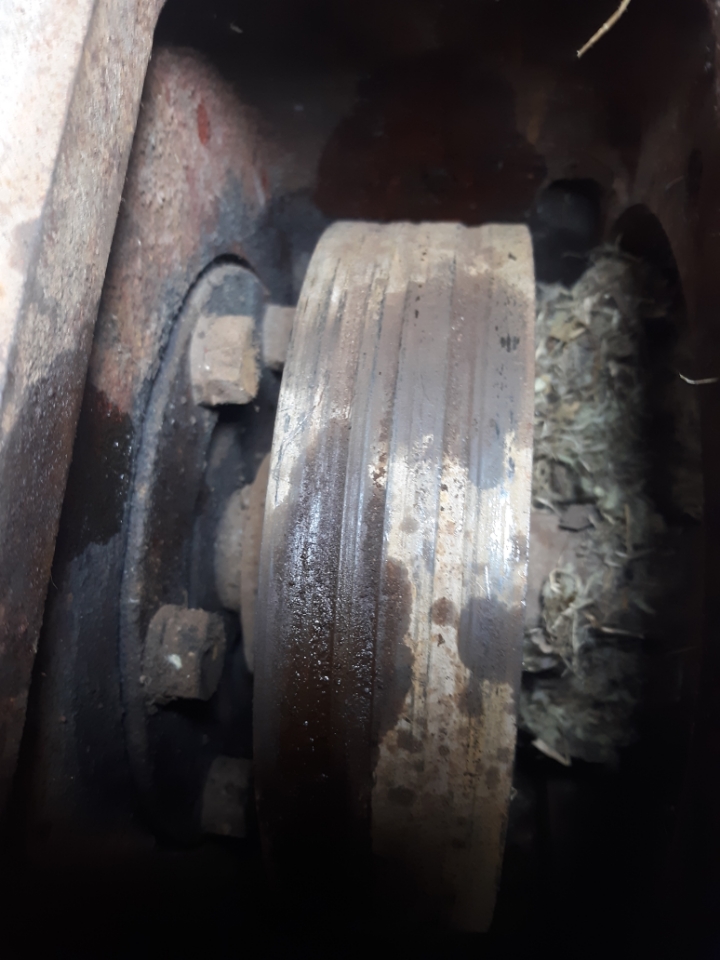 Drum and lining don't look so good though but I kinda figured that 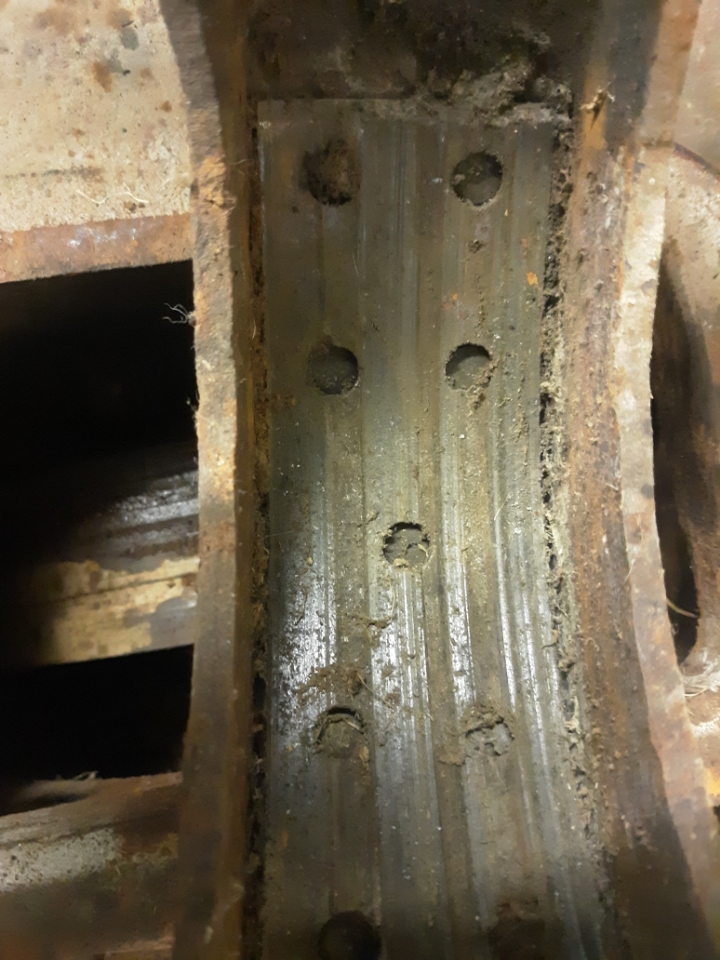 That'll need to come apart so's I can clean out the mouse house |
Posted By: AC720Man
Date Posted: 01 Apr 2023 at 11:37pm
|
That looks like my D17 brake drum did. A good chain hoist will become your best friend. I chose to cut off the old drum instead of pulling it. A V cut and then a wedge chisel, one smack of a hammer and it fell apart. Replaced the pinion seal while apart even though it wasn’t leaking oil. ------------- 1968 B-208, 1976 720 (2 of them)Danco brush hog, single bottom plow,52" snow thrower, belly mower,rear tine tiller, rear blade, front blade, 57"sickle bar,1983 917 hydro, 1968 7hp sno-bee, 1968 190XTD |
Posted By: wjohn
Date Posted: 02 Apr 2023 at 9:12am
|
Nice! Those pins sure can be a royal pain. I don't see any rivet heads above the lining in your pic, so someone must have changed the lining once before after the heads had dug in, then put that current lining on and it just wore into the grooves already in the drum? ------------- 1939 B, 1940 B, 1941 WC, 1951 WD, 1952 CA, 1956 WD-45 |