| Author |
 Topic Search Topic Search  Topic Options Topic Options
|
IBWD MIke 
Orange Level


Joined: 08 Apr 2012
Location: Newton Ia.
Points: 4152
|
 Post Options Post Options
 Thanks(0) Thanks(0)
 Quote Quote  Reply Reply
 Topic: Rim painting. Topic: Rim painting.
Posted: 10 Jul 2023 at 8:12am |
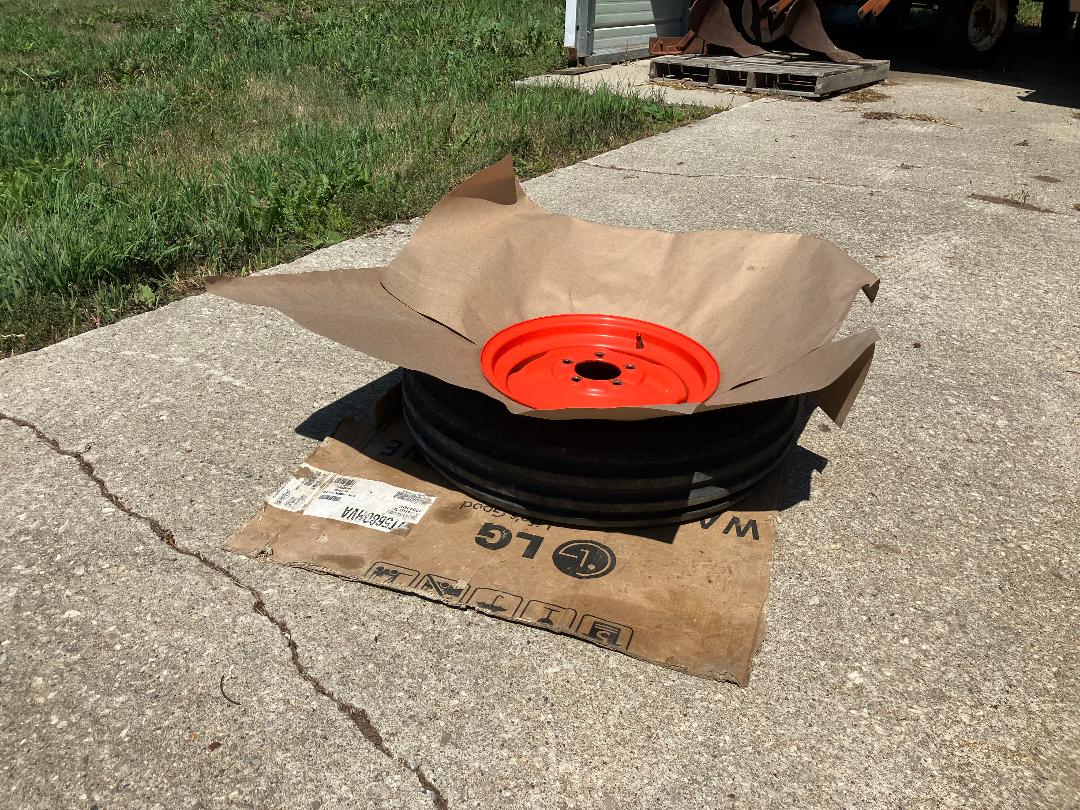
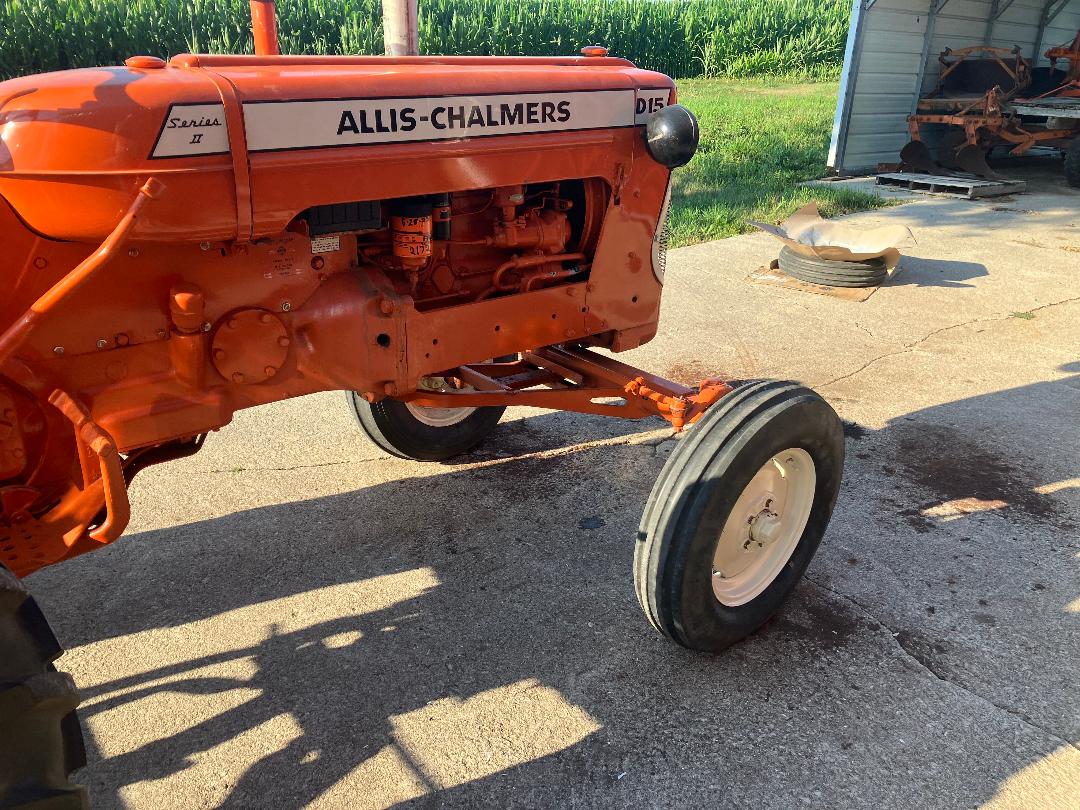
Yesterday I took the power washer to an old garage we're going to paint next weekend. It was a lot of work and took about three times as long as I had thought it would. When my shoulders got tired and I needed a break I worked on painting the front rims on the D-15.
Put the ones that came on the tractor back on so I could do this. The reason I post this is because I learned this trick right here. Wish I could remember who posted it originally to give them credit. Anyway, the bead-breaker I bought awhile back did a great job. Made a couple of pieces out of some light cardboard, worked great! Got one done and the first coat on the other. Will put the second coat on today and maybe get it on the tractor. Since the one that I put on the tractor was already getting soft I put the done one on.
Thinking I'll take this to the MIAPA show next month with a 2 bottom plow. Will look better with all white wheels.
|
 |
|
Sponsored Links
|
|
 |
plummerscarin 
Orange Level Access

Joined: 22 Jun 2015
Location: ia
Points: 3992
|
 Post Options Post Options
 Thanks(0) Thanks(0)
 Quote Quote  Reply Reply
 Posted: 10 Jul 2023 at 12:35pm Posted: 10 Jul 2023 at 12:35pm |
|
Yep, I do that using plastic sheeting. Cut a piece to cover the whole tire. Use a utility knife to cut out the center the size of the inner bead diameter then stretch it over the rim. When done I fold it up and store for the next time
|
 |
mdm1 
Orange Level


Joined: 12 Sep 2009
Location: Onalaska, WI
Points: 2682
|
 Post Options Post Options
 Thanks(0) Thanks(0)
 Quote Quote  Reply Reply
 Posted: 10 Jul 2023 at 6:36pm Posted: 10 Jul 2023 at 6:36pm |
|
Glad to see you take the time to mask off the tires. Will never understand why some people don't. Looks nice.
|
|
Everything is impossible until someone does it! WD45-trip loader 1947 c w/woods belly mower, 1939 B, #3 sickle mower 1944 B, 2 1948 G's. Misc other equipment that my wife calls JUNK!
|
 |
AC720Man 
Orange Level


Joined: 10 Oct 2016
Location: Shenandoah, Va
Points: 5250
|
 Post Options Post Options
 Thanks(0) Thanks(0)
 Quote Quote  Reply Reply
 Posted: 10 Jul 2023 at 10:23pm Posted: 10 Jul 2023 at 10:23pm |
|
Thanks for posting that trick! Getting ready to paint my D17 wheels. That should work on the rears also.
|
|
1968 B-208, 1976 720 (2 of them)Danco brush hog, single bottom plow,52" snow thrower, belly mower,rear tine tiller, rear blade, front blade, 57"sickle bar,1983 917 hydro, 1968 7hp sno-bee, 1968 190XTD
|
 |
Codger 
Orange Level


Joined: 23 Dec 2020
Location: Utopia
Points: 2458
|
 Post Options Post Options
 Thanks(0) Thanks(0)
 Quote Quote  Reply Reply
 Posted: 10 Jul 2023 at 10:41pm Posted: 10 Jul 2023 at 10:41pm |
|
I have a set of three of these shields commercially made from sheet metal. They are a slide open type affair like a "hand" of playing cards and work well. The three sets cover rim sizes from about 12" to 24.5" truck tire rims. They work great to blast wheels clean and refinish without dismounting the tire(s).
|
|
That's All Folks!
|
 |
wjohn 
Orange Level


Joined: 19 Jan 2010
Location: KS
Points: 2265
|
 Post Options Post Options
 Thanks(0) Thanks(0)
 Quote Quote  Reply Reply
 Posted: 10 Jul 2023 at 11:09pm Posted: 10 Jul 2023 at 11:09pm |
|
Looks good in the right color!
|
|
1939 B, 1940 B, 1941 WC, 1951 WD, 1952 CA, 1956 WD-45
|
 |
IBWD MIke 
Orange Level


Joined: 08 Apr 2012
Location: Newton Ia.
Points: 4152
|
 Post Options Post Options
 Thanks(0) Thanks(0)
 Quote Quote  Reply Reply
 Posted: 11 Jul 2023 at 8:03am Posted: 11 Jul 2023 at 8:03am |
Thanks guys. Just an example of something I learned reading this site and filed away until needed.
Sloppy rim painting kind of drives me nuts. Have seen many painted with no masking what-so-ever. Some get it done with minimal over-spray. Others, and I remember one Farmall, though not what model, that the rims looked ok but the tires had about a two inch band of Red paint all the way around. This was at an auction, of course.
An update on the D-15; Removed the 'three point ' yesterday. Super easy, and if I ever get something that mounts that way, will be easy to go back on. All of my attachments are snap-coupler so that is how she's going to live at least until something new follows me home!
|
 |


 Topic Options

 Post Options
 Thanks(0)


