WD45 steering bolster
Printed From: Unofficial Allis
Category: Allis Chalmers
Forum Name: Farm Equipment
Forum Description: everything about Allis-Chalmers farm equipment
URL: https://www.allischalmers.com/forum/forum_posts.asp?TID=192480
Printed Date: 15 Nov 2024 at 6:42pm
Software Version: Web Wiz Forums 11.10 - http://www.webwizforums.com
Topic: WD45 steering bolster
Posted By: DSeries4
Subject: WD45 steering bolster
Date Posted: 19 Dec 2022 at 5:02pm
|
I brought my 57 WD45 into that shop to do some work on it and I noticed the bottom of the steering bolster is leaking pretty good. It has the 4 bolt axle and there is no bolt on cover on the top like my 54 WD45 has. Can I leave the bolster on the tractor to replace the seals on the bottom, or do I have to remove it and flip it upside down? I don't want all the guts to fall out if I leave it on the tractor. Many thanks! Good time to fix up the front pivot too!  ------------- '49 G, '54 WD45, '55 CA, '56 WD45D, '57 WD45, '58 D14, '59 D14, '60 D14, '61 D15D, '66 D15II, '66 D21II, '67 D17IV, '67 D17IVD, '67 190XTD, '73 620, '76 185, '77 175, '84 8030, '85 6080 |
Replies:
Posted By: Gary
Date Posted: 19 Dec 2022 at 6:57pm
|
Myron Sent you a Xmas Present. Check your email, and not under the Tree ! Gary |
Posted By: JC-WI
Date Posted: 19 Dec 2022 at 8:52pm
|
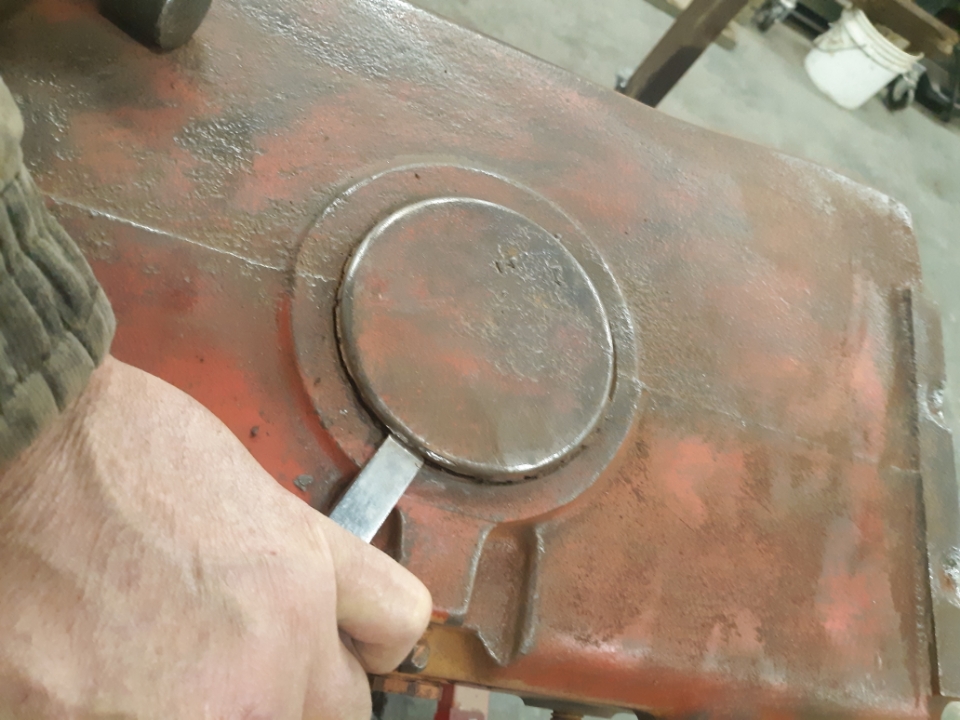
the 3 bolt front bolster will have the rectangular top cover, the earlier ones had a square cover and 4 bolts. the true WD45 from factory will have a 4 bolt front support and a round press in cap that can be pried out or using a chisel to tap it up and out. Without the repair manual here, I would say to block the tractor up, take the wide front off, remove cover and look in and see if there's a cap screw or two on top of steering sector gear. Take them out and remove bolts underneath, maybe leave a bolt or two partially in to catch the assembly and then press shaft out of steer gear. Good luck. ------------- He who says there is no evil has already deceived himself The truth is the truth, sugar coated or not. Trawler II says, "Remember that." |
Posted By: Gary
Date Posted: 20 Dec 2022 at 8:14am
|
JC-WI So the first 40,000 WD45's built in 1953 were not 'true WD45's' because they did not have the 4 bolt Support Plate or the round Cover Plate on top. Not sure where you get your info from, but I rely on the Allis Parts Catalog for the facts. 1953 at Serial WD 127,007 the so-called 45 Trans. with Curved Shifter 1953 at Serial WD 146,607 1st WD45 and 226 Engine, Snap Coupler Drawbar late 1954 at Serial WD 186,413 4 bolt front Plate and round Press-in Cover G ................................................................... corrected typo: 1953 to 1954, near the end ( 190992 ) of 1994 production ........................................................................ Lowest Diesel Serial on the Owner Registry is 201190 |
Posted By: Ed (Ont)
Date Posted: 20 Dec 2022 at 3:22pm
| Serial 186,413 is late 1954 not 1953. I have 175421. it is a 1954. They were true WD45. Later ones had a couple upgrades tho - not uncommon. |
Posted By: Dusty MI
Date Posted: 20 Dec 2022 at 5:57pm
|
My dad bought one of the last '53 WD's, it had the pin drawer bar which was changed to a Snap-Coupler. Also the snap latches were added. ------------- 917 H, '48 G, '65 D-10 series III "Allis Express" |
Posted By: groundhog55
Date Posted: 21 Dec 2022 at 7:43am
| They went to the four bolt plate when the diesel engine was introduced. |
Posted By: DSeries4
Date Posted: 26 Dec 2022 at 8:33pm
|
Started working on tearing down this afternoon. Spent some time working on removing the round cap on top. I have it lifted up a bit, still more to go. For removing the entire bolster, the universal joint needs to be disconnected from the steering shaft. I see mine has a solid round pin keeping things together. Any ideas how to removed the pin? It's also under the governor - not the most accessible location! Next question: the manual specifies SAE 240 fluid for the bolster, however I do not see any fill plug in the top - just a grease zerk. Very confusing! Can someone clarify?  ------------- '49 G, '54 WD45, '55 CA, '56 WD45D, '57 WD45, '58 D14, '59 D14, '60 D14, '61 D15D, '66 D15II, '66 D21II, '67 D17IV, '67 D17IVD, '67 190XTD, '73 620, '76 185, '77 175, '84 8030, '85 6080 |
Posted By: plummerscarin
Date Posted: 27 Dec 2022 at 6:19am
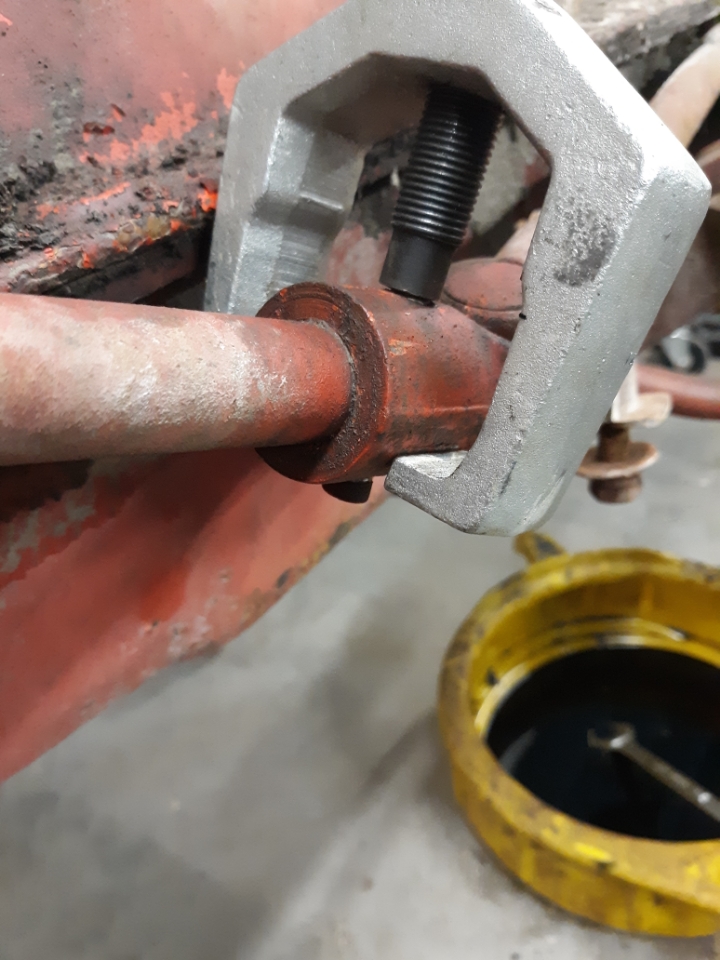
| I used a pitman arm puller to drive out the pin. It took a series of small nuts stacked up as the pin pushed through. There are photos in my "Dads WD project" thread. Admittedly, I had the side frame off for better access but the whole tractor was coming apart anyway |
Posted By: WF owner
Date Posted: 27 Dec 2022 at 6:30am
| I have used John Deere cornhead grease in things that call for very heavy grease/oil that can't be found anymore. It comes in tubes that go in a grease gun. |
Posted By: DrAllis
Date Posted: 27 Dec 2022 at 6:33am
| I would use John Deere cornhead gearbox grease only if I couldn't find Hugger cornhead gearbox grease. There could be some kind of bad chemical reaction to Deere products being used in an A-C. |
Posted By: Gary
Date Posted: 27 Dec 2022 at 7:03am
|
I totally agree with the Dr. The last thing you want Myron is for 'Greene Blood' leaking out your new seal. Gary |
Posted By: DSeries4
Date Posted: 13 Jan 2023 at 8:33pm
|
More questions: 1) What is the best way to remove the solid pin on the universal joint? I am reluctant to use heat as I do not want to cook the grease in the U joint. 2) What is the diameter of the hole in the U joint? Can a regular roll pin be used when reinstalling the bolster? 3) What is the best way to grease the universal joint? I do not see a grease zerk on mine. Many thanks! ------------- '49 G, '54 WD45, '55 CA, '56 WD45D, '57 WD45, '58 D14, '59 D14, '60 D14, '61 D15D, '66 D15II, '66 D21II, '67 D17IV, '67 D17IVD, '67 190XTD, '73 620, '76 185, '77 175, '84 8030, '85 6080 |
Posted By: Gary
Date Posted: 14 Jan 2023 at 6:17am
|
Hi Myron Are you sure it is a 'solid' pin and not a spring pin packed solid with rust ? I'd try running a small drill through the middle of the pin. I'd remove the Side Rail to have better access to the Universal. You'll be removing the front 4 bolts and loosening the rest in order to remove the Bolster anyway. As a last resort, if it is a solid pin, I'd drill the outer ends of the pin on the Bolster side of the Universal to weaken it, then twist the steering shaft to sheer the remaining pin. I see replacement Universal Joints have a Grease Zerk. Gary https://www.amazon.com/Steering-Chalmers-Interchangeable-70224825-70224825GV/dp/B08C8YNC9Y" rel="nofollow - https://www.amazon.com/Steering-Chalmers-Interchangeable-70224825-70224825GV/dp/B08C8YNC9Y Pin 912855 3/8 inch |
Posted By: plummerscarin
Date Posted: 14 Jan 2023 at 7:16am
Mine is also a solid pin. This was my solution. Apply pressure to pin tap the end of the pusher bolt. Rinse repeat. I stacked small nuts over the pin as progress was made  I used a flat chisel to work the cover up out of hole. |
Posted By: Gary
Date Posted: 14 Jan 2023 at 8:59am
|
Wonder why Allis didn't design the Cover with a flange similar to the later Belt Pulley Delete Cover Plate. G |
Posted By: DSeries4
Date Posted: 14 Jan 2023 at 9:29am
Hi Gary, it's definitely a solid pin. I have all the bolts holding the bolster loosened and I am planning to remove the left side frame rail so I do not have to deal with the belt pulley seal on the right side.. The existing U joint is still very good. No slop in it, so I prefer to keep using it. However I would like to grease it when I get everything apart. I will take a closer look, but I don' t recall seeing a grease zerk... ------------- '49 G, '54 WD45, '55 CA, '56 WD45D, '57 WD45, '58 D14, '59 D14, '60 D14, '61 D15D, '66 D15II, '66 D21II, '67 D17IV, '67 D17IVD, '67 190XTD, '73 620, '76 185, '77 175, '84 8030, '85 6080 |
Posted By: SteveM C/IL
Date Posted: 14 Jan 2023 at 9:48am
| I use a hammer and punch from bottom side on those pins. |
Posted By: IBWD MIke
Date Posted: 15 Jan 2023 at 7:55am
|
I believe those pins are still available from AGCO. My NF u-joint was sloppy so I got some drill rod 1/32" bigger, reamed the hole to size. That tightened things up a lot. |
Posted By: Gary
Date Posted: 15 Jan 2023 at 8:47am
|
Myron Once you get the Universal removed, disassemble it and see if it has grease passages from the centre of the X out to the 4 bearing locations. If not I think you are SOL as far as adding a Zerk. But for the amount you will be driving it, I would just clean and repack. Gary |
Posted By: tom51
Date Posted: 15 Jan 2023 at 9:50pm
| New U- joint inserts are available for DJ’s for less than 20 bucks and they are greasable |
 Gary wrote: