GP bucket overhaul
Printed From: Unofficial Allis
Category: Allis Chalmers
Forum Name: Construction and other equipment
Forum Description: everything else with orange (or yellow) paint
URL: https://www.allischalmers.com/forum/forum_posts.asp?TID=133911
Printed Date: 04 Apr 2026 at 4:21am
Software Version: Web Wiz Forums 11.10 - http://www.webwizforums.com
Topic: GP bucket overhaul
Posted By: DMiller
Subject: GP bucket overhaul
Date Posted: 17 Jan 2017 at 2:21pm
Well I dug the GP out of the mud from the donor, the rebuild process begins and YES, I put those holes in it before you ask. The MP bucket is just too heavy and hard to manage also being about 1/3 less volume.  
|
Replies:
Posted By: DMiller
Date Posted: 24 Jan 2017 at 3:03pm
Used up what gas I had left for Gas Axe but got this far. Inside structure still good, played connect the dots on rub thru holes to cut away the excess scabs. Was three layers OVER the original skin and wear plates, just a mess outside. I get bottles refilled Friday then back at it until I can put it back inside the shop to start dressing for welding. Steel is ordered base plate and wear shoes in AR400.
|
Posted By: LeonR2013
Date Posted: 24 Jan 2017 at 9:42pm
| Are those some grader cutting blades welded on the front of the bucket? |
Posted By: DMiller
Date Posted: 25 Jan 2017 at 1:42pm
| Best I can tell, Yes. They are coming off too! Have a new 1" thick cutting edge awaiting. |
Posted By: david weldon
Date Posted: 25 Jan 2017 at 4:14pm
| are you taking of the 4 in 1 bucket on the 7g to put this on dave ? |
Posted By: LeonR2013
Date Posted: 25 Jan 2017 at 6:21pm
| I tried to use cutting edge off a grader one time. To dang hard for the app. I was using them for and broke real quick. Those things are really hard, but I guess they have to be. |
Posted By: DMiller
Date Posted: 26 Jan 2017 at 3:52pm
| Old Ulrich bucket too dang heavy after using it this long for my purposes. Will keep it available and the lines will still be on the tractor with quick connects. But yes I am putting the GP on it for now. |
Posted By: DMiller
Date Posted: 28 Jan 2017 at 10:06pm
This is why the 4/1 I have is coming off. Six pivot points each side to do what most can with only three, lots of machinery moving and weighing tonnage. Do not understand the thinking on this bucket, why had to be so complex and heavy. Have gotten a bit further on the floor remove.  
|
Posted By: LeonR2013
Date Posted: 29 Jan 2017 at 8:33am
| My O My. That is a heavy bucket isn't it? I guess it would have to be for it's intended use, but I think simpler would be better like you're doing. |
Posted By: DMiller
Date Posted: 29 Jan 2017 at 2:51pm
| Have looked at all sort of 4/1, Multi Purpose and so on buckets, this is the ONLY Ulrich I have ever come across. I do not believe they were all too popular and most probably ended up against a gas axe long ago. Will keep it and if EVER I come to show the old girl at tractor shows will have the heavy critter on it. |
Posted By: HD6 Merv
Date Posted: 29 Jan 2017 at 10:37pm
|
yes can see why your taking it off now Dave. Is a complicated way of doing what most other 4 in 1 buckets do simply. personally I wouldn,t have a track loader unless it had a 4 in 1 bucket. but that design is a definite exception. ------------- tits tyres and tracks they all cost you money |
Posted By: HD6 Merv
Date Posted: 29 Jan 2017 at 10:40pm
My old 933G with how a 4 in 1 bucket should be 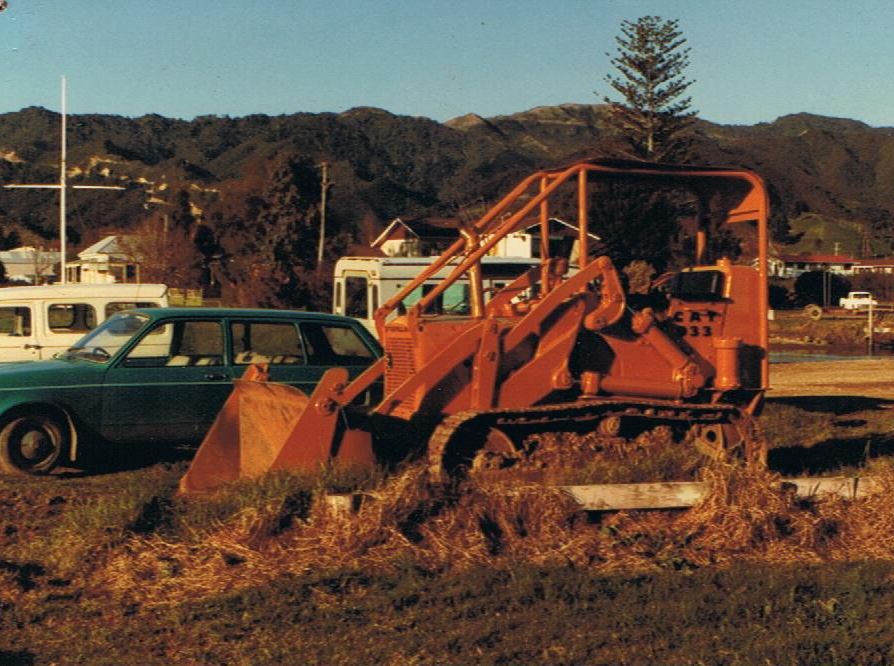 ------------- tits tyres and tracks they all cost you money |
Posted By: DMiller
Date Posted: 30 Jan 2017 at 4:10am
| Had found a older 4/1 off another brand last year, had considered buying it and converting to fit the Allis but just could not bring myself there. Will manage with these two as I get the GP repaired it will be a good light on her toes machine for general work, will have the MP for when I choose to use the heavy beast. |
Posted By: LeonR2013
Date Posted: 30 Jan 2017 at 8:57pm
| You know it just came to me where one of these would be handy. Back in about 1960 I drove a dump truck and moved a lot of dirt. That would have been easy to run up to the truck and open it up and dump. Seems like it would have been a little faster. |
Posted By: JohnCO
Date Posted: 31 Jan 2017 at 12:23am
|
I had a 4 in 1 bucket on an IHC 500E crawler. It was handy for finishing the last few bucket fulls on the truck as you could also open it and use the bucket to push the material over to the other side of the box. They are also handy for pulling fence posts and picking up rocks or broken concrete in demo jobs. The straight blade was useful for pushing material without filling the bucket.
------------- "If at first you don't succeed, get a bigger hammer" Allis Express participant |
Posted By: DMiller
Date Posted: 31 Jan 2017 at 4:02am
| I had to 'open up' the entry to our farm for better visibility determined by MODOT, the Allis worked well even before I swapped transmissions where I was moving dirt off the road edge up to a old Chev 2 1/2 ton dump truck. I did use the 4/1 as noted to top fill and push the load to center and I did use it to pluck a few old wooden posts as well Honey Locust saplings. Only issue was riding hard on the idlers with all the weight up front empty, as well the bucket heaped would barely carry 1 1/2 yards where the GP has a 2 1/4-2 1/2(guessing) capacity |
Posted By: JohnCO
Date Posted: 01 Feb 2017 at 1:14am
|
Wow, D miller, either you were working late last night or up early, 3:02 am!
------------- "If at first you don't succeed, get a bigger hammer" Allis Express participant |
Posted By: DMiller
Date Posted: 01 Feb 2017 at 4:09am
|
Nah, my computer doesn't clock right Is closer to 4:30am right now, never have figured that one out! I am up early, usually by 3:30am when work the day watches, or down late as 7:30am for night watches. Managed to get the remnant cutting edge removed last evening with a section of the bucket moldboard that was so hacked/jacked up along the leading edge I decided to remove and replace it too. That will only be a piece of 3/16" x 12" x 78". Remaining pieces of the old corner bits I will grinder away at the welds to see if can get them off cleaner that way. The next step clean up what I have now and start fitment then welding. |
Posted By: DMiller
Date Posted: 02 Feb 2017 at 4:26am
This is inside for now, bad COLD weather coming for Saturday, did manage to get a few inner bottom welds cut into and overlaid. Still working on the welded, re-welded, over-welded and hacked up corner bits, may just end up using up what gas I have to 'wash' them off the side panels then reload the bottles AGAIN.
|
Posted By: LeonR2013
Date Posted: 02 Feb 2017 at 12:10pm
| Dave I really like the way you're going at it. This is something the new age Operator/farmer doesn't have a clue how to do. This sort of thing was always fun to me. Bu the way my GGM was from Herman. Name of Shelton. |
Posted By: DMiller
Date Posted: 03 Feb 2017 at 6:38pm
| My neighbor worked at L&S for a few years, also taught at Linn, he said he taught mechanic basics for the farm boys but never got this deep into a loader. I have only been in Hermann now for roughly five years, only lived here the last two and love it. Quite a few people have looked at what I get done and just marvel at the capability to swap from carpenter, to tile setter to electrician or mechanic then welder. Just some of the skills I honed or boned up on over the years. |
Posted By: DMiller
Date Posted: 04 Feb 2017 at 5:26pm
Was supposed to warm some today, I believe the weather liars were incorrect again but I did gain a little ground!! Got the side panels hacked away, gave up on saving any part of them and got a few pieces somewhat aligned and tacked in place.  
|
Posted By: david weldon
Date Posted: 05 Feb 2017 at 8:30am
| great bit of work there dave. |
Posted By: DMiller
Date Posted: 05 Feb 2017 at 10:11am
|
Thanks. A lot of fit up to do yet as I get to the cutting edge next. Have to set it and then set the floor to flip the bucket over to finish inside welds. Should be a nice unit once completed. |
Posted By: LeonR2013
Date Posted: 05 Feb 2017 at 2:05pm
| Man that is really looking good. The thing about a carpenter is that if he is a good one, he has to know a little bit about all that other stuff so he can prepare the things he's working on for the next guy. |
Posted By: DMiller
Date Posted: 05 Feb 2017 at 6:18pm
| Ain't that the truth Leon!! |
Posted By: JohnCO
Date Posted: 05 Feb 2017 at 8:00pm
|
Was talking to a friend yesterday at an auction, said he had spent the last couple weeks rebuilding a bucket on their FA wheel loader, said it nowhas more welding rod in it then steel!
------------- "If at first you don't succeed, get a bigger hammer" Allis Express participant |
Posted By: DMiller
Date Posted: 06 Feb 2017 at 4:24am
|
Can get there pretty quick. I have already used five pounds 3/32 7018 rod for tacks, have a few more pounds to set before start in on the full line welds so picked up 30 pound 1/8" 7018. Old moldboard had eroded to 3/16" thick, the side panels are 1/4", the side leading edges will be 1/2" AR400 as will be the cheeks under the low corner cutting edges and the rub shoes on the bottom. Bottom sheet is 3/8" as well AR400. The cutting edge I have is CASE NOS I bought from a local several months ago 1" x 10" x 96" and will be cut down to fit the 78" bucket. |
Posted By: DMiller
Date Posted: 20 Feb 2017 at 6:41pm
A 'little' further along, only wish my welds looked as they did twenty years ago, hands not as steady and eyes not as sharp anymore. Cutting edge is affixed, need to set floor plate and flip it over.  |
Posted By: JohnCO
Date Posted: 20 Feb 2017 at 10:17pm
|
Good work, how much are you paying your self to do this?
------------- "If at first you don't succeed, get a bigger hammer" Allis Express participant |
Posted By: DMiller
Date Posted: 21 Feb 2017 at 4:29am
| NOT near enough!! |
Posted By: DMiller
Date Posted: 21 Feb 2017 at 6:32pm
|
Got hot today as rain set in last night and too wet to set fence. Floor plate is pocket hole cut and tacked onto bucket. 
|
Posted By: Dozer
Date Posted: 22 Feb 2017 at 4:01pm
| That metal is going to try very hard to warp and crack. Be diligent as you weld. Best wishes |
Posted By: DMiller
Date Posted: 22 Feb 2017 at 6:05pm
| Tack it in spots, then move to other side or to center and tack those down, so far is pretty well set to the ribs inside the inner bottom, no warpage of note. |
Posted By: darrel in ND
Date Posted: 23 Feb 2017 at 10:14am
| That's a fine piece of workmanship. I hear what you saying about how beads looked a little better when I guy was younger. My main problem though, is not being able to see like I used to. Sometimes I completely miss the crack where the weld is supposed to be. Darrel |
Posted By: LeonR2013
Date Posted: 24 Feb 2017 at 6:42am
| Dang Darrel, I thought that was just me. That just aggravates the heck out of me. The self darkening helmet helps a little bit. |
Posted By: JohnCO
Date Posted: 24 Feb 2017 at 4:08pm
|
I have the same problem, especially if the sun is behind the helmet. I started putting a bright light onto the area being welded to be able to see the crack better. The wire feed welder sure makes me look like a good welder compared to the stick!
------------- "If at first you don't succeed, get a bigger hammer" Allis Express participant |
Posted By: DMiller
Date Posted: 01 Mar 2017 at 6:15pm
|
This was this weeks progress. DO NOT look too close at the first pass root pass welds, the majority of them will get a second lay over. []  
|
Posted By: DMiller
Date Posted: 08 Mar 2017 at 10:11am
Here is the most current progress, second pass welds are done inside bucket, root passes made to teeth: 
|
Posted By: steve(ill)
Date Posted: 08 Mar 2017 at 9:43pm
|
That is a LOT of welding..........all STICK or you using a wire feed in places ? ------------- Like them all, but love the "B"s. |
Posted By: darrel in ND
Date Posted: 08 Mar 2017 at 9:57pm
| Looking good. Thanks for the progress report. Darrel |
Posted By: JC-WI
Date Posted: 08 Mar 2017 at 10:50pm
|
DMiller, That is a lot of work there to cut the old off and then replace and reweld it all...but it will look great when your done and got it all painted up and lookin like new. ... Was just thinking, it might have been easier to call Mel up and seen if he had a really clean bucket in his parts yard... and gone to California on a trip.  ... But that's a little late to bethinking that thought now... ... But that's a little late to bethinking that thought now...Darrel, Leon, an John, you guys kinda sound like what I am experiencing for the last couple years... an I keep blamin the weld splattered glass in my helmet for not seeing so good. They say there are magnifying lenses to put in your helmets to see better, I got some bifocals for reading which I never use and never think of trying when I am welding either. ------------- He who says there is no evil has already deceived himself The truth is the truth, sugar coated or not. Trawler II says, "Remember that." |
Posted By: DMiller
Date Posted: 09 Mar 2017 at 7:53am
| So far ALL stick welded, E7018. Root passes 3/32", cover passes 1/8". No plasma torch either, all cuts have been done the old fashioned Acetylene and O2 cutting torch 'Gas Axe'. Did buy a new suitcase DC stick/TIG capable welder runs off 240V AC. Nice but expensive and very handy in the shop unlike the old buzz box welders I have had. |
Posted By: LeonR2013
Date Posted: 09 Mar 2017 at 9:32am
| Coming right along there Dave. Looks like you'll have'er done by good dozing time. Mu Hillbilly buddy and I plan on coming down there and do some fishing when the river rises. Come down and we'll swap some lies about fish even if we don't catch any. |
Posted By: DMiller
Date Posted: 09 Mar 2017 at 11:39am

|
Posted By: DMiller
Date Posted: 13 Mar 2017 at 8:09am
Closing in on surgery date for ME. Have the bucket well enough along now to let sit for a while. I have finished these side welds and have flipped it back to the upside down but is also closing in on installing for use.
|
Posted By: DMiller
Date Posted: 12 Apr 2017 at 7:05pm
|
Finish passes completed, bucket set back onto the bottom and paint going on. Have rust converter to use on mold board first leave that dry and then paint it as well. Just rattle cans for now, when finally get to rebuilding the rest of the old girl and making tractor show presentable will use real spray gun and heavy enamel on the whole unit. Not my prettiest work but will do for working.   |
Posted By: JohnCO
Date Posted: 12 Apr 2017 at 9:33pm
|
It may not be as pretty as new but it will do a great job and last a long, long time! Good work, glad you are able to do it again. ------------- "If at first you don't succeed, get a bigger hammer" Allis Express participant |
Posted By: AC Mel
Date Posted: 12 Apr 2017 at 9:59pm
| I concur, looks great!!. Come on out here and you can join our restoration team!! That will make 3 of us.(LOL) |
Posted By: shameless dude
Date Posted: 13 Apr 2017 at 8:10pm
| it looks good to me too! |
Posted By: LeonR2013
Date Posted: 14 Apr 2017 at 9:33am
| Can't them old Missouri boys, right Dave? |
Posted By: DMiller
Date Posted: 14 Apr 2017 at 11:53am
|
Would love to come out that way Mel unfortunately the little woman is kinda stuck on MO!! I watch and admire those rebuilds you guys perform, only wish my little operation was as good! The three of us old MO boys(Me, Myself and I) just do not seem to come up with enough time and money at the same time!
|
Posted By: tadams(OH)
Date Posted: 14 Apr 2017 at 3:43pm
| Looks good don't scratch it up now. |
Posted By: DMiller
Date Posted: 17 Apr 2017 at 5:56pm
|
Another add, quick disconnects on the MP so I can cut it loose fairly easy. Small project when I started, had new hoses and new fittings to replace the old hoses EXCEPT the one fitting I knew size was #12 JIC 3/4", the one I had not taken loose was #14 JIC 7/8" of which good luck finding a fitting #14 to 1" NPT, they do not seem to exist yet do on hose ends. SO, hack the old hose fitting and built my own.  
|