Finally got my WC, some assembly required......
Printed From: Unofficial Allis
Category: Allis Chalmers
Forum Name: Farm Equipment
Forum Description: everything about Allis-Chalmers farm equipment
URL: https://www.allischalmers.com/forum/forum_posts.asp?TID=113417
Printed Date: 19 Mar 2026 at 4:42am
Software Version: Web Wiz Forums 11.10 - http://www.webwizforums.com
Topic: Finally got my WC, some assembly required......
Posted By: littlemarv
Subject: Finally got my WC, some assembly required......
Date Posted: 16 Oct 2015 at 9:23pm
|
Well, I've been looking for an unstyled WC all summer, for my next restoration project. I met a lot of nice people, at tractor shows, and tractor pulls, and on this site, who had a WC or knew someone who did. So I went and checked out quite a few, and learned a lot about the small differences in WC's through the years. Unfortunately, they were all out of my price range. Then forum member macvette told me he knew a guy who has an unstyled WC basket case. This sounds right up my alley. Gave the guy a call, turns out someone gave him the tractor, they started to restore it but gave up halfway through. They gave it to Jerry because he is a scrapper and figured he would get rid of it, that was about 8 years ago. Being a scrapper with some sand, he has a pretty good collection of stuff that he says is "too good to scrap". So, I went over to his house to take a look a few weeks ago. http://s304.photobucket.com/user/rsommer1/media/Mobile%20Uploads/IMG_20151016_085621882_zpsbi6voz8x.jpg.html" rel="nofollow -  http://s304.photobucket.com/user/rsommer1/media/Mobile%20Uploads/IMG_20151016_091247362_zpsryvdgxpq.jpg.html" rel="nofollow -  Isn't it a beaut? The engine is out, and completely torn apart. He says the block is in here... http://s304.photobucket.com/user/rsommer1/media/Mobile%20Uploads/IMG_20151016_104830907_zpscd6wfl77.jpg.html" rel="nofollow -  And most of the parts should be in here somewhere... http://s304.photobucket.com/user/rsommer1/media/Mobile%20Uploads/IMG_20151016_104804577_zpstyrgzlez.jpg.html" rel="nofollow -  We looked around for quite some time, couldn't find the air cleaner, manifold, steering wheel, hood, fuel tank, or radiator. But, it does have good round spoke rims, fenders in good shape, six bolt front rims, and four brand new cylinder kits still in the boxes. He said the guy had some engine work done, the crank is wrapped in shrink wrap from the engine shop. So, the long drawn out bargaining process went something like this: "How much?" "Give me good scrap price." "Scrap ain't worth squat right now." "Then it can sit until scrap goes back up." Boy, he's got me over a barrel! "O.K." There. Its settled. He said I cold come back, we will dig the tractor out, search for parts, and anything Allis goes with the tractor. As I was driving out there this morning, I was thinking I must be nuts. Buying a basket case with no tires, barely over half the engine, no radiator, I'm going to be so far into this tractor just to get it running. Oh well, this is my hobby.... So, we took all the trailer axles off and stacked them neatly nearby, http://s304.photobucket.com/user/rsommer1/media/Mobile%20Uploads/IMG_20151016_091258318_zpsgbhqximc.jpg.html" rel="nofollow -  http://s304.photobucket.com/user/rsommer1/media/Mobile%20Uploads/IMG_20151016_091309613_zpsbrmntnkv.jpg.html" rel="nofollow -  Then the fun part, wiggling it out of the back 40, http://s304.photobucket.com/user/rsommer1/media/Mobile%20Uploads/IMG_20151016_092713493_zps4bxzaeh7.jpg.html" rel="nofollow -  http://s304.photobucket.com/user/rsommer1/media/Mobile%20Uploads/IMG_20151016_095722576_zpsfwtwywyu.jpg.html" rel="nofollow -  http://s304.photobucket.com/user/rsommer1/media/Mobile%20Uploads/IMG_20151016_095837238_zpsimstzy7a.jpg.html" rel="nofollow -  While we were towing it, I popped it into a gear or two, the input shaft started turning, and the straight cut gears made the familiar groaning sound, so at least I know that much about the trans and finals. I dug the block out of the junk pile, he made me put the pile back together. I thought that was pretty funny. http://s304.photobucket.com/user/rsommer1/media/Mobile%20Uploads/IMG_20151016_104841563_zpscvqrs8q7.jpg.html" rel="nofollow -  We hauled everything out of the shed we could find, and laid it out. As we were working, he says "You know, there is a hood over there, it's orange, but I don't know what it fits. Its got a distillate tank on it, want to take a look?" YES. http://s304.photobucket.com/user/rsommer1/media/Mobile%20Uploads/IMG_20151016_173923817_zpsove3ffxc.jpg.html" rel="nofollow -  SCORE. Little while later he says "You know, there is a manifold in the shed over there but I don't know what it fits. Want to take a look?" YES. http://s304.photobucket.com/user/rsommer1/media/Mobile%20Uploads/IMG_20151016_205336579_zps1pu2bzob.jpg.html" rel="nofollow -  SCORE. Then we went and stripped the parts off the WD I thought I could use. Head, rockers, push tubes, side cover, fan blade, belt pulley, and PTO. He threw in some shutters that he doesn't know what they fit, another valve cover and set of rockers, and some other stuff. Made for a pretty good load. http://s304.photobucket.com/user/rsommer1/media/Mobile%20Uploads/IMG_20151016_150345536_HDR_zpsnx2nsxr5.jpg.html" rel="nofollow -  Scrambled back to town in time to pick the boy up from school, he made me promise to bring the tractor to school. He needed to help unload it. http://s304.photobucket.com/user/rsommer1/media/Mobile%20Uploads/IMG_20151016_150325687_HDR_zpszgaqhcql.jpg.html" rel="nofollow -  http://s304.photobucket.com/user/rsommer1/media/Mobile%20Uploads/IMG_20151016_150859350_zpsjlugknto.jpg.html" rel="nofollow -  Tagged and bagged everything I took apart today, so I know where it goes. http://s304.photobucket.com/user/rsommer1/media/Mobile%20Uploads/IMG_20151016_171710304_zpsedkbvyzu.jpg.html" rel="nofollow -  So there. Got my project, and made a new friend to boot. He wants me to do a little work on his WD, and he has a jig for welding rims on spoke wheels, which I have been meaning to make to convert my steel wheeled plow to rubber. He is a pretty funny guy, same age as my dad, and acts and thinks just like him. Glad I got to spend the day with him, and I think he had a good time too. I gave him an Allis Connection calendar, and some venison snack sticks, I think he was more pleased with those than with the money! My plan is to clean up the block and see if its been line bored, then build the engine over the winter, then next spring, get started on the tractor, maybe ready for paint next fall? Thanks for looking! ------------- The mechanic always wins. B91131, WC23065, WD89101, CA29479, B1, Early B10, HB212, 416H |
Replies:
Posted By: Dan73
Date Posted: 16 Oct 2015 at 9:34pm
| Wow that is a really cool story you got there. Looks like you have some work ahead of you. I bet you and your son build some great memories along with a great tractor. Keep us posted. |
Posted By: Chalmersbob
Date Posted: 16 Oct 2015 at 9:34pm
|
GOOD FIND Enjoy working on it. Great project for you and your son to work on together. Bob
------------- 4 B's, 1 C's,3 CA's, 2 G's WD, D14, D15, B-1, B10, B12, 712S, |
Posted By: Dmpaul89
Date Posted: 16 Oct 2015 at 9:39pm
| Wow what an interesting story lol. Looks like you have your work cut out. sounds like one of my deals |
Posted By: macvette
Date Posted: 16 Oct 2015 at 9:39pm
| Well, how bout that. Man and machine finally meet. Quite a project. Thank goodness you are a mechanic! |
Posted By: Steve in NJ
Date Posted: 16 Oct 2015 at 10:43pm
|
Only Tractor guys like us can find a carcass and take on the challenge of putting it together and getting it running from scrap! Good luck with your project. I'm sure it'll be a challange as well as fun to put it together. That's pretty funny. Parts over here, parts over there, and parts in the scrap pile! LOL!
------------- 39'RC, 43'WC, 48'B, 49'G, 50'WF, 65 Big 10, 67'B-110, 75'716H, 2-620's, & a Motorhead wife |
Posted By: B26240
Date Posted: 17 Oct 2015 at 6:47am
| littlemarv I have two extra gas tanks for the unstyled wc's you are welcome to one of them your choice FREE !! Anyone who will take on a challenge like you are doing should get some help from those of us with miss. parts collecting dust. BTW I'm just north of Grand Rapids MN 100 miles from Duluth. May have other small items if I look around. Mark |
Posted By: TedBuiskerN.IL.
Date Posted: 17 Oct 2015 at 7:05am
|
The seat on your tractor looks like a Knoedler after market. Rides much better than a stock seat and is easily adjustable for the weight of the rider. ------------- Most problems can be solved with the proper application of high explosives. |
Posted By: Hubnut
Date Posted: 17 Oct 2015 at 7:19am
|
I love it! AND, more importantly, I'm glad others are as nuts as I am about this hobby. Sometimes I wonder if I'm crazy for working on old tractors all weekend long--but I simply LOVE the hobby and relax while doing it. Thank you for the post and keep us updated. |
Posted By: ac45dave
Date Posted: 17 Oct 2015 at 7:40am
WOW!!!what a find and story.love to follow this kind of post.please by all means keep us all updated on the progress of this project.like to see lots of pics of the progress.   ------------- 54 wd-45gas ; 56 wd-45d N/F w/fact p/s ; 63 d-17 sIII N/F gas ; 60 D14 N/F ; 67 d-17 sIV N/F gas ; 63D15 sII W/F; 39rc#667 ; 2021 massey 4710 fwa ; gravely 2 wheel tractors |
Posted By: KenBWisc
Date Posted: 17 Oct 2015 at 8:11am
|
I have the correct seat and a few other parts if you need them. And, you know where I live!
------------- '34 WC #629, '49 G, '49 B, '49 WD, '62 D-19, '38 All Crop 60 and still hunting! |
Posted By: grateful1micelf
Date Posted: 17 Oct 2015 at 9:12am
very cool find. that will be so rewarding as you go and in the end to see the progress as you bring that thing back to life. can't wait to see some more pics. 
------------- 1955 WD45 (1st and only tractor i've owned..for now) |
Posted By: Alberta Phil
Date Posted: 17 Oct 2015 at 9:34am
| Great project and a good story! As Steve mentioned, old tractor guys and hot rodders can usually see treasure where others see only junk!! |
Posted By: Fred in Pa
Date Posted: 17 Oct 2015 at 9:36am
|
U are a PICKER ------------- He who dies with the most toys is, nonetheless ,still dead. If all else fails ,Read all that is PRINTED. |
Posted By: FloydKS
Date Posted: 17 Oct 2015 at 10:02am
|
and when you get the tractor going you will be a 'grinner' pickin and grinnin ------------- Holding a grudge is like taking poison and expecting the other person to die |
Posted By: Steve in NJ
Date Posted: 17 Oct 2015 at 11:27am
Well, you see Doc, this guy had this scrap WC, and I couldn't help myself.....  I remember when my buddy Tom and I pulled "Alice" my Model B outta' the Adirondack woods and literaly dragged it down the mountain in the snow (back brakes had ice in them) with his Kobota 4x4 and all the way down the timber road to his house. The right brake broke loose on the way, but the left one was still draggin' by the time we got to his farm. It was February and it was a warm spell up there in the mountains at about 12 degrees. If anyone though that I was outta' my mind, it was my ex-wife at the time! She thought the two of us should have our heads examined. Put a Salamader heater on the left fiinal and went in for lunch. Came out, and the final warmed up enough to push it in his 5 bay garage. Talk about the start of a challenge! My first Tractor, and I had a ball doing it. Motor was stuck tighter than a crabs butt, but got it apart and rebuilt the whole darn Tractor. The following summer, I took my skeptical wife at the time for a ride on it. She really didn't have anything to say that time. That was 16 years ago already, and still have "Alice". JoAnna on the other hand is a 180 degree's. When I bring home a carcass, she wants to know when its gonna be done so she can rip around on it! Being she's a collector herself, she can appreciate that there is a "gem" there once some TLC is put into it. She's seen a few of these "projects" of mine come together over the past 6-7 years and can't get over the outcome of them. It sure helps when you have the support as well as interest in your hobbies from your spouse!! This wife is a keeper! I remember when my buddy Tom and I pulled "Alice" my Model B outta' the Adirondack woods and literaly dragged it down the mountain in the snow (back brakes had ice in them) with his Kobota 4x4 and all the way down the timber road to his house. The right brake broke loose on the way, but the left one was still draggin' by the time we got to his farm. It was February and it was a warm spell up there in the mountains at about 12 degrees. If anyone though that I was outta' my mind, it was my ex-wife at the time! She thought the two of us should have our heads examined. Put a Salamader heater on the left fiinal and went in for lunch. Came out, and the final warmed up enough to push it in his 5 bay garage. Talk about the start of a challenge! My first Tractor, and I had a ball doing it. Motor was stuck tighter than a crabs butt, but got it apart and rebuilt the whole darn Tractor. The following summer, I took my skeptical wife at the time for a ride on it. She really didn't have anything to say that time. That was 16 years ago already, and still have "Alice". JoAnna on the other hand is a 180 degree's. When I bring home a carcass, she wants to know when its gonna be done so she can rip around on it! Being she's a collector herself, she can appreciate that there is a "gem" there once some TLC is put into it. She's seen a few of these "projects" of mine come together over the past 6-7 years and can't get over the outcome of them. It sure helps when you have the support as well as interest in your hobbies from your spouse!! This wife is a keeper! ------------- 39'RC, 43'WC, 48'B, 49'G, 50'WF, 65 Big 10, 67'B-110, 75'716H, 2-620's, & a Motorhead wife |
Posted By: JC-WI
Date Posted: 17 Oct 2015 at 1:13pm
|
Littlemarv, i see you have a WD flywheel and ring gear... now do yourself a favor, go back and get the starter bell housing and be able to electric start the tractor when you decide cranking isn't as much fun, and far safer using a switch. good luck on your project. ------------- He who says there is no evil has already deceived himself The truth is the truth, sugar coated or not. Trawler II says, "Remember that." |
Posted By: Sugarmaker
Date Posted: 17 Oct 2015 at 1:33pm
|
Awesome story and pictures of a tractor that was so close to being gone! Rescued! Yes you will spend a bunch getting it back together and you may need to buy a parts tractor. Most of the tearing down is already done! Yes post pictures as you get it home and start the process. I have never done one with so many parts not accounted for. It always seems to me I need that one little thing. I love having a parts tractor around too! Regards, Chris ------------- D17 1958 (NFE), WD45 1954 (NFE), WD 1952 (NFE), WD 1950 (WFE), Allis F-40 forklift, Allis CA, Allis D14, Ford Jubilee, Many IH Cub Cadets, 32 Ford Dump, 65 Comet. |
Posted By: Tim NH
Date Posted: 17 Oct 2015 at 4:15pm
Hey littlemarv. I could tell last summer you were hot for a WC when you and your son went by on this borrowed WC. If you remember, it wasn't to long after I took the picture, that electric start would have been nice to have. Its going to be a lot of work, but you've got help. Tim ------------- 1950 WD 1959 D14 1955 WD45 1976 7000 B 207 |
Posted By: Sugarmaker
Date Posted: 17 Oct 2015 at 5:30pm
|
Love the picture! A little buffing and the one you pulled from the junk pile will look like that too! Regards, Chris ------------- D17 1958 (NFE), WD45 1954 (NFE), WD 1952 (NFE), WD 1950 (WFE), Allis F-40 forklift, Allis CA, Allis D14, Ford Jubilee, Many IH Cub Cadets, 32 Ford Dump, 65 Comet. |
Posted By: Alex09(WI)
Date Posted: 17 Oct 2015 at 8:08pm
|
We have seen the before picture, and I'm sure we all will be looking forward to the "after" picture. Glad to hear it is going back together and not to China! Good luck with the tractor!
------------- www.awtractor.com A&W TRACTOR 920-598-1287 KEEPING ALLIS-CHALMERS IN THE FIELDS THROUGH THE 21ST CENTURY |
Posted By: littlemarv
Date Posted: 18 Oct 2015 at 7:31am
|
When I got to drive that WC at Hutch, I said "That's it. I WILL have one of these". As you can see in the unloading pic, I picked up the plow already. Thanks for all the advice guys, I really appreciate it. I'm going to try and get as close to original as I can, but it won't be perfect, so correct police can shake their heads and waggle their fingers, I don't care. Sugarmaker and I think alike- its already taken apart! I was going to do that anyways, now I don't have to. Just gotta clean and measure everything, and the engine should go together pretty good. I'm pretty excited to get going on this, but before I go get the chrome lug nuts caps to finish it off, I should probably see if the crank fits in the block, huh? My plan goes like his: Engine work and all other small items over the winter. Replace trans input seal and install engine and radiator in spring. Get tractor operational and list all needed parts so I have a shopping list at Hutch, my best bet for getting all parts at once. Then tear down and paint about this time next year. Pretty presumptuous,huh? I will keep you guys up to speed, don't worry. I have questions about stuff from the hand crank to the drawbar, and all points in-between. Thanks for looking! ------------- The mechanic always wins. B91131, WC23065, WD89101, CA29479, B1, Early B10, HB212, 416H |
Posted By: Dan73
Date Posted: 18 Oct 2015 at 7:37am
| Great plan but I agree with the guys staying to look for the way to add a starter. Those hand cranks scare me. I love the old tractors but my grandfather always said if it doesn't have a starter pull it with one that does. |
Posted By: Redwood
Date Posted: 18 Oct 2015 at 7:58am
| Just a word on one of my regrets, is cleaning an rust removal. I wish I had sent the whole thing to a sand blaster. I have nearly as much invested in sand paper, wire wheels, degreaser, cleaner thinner, rags,ect. And be the time I find enough time from work I need more rust removal to be able to paint. If I had sent it for rust removalI could have primed the whole thing in a fraction of the time for not much more. And yes every time you spend ten or twenty dollars it adds up. every trip to the hardware store is 50 or 60. But that is my regret others my feel different and my have more time. Just started painting. Will be some time before assembly |
Posted By: GaryL
Date Posted: 18 Oct 2015 at 9:47am
| I still have some bits and pieces left over from a parted WC and need to post more pics of the other small parts. So, you can keep that in mind, if needed. |
Posted By: Gerald J.
Date Posted: 18 Oct 2015 at 10:40am
|
You will need parts book, shop manual, and operator's manual. Find them on line at: http://www.grandpastractor.com/kunena/allis-chalmers-tractors.html" rel="nofollow - http://www.grandpastractor.com/kunena/allis-chalmers-tractors.html Gerald J. |
Posted By: HudCo
Date Posted: 18 Oct 2015 at 11:04am
| great story, those projects are the best those fenders look cherry |
Posted By: Sugarmaker
Date Posted: 18 Oct 2015 at 6:09pm
|
Yea that WC that Gary L has would be a great parts tractor. The cleaning on these projects is a major task. And I agree that if you can get some of the parts blasted it can save you bunches of time and dollars. And is better than you can clean them too. I used blasting for rear rims. I would suggest that you look at a electrolysis tank for cleaning rust too. Its a much slower process but the cost is low. Regards, Chris ------------- D17 1958 (NFE), WD45 1954 (NFE), WD 1952 (NFE), WD 1950 (WFE), Allis F-40 forklift, Allis CA, Allis D14, Ford Jubilee, Many IH Cub Cadets, 32 Ford Dump, 65 Comet. |
Posted By: littlemarv
Date Posted: 18 Oct 2015 at 7:18pm
|
I put the front end up on a stand I made for splitting a WD awhile back. Put the back up on blocks to keep the rims off the ground. I think I will crack the drain plugs on the trans and rear end to drain off any water, and cover up the shift tower somehow as the boot is junk. Then I will consider this chassis winterized. http://s304.photobucket.com/user/rsommer1/media/Mobile%20Uploads/IMG_20151018_180836161_HDR_zpsazabscrd.jpg.html" rel="nofollow -  Is this hitch a common aftermarket thing, or a different Allis hitch, or a really good homemade one? http://s304.photobucket.com/user/rsommer1/media/Mobile%20Uploads/IMG_20151018_175821180_zpsctxmdd2f.jpg.html" rel="nofollow -  I will probably start a new post on the engine build, thanks for all the help so far! ------------- The mechanic always wins. B91131, WC23065, WD89101, CA29479, B1, Early B10, HB212, 416H |
Posted By: Ted J
Date Posted: 19 Oct 2015 at 6:52am
|
WOW!!! What a story and a GOOD time and a GREAT FIND!! Have a great time with your son working on this and building memories.... I agree, what a laugh! Parts over here and over here and...... Keep us up to date and with pics!! I've never seen a hitch like that one, but then I haven't see too many unstyled WCs. ------------- "Allis-Express" 19?? WC / 1941 C / 1952 CA / 1956 WD45 / 1957 WD45 / 1958 D-17 |
Posted By: Dusty MI
Date Posted: 19 Oct 2015 at 7:05am
|
Try some oven cleaner for cleaning it. Spray it on, let sit for a while, then was off with water. ------------- 917 H, '48 G, '65 D-10 series III "Allis Express" |
Posted By: allisguy.11
Date Posted: 19 Oct 2015 at 8:17am
| original tires! nice! |
Posted By: Bill Long
Date Posted: 19 Oct 2015 at 2:44pm
|
The Flat Top WC is the first tractor my father sold. I almost got it back - wish I had - but at the time was not really interested and then it was painted BLUE. My congratulations on your persistence. You saved another one. Thanks for keeping the name of Allis Chalmers alive. I would be delighted to see the progress. Good Luck! Bill Long |
Posted By: WC7610
Date Posted: 20 Oct 2015 at 9:12am
|
Nice project.
Another vote for changing the bell housing out for an electric start- if you hate the electric start you can always switch them back..
Also agreed you need parts book and service manual- invaluable. The sponsors on the site are all great for parts.
Keep posting updates! ------------- Thanks Most Bad Government has grown out of Too Much Government- Thomas Jefferson |
Posted By: littlemarv
Date Posted: 31 Jan 2016 at 9:43pm
|
Alright, I've been meaning to update this post for a few MONTHS now..... Been taking parts to work with me, and cleaning a little every day. Spent a couple hours on the block, first and foremost. Cleaned all the machined surfaces, and chased every bolt hole with a tap. http://s304.photobucket.com/user/rsommer1/media/Mobile%20Uploads/IMG_20151031_220749063_HDR_zpsxapnrlag.jpg.html" rel="nofollow -   So, that cleaned up real nice. Just need to pull the cam bearings and the block can get baked and blasted. I talked it over with the engine machine shop in town, cracks up top are no big deal. Cleaning and stacking parts.... http://s304.photobucket.com/user/rsommer1/media/Mobile%20Uploads/IMG_20151104_205259181_zpscsgbvvh7.jpg.html" rel="nofollow -  Cleaned up the governor,  http://s304.photobucket.com/user/rsommer1/media/Mobile%20Uploads/IMG_20151115_163821136_zpsgxpoqykq.jpg.html" rel="nofollow - B26240 set me up with two fuel tanks, I just had to ship them down here. One has a dent in it, my plan is to clean them both up, use one for my tractor, and pass along the other one to someone who needs it. http://s304.photobucket.com/user/rsommer1/media/Mobile%20Uploads/IMG_20151207_145602622_zpsjip48xez.jpg.html" rel="nofollow -  Took apart the oil pump, all looks good inside, made up some fittings to test the oil pump and the gauge, put some paper towels over the gear, pushed a 12 point socket over it, and spun it with my electric impact in a bucket of oil. 30 psi no problem. http://s304.photobucket.com/user/rsommer1/media/Mobile%20Uploads/IMG_20151211_091426556_zpsgxpdkolk.jpg.html" rel="nofollow -  http://s304.photobucket.com/user/rsommer1/media/Mobile%20Uploads/IMG_20151211_122256124_HDR_zpsgzhk7lhs.jpg.html" rel="nofollow -  Took the water pump cover off, hit the abort button on this one pretty quick, just going to get a new one. http://s304.photobucket.com/user/rsommer1/media/Mobile%20Uploads/IMG_20151213_152016372_HDR_zpsgc1fgood.jpg.html" rel="nofollow -  Stripped the head down, http://s304.photobucket.com/user/rsommer1/media/Mobile%20Uploads/IMG_20151227_212556832_zpsjvgrmtj6.jpg.html" rel="nofollow -  http://s304.photobucket.com/user/rsommer1/media/Mobile%20Uploads/IMG_20151227_212622943_zpseqdhmlwh.jpg.html" rel="nofollow -  The valve stems look O.K. for reuse, may be able to get away with guides and springs and a grind? Need to take the head in for that part. Strangely enough, I never took a picture of the crank after I cleaned it. It was laying on the dirt floor wrapped in plastic from the engine shop. Unwrapped it, polished a tiny bit of surface rust off it, and measured it. Mains 0.020" undersize, rods 0.030" undersize. The cam bearing journals measure about 0.0015" under spec. In the manual, it says there are special 0.002" undersize bearings available. Called Norm Meinert, sure enough, he has a few sets. So, he hooked me up with a complete gasket set, rods, mains, and cam bearings. http://s304.photobucket.com/user/rsommer1/media/Mobile%20Uploads/IMG_20151227_212801571_zpsmnr9a7ms.jpg.html" rel="nofollow -  Alright, running out of room. Time to add another shelf under the table for more storage... http://s304.photobucket.com/user/rsommer1/media/Mobile%20Uploads/IMG_20151227_212654394_zpsinbkjq4n.jpg.html" rel="nofollow -  Mini me helped pull the cam bearings. I though he would get a bang out of pulling them, they were in there so tight I had him sit on the block while I used an 18" crescent wrench to turn the puller. Guess they've been in there way longer than I've been alive.... http://s304.photobucket.com/user/rsommer1/media/Mobile%20Uploads/IMG_20151221_174515252_HDR_zpselabcpcv.jpg.html" rel="nofollow -  http://s304.photobucket.com/user/rsommer1/media/Mobile%20Uploads/IMG_20151221_174722551_zpseonk7hkg.jpg.html" rel="nofollow -  Took the block and rods in to Carquest, they have an engine machine shop right here in town. Line bore the mains, size four rods and check for twist, and bake and blast the block. Pretty amazing how the block cleaned up. http://s304.photobucket.com/user/rsommer1/media/Mobile%20Uploads/IMG_20160129_153616125_zpswklox73s.jpg.html" rel="nofollow -  http://s304.photobucket.com/user/rsommer1/media/Mobile%20Uploads/IMG_20160129_211755710_zpspaxcmkdf.jpg.html" rel="nofollow -  http://s304.photobucket.com/user/rsommer1/media/Mobile%20Uploads/IMG_20160129_214730683_HDR_zpszmrdo3ou.jpg.html" rel="nofollow -  The rear rims are in great shape. The old rotten tires were folded up under the rims, so the rims were never on the ground. Took them off, got them sandblasted and primed. http://s304.photobucket.com/user/rsommer1/media/Mobile%20Uploads/IMG_20151213_104133045_zpszx9zxrl9.jpg.html" rel="nofollow -  More to come.... Thanks for looking! ------------- The mechanic always wins. B91131, WC23065, WD89101, CA29479, B1, Early B10, HB212, 416H |
Posted By: Sugarmaker
Date Posted: 01 Feb 2016 at 8:14am
|
OH MY Goodness! What great progress on the engine work! Glad you have your son helping. Thanks for posting the up date on the WC. Based on what I see its coming along nicely. Good documentation. Regards, Chris ------------- D17 1958 (NFE), WD45 1954 (NFE), WD 1952 (NFE), WD 1950 (WFE), Allis F-40 forklift, Allis CA, Allis D14, Ford Jubilee, Many IH Cub Cadets, 32 Ford Dump, 65 Comet. |
Posted By: GaryL
Date Posted: 01 Feb 2016 at 8:17am
| ^^ What Chris said. |
Posted By: ac45dave
Date Posted: 01 Feb 2016 at 10:27am
|
I like these kinds of posts.keep the updates and pics comming ------------- 54 wd-45gas ; 56 wd-45d N/F w/fact p/s ; 63 d-17 sIII N/F gas ; 60 D14 N/F ; 67 d-17 sIV N/F gas ; 63D15 sII W/F; 39rc#667 ; 2021 massey 4710 fwa ; gravely 2 wheel tractors |
Posted By: Jim Hancock
Date Posted: 01 Feb 2016 at 11:34am
|
Looking good! ------------- How blessed we are by HIS GRACE! |
Posted By: littlemarv
Date Posted: 28 Feb 2016 at 11:30pm
|
Building up my parts inventory.... Picked up what I believe to be the correct carb. Says Zenith 7078 on the tag, but apparently its a 124 1/2 model B series. Got some parts coming from Steve at B&B. http://s304.photobucket.com/user/rsommer1/media/Mobile%20Uploads/IMG_20160201_172628237_HDR_zpszer6rn7z.jpg.html" rel="nofollow -  Got a set of spoke front wheels from member oldorangeiron. Took off my six bolt fronts and got them blasted and primed. http://s304.photobucket.com/user/rsommer1/media/Mobile%20Uploads/IMG_20160205_080116904_zpspyuiqiab.jpg.html" rel="nofollow -  Found some 16" car tires laying around, put those on the dished rims, to put on the tractor in the meantime. My plan is to get the tractor up and running, make sure everything works and take care of any leaks, then put the spokes on when I paint it. Not sure if the tires are even going to fit, they are a little wide compared to a 6.50 by 16 tri rib. http://s304.photobucket.com/user/rsommer1/media/Mobile%20Uploads/IMG_20160228_175823774_zpszffb3tsa.jpg.html" rel="nofollow -  Alex09 helped me out with a radiator. The fins need a little TLC, but it should clean up O.K. http://s304.photobucket.com/user/rsommer1/media/Mobile%20Uploads/IMG_20160228_212700866_zps6p6uxaqa.jpg.html" rel="nofollow -  Whats the tube on the back side for? It goes up into the top tank and theres a cap type thing on top of it, just under the radiator cap. Would that be an overflow tube?  http://s304.photobucket.com/user/rsommer1/media/Mobile%20Uploads/IMG_20160228_212637739_zpsppowtykz.jpg.html" rel="nofollow - http://s304.photobucket.com/user/rsommer1/media/Mobile%20Uploads/IMG_20160228_212637739_zpsppowtykz.jpg.html" rel="nofollow -
------------- The mechanic always wins. B91131, WC23065, WD89101, CA29479, B1, Early B10, HB212, 416H |
Posted By: B26240
Date Posted: 29 Feb 2016 at 6:16am
| Hi Marv; Yes that's the overflow tube. Great progress I'm happy to be a small part of this project, specially when I see the picture of your son helping out. Looking forward to future updates !! Mark |
Posted By: wdtom
Date Posted: 29 Feb 2016 at 10:06am
| Just take one part at a time, and don't rush it. Depending on how much time you have to work on it it could take you a few years, but you have saved another orange one! And the fenders look great too! There are a couple of parts you won't have to look for or do much too. Good luck on your new tractor. |
Posted By: CTuckerNWIL
Date Posted: 29 Feb 2016 at 10:27am
|
Great job with this. I used a battery charger and water to clean most of my WC smaller parts. The block looked almost as good as yours after 2 weeks in a 55 gallon plastic barrel. It looks like you are about 3years into the restoration by comparison to my project  ------------- http://www.ae-ta.com" rel="nofollow - http://www.ae-ta.com Lena 1935 WC12xxx, Willie 1951 CA6xx Dad bought new, 1954WD45 PS, 1960 D17 NF |
Posted By: littlemarv
Date Posted: 29 Feb 2016 at 2:25pm
|
So if that is the overflow tube, is this a non pressurized system? ------------- The mechanic always wins. B91131, WC23065, WD89101, CA29479, B1, Early B10, HB212, 416H |
Posted By: allischalmerguy
Date Posted: 29 Feb 2016 at 8:51pm
|
Mini Me is blessed to have a Dad who is a Mechanic and he can grow up learning all this! My Dad was not a mechanic. ------------- It is great being a disciple of Jesus! 1950 WD, 1957 D17...retired in Iowa, |
Posted By: littlemarv
Date Posted: 10 Apr 2016 at 12:29am
|
Took the carb apart and dunked it in the carb cleaner overnight. Everything came so clean I could have probably just put it back together, but Steve at B&B hooked me up with a rebuild kit, so I put new parts in. http://s304.photobucket.com/user/rsommer1/media/Mobile%20Uploads/IMG_20160306_193658813_HDR_zps9fpqsvk2.jpg.html" rel="nofollow - http://s304.photobucket.com/user/rsommer1/media/Mobile%20Uploads/IMG_20160306_192933387_HDR_zpsbjrp5ew8.jpg.html" rel="nofollow -  http://s304.photobucket.com/user/rsommer1/media/Mobile%20Uploads/IMG_20160306_192926642_HDR_zpsqgmm3uzq.jpg.html" rel="nofollow -  One thing I learned pretty quick, is when you are monkeying with carbs, you HAVE to have a screwdriver that fits tight in the brass seats down in the carb. Ground this one down when I did a couple of Briggs carbs, worked good for this one as well. http://s304.photobucket.com/user/rsommer1/media/Mobile%20Uploads/IMG_20160315_223458585_zpsowj9b3fh.jpg.html" rel="nofollow -  Wasn't sure on the float height cause it didn't match the instructions, sent a quick email to Steve and he says it looks good. http://s304.photobucket.com/user/rsommer1/media/Mobile%20Uploads/IMG_20160314_212609631_zpsc2gbanpu.jpg.html" rel="nofollow -  Picked up a mag off ebay for $25. Said it didn't turn and no spark. So, I took a chance on it. It turns just fine, they must not have tried too hard to get it past the impulse. I grabbed a spark plug wire set and some plugs, bolted it up to a spare governor assembly, and chucked it in my 1/2" drill. No spark. I'm no expert on these things, but I think the missing rotor may have something to do with it. http://s304.photobucket.com/user/rsommer1/media/Mobile%20Uploads/IMG_20160306_203513707_HDR_zpsig8egyk9.jpg.html" rel="nofollow -  Popped the rest of the back cover off. The tar or whatever leaked out of the coil and man does that STINK! So, a few new parts are in order here... http://s304.photobucket.com/user/rsommer1/media/Mobile%20Uploads/IMG_20160306_201920246_zps608yqwsl.jpg.html" rel="nofollow -  http://s304.photobucket.com/user/rsommer1/media/Mobile%20Uploads/IMG_20160306_201932526_zpsijnx9wav.jpg.html" rel="nofollow -  Ken hooked me up with a seat and backrest bracket, Alex 09 had a seat spring, to get the seat back to original. Just need the backrest yet. http://s304.photobucket.com/user/rsommer1/media/Mobile%20Uploads/IMG_20160326_165535924_HDR_zpshgd42tfn.jpg.html" rel="nofollow -  SO, slowly but surely. More to come.... ------------- The mechanic always wins. B91131, WC23065, WD89101, CA29479, B1, Early B10, HB212, 416H |
Posted By: B26240
Date Posted: 10 Apr 2016 at 6:24am
| Marv; great progress!! Steiner tractor parts sells the backrest for the seat if you can't find one elsewhere. When it comes time be sure to take pictures of getting the motor out of the basement of your house, as many of us are wondering how that's going to happen. I love seeing your son helping some on this. Mark |
Posted By: LeonR2013
Date Posted: 10 Apr 2016 at 6:41am
| You know Little Marv when those first pics. came up I thought, "What has this boy gotten himself into"? Then when you got all the junk cleaned off it I saw real possibilities here. When you found all the parts at the junk yard including the crank, head, liner kits, the big money parts, you were on your way. Plus friends that have contributed parts or sold you at a very reasonable cost, I don't think you will have any more in it than one that is a non-runner. Plus with your name=mine=oldest son=my father you've got four generations right there to finish it. YAH. GIT'ER DONE. Leon R Cmo LOL |
Posted By: Sugarmaker
Date Posted: 10 Apr 2016 at 9:29am
|
Marv, Awesome pictures and congratulations for your post being moved to the AC forum knowledge base of information! This restoration work and documentation on the WC will be a inspiration for many others! Thanks for taking the time to help AC folks! Regards, Chris ------------- D17 1958 (NFE), WD45 1954 (NFE), WD 1952 (NFE), WD 1950 (WFE), Allis F-40 forklift, Allis CA, Allis D14, Ford Jubilee, Many IH Cub Cadets, 32 Ford Dump, 65 Comet. |
Posted By: alleyyooper
Date Posted: 10 Apr 2016 at 11:32am
|
I was at a JD dealer looking for a stock Antique pulling tractor. They had a styled WC with a strange set up for electric starting. A bracket was mounted to the frame rail above the belt pulley. In that frame was a regular engine starter with the nose and gears removed. In there place was a small flat belt pulley about 4 inch's in dia. there was a flat belt around the belt pulley and back up to that starter. Engage the belt pulley run the starter engine starts disengage that belt pulley slip the belt off and you could do belt work with it. To this day I kick my self for not getting a picture of the set up I thought it was so different. It was back in the day before Digital cameras too.  Al Al
|
Posted By: Bill Long
Date Posted: 10 Apr 2016 at 4:17pm
|
The first tractor Allis Chalmers tractor my father sold was a Flat Top WC in the 30's. From that I have a special affection for them. Let me wish you the very best on your restoration efforts. I commend you for taking the challenge of a such a difficult project. I remember the pictures of Fred Wilke getting his Waukesha WC. It was in parts similar to your and now it is one of the prized displays of his collection. Keep us in touch as to the progress. I know that no flat top WC came through with a starter till 1938 when the styled WC's were introduced. We got a carload Thanksgiving day 1938 and unloaded them that day. What a treat to have an electric starter. While it may not be "correct" you should give the addition very close attention. Good Luck! Bill Long ps: Fred Wilke, Rick Walten, and I with Fred's 1933 Waukesha WC, in NY GOTO.  |
Posted By: Steve in NJ
Date Posted: 11 Apr 2016 at 6:53am
|
Great pic Bill! But your missin' the bottom half of your pants... LOL! Looks like that was taken at the first GOTO in NY. Steve@B&B ------------- 39'RC, 43'WC, 48'B, 49'G, 50'WF, 65 Big 10, 67'B-110, 75'716H, 2-620's, & a Motorhead wife |
Posted By: Bob-Maine
Date Posted: 11 Apr 2016 at 8:12am
|
Steve, you are right. I remember it well. The story about the WC rescue reminds me of one ( a '37) I bought in Intervale, NH. Had to cut some ash trees to get it out of the woods. Bob2allisdowneast ------------- I used to think I was indecisive, but now I'm not sure. |
Posted By: Ted J
Date Posted: 11 Apr 2016 at 11:22am
|
It's coming right along!! Is it gonna go to any shows this year?
------------- "Allis-Express" 19?? WC / 1941 C / 1952 CA / 1956 WD45 / 1957 WD45 / 1958 D-17 |
Posted By: alan-nj
Date Posted: 11 Apr 2016 at 12:08pm
|
nah steve, that's just what your pants look like when regular size guys wear them.... ------------- If ignorance is bliss, than happy days are here again. |
Posted By: Steve in NJ
Date Posted: 11 Apr 2016 at 12:29pm
|
Oh, okay, maybe that's what that is. Thanks for clearing that up for my big Al. BTW, that's my Grey shop van at the edge of the bay door! Just noticed that... ------------- 39'RC, 43'WC, 48'B, 49'G, 50'WF, 65 Big 10, 67'B-110, 75'716H, 2-620's, & a Motorhead wife |
Posted By: marv
Date Posted: 11 Apr 2016 at 6:00pm
| Oh the fun! That is my friends WC You drove. He got me started on a 42 B. |
Posted By: Steve in NJ
Date Posted: 12 Apr 2016 at 5:34am
|
Yer' makin' fantastic headway Ryan. Keep rollin' with it man! You have one of those leaky tar taped coils that I always talk about. If'n ya need parts for that ole' girl we got em' in stock. You'll probably find a mess under that coil once you pull it up and out. If you have problems getting the set screws loose, take a Bernzamatic torch and warm up the side of the Mag housing next to the screws. They'll come right out then... Keep goin' man, its comin' along great. Oh yeah, keep them pics comin' to!! Steve@B&B ------------- 39'RC, 43'WC, 48'B, 49'G, 50'WF, 65 Big 10, 67'B-110, 75'716H, 2-620's, & a Motorhead wife |
Posted By: littlemarv
Date Posted: 02 May 2016 at 9:23pm
|
I'm not sure if its going to make any shows this year. Its not for lack of trying, I'm going as fast as my wallet will let me, but the rest of my life sure gets in the way of my full time tractoring! At any rate, did a little wheeling and dealing on some.....wheels! Alex09 hooked me up with two rears, and a steering wheel. I put these on for now, to roll it into the shed, and to run it a bit to check it all out before painting. Once I get to making it shine, then I will have to drop some coin on some nice tires to go on the correct rims. http://s304.photobucket.com/user/rsommer1/media/Mobile%20Uploads/IMG_20160502_201605969_zps7czta99r.jpg.html" rel="nofollow -  Those car tires were way too wide, They hit the pedestal, so I managed to scrounge up some tri ribs. Not sure if that is the correct steering wheel or not, but its getting to be go time, here. I can look for the few "correct" parts I need while I'm putting her together with the parts I have on hand. Well, I managed to get one picture in before old flash got back from putting the jack away.... http://s304.photobucket.com/user/rsommer1/media/Mobile%20Uploads/IMG_20160502_201624741_zpsmj4hodgd.jpg.html" rel="nofollow -  I noticed once I got the steering wheel on, there was a good amount of play in the steering. I thought it might have to do with being up in the air, so I waited until it was on the ground. There is a solid 3/8 of a turn on the steering wheel before the front wheels start moving. Is there anything to adjust to compensate for wear, or do I need to replace some parts? I wonder how long it been since this thing sat on four air tires..... ------------- The mechanic always wins. B91131, WC23065, WD89101, CA29479, B1, Early B10, HB212, 416H |
Posted By: Dan73
Date Posted: 02 May 2016 at 9:34pm
|
I agree with your son. Those tires look good enough I would run them even after getting it fixed up. It is starting to really come together and look like a tractor again. Like some others I wondered just what you where getting into but it looks like you have done really good at controlling the cost while fixing it right so far. Keep up the good work you will be looking for something to pull with it before you know. |
Posted By: B26240
Date Posted: 03 May 2016 at 5:33am
| Marv look at the steering shaft u-joint as now would be a great time to change it while the engine is out. Also the worm gear is held on the shaft with a pin and I have seen these loose. On the bottom of bolster shaft the spindles are keyed to bolster shaft and this big key is probably a little worn. These are the easier things to fix. A little wear here and there and it all adds up. Mark |
Posted By: BenGiBoy
Date Posted: 03 May 2016 at 7:38am
|
The looseness of the steering wheel is just from wear in the steering box, probably. I have been told that they can be adjusted, but then you mess up the wear pattern and it binds, so it is just better to leave it how it is. JMHO.. ------------- '39 Model B Tractors are cheaper than girls, remember that! |
Posted By: littlemarv
Date Posted: 13 May 2016 at 9:41am
|
When I visited Ken this spring, he mentioned putting oversize pins in the shift tower? The shifter felt pretty good, actually, before I took it off the tractor. I removed it because the reverse interlock linkage was rusted and froze tight. A little soak with some homebrew penetrant and it freed right up. I was just going to put a new boot on and reassemble, but I thought I'd take a peek at those pins. However, I cant get the shift lever out. I removed the snap ring and pulled this spacer out from above the ball, but the lever wont come out. Am I missing something else?  http://s304.photobucket.com/user/rsommer1/media/Mobile%20Uploads/IMG_20160511_213555647_zps8zkayeth.jpg.html" rel="nofollow - http://s304.photobucket.com/user/rsommer1/media/Mobile%20Uploads/IMG_20160511_213555647_zps8zkayeth.jpg.html" rel="nofollow -
------------- The mechanic always wins. B91131, WC23065, WD89101, CA29479, B1, Early B10, HB212, 416H |
Posted By: CAL(KS)
Date Posted: 13 May 2016 at 10:11am
|
flip it over, you will need to take the reverse lockout mechanism and spring off before it will come out. fun to do with rails and forks on ------------- Me -C,U,UC,WC,WD45,190XT,TL-12,145T,HD6G,HD16,HD20 Dad- WD, D17D, D19D, RT100A, 7020, 7080,7580, 2-8550's, 2-S77, HD15 |
Posted By: littlemarv
Date Posted: 13 May 2016 at 10:48am
|
As I was trying to get it out, it crossed my mind that that mechanism must be involved somehow. Well, new boot and new gasket and back on she goes. Not going to dig into it at this time. Thanks. ------------- The mechanic always wins. B91131, WC23065, WD89101, CA29479, B1, Early B10, HB212, 416H |
Posted By: B26240
Date Posted: 13 May 2016 at 3:48pm
| Marv if you ever do take the shift rails out of the shifter top be VERY CAREFULL of the detent balls as they can come flying out at warp speed due to the fact that they are under spring tension. |
Posted By: B26240
Date Posted: 13 May 2016 at 3:51pm
| Marv have you checked the wear items I listed in regard to the steering yet? If so what have you found? Mark |
Posted By: littlemarv
Date Posted: 13 May 2016 at 7:33pm
|
Well, the u-joint has a little play, and actually the pin that holds the yoke on has a little play too. Haven't looked into the pedestal itself yet. I hope to pressure wash the entire chassis and bring it in the garage sometime in the next few weeks. Garage has been rather busy. Two weeks ago, block garage sale. One week ago, painted the topper for the truck. This weekend, Courtney's birthday party. Next two weekends, camping. Every weekday, work all day, pick up kids, do homework, make supper, then at least one sporting event if not two. I don't know how we got so busy, but I sneak in a little tractor tinkering here and there. ------------- The mechanic always wins. B91131, WC23065, WD89101, CA29479, B1, Early B10, HB212, 416H |
Posted By: Sugarmaker
Date Posted: 13 May 2016 at 8:28pm
Your 'livin" Marv! Good job! Regards, Chris ------------- D17 1958 (NFE), WD45 1954 (NFE), WD 1952 (NFE), WD 1950 (WFE), Allis F-40 forklift, Allis CA, Allis D14, Ford Jubilee, Many IH Cub Cadets, 32 Ford Dump, 65 Comet. |
 littlemarv wrote:
Posted By: Thad in AR.
Date Posted: 13 May 2016 at 8:45pm
| This is a great post. I hope it inspires me to get back on mine. The steering was very loose on mine. The biggest problem was the keyway in the bottom of the main shaft where the spindle block goes was wore bad. I finally bought another used pedistal and used the best parts from each. I was able to get bearings and races through NAPA. Keep up the good work and thanks for taking the time to share pics with us when time is so valuable. |
Posted By: littlemarv
Date Posted: 03 Jun 2016 at 12:32am
|
Alright, its go time. I told Courtney to get on the tractor and steer, I would pull with the 416, and Carter could take a few pictures. Carter let out a screech and the argument was on! We tried rock paper scissors, pick a number, 7 and 10 year old logic, bargaining, but nothing seemed to yield results suitable to all parties involved. Finally, I told both of them to get on the tractor, Courtney steer, and Carter work the brakes. Finally! Peace returns! So I had to take the damn picture. http://s304.photobucket.com/user/rsommer1/media/Mobile%20Uploads/IMG_20160602_150827517_zpsyxrf42jp.jpg.html" rel="nofollow -  Pulled it in the garage, installed some guide studs, and plunked the shift tower into place. http://s304.photobucket.com/user/rsommer1/media/Mobile%20Uploads/IMG_20160602_171506907_HDR_zpsdqbj44x1.jpg.html" rel="nofollow -  http://s304.photobucket.com/user/rsommer1/media/Mobile%20Uploads/IMG_20160602_222024635_HDR_zpscoyxwbx0.jpg.html" rel="nofollow -  http://s304.photobucket.com/user/rsommer1/media/Mobile%20Uploads/IMG_20160602_172217323_HDR_zpsojf2glj5.jpg.html" rel="nofollow -  Scraped gunk for awhile, found some pretty nice paint inside the framerails. http://s304.photobucket.com/user/rsommer1/media/Mobile%20Uploads/IMG_20160602_153347273_zpsjkdnknnn.jpg.html" rel="nofollow -  I removed this piece. The only thing good on the toolbox is the hole... http://s304.photobucket.com/user/rsommer1/media/Mobile%20Uploads/IMG_20160602_172243741_HDR_zpstqk4hmrf.jpg.html" rel="nofollow -  Fired up the pressure washer. Before http://s304.photobucket.com/user/rsommer1/media/Mobile%20Uploads/IMG_20160602_153856199_zpswv5lgv7u.jpg.html" rel="nofollow -  After http://s304.photobucket.com/user/rsommer1/media/Mobile%20Uploads/IMG_20160602_220813547_zpsehn1zexn.jpg.html" rel="nofollow -  http://s304.photobucket.com/user/rsommer1/media/Mobile%20Uploads/IMG_20160602_220828493_zpsnocqnt1n.jpg.html" rel="nofollow -  Hold up! Today is the last day of school. This calls for ice cream. Everybody pull up a chair. http://s304.photobucket.com/user/rsommer1/media/Mobile%20Uploads/IMG_20160602_200013825_zpsfyuk3zhm.jpg.html" rel="nofollow -  Scraped out the bellhousing, and went in after the trans input seal. Removed the clutch return spring, the fork keeper, the throwout bearing, the fork jam bolt, and pivoted the fork down out of the way. Removed the sleeve over the input shaft, only to find out there is no input seal. The shaft is spiral grooved to keep the oil in. I told my dealer I had an unstyled WC and they sent a cork seal about 2" in diameter, but that must be for a styled one? But, at any rate, I got to see how it all comes apart, and inspect and grease everything. Replaced the throwout bearing. http://s304.photobucket.com/user/rsommer1/media/Mobile%20Uploads/IMG_20160602_230416051_zpsfbwhygtl.jpg.html" rel="nofollow -  ------------- The mechanic always wins. B91131, WC23065, WD89101, CA29479, B1, Early B10, HB212, 416H |
Posted By: patrickmull
Date Posted: 03 Jun 2016 at 5:43am
look at that wide foot plate in the middle looking good i just got mine done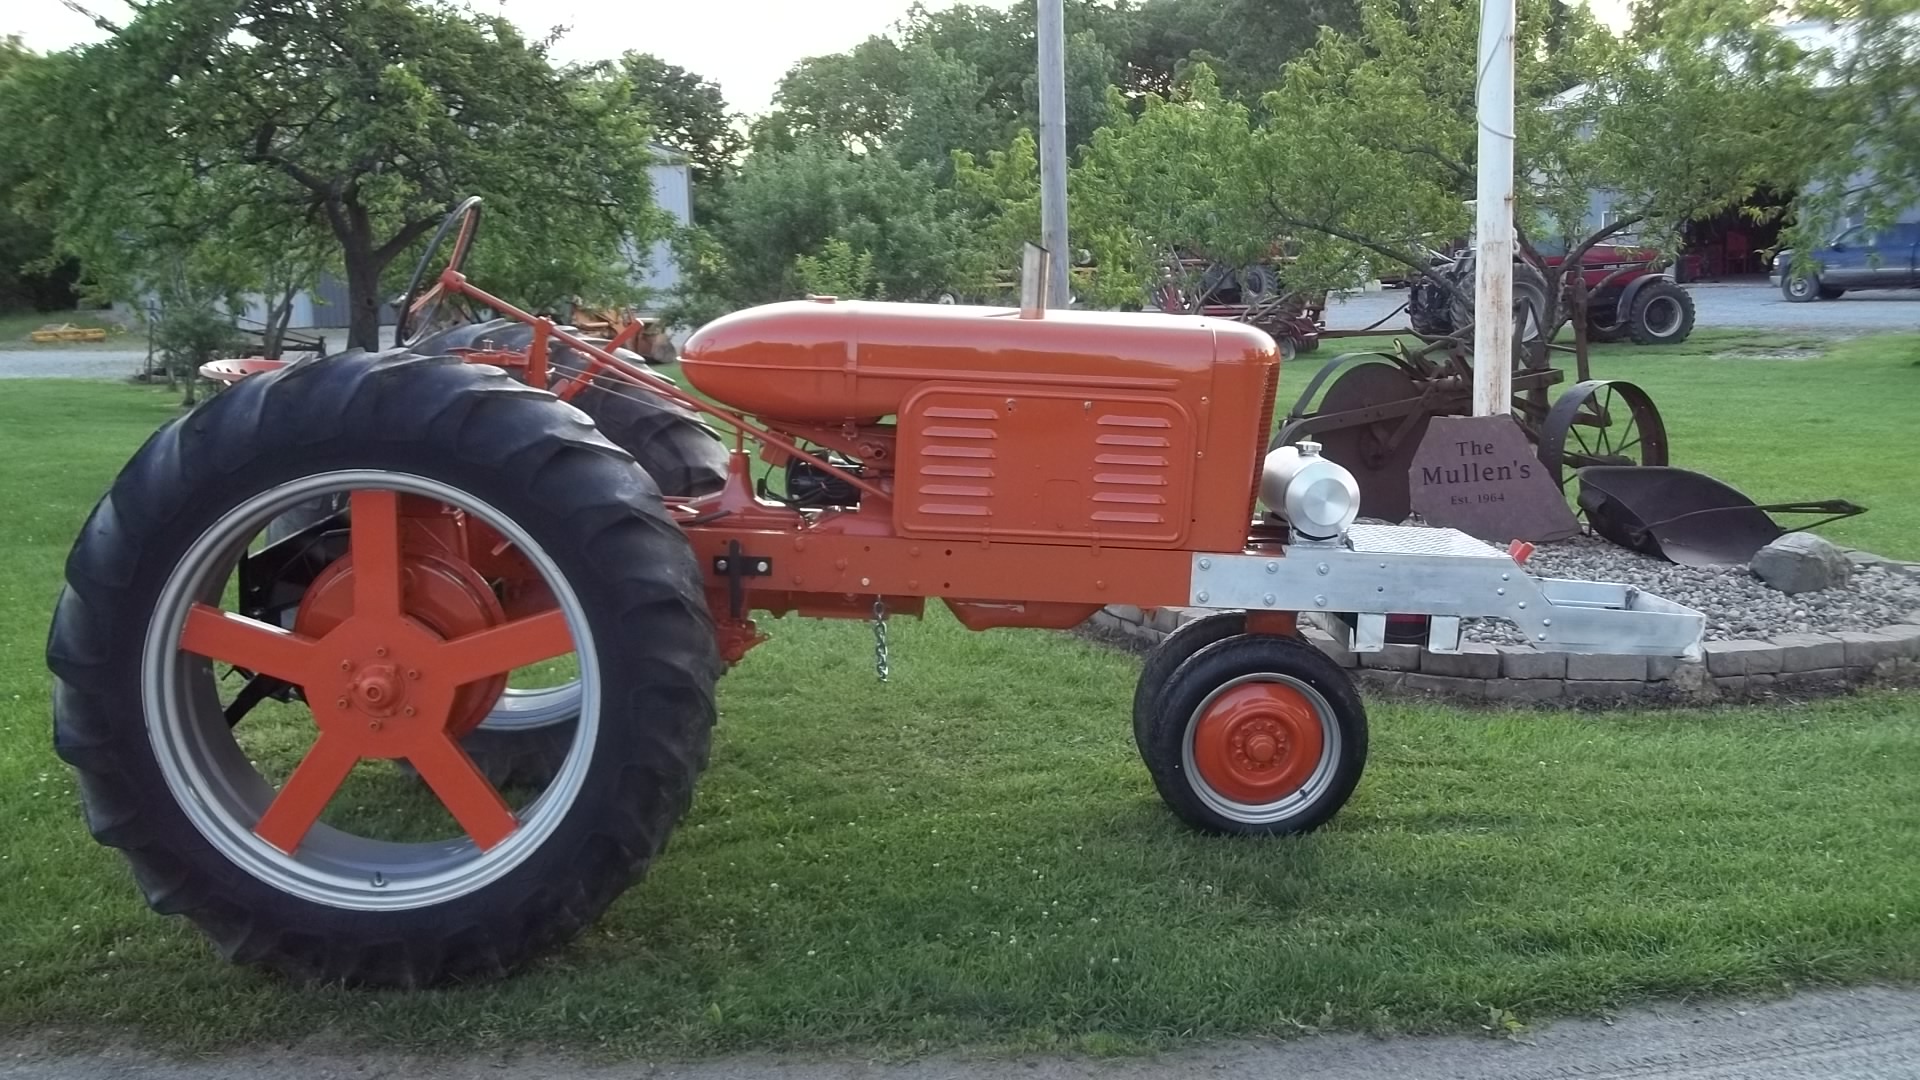 |
Posted By: JoeM(GA)
Date Posted: 03 Jun 2016 at 5:49am
|
Allis always had the spiral with the cork or felt seals, it helps work the oil back away from the seal. My 41 WC had a felt seal with a steel guard http://s33.photobucket.com/albums/d84/Joecdeere/1941%20WC/?action=view¤t=inputsealretainer.jpg" rel="nofollow"> 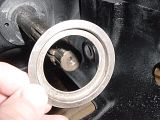 ------------- Allis Express North Georgia 41 WC,48 UC Cane,7-G's, Ford 345C TLB |
Posted By: Dan73
Date Posted: 03 Jun 2016 at 5:55am
What is the tank and platform on the front used for? I haven't seen anything like that and as far as it hangs out in front it must have a good purpose. |
Posted By: littlemarv
Date Posted: 03 Jun 2016 at 7:36am
|
Well, I need to be sure on the tranny seal. The seal that I got is about 1/8" thick, 2" O.D., and 1 1/8" I.D. I didn't see any remnants of an old seal, or anyplace for the seal to actually go. There is a thin steel sleeve that goes over the input shaft, and has a flat flange on it that bolts to the front of the tranny with two 3/8" bolts. The part number on the seal is 70202086. My tranny does look like the picture in the post above, do I have the right seal? Any ideas? ------------- The mechanic always wins. B91131, WC23065, WD89101, CA29479, B1, Early B10, HB212, 416H |
Posted By: CAL(KS)
Date Posted: 03 Jun 2016 at 8:00am
|
wc should have the felt or cork whatever it was and wd and up have a rubber lip seal. both numbers are listed in the agco parts book. if i remember correctly the seal is clamped between the thin sleeve and bellhousing. when we put a starter bellhousing on my brothers 38 we used a wd bellhousing and seal holder. ------------- Me -C,U,UC,WC,WD45,190XT,TL-12,145T,HD6G,HD16,HD20 Dad- WD, D17D, D19D, RT100A, 7020, 7080,7580, 2-8550's, 2-S77, HD15 |
Posted By: patrickmull
Date Posted: 03 Jun 2016 at 11:10am
| that's a pulling tractor that's my fuel tank and weight bracket |
Posted By: Dan73
Date Posted: 03 Jun 2016 at 12:10pm
| So you don't use the normal gas tank? Just curious. Thought it might be a weight bracket of some kind. |
Posted By: patrickmull
Date Posted: 03 Jun 2016 at 2:37pm
| No I wanted to get as much weight out front as I could with as much engine as i have I have trouble keeping the front end down |
Posted By: JoeM(GA)
Date Posted: 03 Jun 2016 at 3:50pm
|
When I bought my seal from Sandy Lake it was felt, if you take the AGCO part number it crosses out to a rubber seal, I'd call the folks at Sandy Lake and ask them. By my parts book and all my pictures, you should have the felt seal in the recess, the seal retainer over it (the piece in my above pic) and the throwout bearing tube bolting down and holding it all in place. ------------- Allis Express North Georgia 41 WC,48 UC Cane,7-G's, Ford 345C TLB |
Posted By: littlemarv
Date Posted: 04 Jun 2016 at 12:46am
|
Dove back in to look at that trans input seal. Pulled the sleeve off the input shaft, http://s304.photobucket.com/user/rsommer1/media/Mobile%20Uploads/IMG_20160603_212745752_HDR_zpsxlfd2hi0.jpg.html" rel="nofollow -  Poked around in there a bit, sure enough, there is a steel washer and a rock hard piece of cork in there. http://s304.photobucket.com/user/rsommer1/media/Mobile%20Uploads/IMG_20160603_212913513_zpsudmdncpu.jpg.html" rel="nofollow -  So, cleaned that out and installed a new seal. http://s304.photobucket.com/user/rsommer1/media/Mobile%20Uploads/IMG_20160603_213437921_HDR_zps4c8k4wh2.jpg.html" rel="nofollow -  There are actually two small holes 90 degrees from the mount holes on the sleeve, must be weep holes. http://s304.photobucket.com/user/rsommer1/media/Mobile%20Uploads/IMG_20160603_213631358_zpsphzopojg.jpg.html" rel="nofollow -  So, got that up to snuff. Only thing left before the motor goes in is the steering u-joint. If I can tighten it up there a bit, I can eliminate 3" of steering slop. Took the u-joint out. Never saw one like this before. No caps, just has pins through it? http://s304.photobucket.com/user/rsommer1/media/Mobile%20Uploads/IMG_20160603_220308812_HDR_zpsgvxhjvwu.jpg.html" rel="nofollow -  Anyways, I have an extra one from a WD laying around, so I popped that one apart. Will have to try and find one locally tomorrow, as it will be holding up progress... http://s304.photobucket.com/user/rsommer1/media/Mobile%20Uploads/IMG_20160603_222015398_zpskkqq2tvz.jpg.html" rel="nofollow -  Cleaned up the input shaft, made sure the disk slides nicely and the pilot bearing fits. http://s304.photobucket.com/user/rsommer1/media/Mobile%20Uploads/IMG_20160603_223316734_zpszmrdde7u.jpg.html" rel="nofollow -  ------------- The mechanic always wins. B91131, WC23065, WD89101, CA29479, B1, Early B10, HB212, 416H |
Posted By: Dan73
Date Posted: 04 Jun 2016 at 2:47am
| That is comming along nice. You will be driving it around before you know it. Nicely done. |
Posted By: littlemarv
Date Posted: 06 Jun 2016 at 10:37pm
http://s304.photobucket.com/user/rsommer1/media/Mobile%20Uploads/IMG_20160606_145442645_HDR_zpsguqmxjht.jpg.html" rel="nofollow -  http://s304.photobucket.com/user/rsommer1/media/Mobile%20Uploads/IMG_20160606_213502755_HDR_zpshkmqu4eh.jpg.html" rel="nofollow -  I seem to remember the steering joint runs pretty close to the block. I installed two 3/8" by 2" bolts, then ground the heads down and cut the excess off. Looks good.  http://s304.photobucket.com/user/rsommer1/media/Mobile%20Uploads/IMG_20160606_215306467_zpsklws9fml.jpg.html" rel="nofollow - http://s304.photobucket.com/user/rsommer1/media/Mobile%20Uploads/IMG_20160606_215306467_zpsklws9fml.jpg.html" rel="nofollow -
------------- The mechanic always wins. B91131, WC23065, WD89101, CA29479, B1, Early B10, HB212, 416H |
Posted By: KenBWisc
Date Posted: 07 Jun 2016 at 8:28am
|
Roll pins work well. I also ran safety wire through the pins just in case they decided to move.
------------- '34 WC #629, '49 G, '49 B, '49 WD, '62 D-19, '38 All Crop 60 and still hunting! |
Posted By: littlemarv
Date Posted: 12 Jun 2016 at 10:21pm
|
Cleaning out the gas tank. Install 20 3/8" nuts, 5 5/8" nuts, a gallon of diesel fuel, and a plug in the bottom.... http://s304.photobucket.com/user/rsommer1/media/Mobile%20Uploads/IMG_20160612_143840664_zpsk6iuwmgb.jpg.html" rel="nofollow -  YES, I counted the nuts so we get them all back. Apply tank to tractor wheel, with a wooden buffer.... http://s304.photobucket.com/user/rsommer1/media/Mobile%20Uploads/IMG_20160612_144244661_zpseyxmhcts.jpg.html" rel="nofollow -  Yet another reason why you need more than one tractor! And, cruise up and down the road in first gear repeatedly. http://s304.photobucket.com/user/rsommer1/media/Mobile%20Uploads/IMG_20160612_150804455_zpsowt2df4s.jpg.html" rel="nofollow -  I've never done this before, read about it on here a few times. I moved the tank to different positions and changed the fuel twice. Got a lot of crap out of it. I guess, in my mind, I thought it would be shiny new inside when done. Its not, but at least everything loose should have come out now instead of heading to the carb! Still picked up an extra screen for the sediment bowl, just in case. ------------- The mechanic always wins. B91131, WC23065, WD89101, CA29479, B1, Early B10, HB212, 416H |
Posted By: dawntreader74
Date Posted: 12 Jun 2016 at 11:00pm
| now you can put a small hose on the shop vac an sure get it all out' works good |
Posted By: alleyyooper
Date Posted: 13 Jun 2016 at 4:47am
|
Ya got the tank off and all, so myself I would just go ahead and coat it and not worry about any thing coming loose later. Al
|
Posted By: littlemarv
Date Posted: 28 Jul 2016 at 10:26pm
|
Sorry fellows, been pretty busy with life in general. Going to Hutch last weekend was just the kick I needed to get back on task here. Slow progress.... The radiator turned into a bit of a struggle. Turns out the bottom tank had a crack in it. I took it to the local radiator shop for repair. He said he could repair it no problem. Over a few weeks, he called me once a week and every week his tone got lower and lower. Finally, he said come and get it, I can't fix it, its crammed full of sealer and all the seams are leaking, its junk. Luckily, in the meantime, I caught wind of a fellow who repairs radiators on the weekends and can fix just about anything, especially ones the first guy said are beyond repair. So, I went and picked it up from the first guy (and paid way too much for nothing) and took it to the second guy. He fixed the radiator, put all the shrouds back on that the first guy chopped off, flow tested it, and painted the core, all for 1/3 what I paid the first guy to do nothing. Lesson learned. Brought the tractor back inside. Made some rubber pads for the radiator mount. Installed the fuel tank, radiator, and hood. I picked up a few pieces at Hutch- cultivator brackets (no reason other than they were only $5) brake covers with the bolt holes not broken off, and a dandy grill screen. Couldn't find just the seat back though. Starting to look like a tractor again! http://s304.photobucket.com/user/rsommer1/media/Mobile%20Uploads/IMG_20160728_214213225_zpsbkr9imxz.jpg.html" rel="nofollow -  Just need to rebuild the mag, and polish off the three dozen little things that pop up on these projects, and we should be in tall cotton! Couple of questions: What is the recommended spark plug for this engine? Is there anything between the fuel tank and the supports, or the hood and radiator, or is it steel on steel? The bolts on all the straps are barely long enough the way it is, I cant imagine there's room for a rubber or leather strap under there. More to come..... ------------- The mechanic always wins. B91131, WC23065, WD89101, CA29479, B1, Early B10, HB212, 416H |
Posted By: CTuckerNWIL
Date Posted: 29 Jul 2016 at 8:35am
|
Yes there was webbing between the supports and the tank and between the tank and the straps. I bought mine at a local JoAnns Fabric store the wife frequents but it is available from places like Steiners. http://www.steinertractor.com/ABC494-fuel-tank-webbing?CID=ABC494&gclid=Cj0KEQjw_eu8BRDC-YLHusmTmMEBEiQArW6c-IMlGWTjnCMNIea-fgM_SVJZ0GCu1I8bRlXan3b10UoaAmf_8P8HAQ" rel="nofollow - http://www.steinertractor.com/ABC494-fuel-tank-webbing?CID=ABC494&gclid=Cj0KEQjw_eu8BRDC-YLHusmTmMEBEiQArW6c-IMlGWTjnCMNIea-fgM_SVJZ0GCu1I8bRlXan3b10UoaAmf_8P8HAQ Autolite 295 is a good plug for it ------------- http://www.ae-ta.com" rel="nofollow - http://www.ae-ta.com Lena 1935 WC12xxx, Willie 1951 CA6xx Dad bought new, 1954WD45 PS, 1960 D17 NF |
Posted By: BenGiBoy
Date Posted: 29 Jul 2016 at 8:39am
|
There is usually a webbing between the hood and fuel tank. Something like this, in one of the colors/widths that it comes in......someone else might know what width/color it was originally. http://stores.djstractorparts.com/fuel-tank-webbing-white-1-88445k45/" rel="nofollow - Fuel Tank Webbing - White 1" ------------- '39 Model B Tractors are cheaper than girls, remember that! |
Posted By: BenGiBoy
Date Posted: 29 Jul 2016 at 8:41am
|
Tucker you must have been typing while I was...... BTW, the tractor looks like it is coming together pretty nicely.  ------------- '39 Model B Tractors are cheaper than girls, remember that! |
Posted By: Dan73
Date Posted: 29 Jul 2016 at 8:43am
| You have made great progress on this tractor. You do want to get that webbing otherwise it will chafe the tank alot. I have a yank that almost has a hole in it from a strap with no webbing. Well I had the tank it went to china with some other scrap as it was a rust bucket. |
Posted By: littlemarv
Date Posted: 29 Jul 2016 at 11:23pm
|
I have some excess strap from some ratchet straps. 1" wide, should fit the bill nicely. Mostly, I thought the top tank of the radiator should be my main concern. So I laid a strip down there too. You can't see it in the picture too well, but I laid one long piece on the rear tank support, two smaller ones on the front, and one around the top of the radiator. http://s304.photobucket.com/user/rsommer1/media/Mobile%20Uploads/IMG_20160729_212029721_zpspscgweqx.jpg.html" rel="nofollow -  Put it all back together with some longer bolts for the straps, adjusted the air cleaner a bit so it doesn't wear through on the hood, installed the sediment bowl and made a fuel line out of 1/4" brake line. Pictures might be getting a little stingy here boys. My photobucket account is just about full and I'd really like to get a video of firing up the engine, so I need to figure out how to get more storage space or something.... ------------- The mechanic always wins. B91131, WC23065, WD89101, CA29479, B1, Early B10, HB212, 416H |
Posted By: Sugarmaker
Date Posted: 30 Jul 2016 at 1:30am
|
littlemarv, Great pictures! I have been told to just make another photobucket account. I didn't do that. I bought more space. i think its maybe 20-$30 per year but i have all my pictures in one account and lots of extra room for more. Good job on bringing this flat top back to life! Regards, Chris ------------- D17 1958 (NFE), WD45 1954 (NFE), WD 1952 (NFE), WD 1950 (WFE), Allis F-40 forklift, Allis CA, Allis D14, Ford Jubilee, Many IH Cub Cadets, 32 Ford Dump, 65 Comet. |
Posted By: B26240
Date Posted: 30 Jul 2016 at 6:01am
| Marv I was hoping to meet you at Hutch, but maybe next year. Mark |
Posted By: CTuckerNWIL
Date Posted: 30 Jul 2016 at 7:54am
I put videos on a free youtube account. They upload about 10 times faster there than to photobucket, and as far as I know, there is no limit to your "storage". ------------- http://www.ae-ta.com" rel="nofollow - http://www.ae-ta.com Lena 1935 WC12xxx, Willie 1951 CA6xx Dad bought new, 1954WD45 PS, 1960 D17 NF |
Posted By: littlemarv
Date Posted: 30 Jul 2016 at 8:49am
|
I was hoping to meet a lot more people this year, that's for sure. I am already plotting for next year, how to free up some "me" time. My family will wander the grounds and watch the field demos, but they won't stand there while I B.S. about tractors. I'd like to go to the meeting, some seminars, and the banquet and tractor ride, while I'm at it. So, looking forward to next year already. Shoot, the way I'm going on this project, we will still be on this topic next year at Hutch! ------------- The mechanic always wins. B91131, WC23065, WD89101, CA29479, B1, Early B10, HB212, 416H |
Posted By: desertjoe
Date Posted: 30 Jul 2016 at 9:11am
|
Hey Marv,,,dang,,you got this project goin your way,,,for sure,,,!!Read the whole thraed and I'm impressed,,Guy,!! Hard to believe what this tractor looked like that many years ago. The thing I really like is your children right at your side wantin to participate and have a hand in the restoration,,,Thats great,,!! You're almost there so keep the pics comin,,,you should be proud,,,!!! |
Posted By: alleyyooper
Date Posted: 30 Jul 2016 at 10:21am
|
You can always got to shutterfly who allows unlimited storage. Just not as easy to post the pictures as photo bucket.  Al Al
|
Posted By: JayIN
Date Posted: 30 Jul 2016 at 2:58pm
|
Yes, that is quite an accomplishment. You sure have perseverance. Something to be.really proud of!!!! ------------- sometimes I walk out to my shop and look around and think "Who's the idiot that owns this place?" |