| Author |
 Topic Search Topic Search  Topic Options Topic Options
|
Sugarmaker 
Orange Level


Joined: 12 Jul 2013
Location: Albion PA
Points: 8544
|
 Post Options Post Options
") Thanks(0) Thanks(0)
 Quote Quote  Reply Reply
 Posted: 01 May 2016 at 8:28pm Posted: 01 May 2016 at 8:28pm |
|
This looks a lot like the WD hand clutch two piece bushing. And your bushing looks real good (even wear). I would think that it may still work pretty good as is? Your just going to have some slop in the system as it moves from one position to the other.
Regards,
Chris
|
|
D17 1958 (NFE), WD45 1954 (NFE), WD 1952 (NFE), WD 1950 (WFE), Allis F-40 forklift, Allis CA, Allis D14, Ford Jubilee, Many IH Cub Cadets, 32 Ford Dump, 65 Comet.
|
 |
|
Sponsored Links
|
|
|
Jacob (WI,ND)
Orange Level

Joined: 11 Sep 2009
Location: Kenmare, ND
Points: 1248
|
Post Options
Thanks(0)
Quote Reply
Posted: 01 May 2016 at 8:30pm |
Chris, thanks! With a little detective work (or a lot) a guy can figure just about anything out. Like I've said for years "If someone was smart enough to originally design, machine, and build these things, then.... I sure should be able to take it apart, figure out what is wrong, how to fix it, and then put it back together!" It really is that simple. 
Steve, that is my guess too, that the hole was in the center. And yes, it's cast, so that makes things a bit more tricky.
Dan, that is a good idea. I had considered a two piece spacer, but I was thinking it just floating in the collar. Brazing it to the shifter might be better. I wonder if the whole amount could be brazed up? Would that be strong enough to wear against? When it comes to metal work and welding/brazing and such, my knowledge is lacking unfortunately. I'm a woodworker by trade  Lots of room for learning, LOL!
Thad, thanks for the encouragement! Oh I HAVE to take the pics. Not only to show you all, but also for me to reference back to so I know how things go back together, LOL!
I enjoy sharing my repairs! If it helps a few people with their projects, it's all worth it then. And that is what this hobby is all about, right? 
Thanks for the comments, I appreciate them all.
|
|
Jacob Swanson
1920 6-12; 1925,1926 20-35 longfenders; 1925,1926 15-25's; 1927,1929 20-35 shortfenders; C; B's; IB; WC's; WD; WD45
|
|
Jacob (WI,ND)
Orange Level
Joined: 11 Sep 2009
Location: Kenmare, ND
Points: 1248
|
Post Options
Thanks(0)
Quote Reply
Posted: 01 May 2016 at 8:37pm |
 Sugarmaker wrote: Sugarmaker wrote:
This looks a lot like the WD hand clutch two piece bushing. And your bushing looks real good (even wear). I would think that it may still work pretty good as is? Your just going to have some slop in the system as it moves from one position to the other.
Regards,
Chris
|
It is very similar to the WD. It probably WOULD be just fine to use as it is, but the problem is, NOW really is the time to fix it if I guy is EVER going to fix it. This clutch assembly can only come out like this now when the engine is out of the tractor. And I don't want to ever have to take the engine out again, HA! The clutch shoes on the other hand CAN be removed with the tractor together, though the clutch access cover. SO the engineers were thinking there! So I'll probably address this issue now, even though it is again adding to the fast growing cost of such a restoration.... But that is the fun of these projects, right?
|
|
Jacob Swanson
1920 6-12; 1925,1926 20-35 longfenders; 1925,1926 15-25's; 1927,1929 20-35 shortfenders; C; B's; IB; WC's; WD; WD45
|
|
Sugarmaker
Orange Level
Joined: 12 Jul 2013
Location: Albion PA
Points: 8544
|
Post Options
Thanks(0)
Quote Reply
Posted: 01 May 2016 at 8:44pm |
|
Jacob,
There are some spray welding techniques that might be able to build up the worn side, and then have it re-machined. There is a spray bronze too. Not sure how it would work? Check with one of your local machine / tool shops too.
Regards,
Chris
|
|
D17 1958 (NFE), WD45 1954 (NFE), WD 1952 (NFE), WD 1950 (WFE), Allis F-40 forklift, Allis CA, Allis D14, Ford Jubilee, Many IH Cub Cadets, 32 Ford Dump, 65 Comet.
|
|
Jacob (WI,ND)
Orange Level
Joined: 11 Sep 2009
Location: Kenmare, ND
Points: 1248
|
Post Options
Thanks(0)
Quote Reply
Posted: 14 May 2016 at 5:33pm |
Hi all!
I got my clutch shifter back from the local machine shop yesterday. I had them make a two piece collar and braze it on like was suggested. They are not set up to do spray welding there, so this was the best option to fix this part we thought. There is much less slop in the collar on the shifter now.
Back in WI, Dad has been experimenting with cutting out felt seals for the clutch shaft (which seals the transmission from the clutch area). He had the scrap of 3/8" felt, so we brainstormed the best way to cut it out, and I came up with this idea and it worked pretty good. He screwed some thin plywood on either side of the felt to sandwich it tight. Then using the center of the screw used a compass to draw the lines of the circle. Then took it to the scroll saw and cut the outside first, then the inside. came out looking like this.
He's going to mail it out to me so I can finish putting the clutch back together, so when I go home at the end of the month, it will be ready to put back into the tractor, and hopefully the engine will follow!
I also had the machine shop turn off the worn thrust surface of the two worn out king pin bushings, and replaced the space with new heavy duty oilite washers.
So since I had them, I could finish putting the spindles together. New Welsh plugs and new tie rod bushings as well, so the spindles are ready to put back on the tractor!
Edited by Jacob (WI,ND) - 25 Mar 2018 at 9:04pm
|
|
Jacob Swanson
1920 6-12; 1925,1926 20-35 longfenders; 1925,1926 15-25's; 1927,1929 20-35 shortfenders; C; B's; IB; WC's; WD; WD45
|
|
Sugarmaker
Orange Level
Joined: 12 Jul 2013
Location: Albion PA
Points: 8544
|
Post Options
Thanks(0)
Quote Reply
Posted: 14 May 2016 at 5:41pm |
|
Nice work! Good details and documentation too!
Regards,
Chris
|
|
D17 1958 (NFE), WD45 1954 (NFE), WD 1952 (NFE), WD 1950 (WFE), Allis F-40 forklift, Allis CA, Allis D14, Ford Jubilee, Many IH Cub Cadets, 32 Ford Dump, 65 Comet.
|
|
Jacob (WI,ND)
Orange Level
Joined: 11 Sep 2009
Location: Kenmare, ND
Points: 1248
|
Post Options
Thanks(0)
Quote Reply
Posted: 14 May 2016 at 5:47pm |
I also cleaned up the radius rods. I got some new lock washers as the originals were broken, so they are ready to go. I also cleaned up the rear pivot bracket and front axle pin. So the front end stuff is about all ready to go back together now.
I also cleaned up the oil pan lower cover. This cover can be removed from the oil pan to access the oil pump screen to clean or service it. Got a new oil drain plug for it too, as the original was very rounded off.
And I cleaned up the push rod side covers, clutch access covers. Is this hole supposed to be in the center of the clutch cover?
And front hubcap and piece below dash.
I also cleaned up the good push rods. I need to get three better ones, as the bottom ends of them were really pitted bad.
I'm almost out of parts to work on again, that is a good sign! That means it's time for a trip home again...
Edited by Jacob (WI,ND) - 25 Mar 2018 at 9:09pm
|
|
Jacob Swanson
1920 6-12; 1925,1926 20-35 longfenders; 1925,1926 15-25's; 1927,1929 20-35 shortfenders; C; B's; IB; WC's; WD; WD45
|
|
NEVER green
Orange Level Access
Joined: 28 Feb 2013
Location: MN.
Points: 8669
|
Post Options
Thanks(0)
Quote Reply
Posted: 15 May 2016 at 9:16am |
Hell of a job Jacob, thanks for your time posting all this!
|
|
2-8050 1-7080 6080 D-19 modelE & A 7040 R50
|
|
Dan73
Orange Level

Joined: 04 Jun 2015
Location: United States
Points: 6054
|
Post Options
Thanks(0)
Quote Reply
Posted: 15 May 2016 at 9:37am |
|
Looks like they did a nice job on the clutch shaft repair. Yes these old tractors are expensive to fix but in the end I think they are worth it. I would much rather hay with my d17 then some of the modern tractors I have used. You and your dad will have tons of pride taking this old girl out to show her off and at the rate you are going that will be alot sooner then I would have guessed when you first posted that you where going to restore it. Every time I look at these posts it makes me want to go work on my stuff. Right now I need to focus on the funding though... Good work and it is really nice to see someone say yes it would probably work the way it is but I want to take the extra effort to make it right. You will be grateful for that later for sure.
|
|
Sugarmaker
Orange Level
Joined: 12 Jul 2013
Location: Albion PA
Points: 8544
|
Post Options
Thanks(0)
Quote Reply
Posted: 15 May 2016 at 5:40pm |
|
Awesome transformation of each part! Cleaning and making these ready for assembly will really make the assembly easier and quicker!
Regards,
Chris
|
|
D17 1958 (NFE), WD45 1954 (NFE), WD 1952 (NFE), WD 1950 (WFE), Allis F-40 forklift, Allis CA, Allis D14, Ford Jubilee, Many IH Cub Cadets, 32 Ford Dump, 65 Comet.
|
|
JayIN
Orange Level

Joined: 18 Dec 2009
Location: SE/IN
Points: 1982
|
Post Options
Thanks(0)
Quote Reply
Posted: 15 May 2016 at 7:37pm |
|
VERY IMPRESSIVE !!!A friend had a Threshermans Special that I used to drive in parades. It was a hoss! A simular tractor. You have great attention to detail. You should be proud. Your Dad must have taught you well!
|
|
sometimes I walk out to my shop and look around and think "Who's the idiot that owns this place?"
|
|
Jacob (WI,ND)
Orange Level
Joined: 11 Sep 2009
Location: Kenmare, ND
Points: 1248
|
Post Options
Thanks(0)
Quote Reply
Posted: 20 May 2016 at 8:04pm |
Hi everyone!
Well I got another piece of the puzzle put together. The clutch is ready to go back into the tractor. The felt seal Dad made worked, it was a touch on the tight side, but since it is felt, I think it will be fine. I smeared it up with grease before assembly.
A few tips I learned along the way. Have a big puller handy when you go to disassemble the clutch gear, as it comes off hard. And plan on having a press handy when you go to reassemble that gear. It goes on hard as well. Stubborn me wanted to have it together before I went home with it so I could spend the most amount of time working on getting the tractor back together as possible. Both of our presses are back home so I made due with a piece of pipe and a BFH to drive the gear back on, but life would have been MUCH easier if I had waited for the press. Next time I will know.
Edited by Jacob (WI,ND) - 25 Mar 2018 at 9:18pm
|
|
Jacob Swanson
1920 6-12; 1925,1926 20-35 longfenders; 1925,1926 15-25's; 1927,1929 20-35 shortfenders; C; B's; IB; WC's; WD; WD45
|
|
Dan73
Orange Level
Joined: 04 Jun 2015
Location: United States
Points: 6054
|
Post Options
Thanks(0)
Quote Reply
Posted: 20 May 2016 at 8:16pm |
|
I would suggest waiting for the press next time I have a bad habit of breaking things when I put then together with a bh.
|
|
Jacob (WI,ND)
Orange Level
Joined: 11 Sep 2009
Location: Kenmare, ND
Points: 1248
|
Post Options
Thanks(0)
Quote Reply
Posted: 12 Jun 2016 at 8:22pm |
I have some big progress to report! I made a trip back to WI to spend some time with the family and get some tractor time in over the first weekend of June. With Dad's help we got a lot accomplished.
Started by putting all the redone clutch parts back into the tractor.
Unfortunately we had to take a step backwards. I noticed that one of the clutch lining rivets was mostly pulled through the lining, and needed to be redone. I don't know how we missed that when cleaning it all up, but that is neither here nor there, it needed to be fixed, so we pulled the shoes back off and I'll order up some new lining material and get it fixed up properly.
The next thing we tackled was the break band assembly. Got that all back on the tractor, as that was already relined and waiting if you remember from a previous post.
It was kinda a pain in the butt to get it back on and adjusted correctly. The pins were still a snug fit even all cleaned up, and the clevis was slightly bent goofy, so the pin had to go in just right to go in easily and some of it was easier to do while laying under the tractor, which in itself is a pain. But I got it!
Everything can't go easily, or everyone would do it
Edited by Jacob (WI,ND) - 25 Mar 2018 at 9:20pm
|
|
Jacob Swanson
1920 6-12; 1925,1926 20-35 longfenders; 1925,1926 15-25's; 1927,1929 20-35 shortfenders; C; B's; IB; WC's; WD; WD45
|
|
Jacob (WI,ND)
Orange Level
Joined: 11 Sep 2009
Location: Kenmare, ND
Points: 1248
|
Post Options
Thanks(0)
Quote Reply
Posted: 12 Jun 2016 at 8:25pm |
The rest of the stuff we worked on was a kinda bounce around and work on different things all at once based on the weather and focus (or lack there of  )Got the heads put back together (mostly). )Got the heads put back together (mostly).
https://photos.google.com/share/AF1QipMw-W2_yghlqdtaQTxKWwnjA2jQPZ4rec8kTtiRGnDvSvFkHie9t4jmlkD6DbqUew/photo/AF1QipMoknRT9CCNlhG-dRXw-2fkfiUAGj4wesT1WDNQ?key=b1kyNl92RG81NVRZeDZ0OHNpYWxYTFNsb0JxVzB3
Here I am putting the valves together. Question for you all, is there a trick to getting the safety snap ring back on these new valves? It looks to me like they were machined wrong, as in too high up on the stem. The original valves had a cotter pin a little ways down from where the spring washer sits. So if a spring were to break the valve wouldn't completely drop into the cylinder. But the new valves have a snap ring immediately under where the spring washer sits, so there is no way to put the snap ring on before the spring and washer because you need to push the washer down the stem a bit to get the valve keeper clips installed. And putting the snap rings on after the springs are installed would be near impossible.Am I missing something? For now I just didn't put the snap rings on. For now I just didn't put the snap rings on.
Edited by Jacob (WI,ND) - 25 Mar 2018 at 9:21pm
|
|
Jacob Swanson
1920 6-12; 1925,1926 20-35 longfenders; 1925,1926 15-25's; 1927,1929 20-35 shortfenders; C; B's; IB; WC's; WD; WD45
|
|
Jacob (WI,ND)
Orange Level
Joined: 11 Sep 2009
Location: Kenmare, ND
Points: 1248
|
Post Options
Thanks(0)
Quote Reply
Posted: 12 Jun 2016 at 8:28pm |
Then we bounced to the upper engine pan. The hole where the rear radius rod bracket pivot mounts was worn, so we got the handy dandy drill press out and set up a reamer to make the hole round and the correct size for a bushing to be installed to take up the slop. Of course I wasn't in the ball enough to have the bushing on hand, so we had to bounce around again and work on something else.
Edited by Jacob (WI,ND) - 25 Mar 2018 at 9:23pm
|
|
Jacob Swanson
1920 6-12; 1925,1926 20-35 longfenders; 1925,1926 15-25's; 1927,1929 20-35 shortfenders; C; B's; IB; WC's; WD; WD45
|
|
Jacob (WI,ND)
Orange Level
Joined: 11 Sep 2009
Location: Kenmare, ND
Points: 1248
|
Post Options
Thanks(0)
Quote Reply
Posted: 12 Jun 2016 at 8:33pm |
With the front cover on, we adjusted the cam thrust play. From just a guess we adjusted it to half a turn out from tight, which gives a little play. I talked with a friend after who suggested one full turn out from tight. So we might loosen it up a bit more before we get it going. For those that have done it, what did you all set yours at?Then the mid pan went on the engine, with the crank seals installed.
https://photos.google.com/share/AF1QipMw-W2_yghlqdtaQTxKWwnjA2jQPZ4rec8kTtiRGnDvSvFkHie9t4jmlkD6DbqUew/photo/AF1QipMCmzg1WIfRow3_X_k7_2yhqulDN-1SLUVn6IzD?key=b1kyNl92RG81NVRZeDZ0OHNpYWxYTFNsb0JxVzB3
We checked over all the cotter pins for the crankshaft main bearing caps and connecting rod caps, as the machine shop didn't quite finish that job up to snuff. Some were missing and some were not properly installed. Might have been because I was rushing them to pick up the engine on a previous trip, but still a little frustrating
Then I had to turn my attention to cleaning up the oil pan, and the oil pump because it is inside of the oil pan.
I'm still looking for advice on how to set the oil pump relief ball. Silly me didn't measure or take note of how far in the screw was set before I disassembled everything. I just used an educated guess as to where it was when reassembling it. We might have to reach up in there and adjust it later if I can find someone that can tell me how it should be set. But I hear the later 20-35's oil pumps are different, so finding this info might be tricky. https://photos.google.com/share/AF1QipMw-W2_yghlqdtaQTxKWwnjA2jQPZ4rec8kTtiRGnDvSvFkHie9t4jmlkD6DbqUew/photo/AF1QipMPYH_bf4EAOHXMkmoS1-DZyHSIbglNAVMZ7od8?key=b1kyNl92RG81NVRZeDZ0OHNpYWxYTFNsb0JxVzB3
Here is the oil pump and drive gear installed in the oil pan.
The lock bolt is safety wired on like it was originally.
Another question, how much play should there be in the drive shaft for the pump front to back?
There was about 1/8" play in mine, so we put an oilite thrust washer in the front bushing piece that the driveshaft goes into, to take up some of the play.
The oil pickup screen was rebuilt next. I got the new brass screen from McMaster Carr, and the rivets were a garage sale score!
Edited by Jacob (WI,ND) - 25 Mar 2018 at 9:27pm
|
|
Jacob Swanson
1920 6-12; 1925,1926 20-35 longfenders; 1925,1926 15-25's; 1927,1929 20-35 shortfenders; C; B's; IB; WC's; WD; WD45
|
|
Jacob (WI,ND)
Orange Level
Joined: 11 Sep 2009
Location: Kenmare, ND
Points: 1248
|
Post Options
Thanks(0)
Quote Reply
Posted: 12 Jun 2016 at 8:35pm |
Then the oil pan could go back on the engine, along with the oil pickup screen cover.
Edited by Jacob (WI,ND) - 25 Mar 2018 at 9:29pm
|
|
Jacob Swanson
1920 6-12; 1925,1926 20-35 longfenders; 1925,1926 15-25's; 1927,1929 20-35 shortfenders; C; B's; IB; WC's; WD; WD45
|
|
Jacob (WI,ND)
Orange Level
Joined: 11 Sep 2009
Location: Kenmare, ND
Points: 1248
|
Post Options
Thanks(0)
Quote Reply
Posted: 12 Jun 2016 at 8:38pm |
Things went a lot smoother once we got to the woods. With the D15 moving the engine around was a piece of cake. Picked it up, pulled the trailer ahead, and brought the engine into the barn. Fortunately it was mostly done raining by then.
https://photos.google.com/share/AF1QipMw-W2_yghlqdtaQTxKWwnjA2jQPZ4rec8kTtiRGnDvSvFkHie9t4jmlkD6DbqUew/photo/AF1QipPg7j9bFYmsPG_wyTEDhqJqsokHZ3ycf-xILyvV?key=b1kyNl92RG81NVRZeDZ0OHNpYWxYTFNsb0JxVzB3
Putting the engine back into the tractor!
https://photos.google.com/share/AF1QipMw-W2_yghlqdtaQTxKWwnjA2jQPZ4rec8kTtiRGnDvSvFkHie9t4jmlkD6DbqUew/photo/AF1QipOFFnWUz-fEuDb8KmNU_4206Z0jBRfB6CGqGWNv?key=b1kyNl92RG81NVRZeDZ0OHNpYWxYTFNsb0JxVzB3
Being down in the sand, working on rusty old iron, does life get any better?!
Then, with the engine in, some of the other assemblies I had previously finished could go back on the tractor. The fan assembly was put on, the front crank pulley was put on, the heads were just set on for now. The front axle was put back on, and once I gather up a few more pieces from some friends I can get the front wheels put back on and it can sit on its own feet for the first time since I got it! https://photos.google.com/share/AF1QipMw-W2_yghlqdtaQTxKWwnjA2jQPZ4rec8kTtiRGnDvSvFkHie9t4jmlkD6DbqUew/photo/AF1QipOJidbx02SVrJFTilgy2ynPgZw1HhG51ZRYUGIV?key=b1kyNl92RG81NVRZeDZ0OHNpYWxYTFNsb0JxVzB3
Edited by Jacob (WI,ND) - 25 Mar 2018 at 9:33pm
|
|
Jacob Swanson
1920 6-12; 1925,1926 20-35 longfenders; 1925,1926 15-25's; 1927,1929 20-35 shortfenders; C; B's; IB; WC's; WD; WD45
|
|
Thad in AR.
Orange Level Access

Joined: 12 Sep 2009
Location: Arkansas
Points: 9668
|
Post Options
Thanks(1)
Quote Reply
Posted: 12 Jun 2016 at 8:50pm |
|
It looks like you guys made good use of time. I'm very impressed. Again thanks for taking time to take pics and share with us.
|
|
HD6GTOM
Orange Level

Joined: 30 Nov 2009
Location: MADISON CO IA
Points: 6627
|
Post Options
Thanks(1)
Quote Reply
Posted: 12 Jun 2016 at 11:08pm |
|
I went over the whole post again tonight, man keep up the good work looking REAL good
|
|
Jacob (WI,ND)
Orange Level
Joined: 11 Sep 2009
Location: Kenmare, ND
Points: 1248
|
Post Options
Thanks(1)
Quote Reply
Posted: 11 Aug 2016 at 8:15pm |
Well, all the work we got done a while ago balances out the utter lack of progress lately. I've been busy with other things lately it seems, but I have a couple little things to report. I ordered up the new clutch lining material, and Dad got the clutch shoes relined a while ago. They are still not put in the tractor, but are ready to go.
We also got a bushing installed in the mid pan and the rear pivot point for the front axle all put together. Everything is nice and tight like it should be now.
I met up with some forum members at Hutch a few weeks back, and got the rest of the parts I should need to complete this tractor. One of which, and the hardest to find, was the throttle quadrant. I got that all taken apart and cleaned up and working properly and put back together.
The only thing I need to do is find/make a spring for the flipper on the lever.
Does anyone have a good pic of what it should be originally? I figure it must circle around a couple times and have an end in each hole, but want to get it right.
Other than that, not much has been happening. Not looking good to have it going for our local show in mid Sep unfortunately...
Edited by Jacob (WI,ND) - 25 Mar 2018 at 9:38pm
|
|
Jacob Swanson
1920 6-12; 1925,1926 20-35 longfenders; 1925,1926 15-25's; 1927,1929 20-35 shortfenders; C; B's; IB; WC's; WD; WD45
|
|
HD6GTOM
Orange Level
Joined: 30 Nov 2009
Location: MADISON CO IA
Points: 6627
|
Post Options
Thanks(0)
Quote Reply
Posted: 12 Aug 2016 at 8:35am |
|
Dog gone good work Jacob Looks like you are making excellent progress.
|
|
AC7060IL
Orange Level
Joined: 19 Aug 2012
Location: central IL
Points: 3575
|
Post Options
Thanks(0)
Quote Reply
Posted: 12 Aug 2016 at 9:15am |
|
GO Jacob! You are doing an awesome job!!
I read your entire post, for the first time today. Your dedication is amazing. The casting repair that involved brazing in two spacers then machining it, was most interesting.
|
|
orange
Bronze Level


Joined: 09 Apr 2011
Location: watertown s d
Points: 140
|
Post Options
Thanks(0)
Quote Reply
Posted: 12 Aug 2016 at 9:21am |
|
Jacob I also have just purchased a 20-35 1927 s. n. 9766 lot of work on mine to do also nothing like yours. I live in Watertown .s. d. Maybe will meet up sometime .
Terry
|
|
truckerfarmer
Orange Level Access

Joined: 26 Jan 2013
Location: Watertown, SD
Points: 3291
|
Post Options
Thanks(0)
Quote Reply
Posted: 12 Aug 2016 at 11:21pm |
|
Terry,was that you I saw headed east on 212 with it this morning? I was at Prairie Stop putting on gas to head to Peever to get Dad's WD cultivator. Must have been the day to haul Orange today.
|
|
Looking at the past to see the future.
'53 WD, '53 WD45, WD snap coupler field cultivator, #53 plow,'53 HD5B dozer
Duct tape.... Can't fix stupidity. But will muffle the sound of it!
|
|
Brendan (AB)
Bronze Level
Joined: 19 Sep 2013
Location: Alberta
Points: 44
|
Post Options
Thanks(1)
Quote Reply
Posted: 13 Aug 2016 at 12:43am |
Hi Jacob,
Thanks for posting all of the information on your restoration. I have a 1927 20-35 also, which I hope to restore one day.
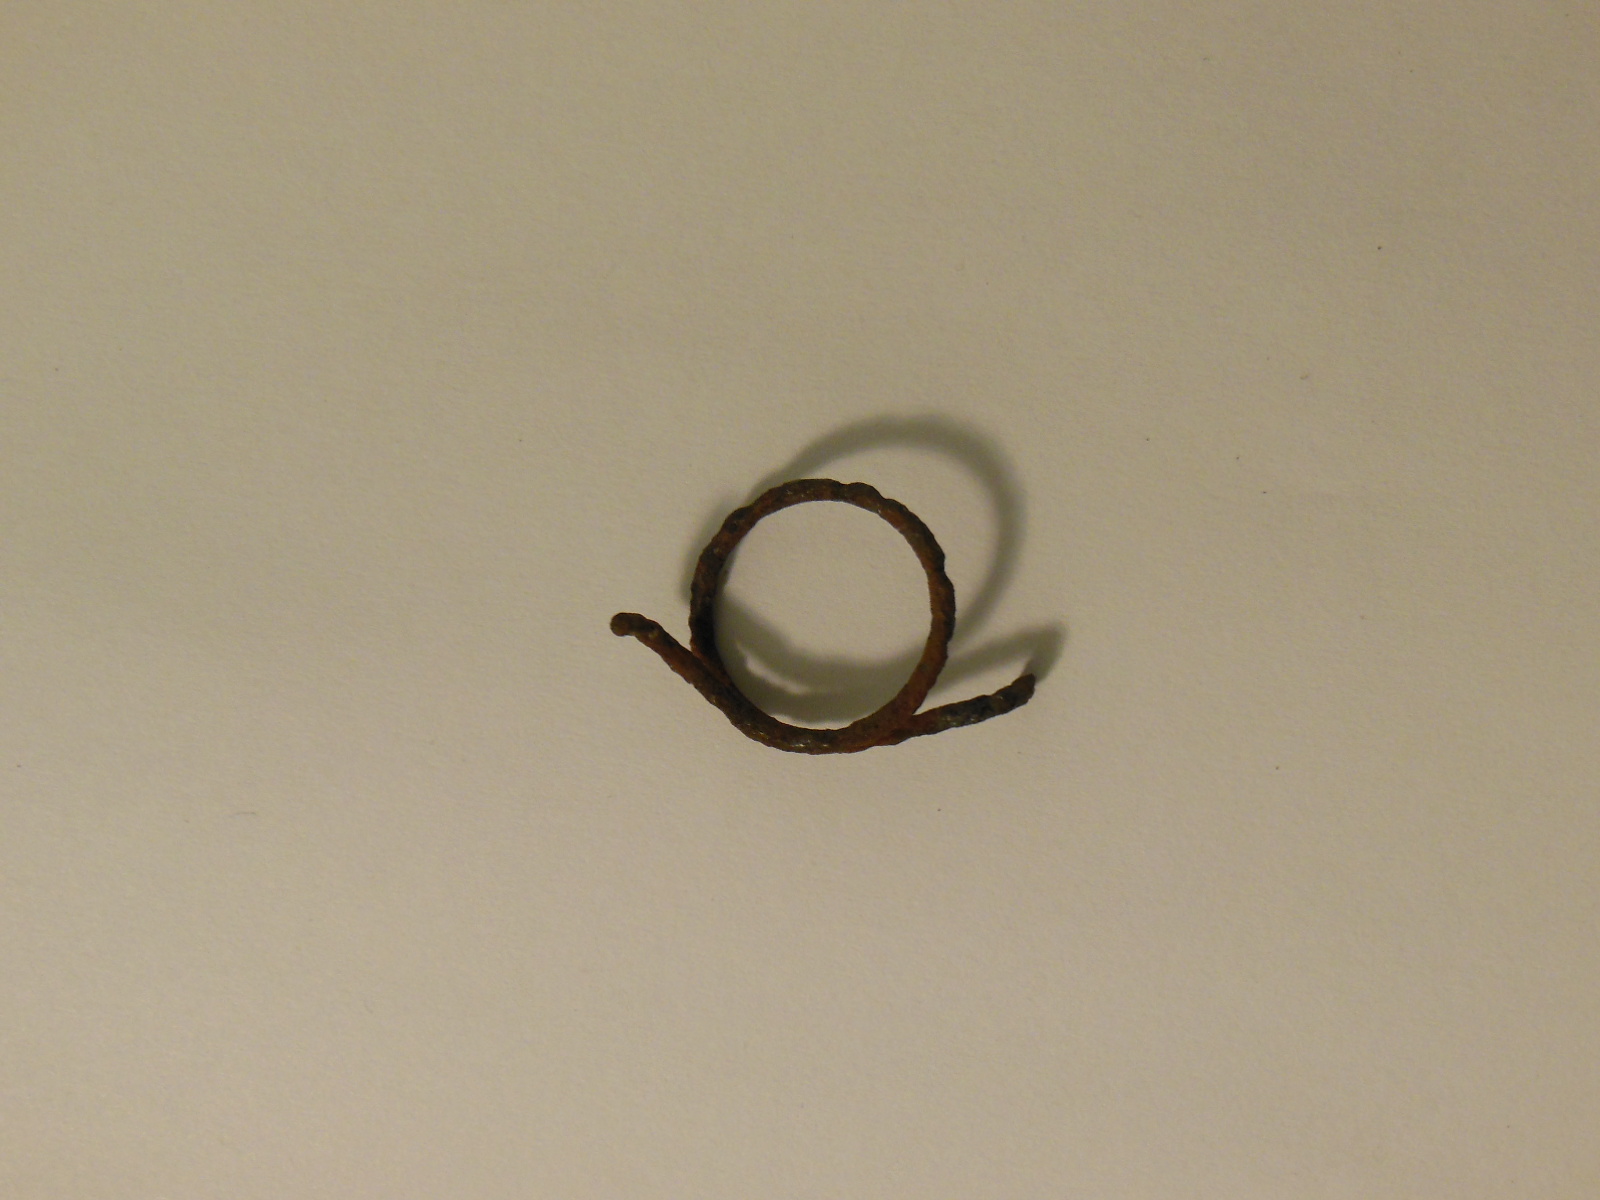
Here are some of pictures of my spring. It's badly pitted, but shows what it should look like. The inside diameter is about 11/16". Hope that helps!
|
|
Alberta Phil
Orange Level
Joined: 13 Sep 2009
Location: Alberta, Canada
Points: 3937
|
Post Options
Thanks(0)
Quote Reply
Posted: 13 Aug 2016 at 9:19am |
|
Good for a pattern, Brendan, but I wouldn't want to put much torque on that particular spring! LOL Looks like an easy one to make.
Have you made much progress on your '27?
Edited by Alberta Phil - 13 Aug 2016 at 9:20am
|
|
Jacob (WI,ND)
Orange Level
Joined: 11 Sep 2009
Location: Kenmare, ND
Points: 1248
|
Post Options
Thanks(0)
Quote Reply
Posted: 13 Aug 2016 at 11:05am |
Thanks Brendan! That is EXACTLY what I was looking for, now I just need to find something to make it out of. I've heard piano wire works good for this sort of think, but don't know where to find any of that?
I'd love to see some pics of your tractor and hear a little more about it Brendan, and if I can be of any assistance just holler.
Same goes for you Terry.
Yeah Phil, I've run into a couple springs like this, where looking at them too hard would snap them 
Thanks again everyone for the encouragement, advice, help, and compliments along the way! Really shows how the AC bunch really is a family |
|
Jacob Swanson
1920 6-12; 1925,1926 20-35 longfenders; 1925,1926 15-25's; 1927,1929 20-35 shortfenders; C; B's; IB; WC's; WD; WD45
|
|
Jacob (WI,ND)
Orange Level
Joined: 11 Sep 2009
Location: Kenmare, ND
Points: 1248
|
Post Options
Thanks(0)
Quote Reply
Posted: 13 Aug 2016 at 12:52pm |
It took a couple (OK maybe several ) attempts, but I got a spring made up. I ended up digging through my junk drawer and found some misc springs from who knows what. Took one with about that 11/16" ID and about the correct thickness wire, and got after it with my pliers. I ended up making it with a little less of a "loop" from end to end to get the right tension on the flipper, but it works good now! PS- starting with a spring "wound" the right way helps, don't ask....  The true test will be to see how it works when on the tractor in operation, but if nothing else I'll make a new one slightly different. Thanks again for the quick reply! One more thing checked off the list of things to do |
|
Jacob Swanson
1920 6-12; 1925,1926 20-35 longfenders; 1925,1926 15-25's; 1927,1929 20-35 shortfenders; C; B's; IB; WC's; WD; WD45
|
|