| Author |
 Topic Search Topic Search  Topic Options Topic Options
|
CA13414 
Silver Level

Joined: 25 Feb 2024
Location: Nebraska
Points: 270
|
 Post Options Post Options
") Thanks(0) Thanks(0)
 Quote Quote  Reply Reply
 Posted: 20 Jul 2024 at 10:47pm Posted: 20 Jul 2024 at 10:47pm |
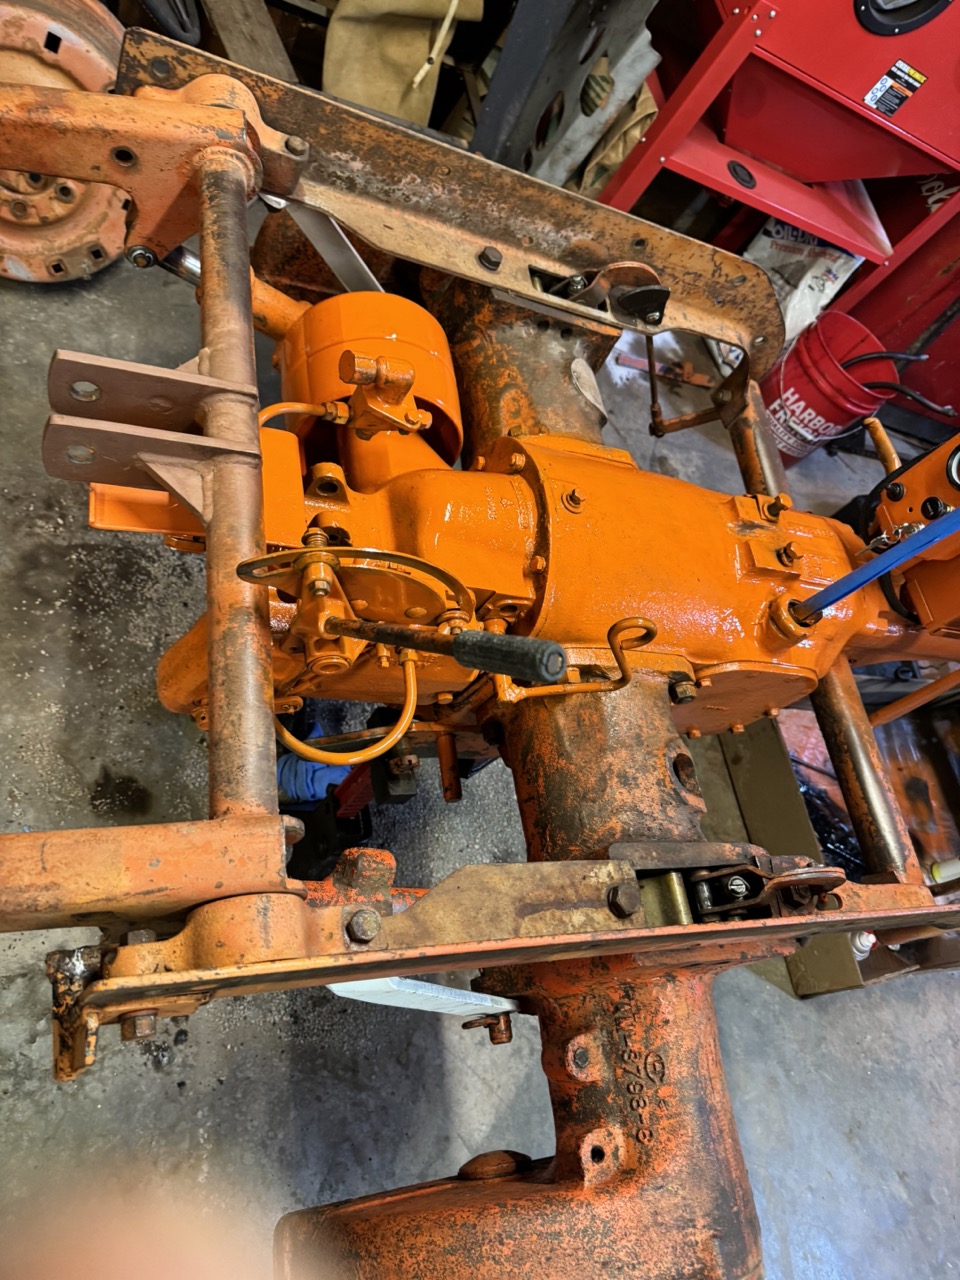
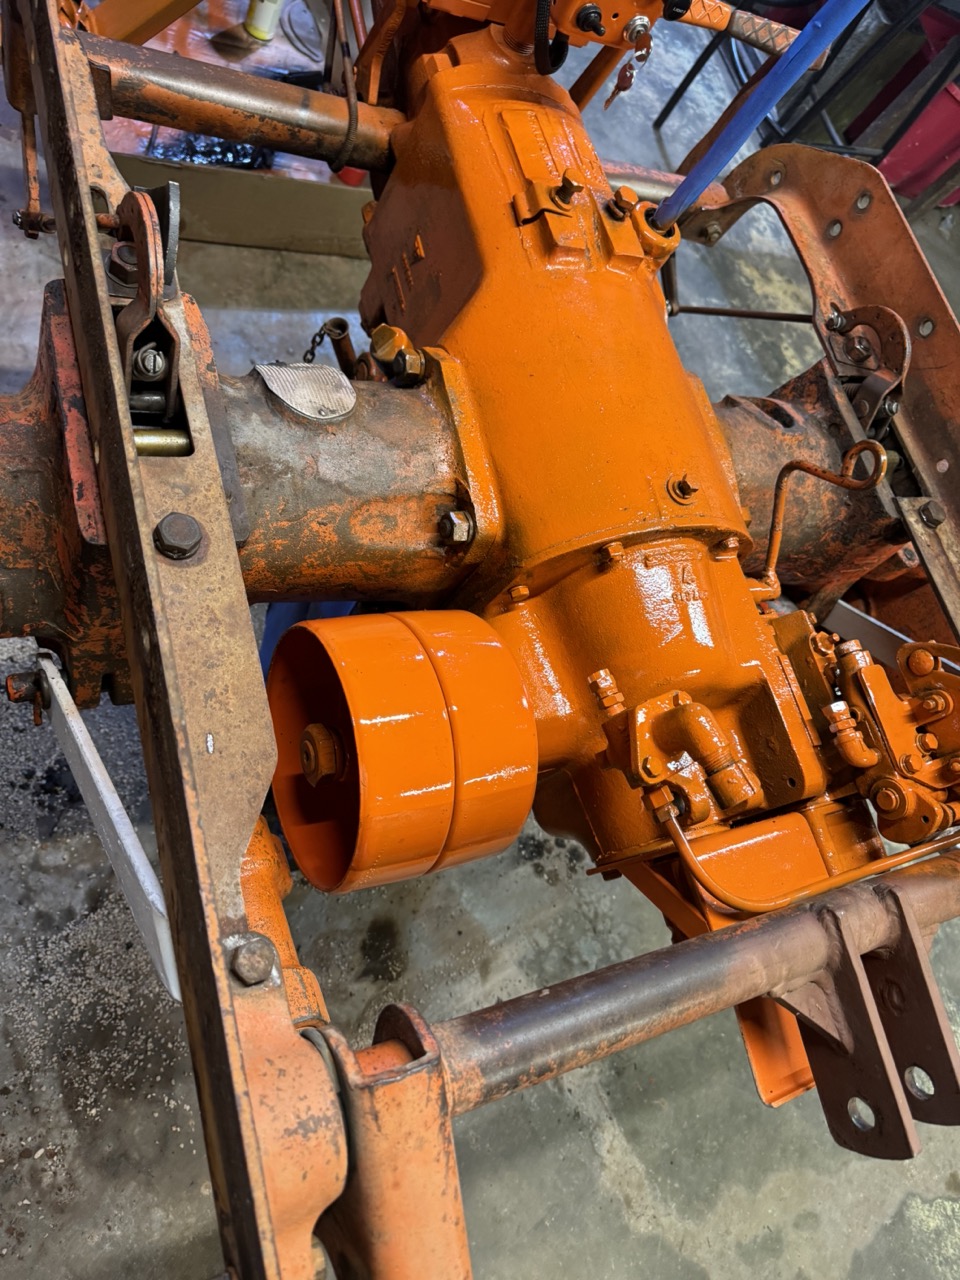
Installed the pulley with a new Woodruff key. 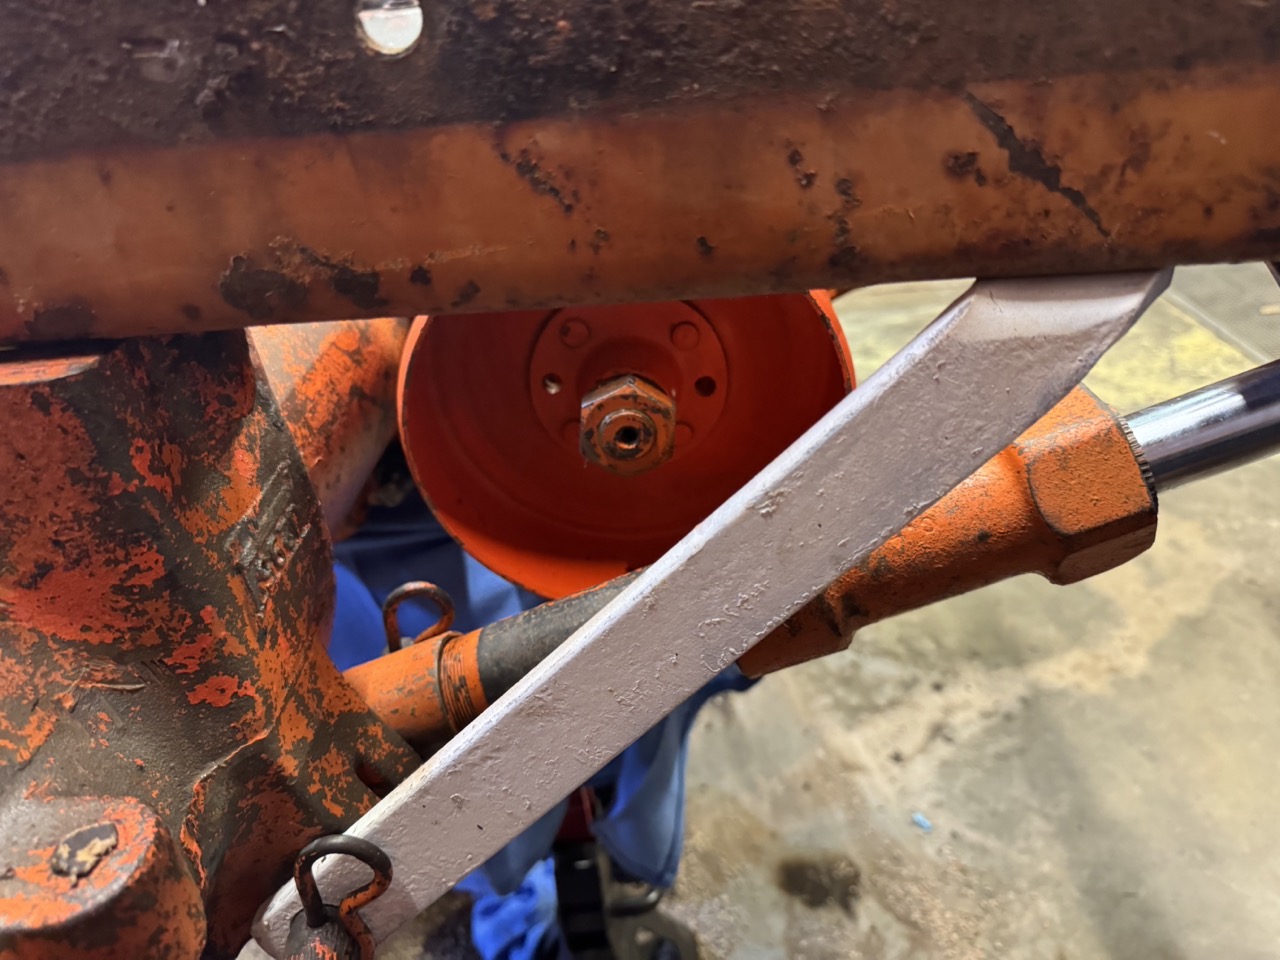
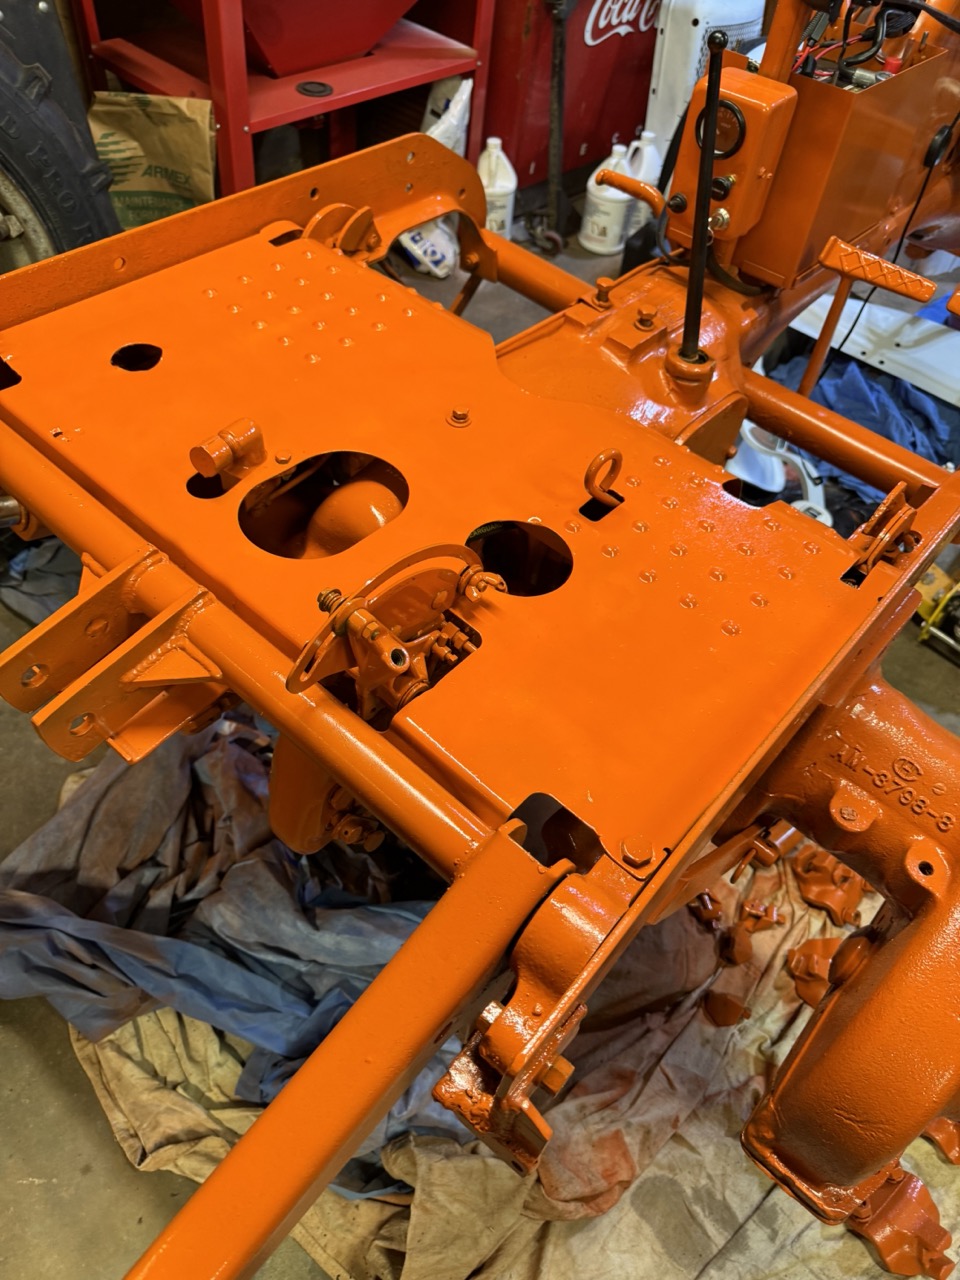
Realized, I did not add the platform and hydrualic lift support braces, thus attached both the left and right. You can see the left side in the picture above with the pully. Then the right side in the picture below.
Also after a final clean up, here is the first coat of paint on the transmission, differential, PTO, pulley and hydraulics.
< id="idg-io-safe-browsing-enabled" ="" oninit="true">
Edited by CA13414 - 20 Jul 2024 at 11:55pm
|
|
Helping the aged survive and thrive! 1953 CA
|
 |
|
Sponsored Links
|
|
|
CA13414
Silver Level
Joined: 25 Feb 2024
Location: Nebraska
Points: 270
|
Post Options
Thanks(0)
Quote Reply
Posted: 20 Jul 2024 at 10:55pm |
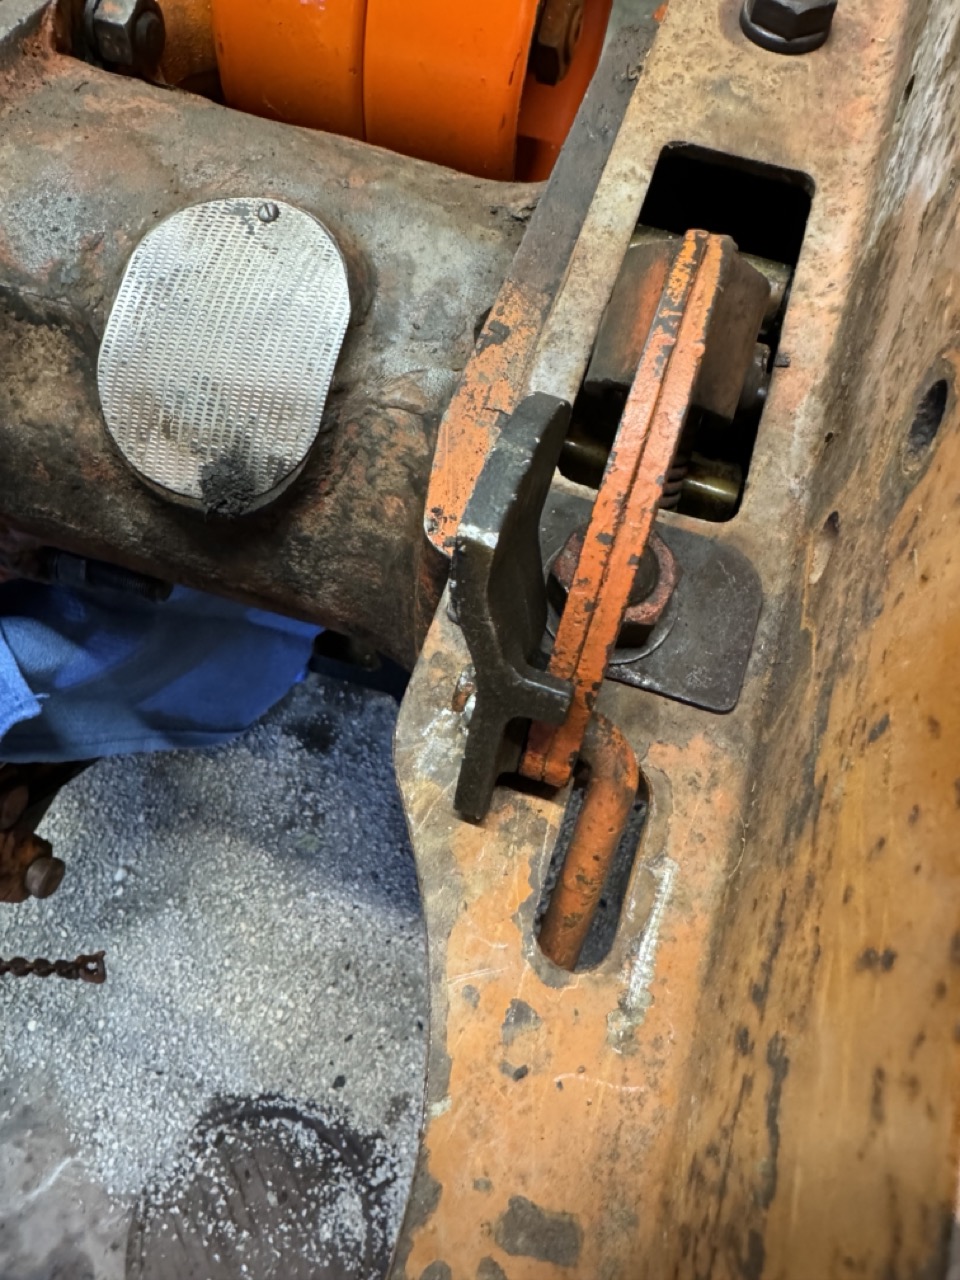
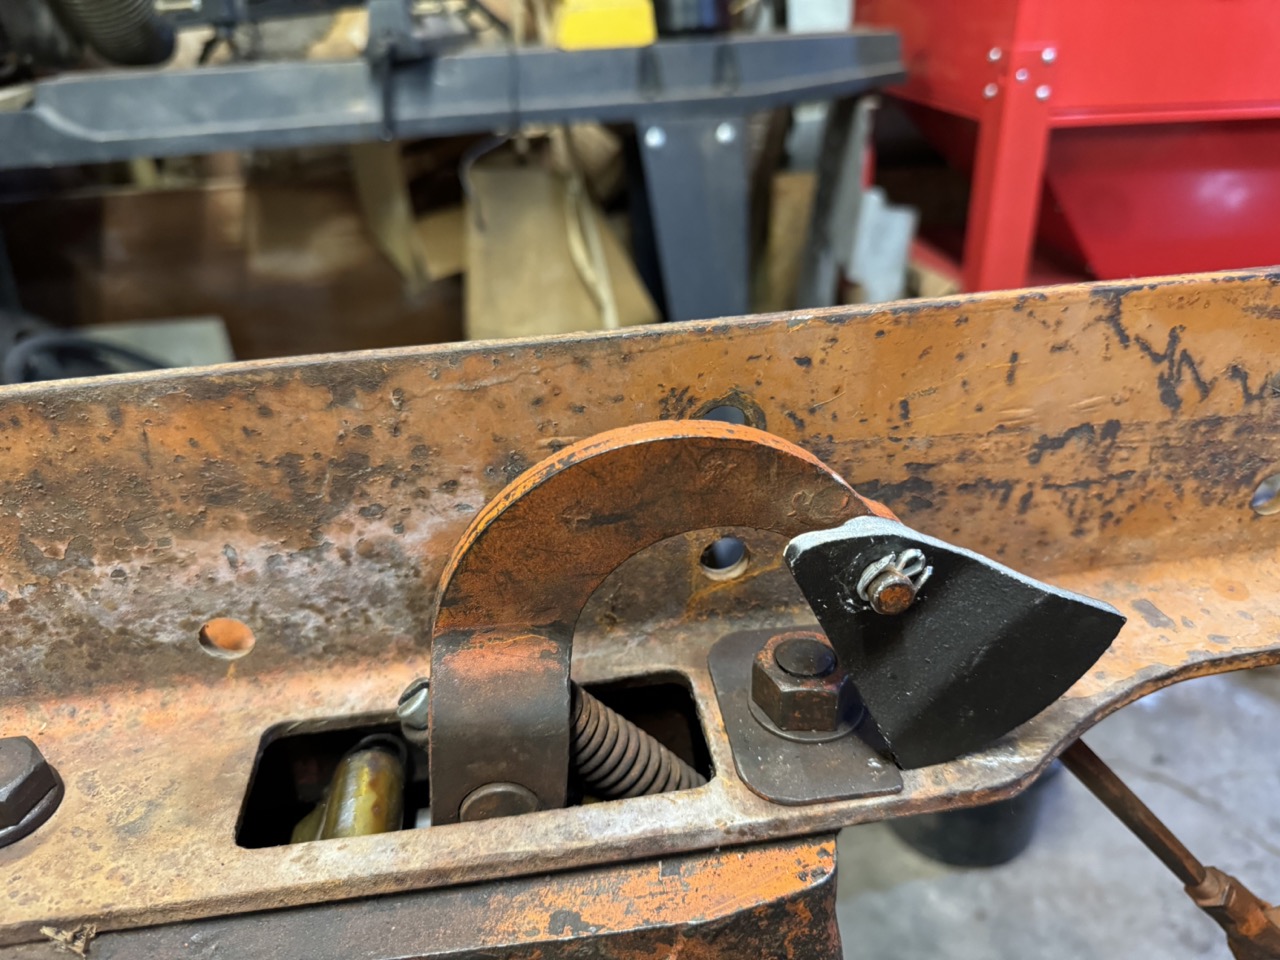
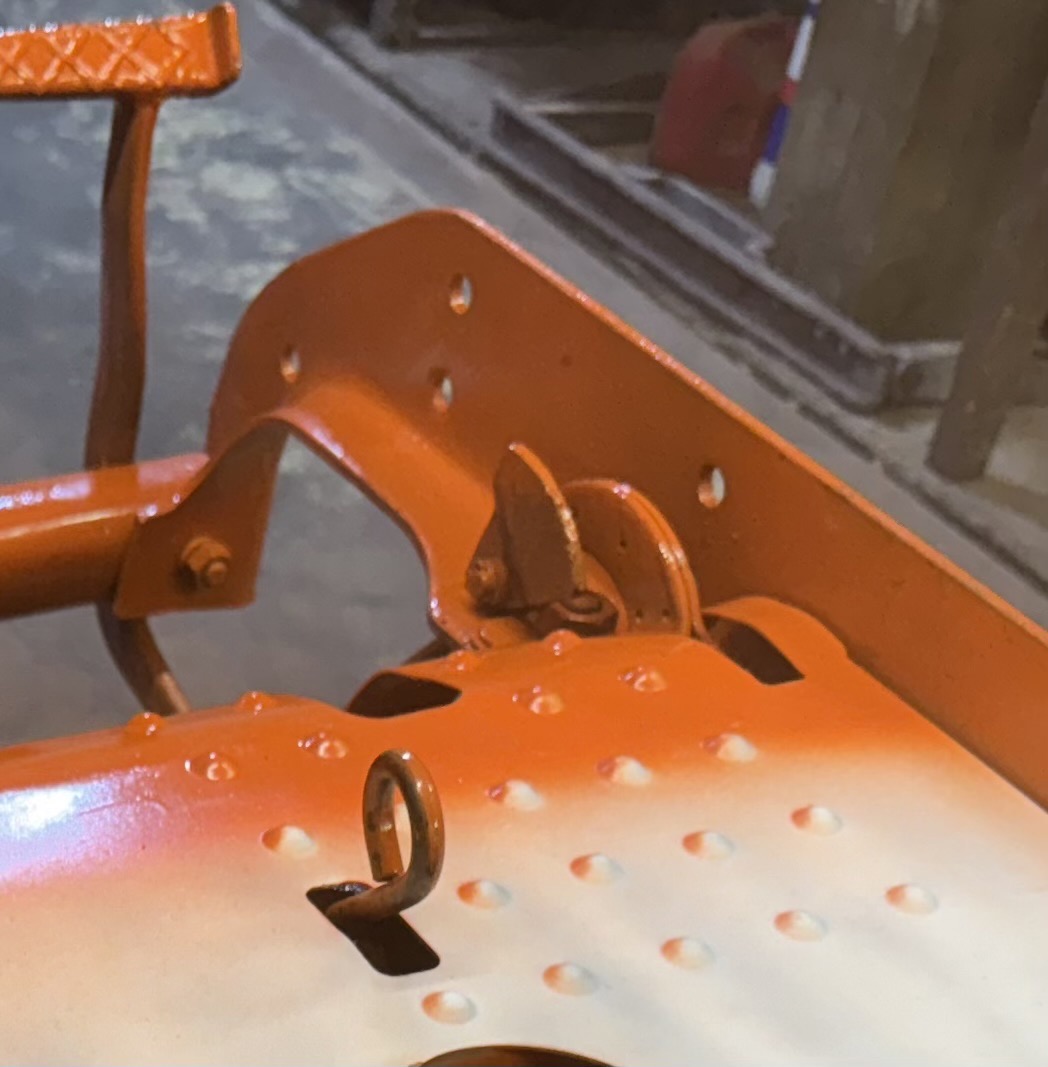
Also remembered, I needed to install the brake lock or "park brake" cam. Thus, took off the brake linkage and installed the brake lock on the left. Adjusted the brake "adjusting screw" such that it was tight when the lock was flipped over and "locked." I think I have this on correctly since it works well.
Is there suppose to be one on the right brake??
Here it is with the brake lock on, or in today terms "park-brake applies!" As an aside, we have been putting in new cotter pin everywhere possible.
< id="idg-io-safe-browsing-enabled" ="" oninit="true">
Edited by CA13414 - 21 Jul 2024 at 7:37pm
|
|
Helping the aged survive and thrive! 1953 CA
|
|
CA13414
Silver Level
Joined: 25 Feb 2024
Location: Nebraska
Points: 270
|
Post Options
Thanks(0)
Quote Reply
Posted: 20 Jul 2024 at 11:06pm |
I was a bit worried about the positive battery cable to the starter and wearing through the cable insulation by rubbing on the edge of the battery box. Thus, found a piece of 1/4 hose and slit it open. Then put it on the "cutout" of the battery box to protect the positive cable from wearing through the insulation. 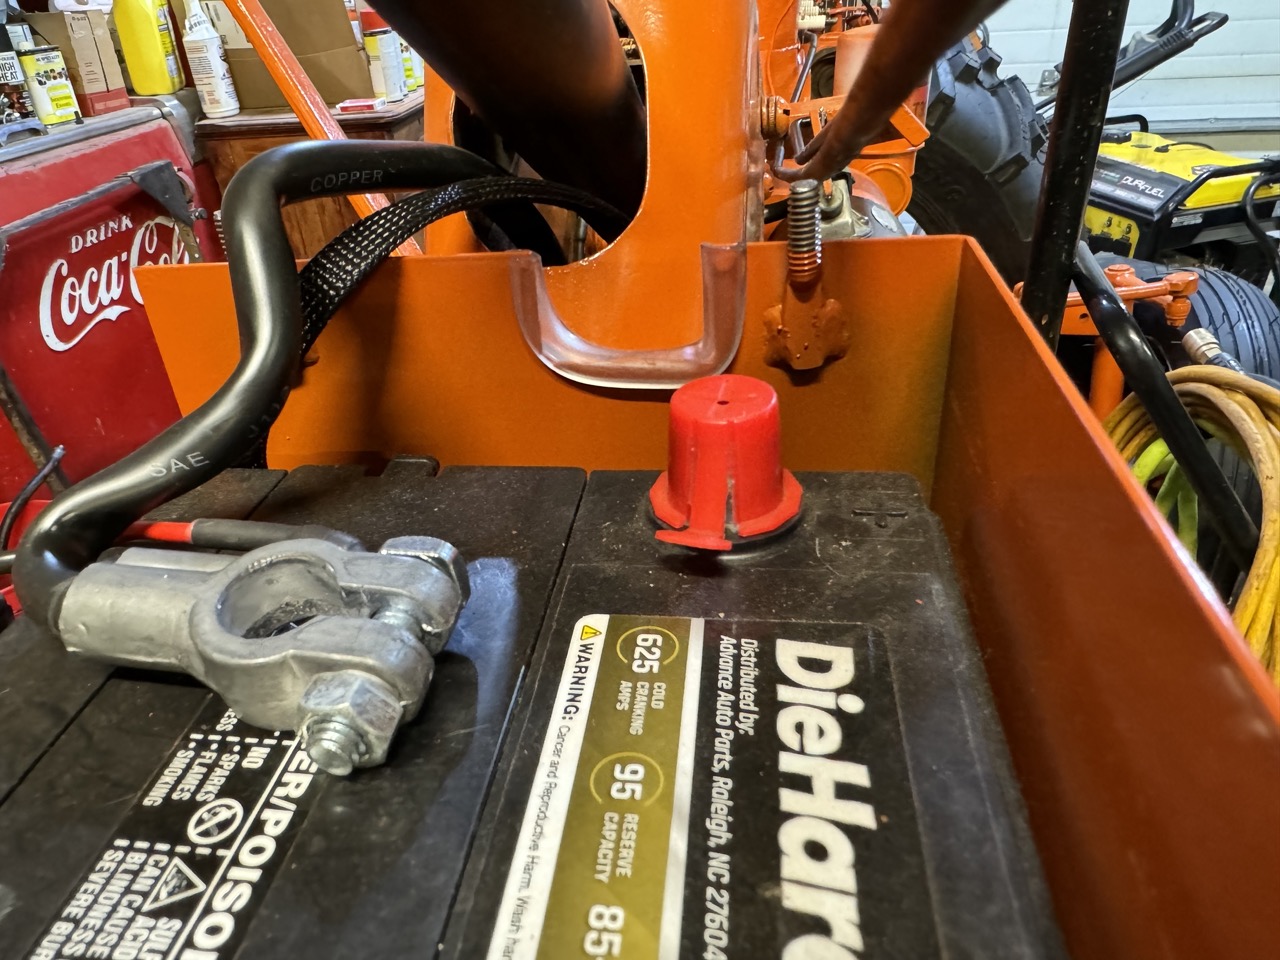
< id="idg-io-safe-browsing-enabled" ="" oninit="true">
Edited by CA13414 - 20 Jul 2024 at 11:48pm
|
|
Helping the aged survive and thrive! 1953 CA
|
|
CA13414
Silver Level
Joined: 25 Feb 2024
Location: Nebraska
Points: 270
|
Post Options
Thanks(0)
Quote Reply
Posted: 20 Jul 2024 at 11:08pm |
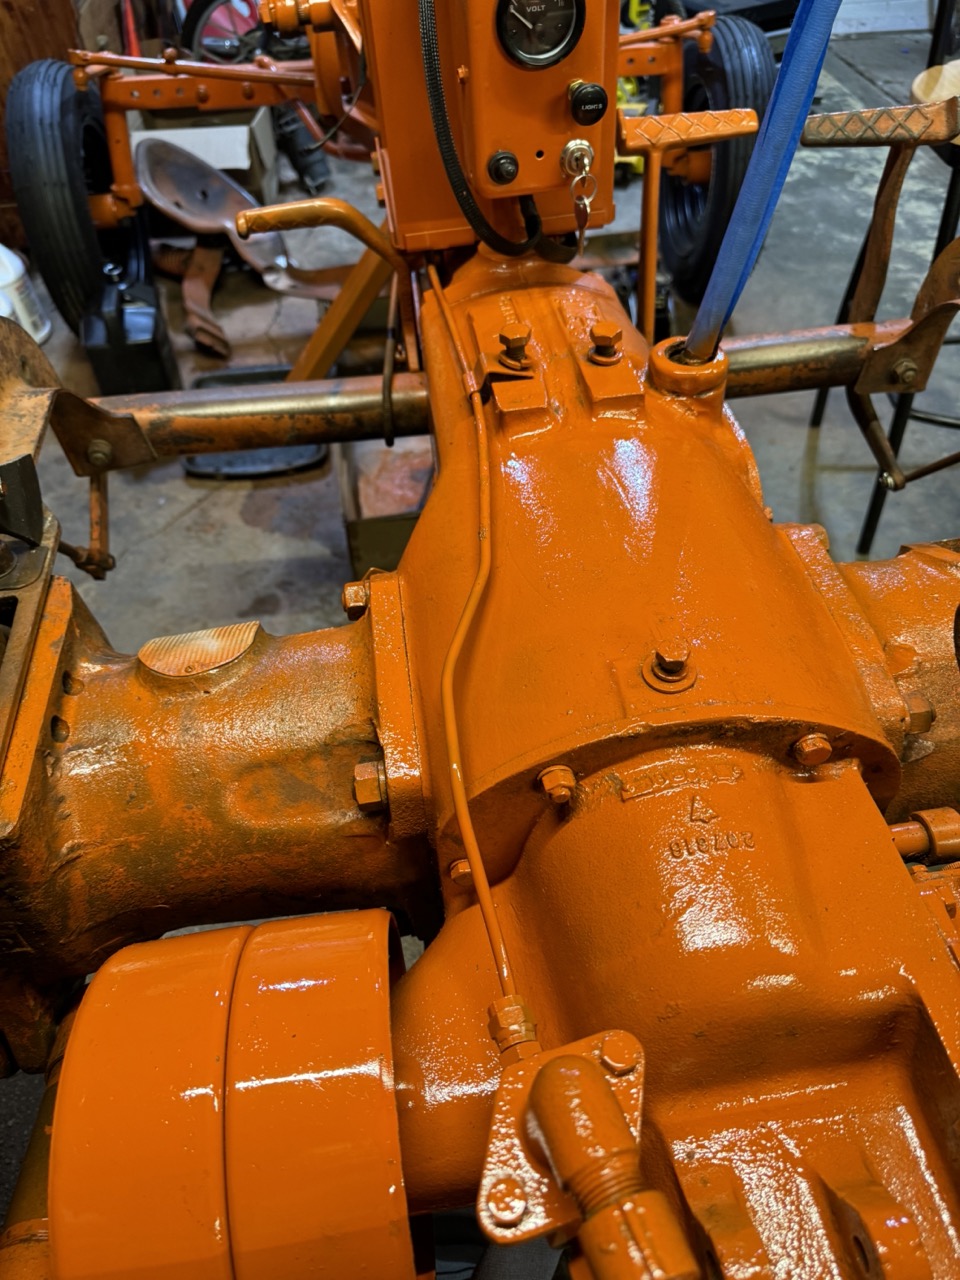
The days work!!! As noted above the first coat of paint on the transmission, differential, PTO, hydraulics and belt pulley.
< id="idg-io-safe-browsing-enabled" ="" oninit="true">
Edited by CA13414 - 20 Jul 2024 at 11:41pm
|
|
Helping the aged survive and thrive! 1953 CA
|
|
CA13414
Silver Level
Joined: 25 Feb 2024
Location: Nebraska
Points: 270
|
Post Options
Thanks(0)
Quote Reply
Posted: 25 Jul 2024 at 8:48pm |
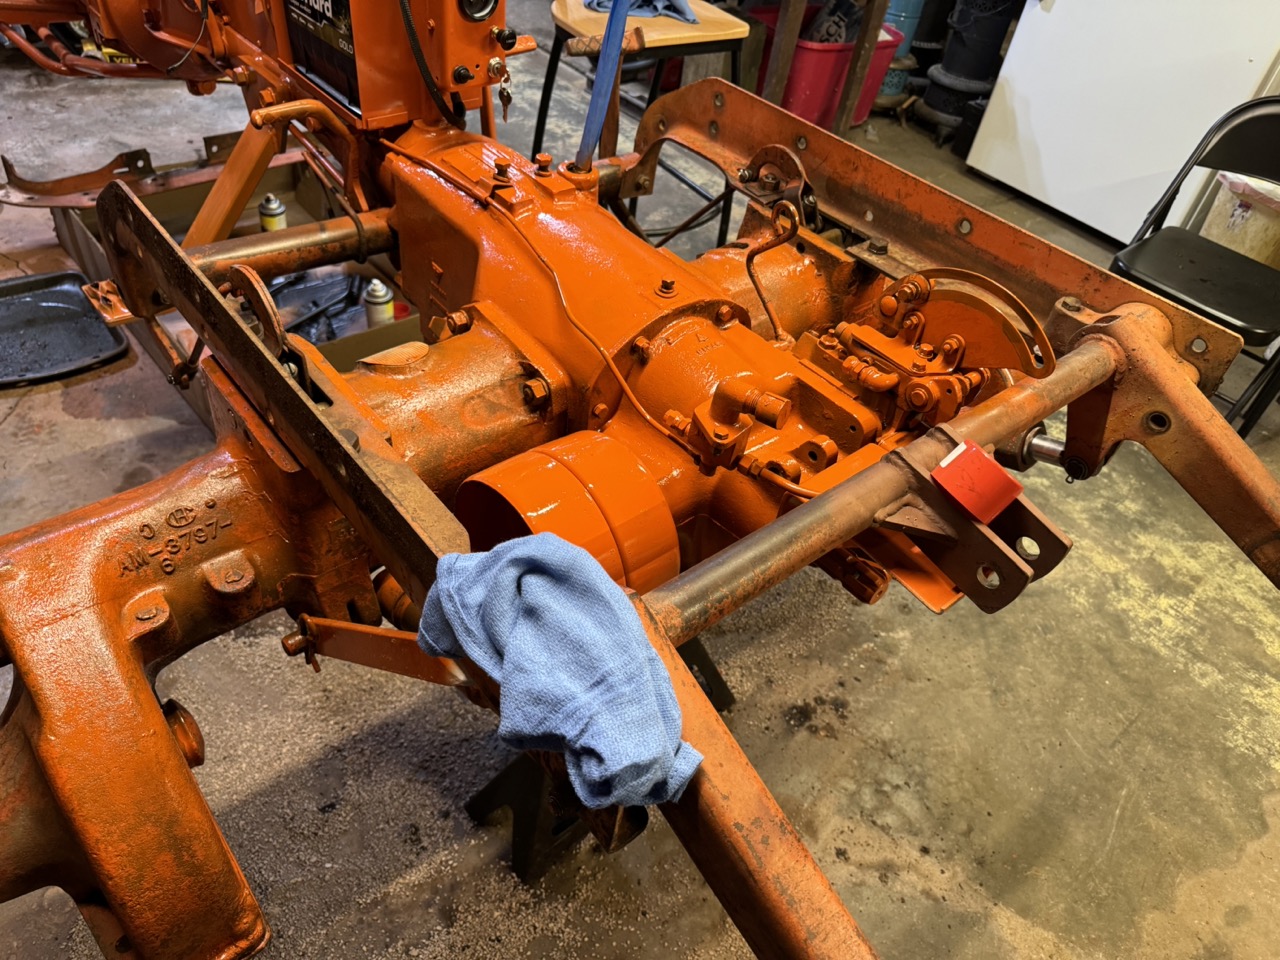
Once again, no oil leaks today.....
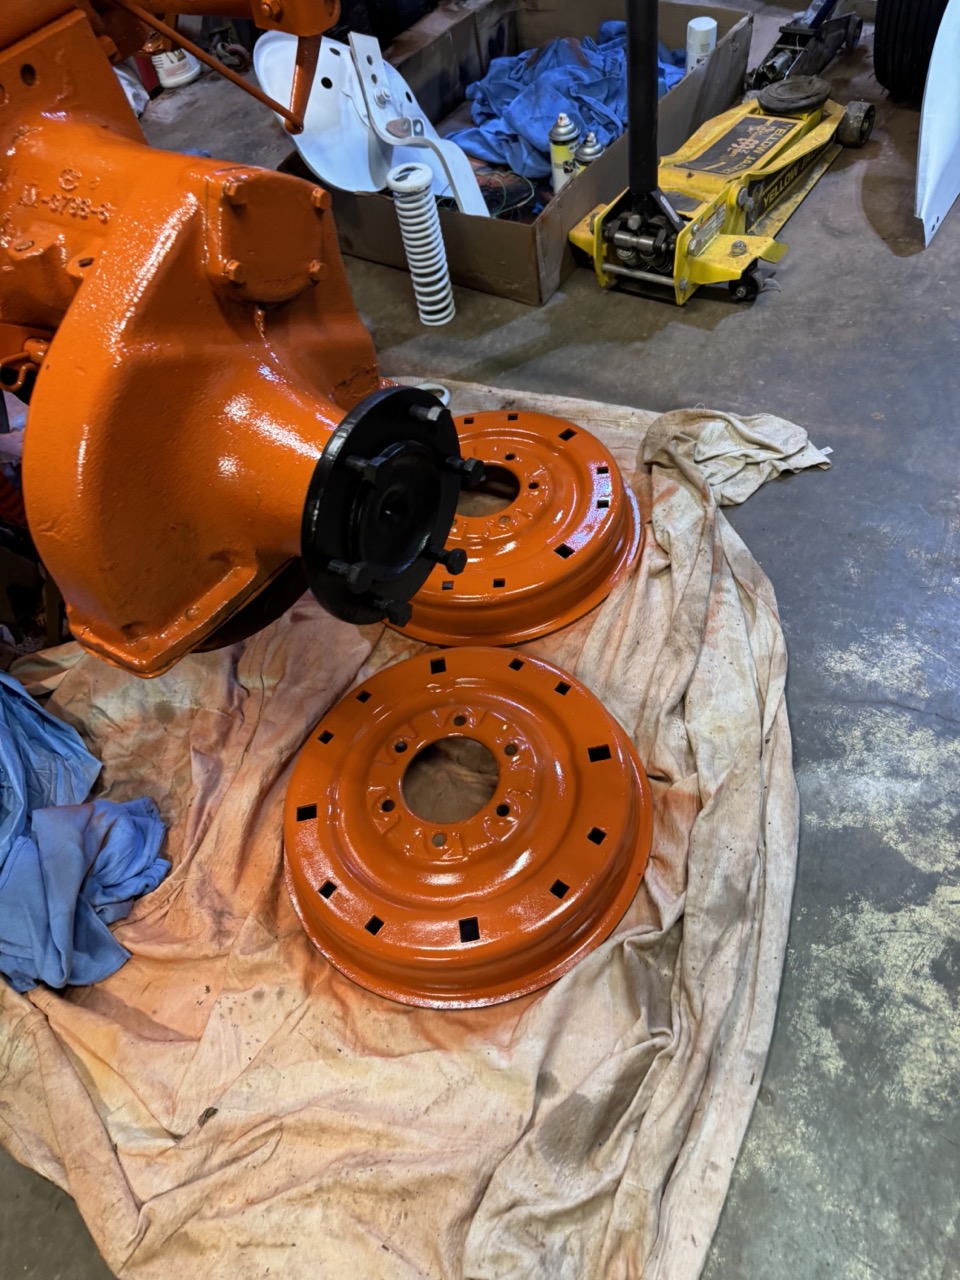
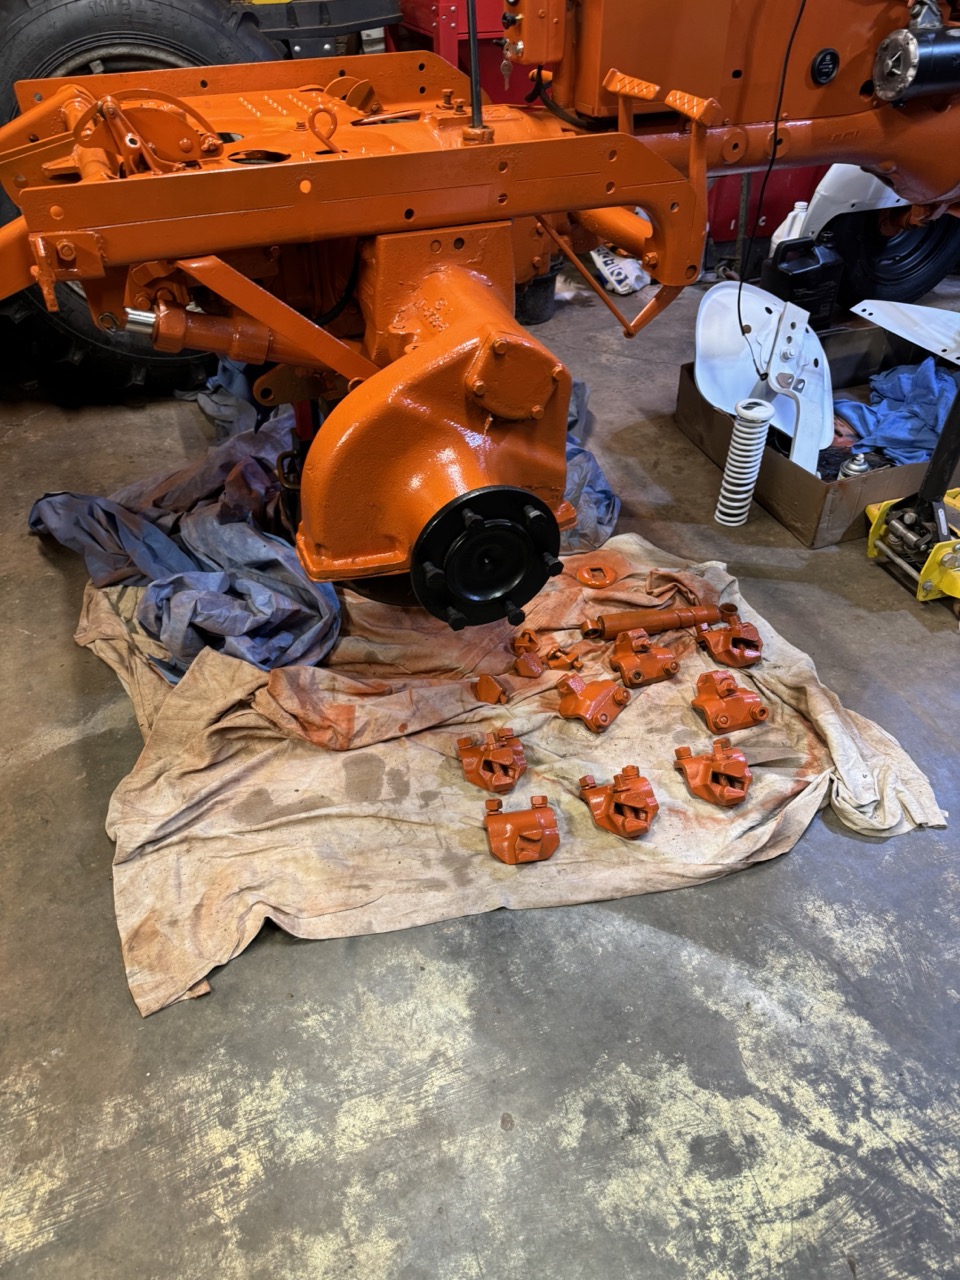
Spent a couple of hours cleaning up the final drive. Amazing how hard the grease build up was and was a bit of work with solvent, and a brush and scraper. Then reinstalled traction booster oil line.
Then the first light coat of paint.
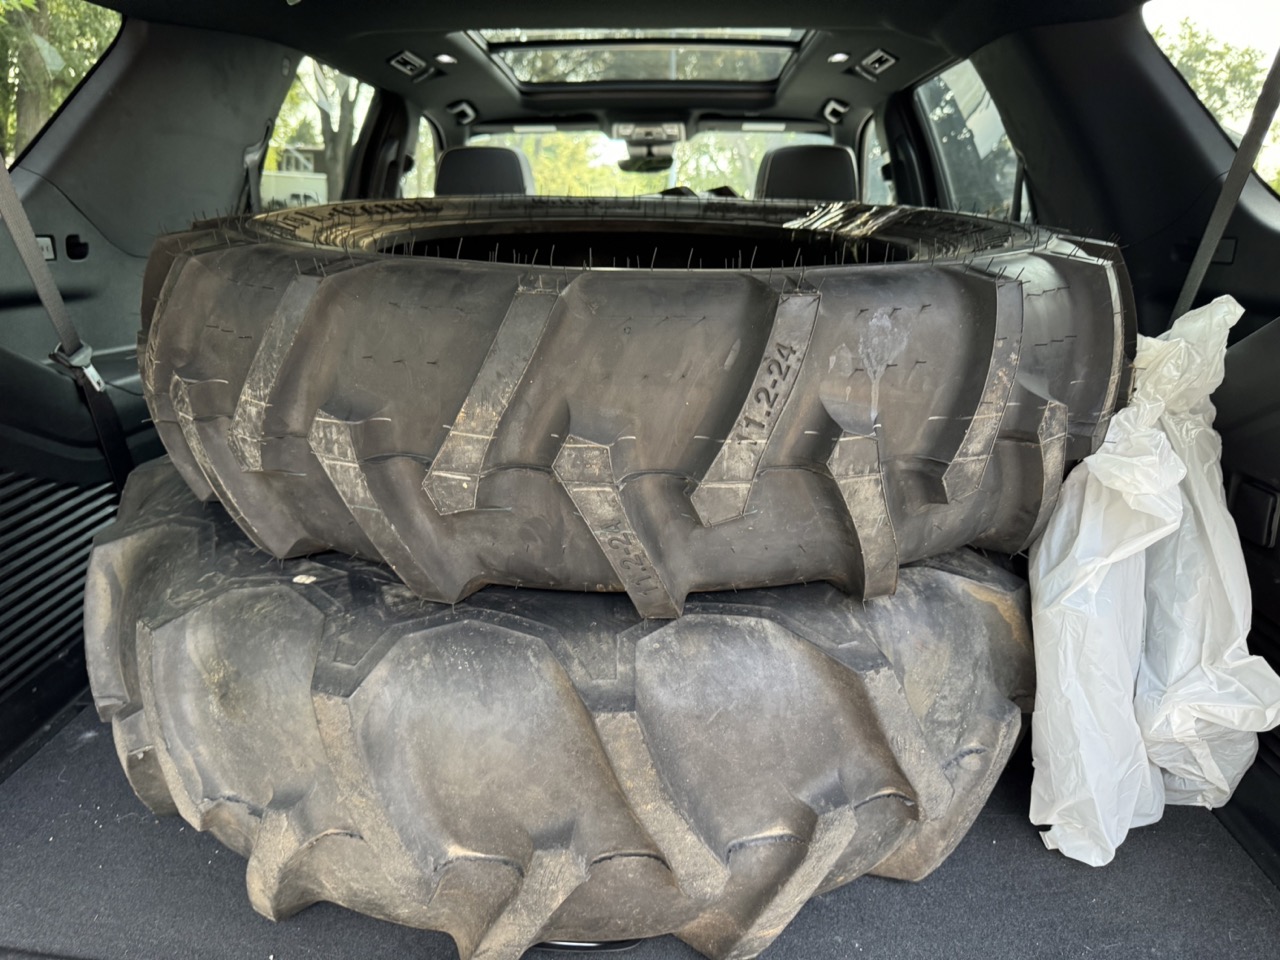
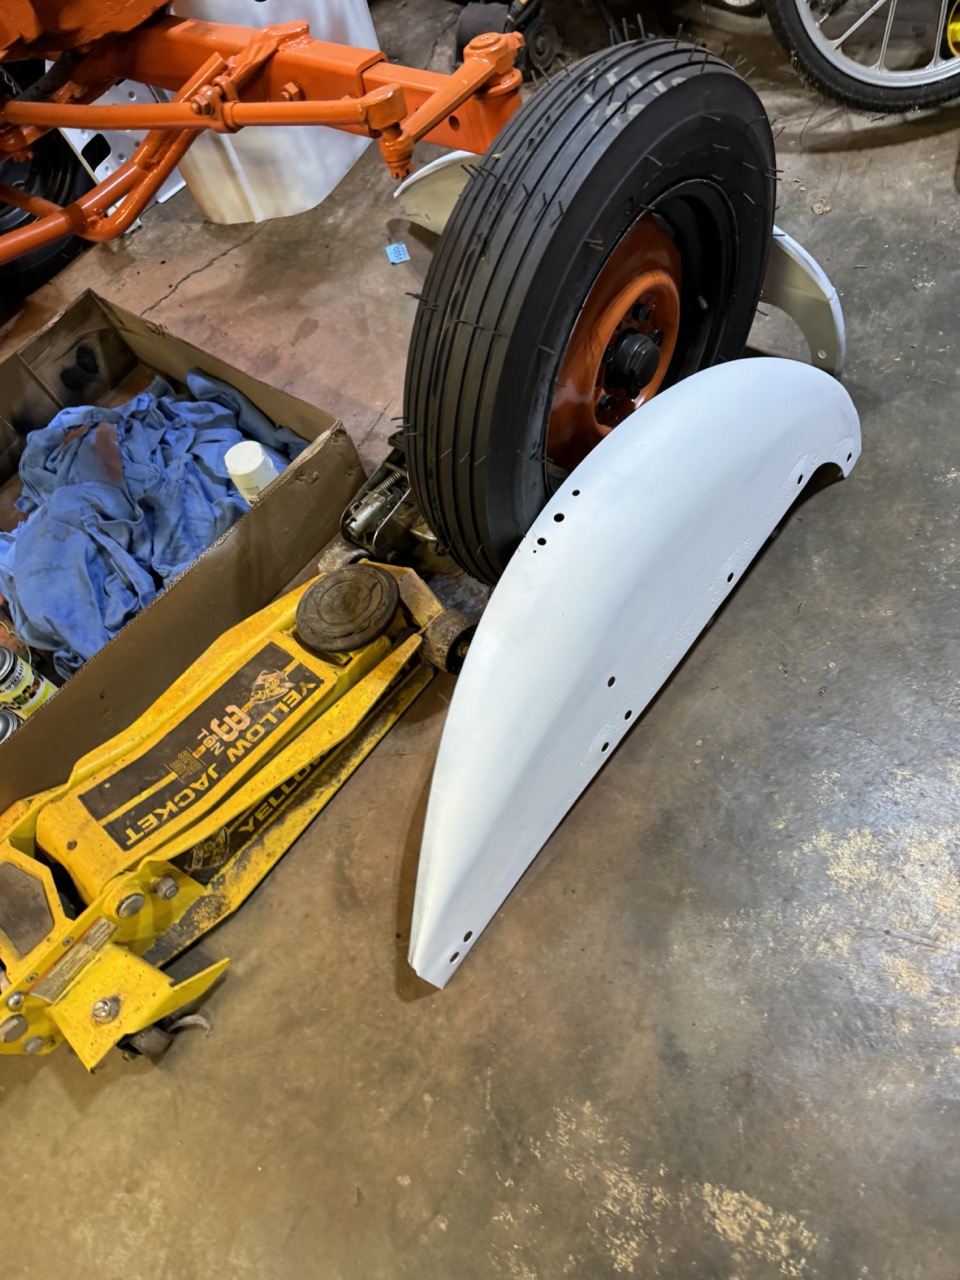
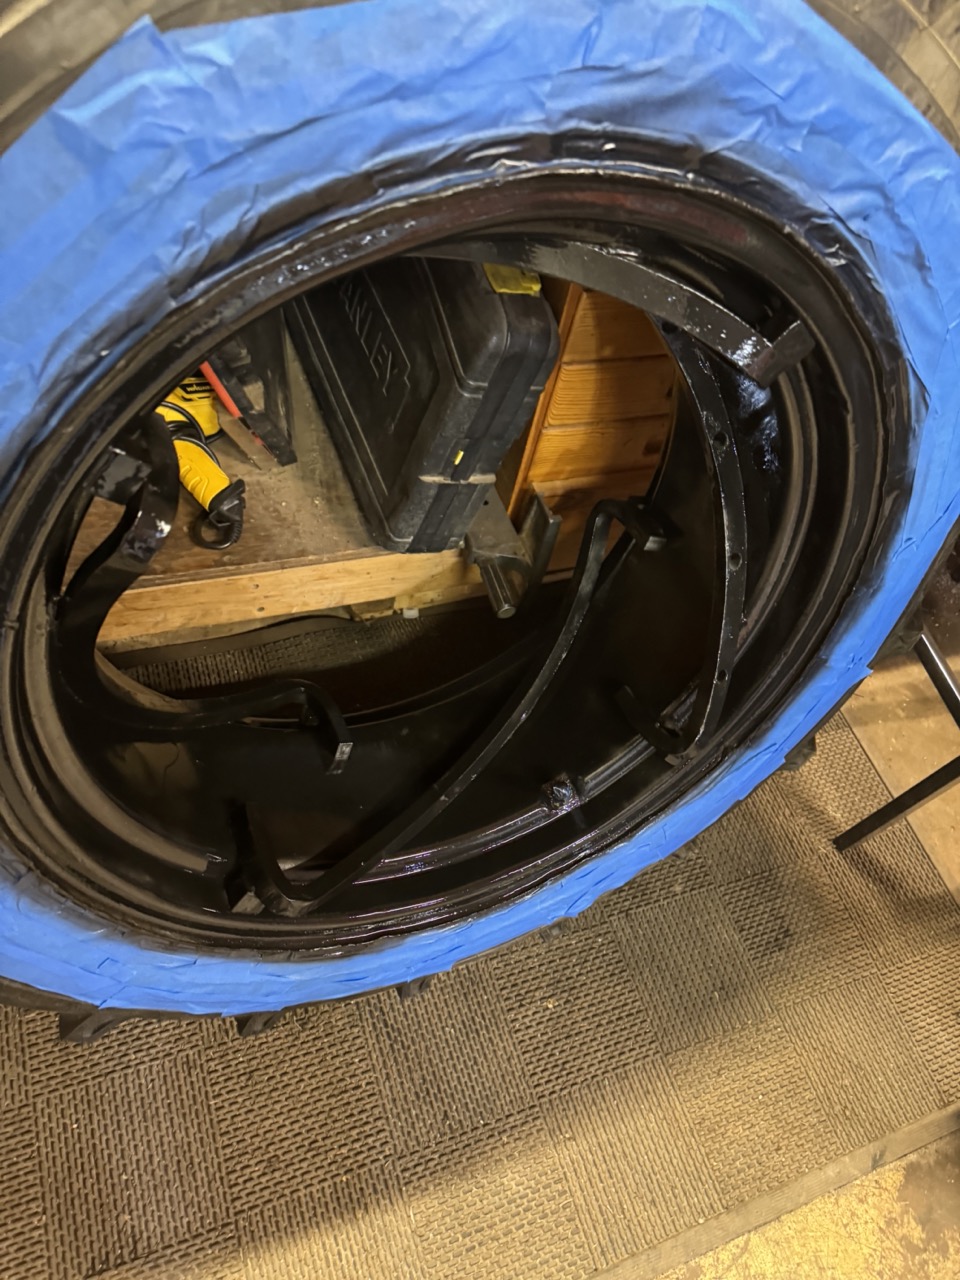
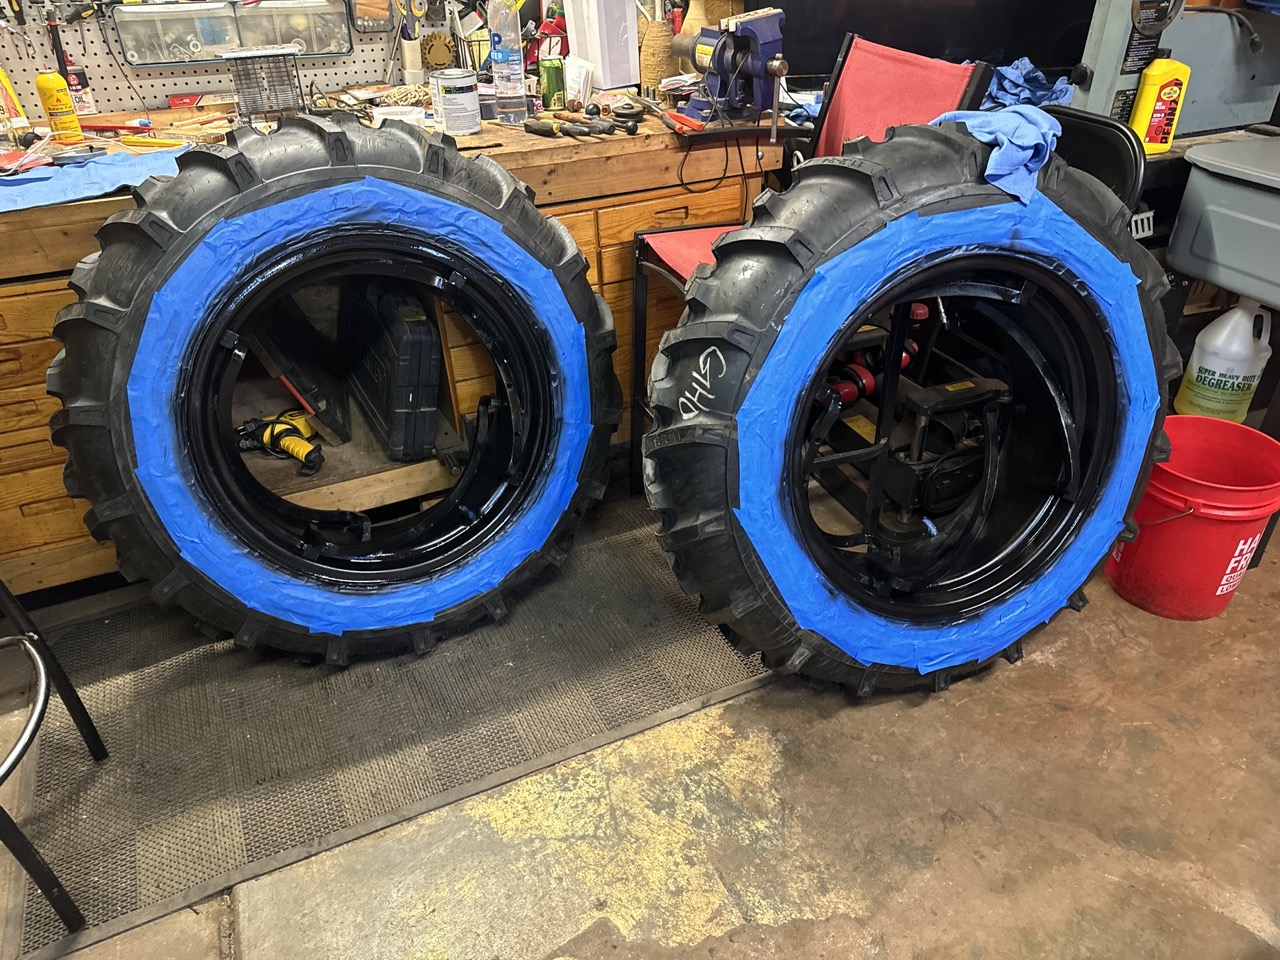
Loaded up the new rear tires. Will have them mounted on the rims tomorrow. Still need to clean up the rear hubs.
< id="idg-io-safe-browsing-enabled" ="" oninit="true">
Edited by CA13414 - 25 Jul 2024 at 8:48pm
|
|
Helping the aged survive and thrive! 1953 CA
|
|
CA13414
Silver Level
Joined: 25 Feb 2024
Location: Nebraska
Points: 270
|
Post Options
Thanks(0)
Quote Reply
Posted: 28 Jul 2024 at 7:05pm |
Was able to spend a number of hours today. Was so busy, didn't even eat anything today!?
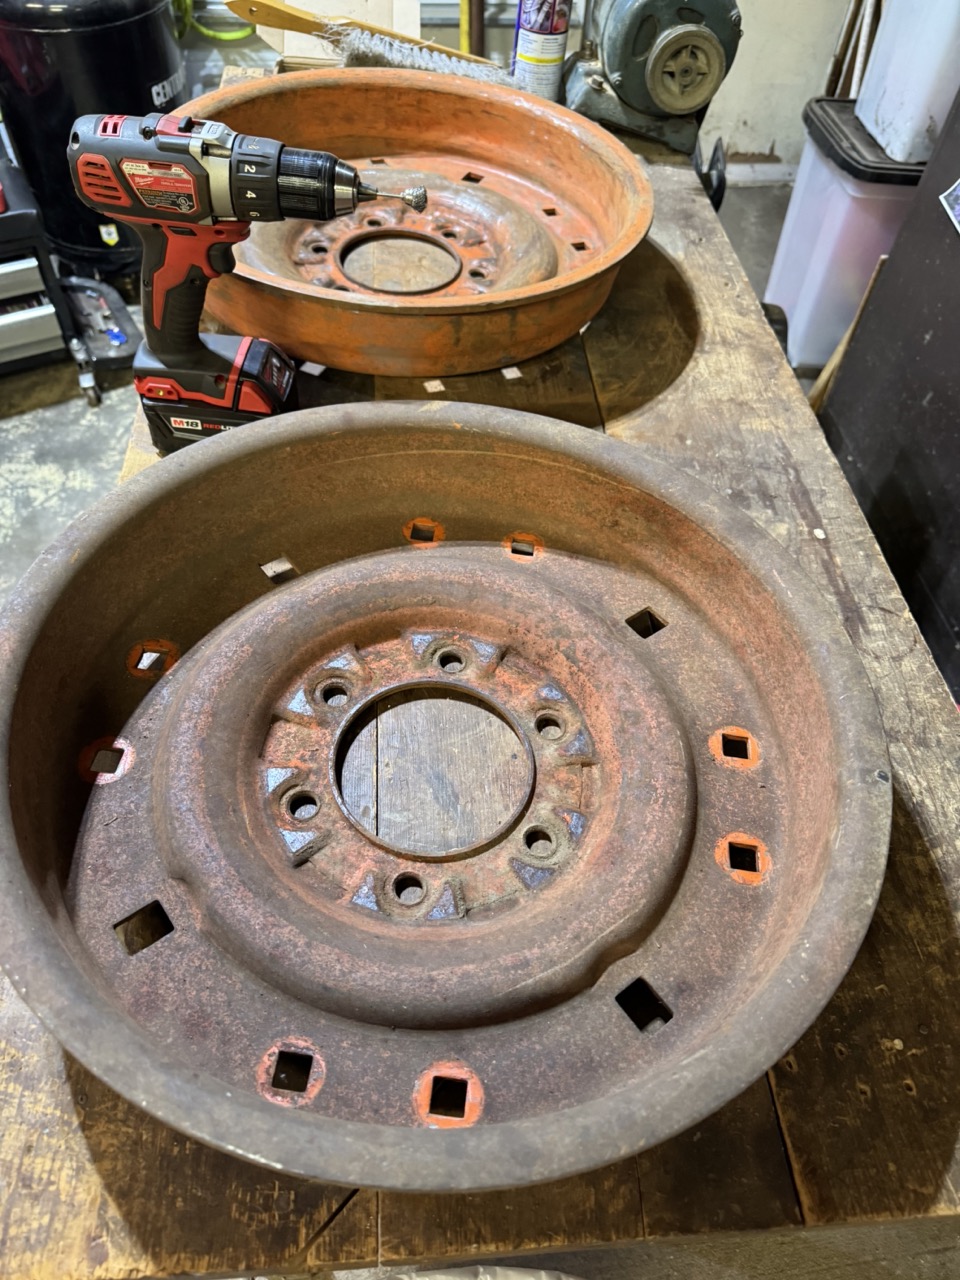
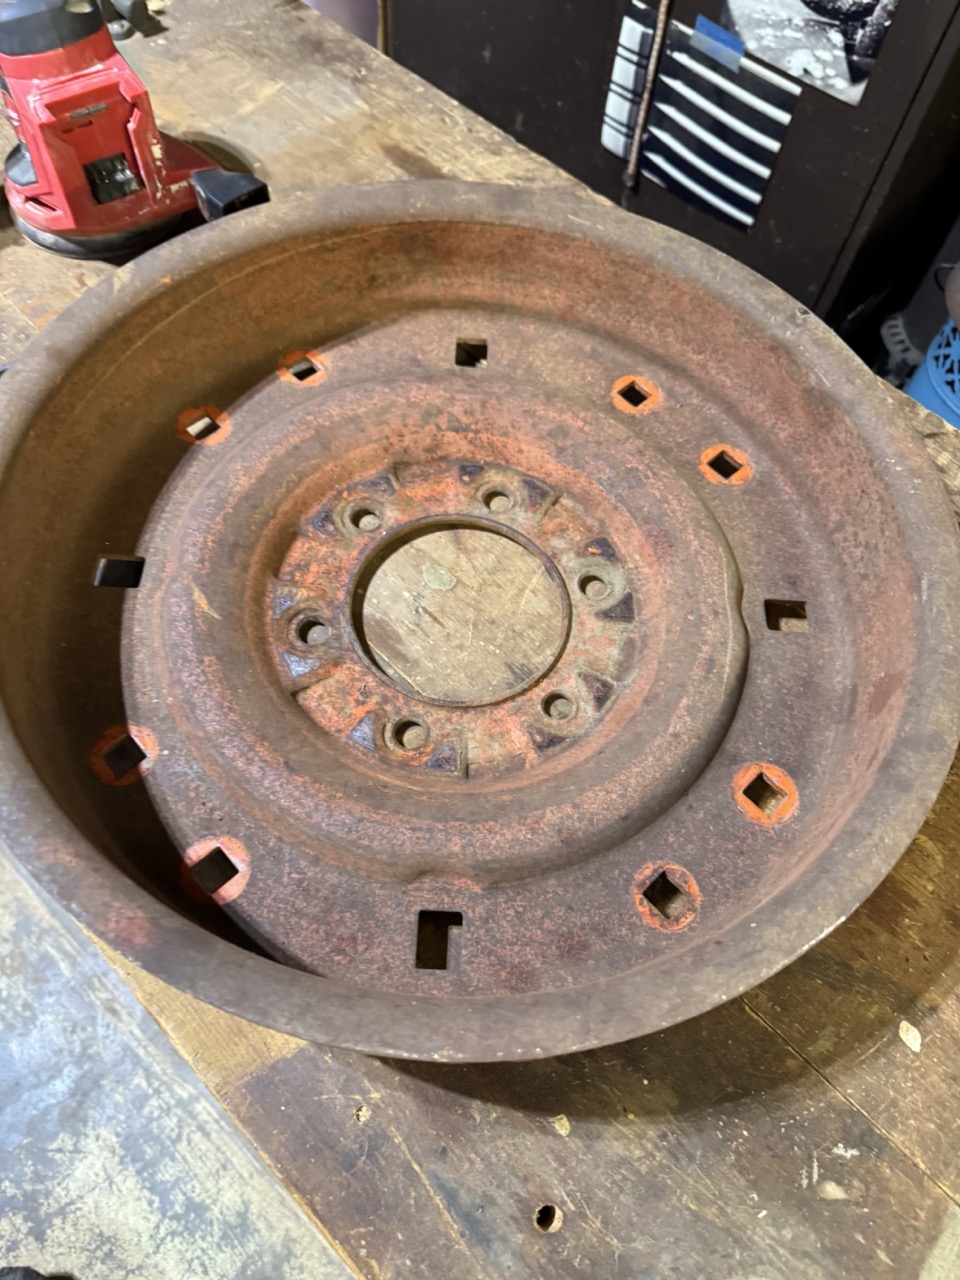
First, cleaned up the rear wheel hubs. Scraped off the grease and dirt, used a sanding drill bit, this small wire brush to clean up the small areas. Took it down to the old paint or metal. Then the orbital sander and hand sanding to finish off the hub. Top picture is after cleaning with the sanding drill bit. Still need to sand with the orbital sander. Below is the other side after cleaning up the dirt and grease. Now taking the drill and sander to finish up.
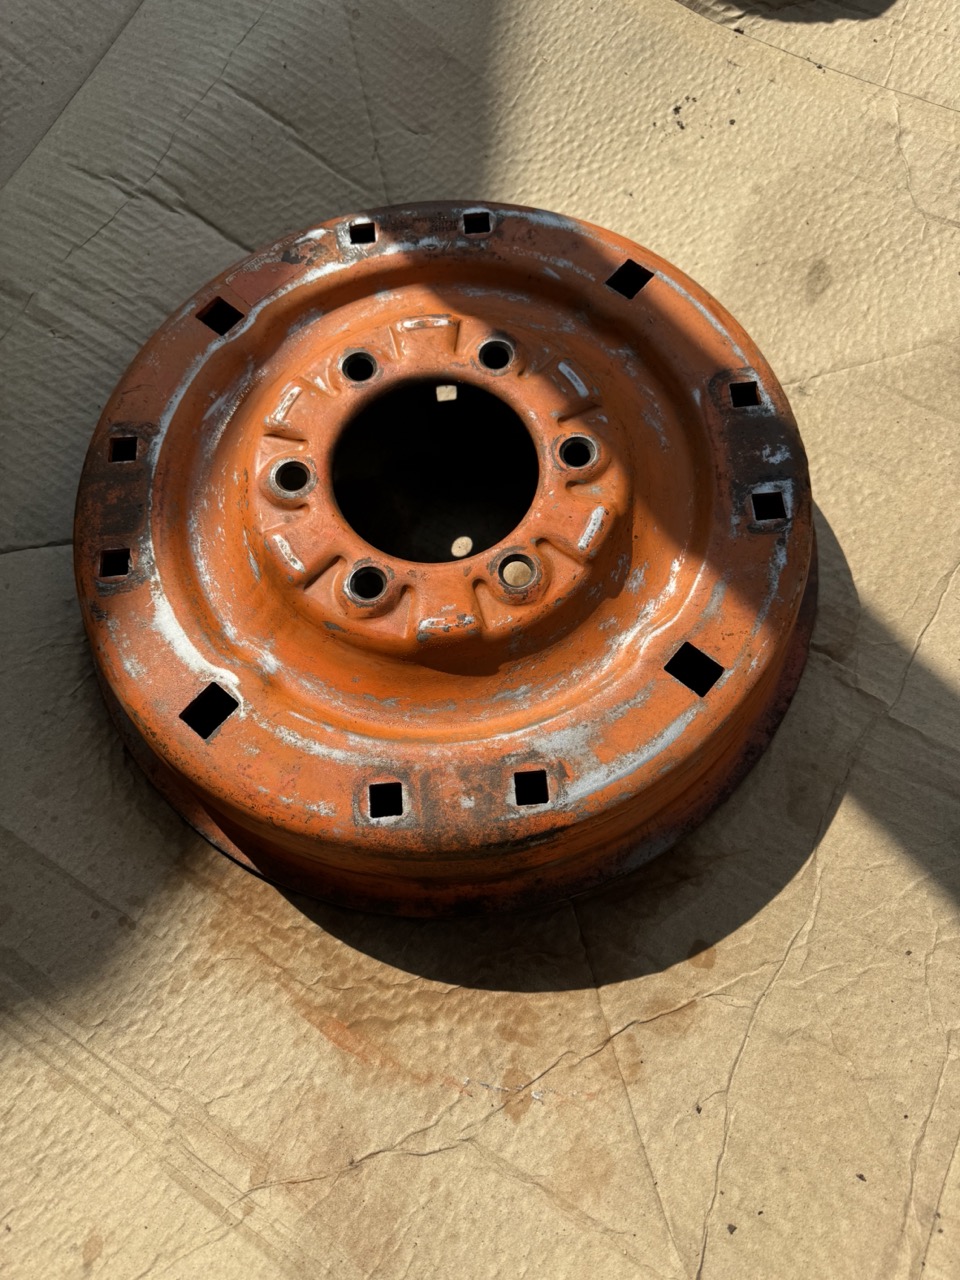
Ready for paint
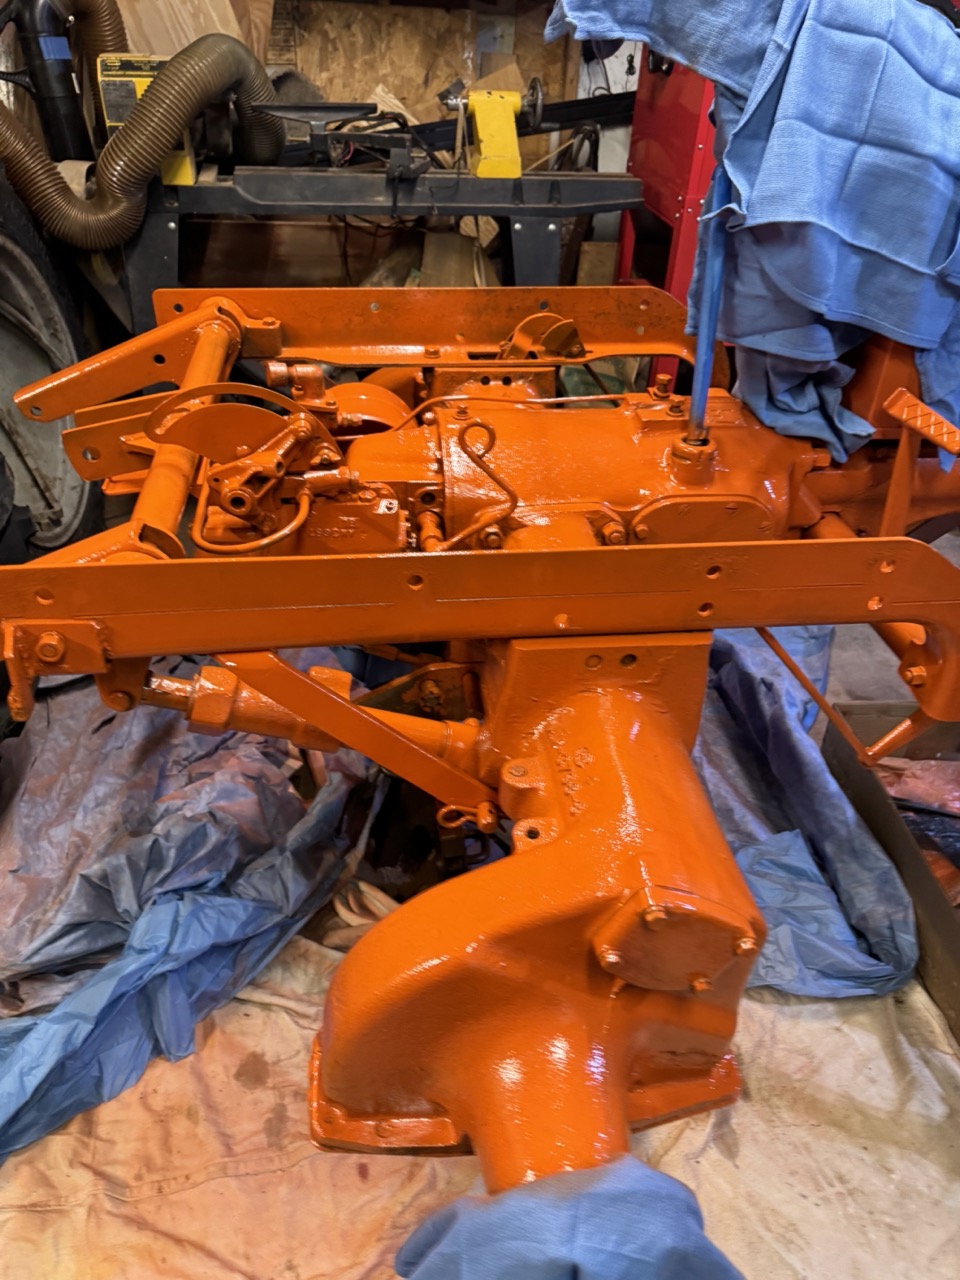
Final coat of paint. As well, the final coat on the transmission, differential and final drive and final drive tube. And yes see the seat and spring primed. Need to see if I can find a new shock absorber.
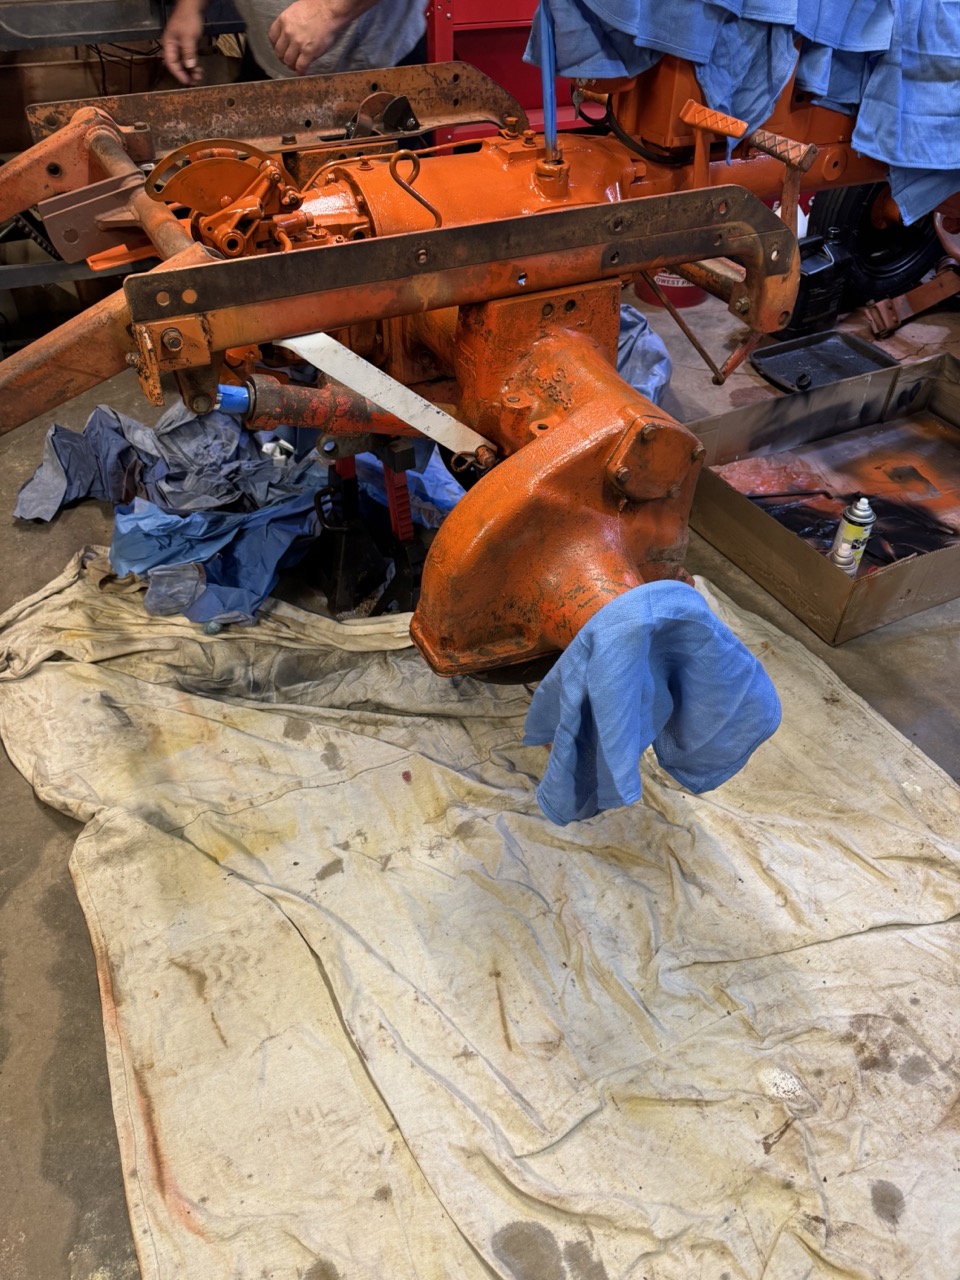
A bit more rust clean up then ready to finish painting the transmission, differential and final drive.
Final coat of paint. Looks awesome. May need a bit of touch up since we are always seeing some little corner or edge that need a bit more.
< id="idg-io-safe-browsing-enabled" ="" oninit="true">
Edited by CA13414 - 29 Jul 2024 at 5:49am
|
|
Helping the aged survive and thrive! 1953 CA
|
|
CA13414
Silver Level
Joined: 25 Feb 2024
Location: Nebraska
Points: 270
|
Post Options
Thanks(0)
Quote Reply
Posted: 28 Jul 2024 at 7:11pm |
Rear tires were mounted on Friday and look great. Started cleaning them up but did not finish. Sometime this week hopefully.< id="idg-io-safe-browsing-enabled" ="" oninit="true">
Edited by CA13414 - 28 Jul 2024 at 7:52pm
|
|
Helping the aged survive and thrive! 1953 CA
|
|
CA13414
Silver Level
Joined: 25 Feb 2024
Location: Nebraska
Points: 270
|
Post Options
Thanks(0)
Quote Reply
Posted: 28 Jul 2024 at 7:14pm |
Then worked on cleaning up the tire rims and the guide rail bodies, eccentric pin bodies and pin blocks. Will add pictures later.
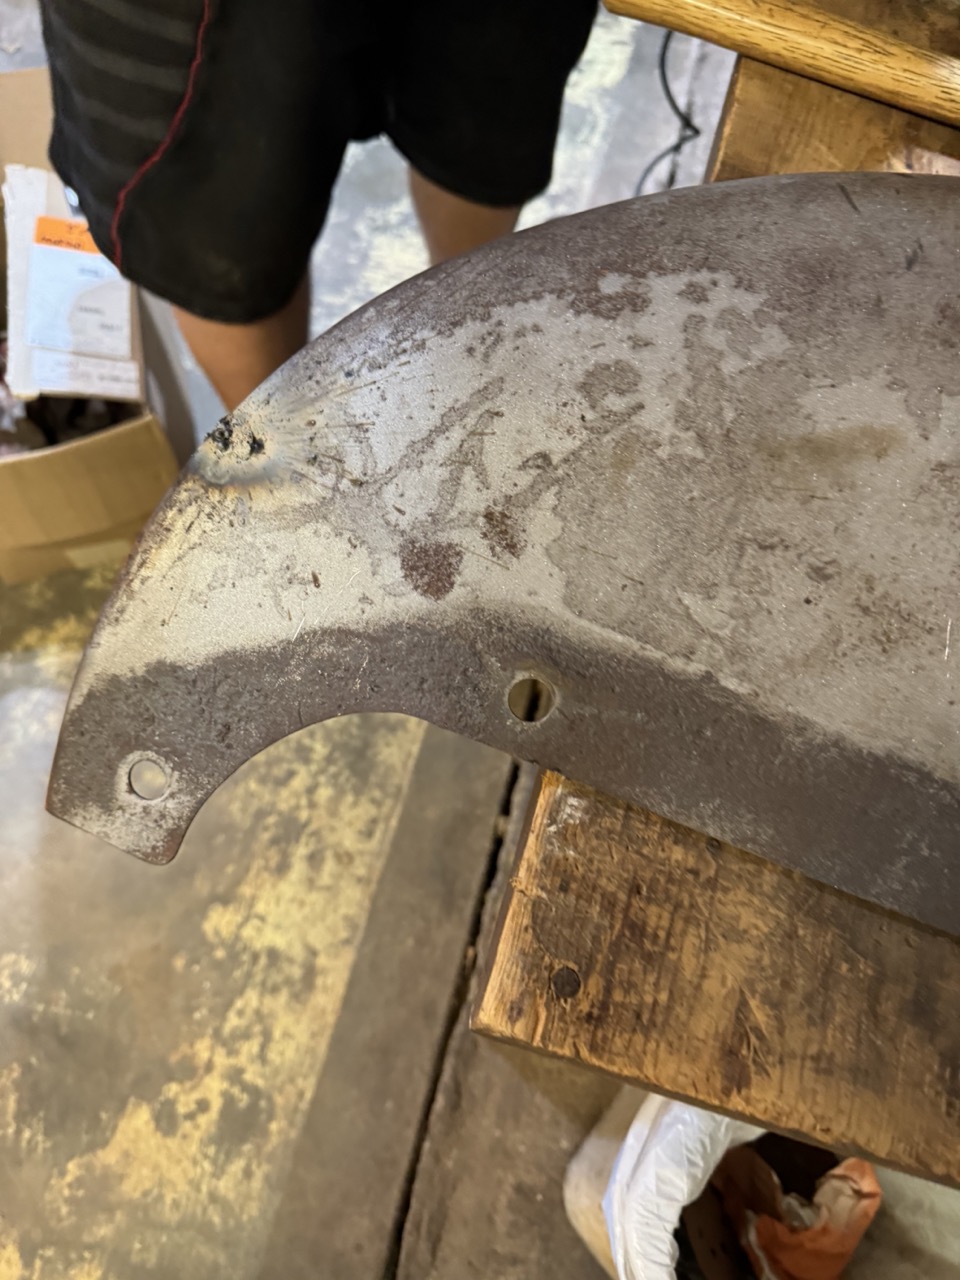
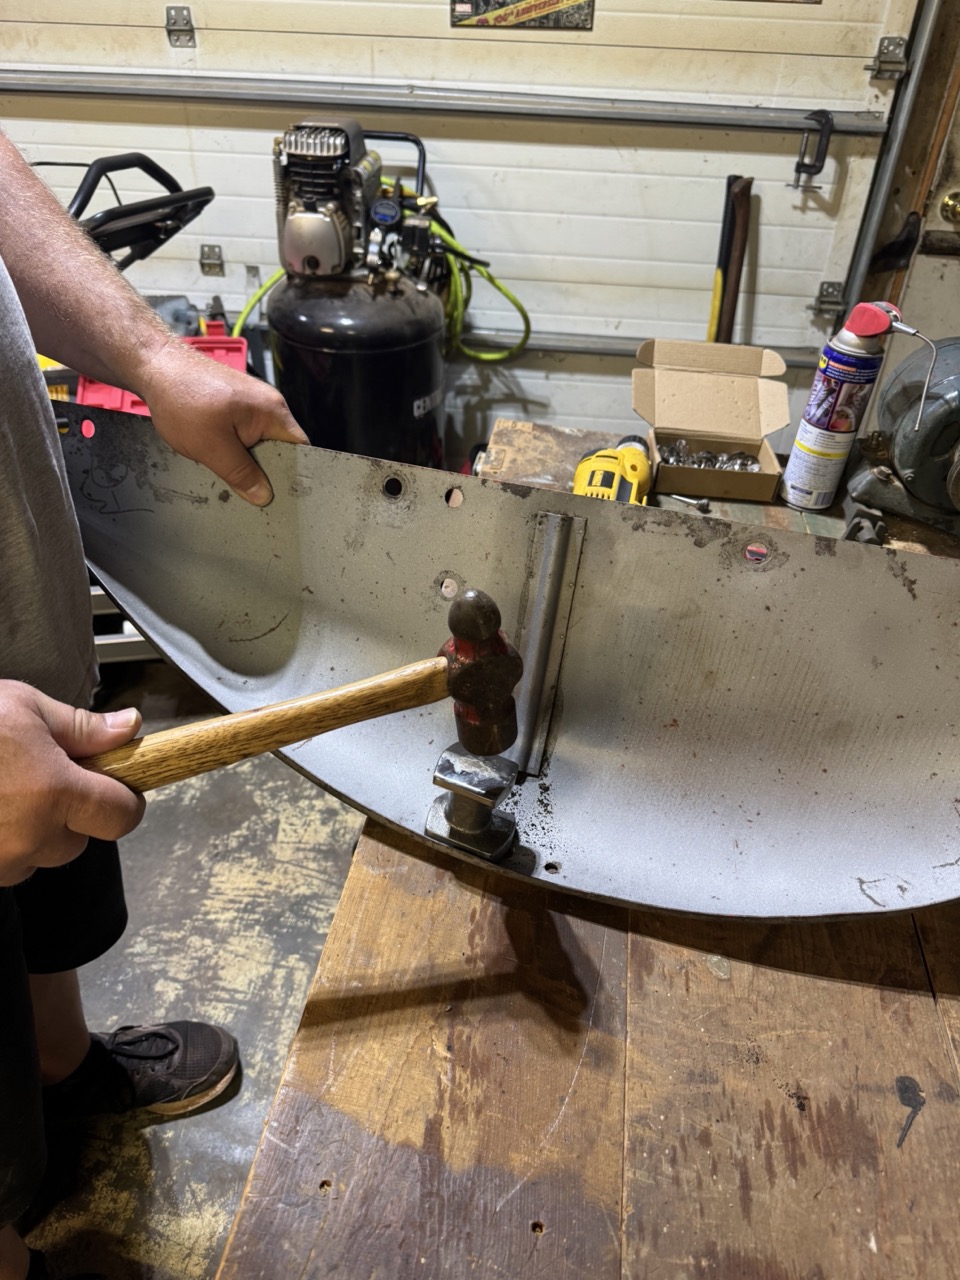
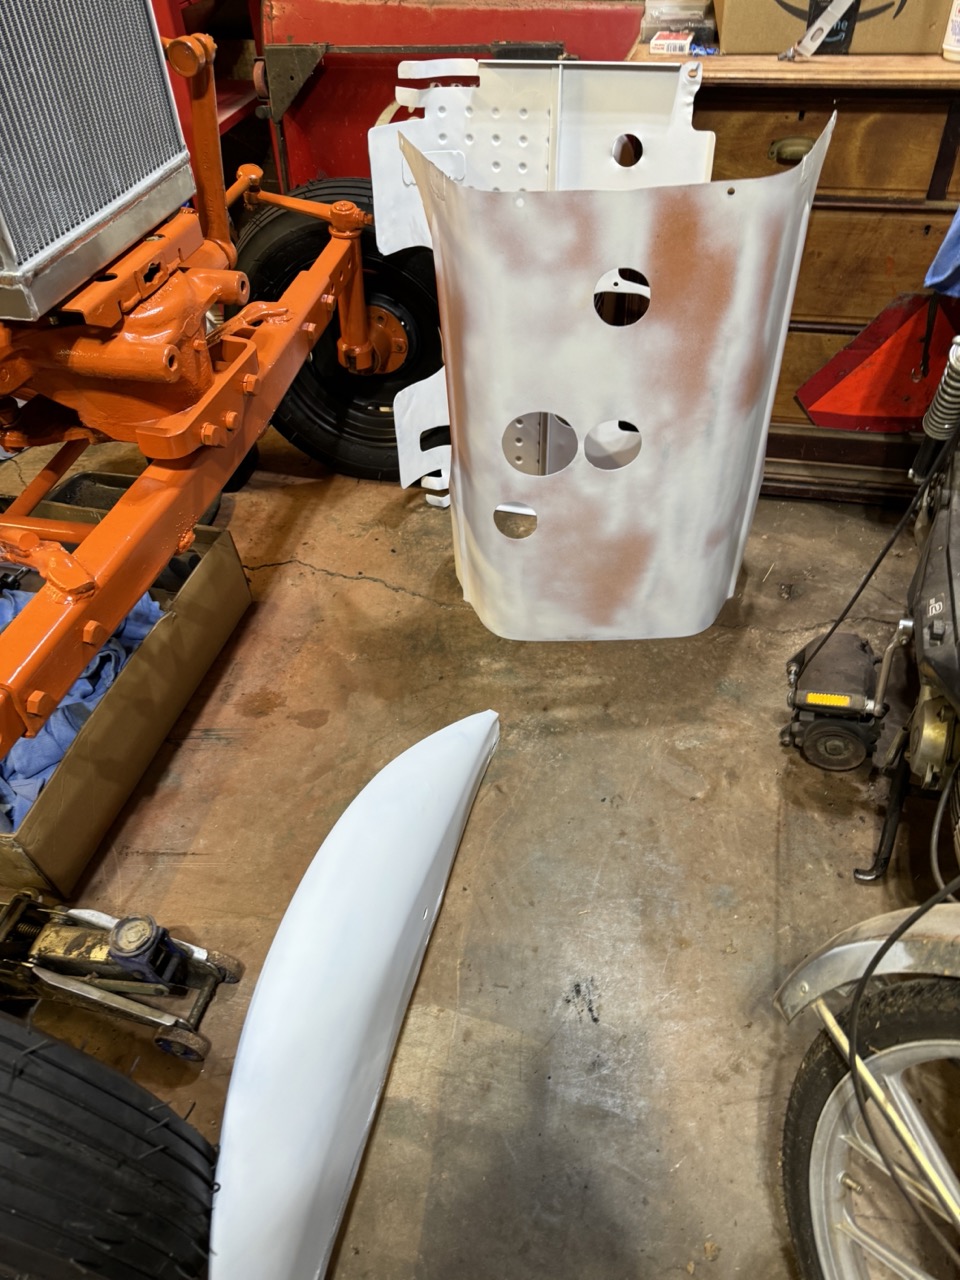
Also did wire weld a crack in the fender. Yep did burn through and needed to fill... thus now need to grind off the excess weld. Then hammered out the dents and sanded them smooth with orbital sander. Also was also able to take off the remaining rust with the orbital sander.
Also cleaned, sanded and hammered out dents on the other fender, then the hood and platform. Did spend a bit of time bending the platform into shape, since it was bent to remove from the family CA. We bent this since we were not able to remove the lift shafts due to rust. Was easy to straighten. All were then primed. May need a bit of bondo here and there.
Otherr fender.
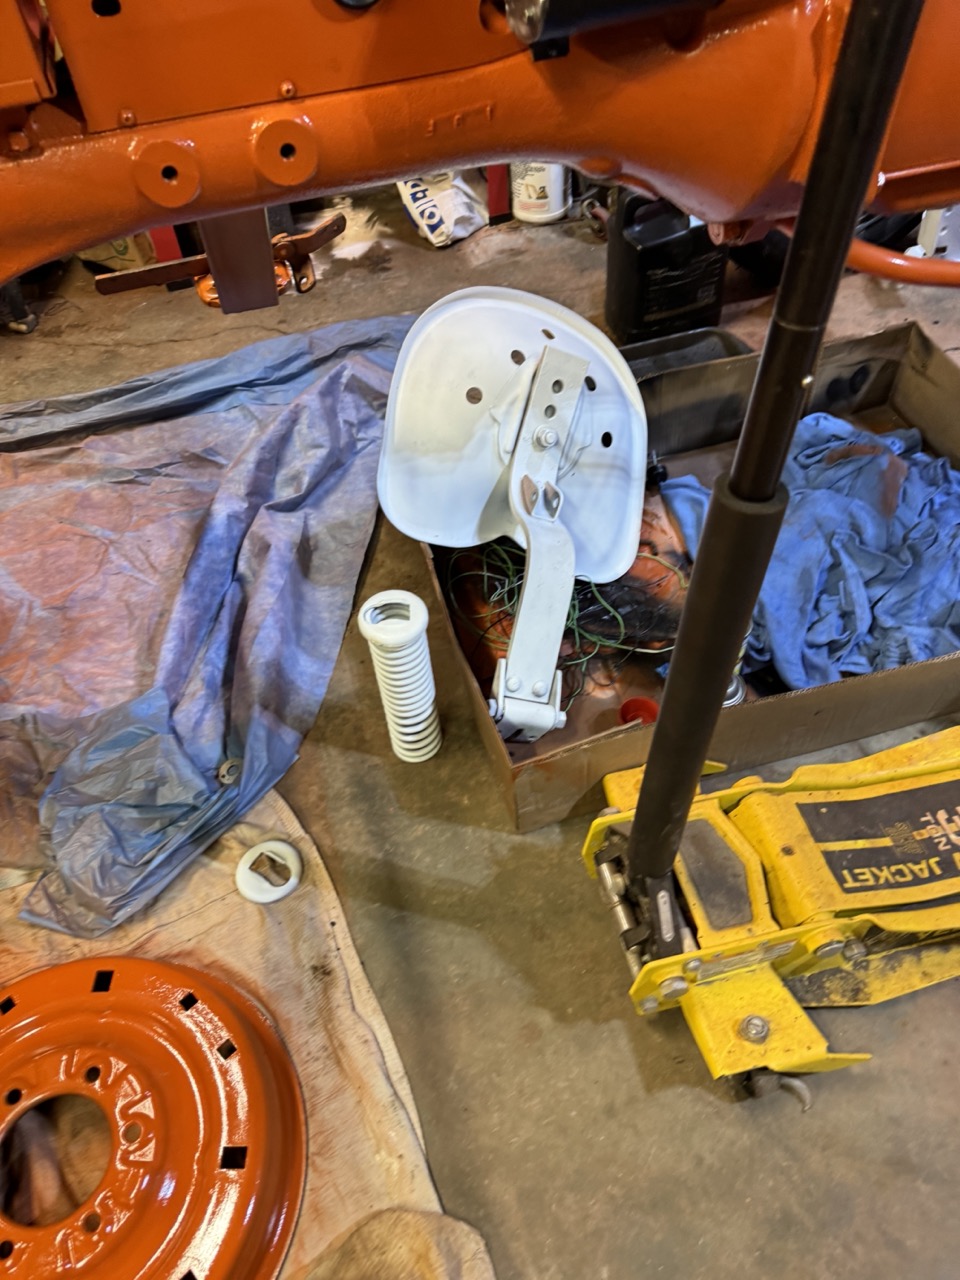
Here cleaned and sanded seat with a coat of primer.
< id="idg-io-safe-browsing-enabled" ="" oninit="true">
Edited by CA13414 - 29 Jul 2024 at 5:52am
|
|
Helping the aged survive and thrive! 1953 CA
|
|
Sugarmaker
Orange Level


Joined: 12 Jul 2013
Location: Albion PA
Points: 8311
|
Post Options
Thanks(0)
Quote Reply
Posted: 28 Jul 2024 at 9:37pm |
Dan, Great documentation on your CA build! Your moving right along. You have the passion to get this done! I have had that in the past not so much at this time!:) This may help me move off center and get something started again on our CA too. I just keep buying things for it, and piling them up, hoping to get back at this little tractor. Regards, Chris and Cheryl
|
|
D17 1958 (NFE), WD45 1954 (NFE), WD 1952 (NFE), WD 1950 (WFE), Allis F-40 forklift, Allis CA, Allis D14, Ford Jubilee, Many IH Cub Cadets, 32 Ford Dump, 65 Comet.
|
|
CA13414
Silver Level
Joined: 25 Feb 2024
Location: Nebraska
Points: 270
|
Post Options
Thanks(0)
Quote Reply
Posted: 29 Jul 2024 at 5:57am |
 Sugarmaker wrote: Sugarmaker wrote:
Dan,Great documentation on your CA build! Your moving right along. You have the passion to get this done! I have had that in the past not so much at this time!:) This may help me move off center and get something started again on our CA too. I just keep buying things for it, and piling them up, hoping to get back at this little tractor. Regards, Chris and Cheryl |
< id="idg-io-safe-browsing-enabled" ="" oninit="true">
Thank you. Is still fun and very rewarding to complete each step. I also go in waves with items. I need to finish this up in Aug, thus the final push underway. Then I need to catch up on a few other things that I have ignored!!!
It is fun to buy things . Then when all parts are ready, you are more efficient when you restart!!
|
|
Helping the aged survive and thrive! 1953 CA
|
|
CA13414
Silver Level
Joined: 25 Feb 2024
Location: Nebraska
Points: 270
|
Post Options
Thanks(0)
Quote Reply
Posted: 29 Jul 2024 at 8:04pm |
Today did a bit more paint touch up.
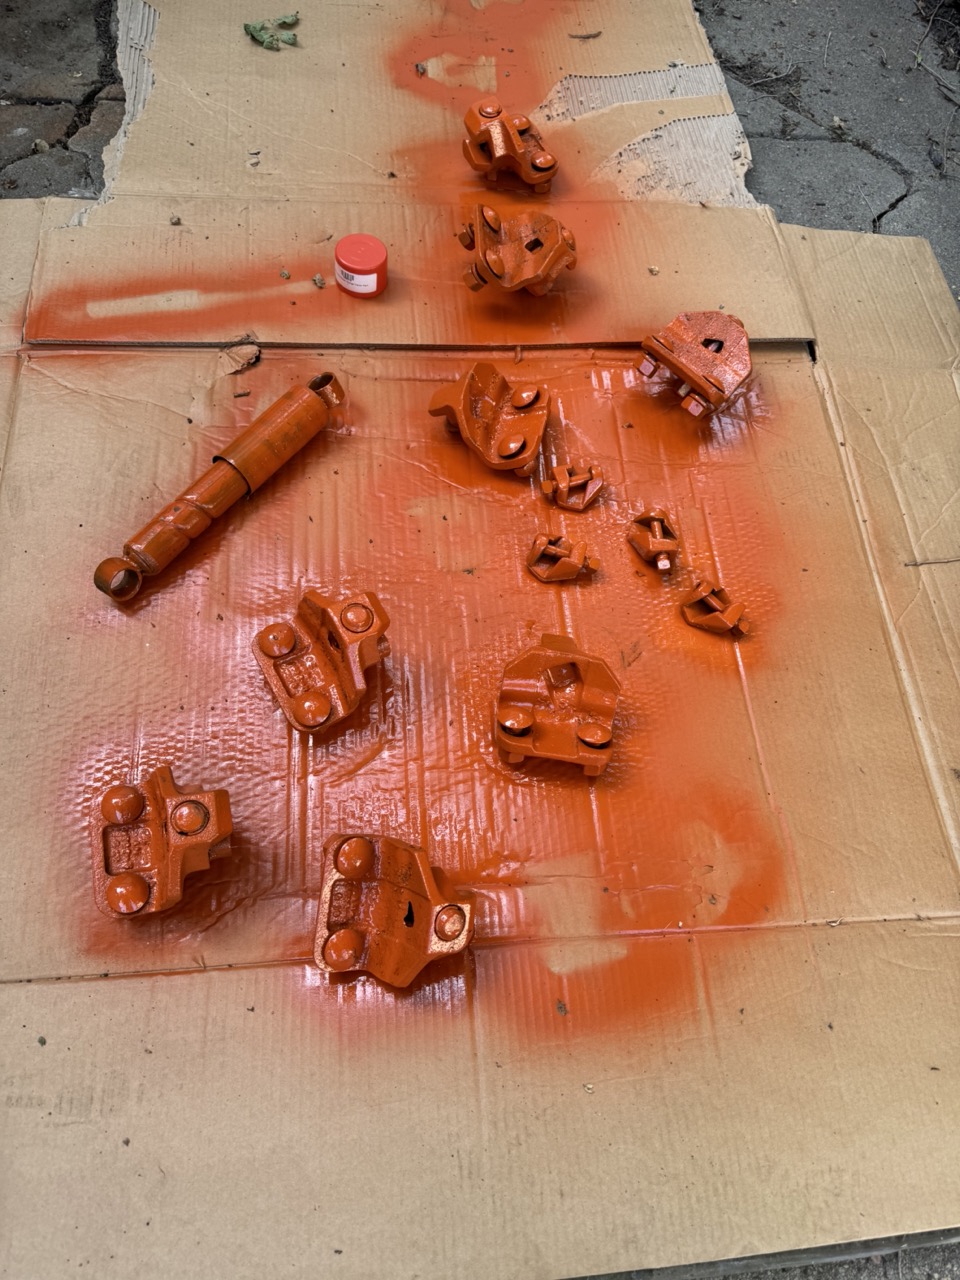
Then painted the rear wheel guide rail bodies, eccentric pin bodies and pin blocks. Yes this is our outdoor paint shop!!!!
Also applied the first coat of paint to the underside of the platform in our outdoor painting booth. :')
Once you get the paint on it is quite easy to see all the bends, dents and etc on the platform. This is where I am totally fine with showing the 75 years of use and wear.
However, I do want the fenders, tank, hood and grill to be mostly clean and a fine finish. For the fenders, hood, tank, grill we plan to paint with the paint gun and add a clear coat.
< id="idg-io-safe-browsing-enabled" ="" oninit="true">
Edited by CA13414 - 29 Jul 2024 at 8:20pm
|
|
Helping the aged survive and thrive! 1953 CA
|
|
CA13414
Silver Level
Joined: 25 Feb 2024
Location: Nebraska
Points: 270
|
Post Options
Thanks(0)
Quote Reply
Posted: 29 Jul 2024 at 9:10pm |
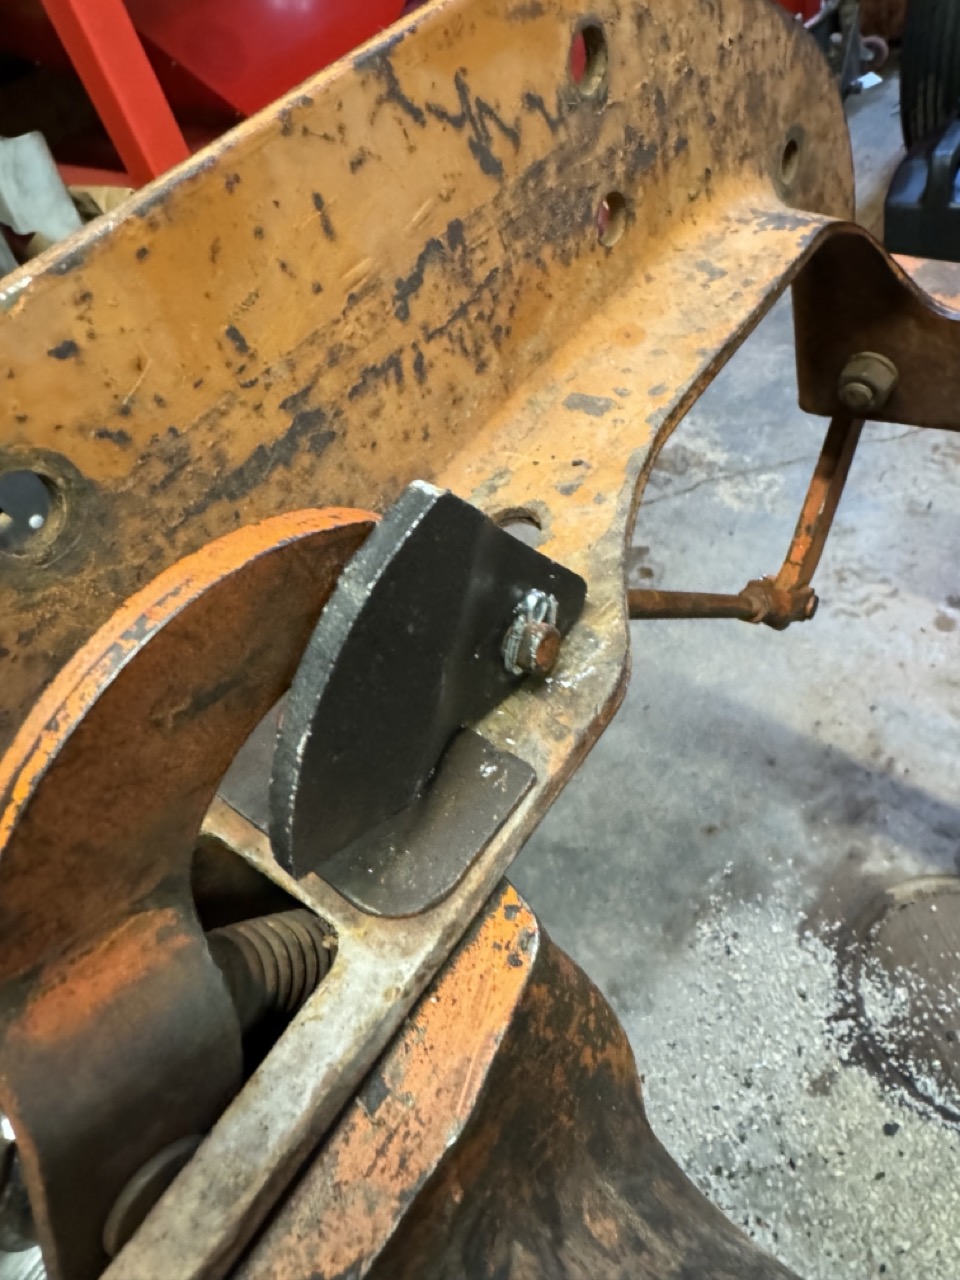
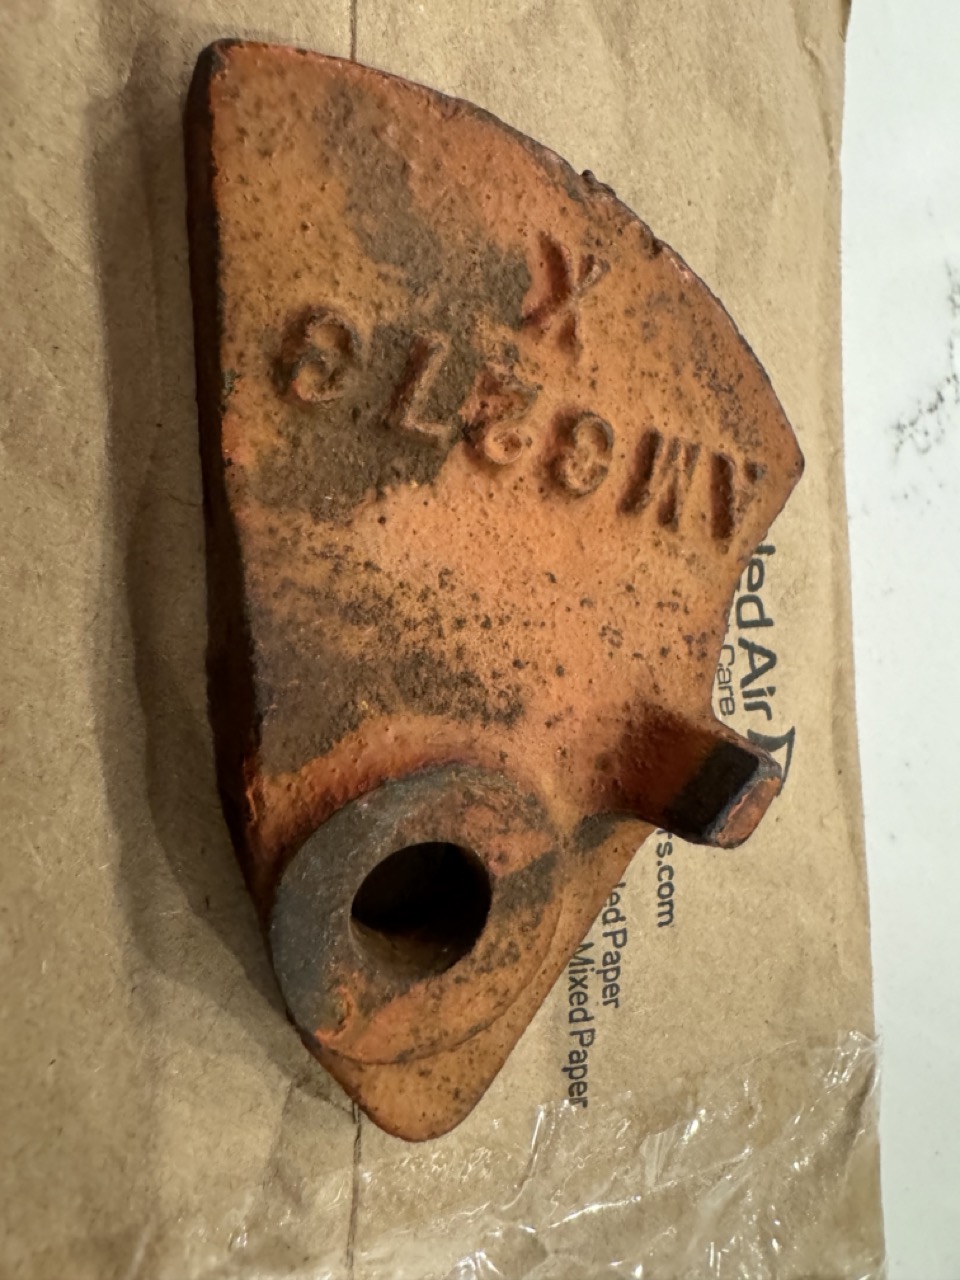
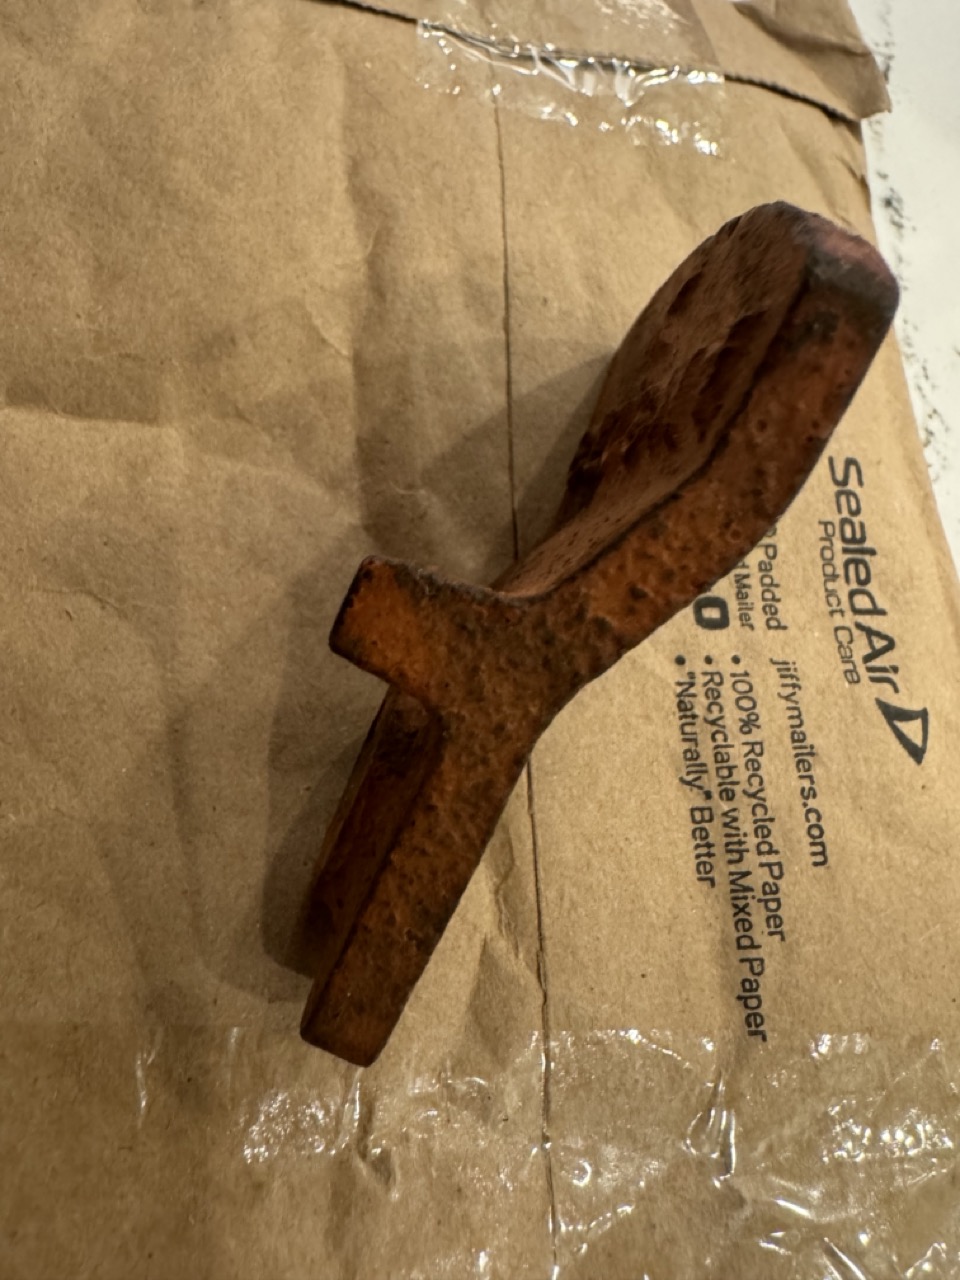
Our family CA did not have either brake lock and the CA we have farmed in as "Ted J" appropriately called it (Page 1) only had the left brake lock. Thus, after a bit of digging around, I found one.
Thank you to Lon Saeger who has been a great resource and was able to find me a right sided brake lock.  .
A little paint and it will be part of the family CA!!
< id="idg-io-safe-browsing-enabled" ="" oninit="true">
Edited by CA13414 - 29 Jul 2024 at 9:13pm
|
|
Helping the aged survive and thrive! 1953 CA
|
|
DiyDave
Orange Level Access

Joined: 11 Sep 2009
Location: Gambrills, MD
Points: 51936
|
Post Options
Thanks(0)
Quote Reply
Posted: 30 Jul 2024 at 4:04am |
|
Adjust both pedals the same, engage the pedal interlock, and the one PB lock should also hold both brakes...
|
|
Source: Babylon Bee. Sponsored by BRAWNDO, its got what you need!
|
|
Gary
Orange Level Access
Joined: 13 Sep 2009
Location: Peterborough,On
Points: 5456
|
Post Options
Thanks(0)
Quote Reply
Posted: 30 Jul 2024 at 4:23am |
|
I have never seen a 'Pedal Interlock' on a CA
G
|
|
CA13414
Silver Level
Joined: 25 Feb 2024
Location: Nebraska
Points: 270
|
Post Options
Thanks(0)
Quote Reply
Posted: 30 Jul 2024 at 5:49am |
When I first read this, I thought Yes!. Then sadly realized our CA doesn't have a interlock. Interesting to know that that was not on a CA, yet now is on virtually every tractor that I remember.
< id="idg-io-safe-browsing-enabled" ="" oninit="true">
Edited by CA13414 - 30 Jul 2024 at 5:50am
|
|
Helping the aged survive and thrive! 1953 CA
|
|
DiyDave
Orange Level Access
Joined: 11 Sep 2009
Location: Gambrills, MD
Points: 51936
|
Post Options
Thanks(0)
Quote Reply
Posted: 30 Jul 2024 at 3:27pm |
Y'all are probably right, sometimes I get it wrong, musta been thinking of D series... 
|
|
Source: Babylon Bee. Sponsored by BRAWNDO, its got what you need!
|
|
dfwallis
Orange Level
Joined: 09 Mar 2023
Location: DFW
Points: 633
|
Post Options
Thanks(0)
Quote Reply
Posted: 30 Jul 2024 at 3:48pm |
|
I like that left side clutch handle access hole cover. I may do something like that. Every time I go home I have to clean out a mouse nest. Last time I left some moth balls and a mouse trap so maybe next time no mess.
|
|
1952 CA13092
|
|
CA13414
Silver Level
Joined: 25 Feb 2024
Location: Nebraska
Points: 270
|
Post Options
Thanks(0)
Quote Reply
Posted: 30 Jul 2024 at 8:02pm |
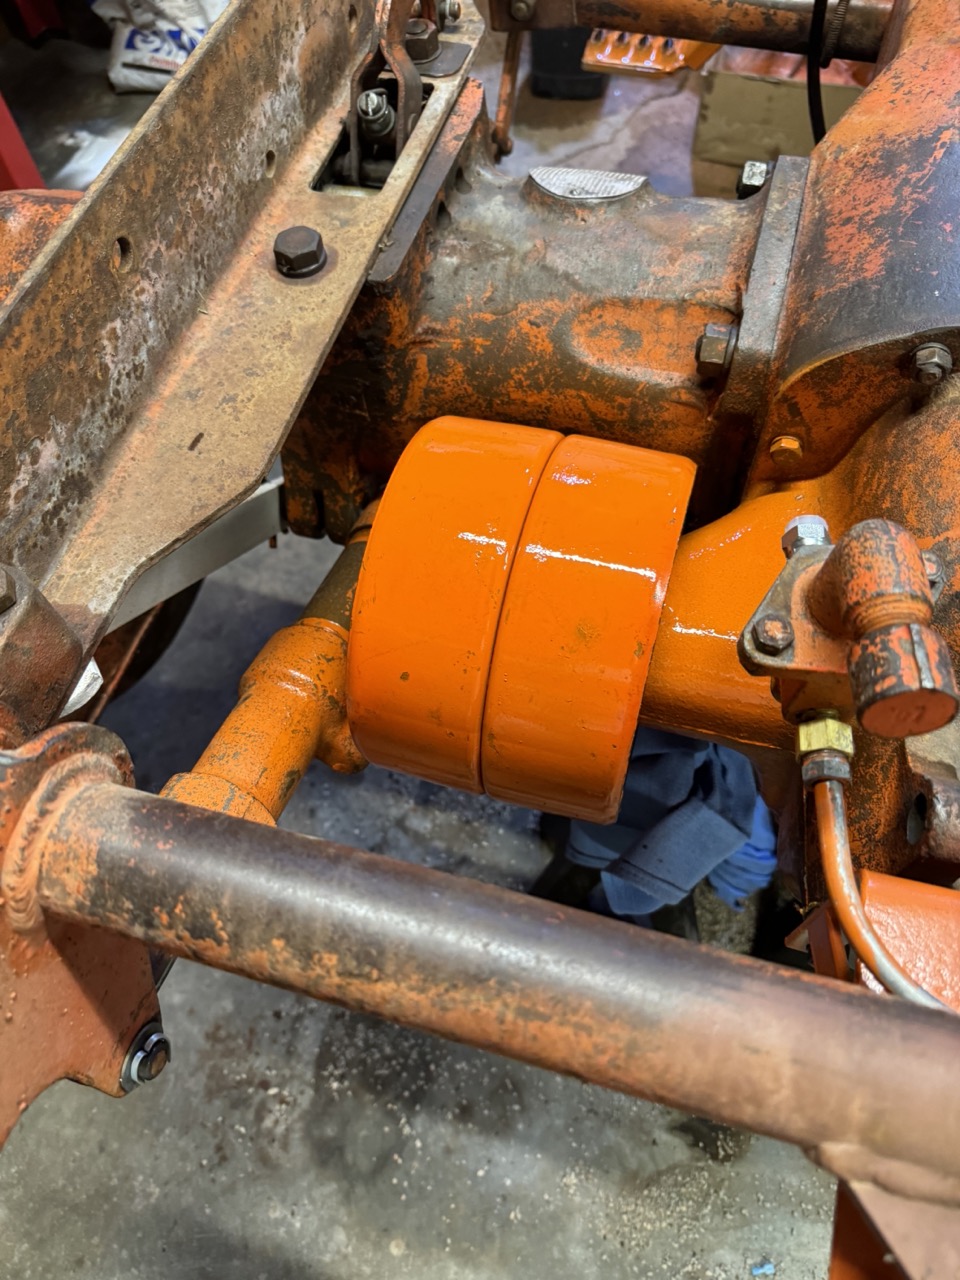
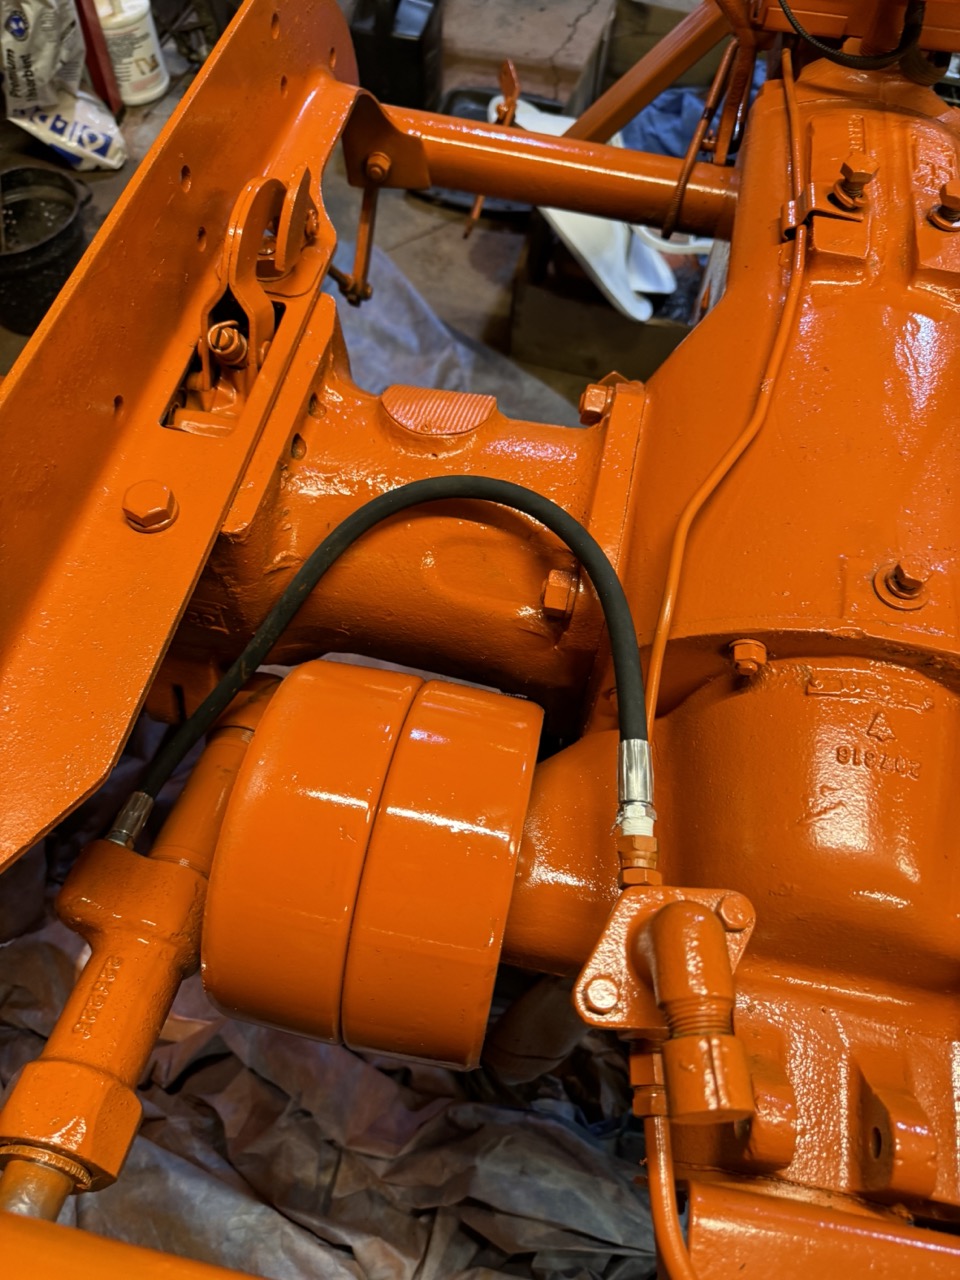
Today, we installed the new hydraulic hoses. First had to flip over the hydraulic cylinder such that the NPT connector was upright. Then with a bit of teflon tape, connected the hoses. The left clears the pulley without out any issues.
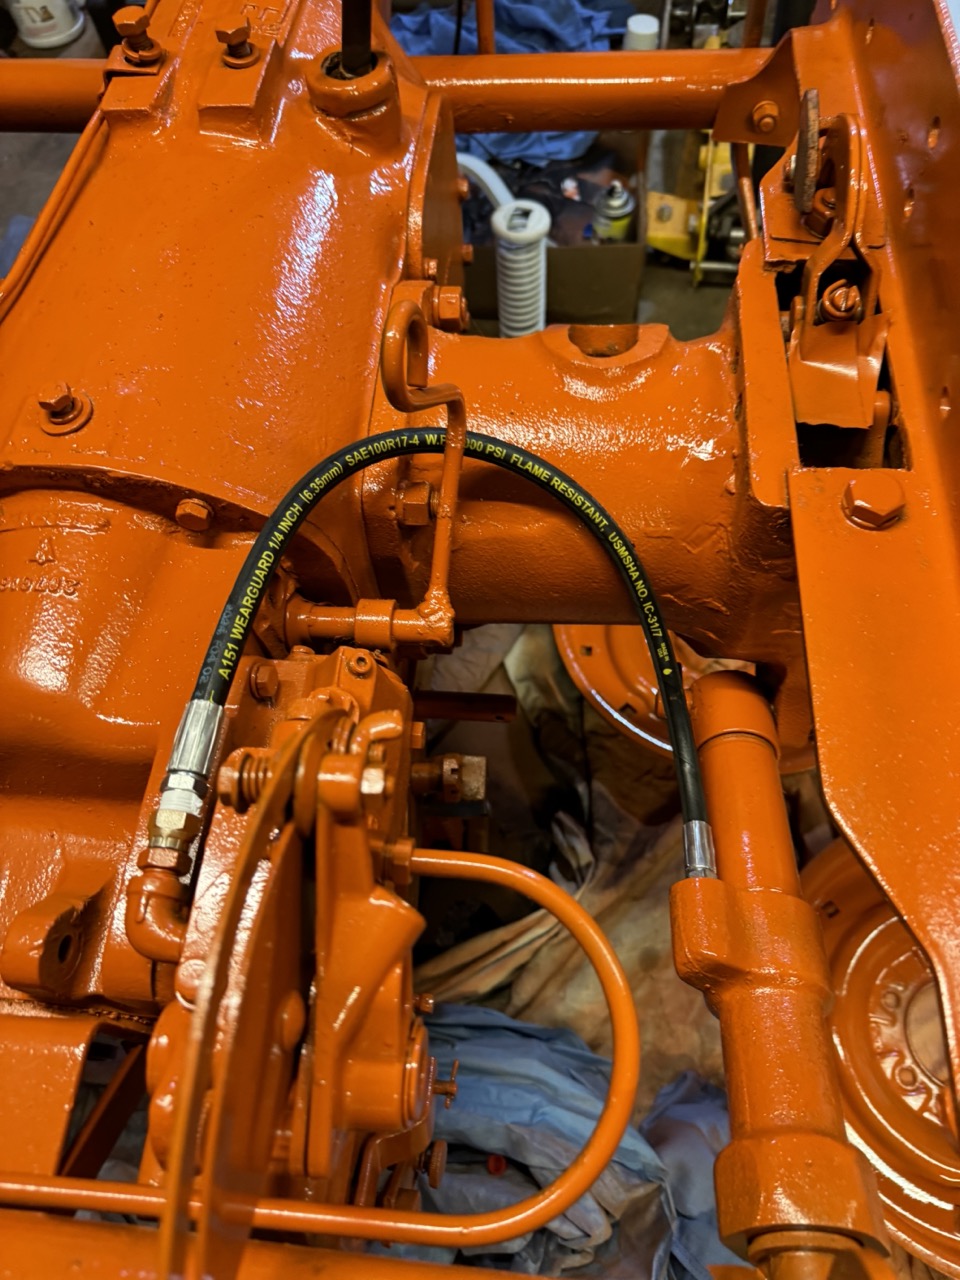
And the right hydraulic hose. Swivel connectors that Steve tagged worked awesome!
|
|
Helping the aged survive and thrive! 1953 CA
|
|
CA13414
Silver Level
Joined: 25 Feb 2024
Location: Nebraska
Points: 270
|
Post Options
Thanks(0)
Quote Reply
Posted: 30 Jul 2024 at 8:14pm |
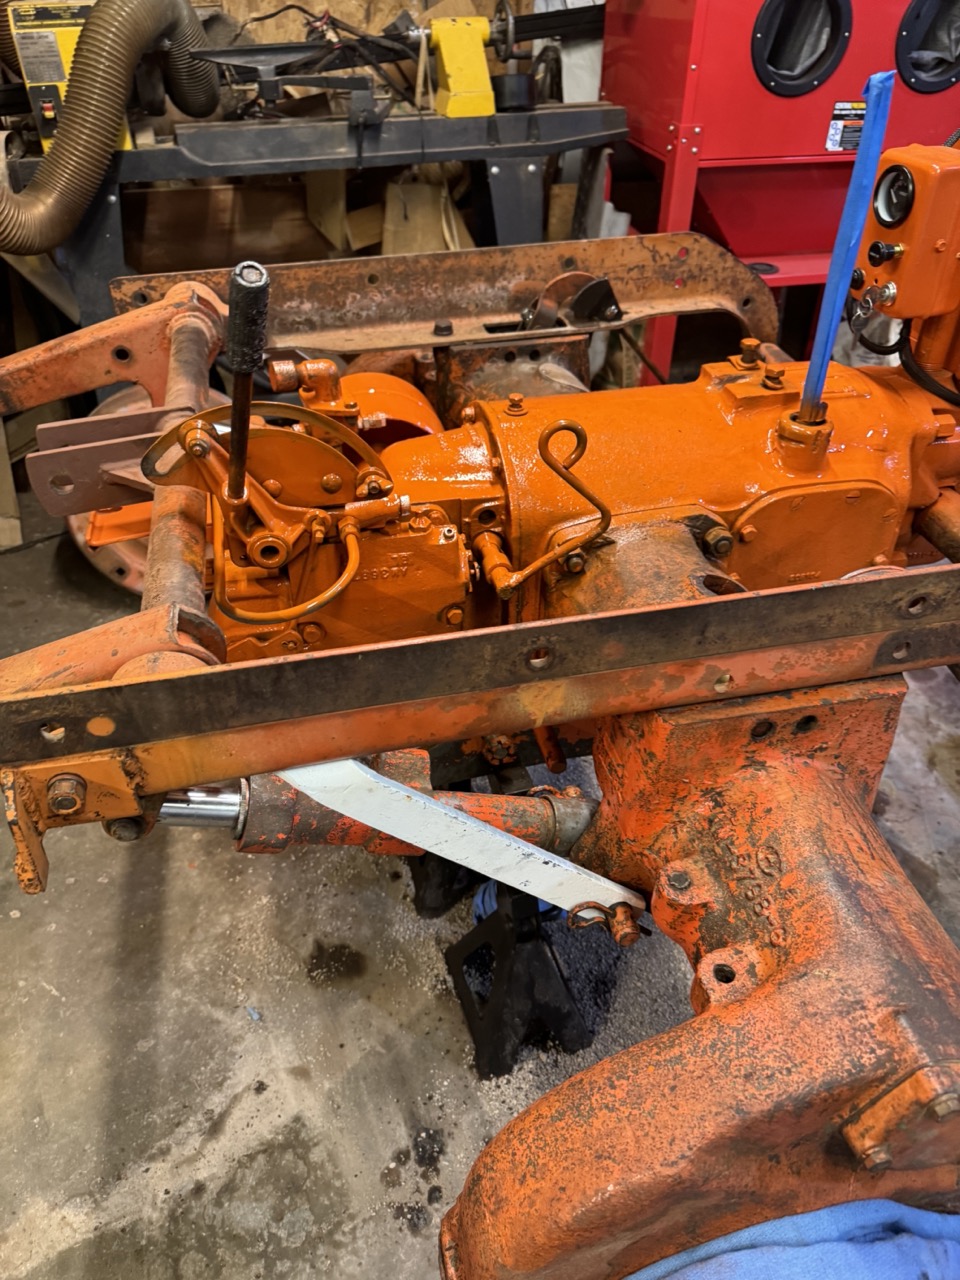
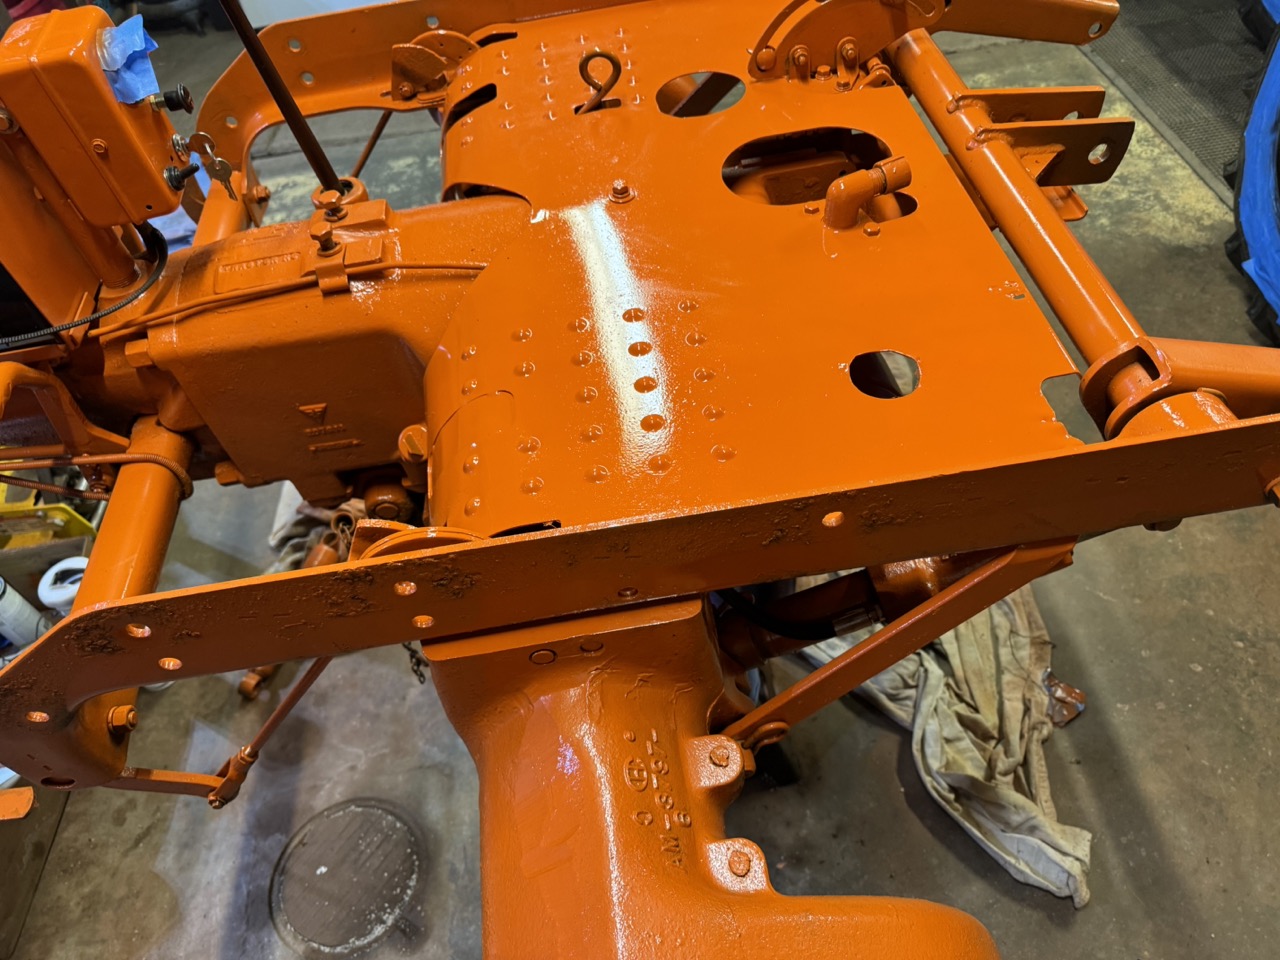
Then we installed the platform. First took off the lift shaft and the hydraulic control arm and "slip plate."
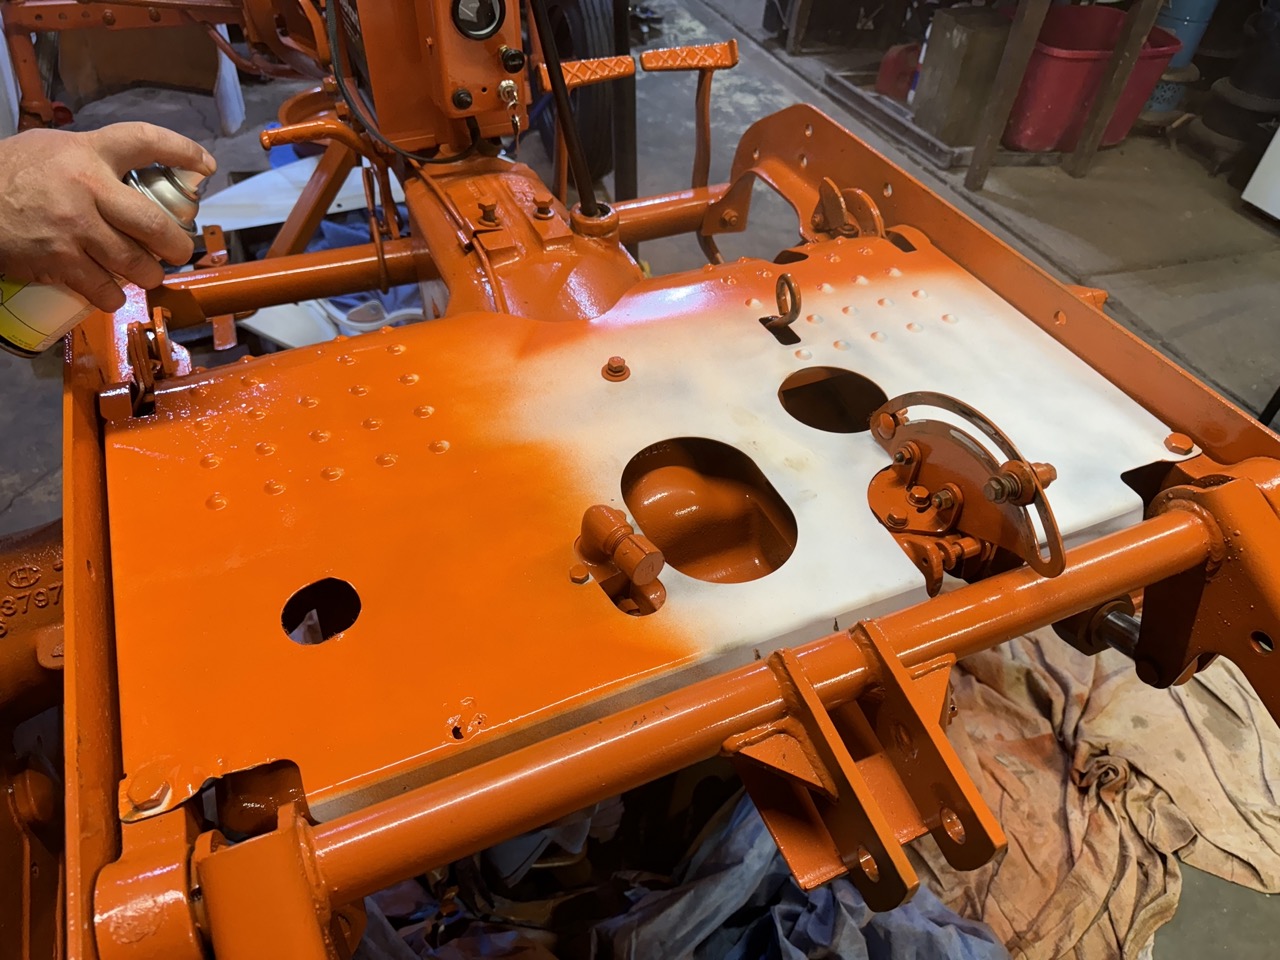
Then placed the platform on after adjusting the curved part in front of the final drive shafts. Was an easy install!! Then reassembled the hydraulic control slide and started painting.
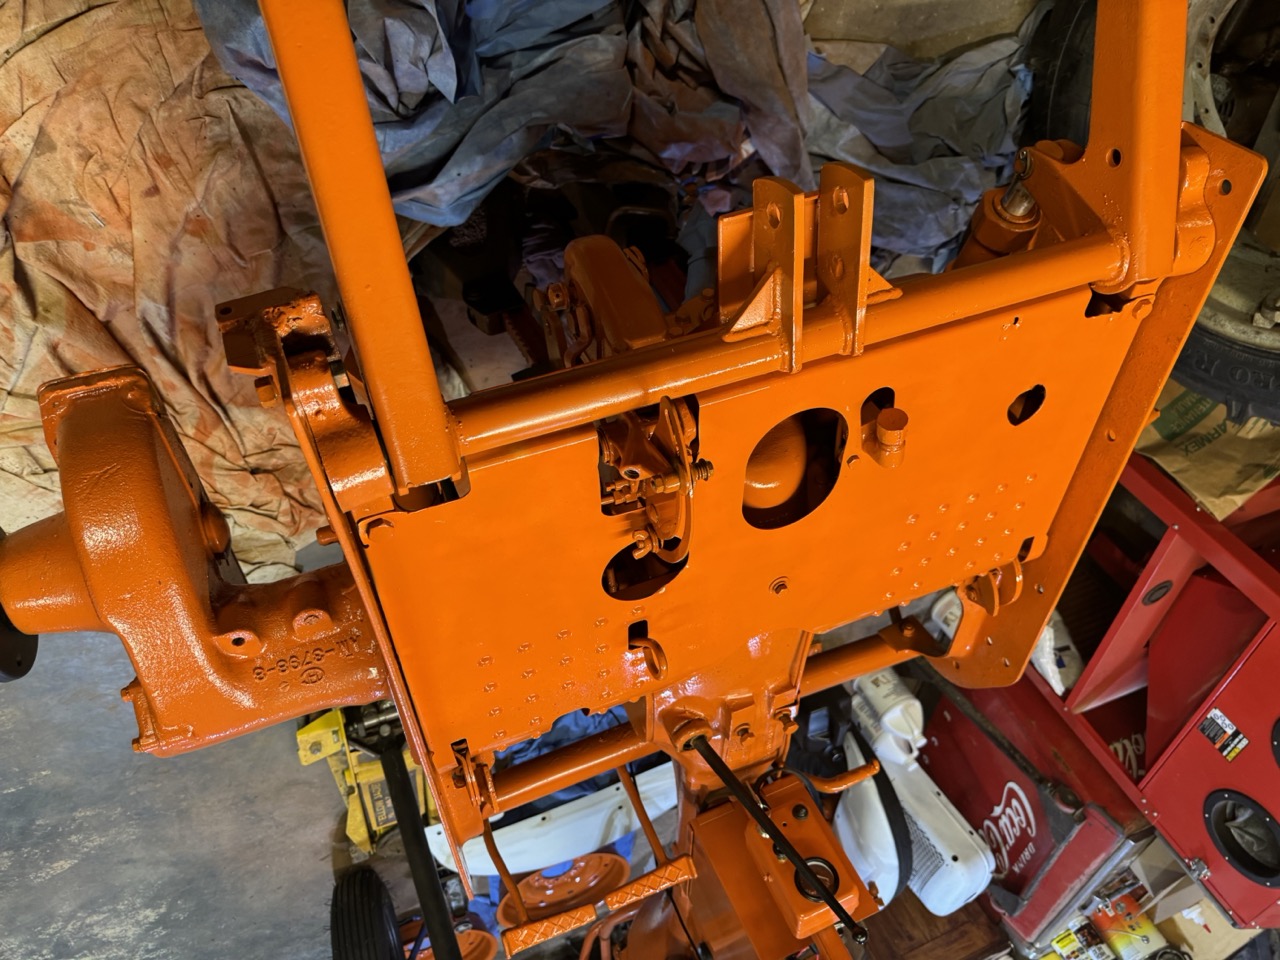
Here are a couple of pics after the first coat of paint. Do see a few spots that need a bit of sanding which we will do on Thursday.
Also note that we installed and painted the right brake lock from Lon! Again, thank you!
< id="idg-io-safe-browsing-enabled" ="" oninit="true">
Edited by CA13414 - 30 Jul 2024 at 8:25pm
|
|
Helping the aged survive and thrive! 1953 CA
|
|
CA13414
Silver Level
Joined: 25 Feb 2024
Location: Nebraska
Points: 270
|
Post Options
Thanks(0)
Quote Reply
Posted: 30 Jul 2024 at 8:23pm |
Finally, a second coat of paint on the rear wheel guide rail bodies, eccentric pin bodies and pin blocks. Will hit them again on Thursday and plan to assemble the rear wheels on Saturday.
Here is the pic of the day. Was productive and fun to do. Sat and looked at the progress, which of course involved a couple of IPA's...... just to admire the success of the day! Was fun!!
On Thursday, we will also finish up the rear wheel rims and hit them with the black paint.
< id="idg-io-safe-browsing-enabled" ="" oninit="true">
Edited by CA13414 - 30 Jul 2024 at 9:53pm
|
|
Helping the aged survive and thrive! 1953 CA
|
|
Lon(MN)
Orange Level
Joined: 11 Sep 2009
Location: Elk River,MN
Points: 1987
|
Post Options
Thanks(0)
Quote Reply
Posted: 31 Jul 2024 at 6:54am |
|
Glad it worked for you and am happy to help.
|
|
http://lonsallischalmers.com
|
|
Sugarmaker
Orange Level
Joined: 12 Jul 2013
Location: Albion PA
Points: 8311
|
Post Options
Thanks(0)
Quote Reply
Posted: 31 Jul 2024 at 8:35pm |
Dan, Your making great progress on the CA! Thanks for the updates. You have helped me move a little off center and start some work on ours! Regards, Chris and Cheryl
Edited by Sugarmaker - 31 Jul 2024 at 8:36pm
|
|
D17 1958 (NFE), WD45 1954 (NFE), WD 1952 (NFE), WD 1950 (WFE), Allis F-40 forklift, Allis CA, Allis D14, Ford Jubilee, Many IH Cub Cadets, 32 Ford Dump, 65 Comet.
|
|
CA13414
Silver Level
Joined: 25 Feb 2024
Location: Nebraska
Points: 270
|
Post Options
Thanks(0)
Quote Reply
Posted: 31 Jul 2024 at 9:02pm |
Sugarmaker wrote:
Dan,Your making great progress on the CA! Thanks for the updates. You have helped me move a little off center and start some work on ours! Regards, Chris and Cheryl
|
Awesome! It is indeed motivating to see all that everyone does on this site. Helps to keep up the momentum.
I have a deadline goal to get this done and hope all is done in the next 3-4 weeks. Fingers crossed.
< id="idg-io-safe-browsing-enabled" ="" oninit="true">
Edited by CA13414 - 31 Jul 2024 at 9:08pm
|
|
Helping the aged survive and thrive! 1953 CA
|
|
CA13414
Silver Level
Joined: 25 Feb 2024
Location: Nebraska
Points: 270
|
Post Options
Thanks(0)
Quote Reply
Posted: 01 Aug 2024 at 6:48pm |
Cleaned up the rear rims with the sander, wire brush and brake cleaner. When they mounted the tires, they uses grease to get the bead on the wheel. Thus, there was grease everywhere!!! Brake cleaner stripped it off nicely.
Then taped them and put on the first coat of black paint.
Will put on another coat tomorrow. Want to assemble the rear wheels on Saturday. Thus, may need to use the heat gun to make sure it is dry. < id="idg-io-safe-browsing-enabled" ="" oninit="true">
Edited by CA13414 - 01 Aug 2024 at 9:10pm
|
|
Helping the aged survive and thrive! 1953 CA
|
|
CA13414
Silver Level
Joined: 25 Feb 2024
Location: Nebraska
Points: 270
|
Post Options
Thanks(0)
Quote Reply
Posted: 01 Aug 2024 at 6:52pm |
Then added another coat of paint of paint to the platform.
< id="idg-io-safe-browsing-enabled" ="" oninit="true">
Edited by CA13414 - 01 Aug 2024 at 6:52pm
|
|
Helping the aged survive and thrive! 1953 CA
|
|
CA13414
Silver Level
Joined: 25 Feb 2024
Location: Nebraska
Points: 270
|
Post Options
Thanks(0)
Quote Reply
Posted: 01 Aug 2024 at 7:31pm |
And yes, some overspray on the gear shift. Thus, will repaint that black this weekend. 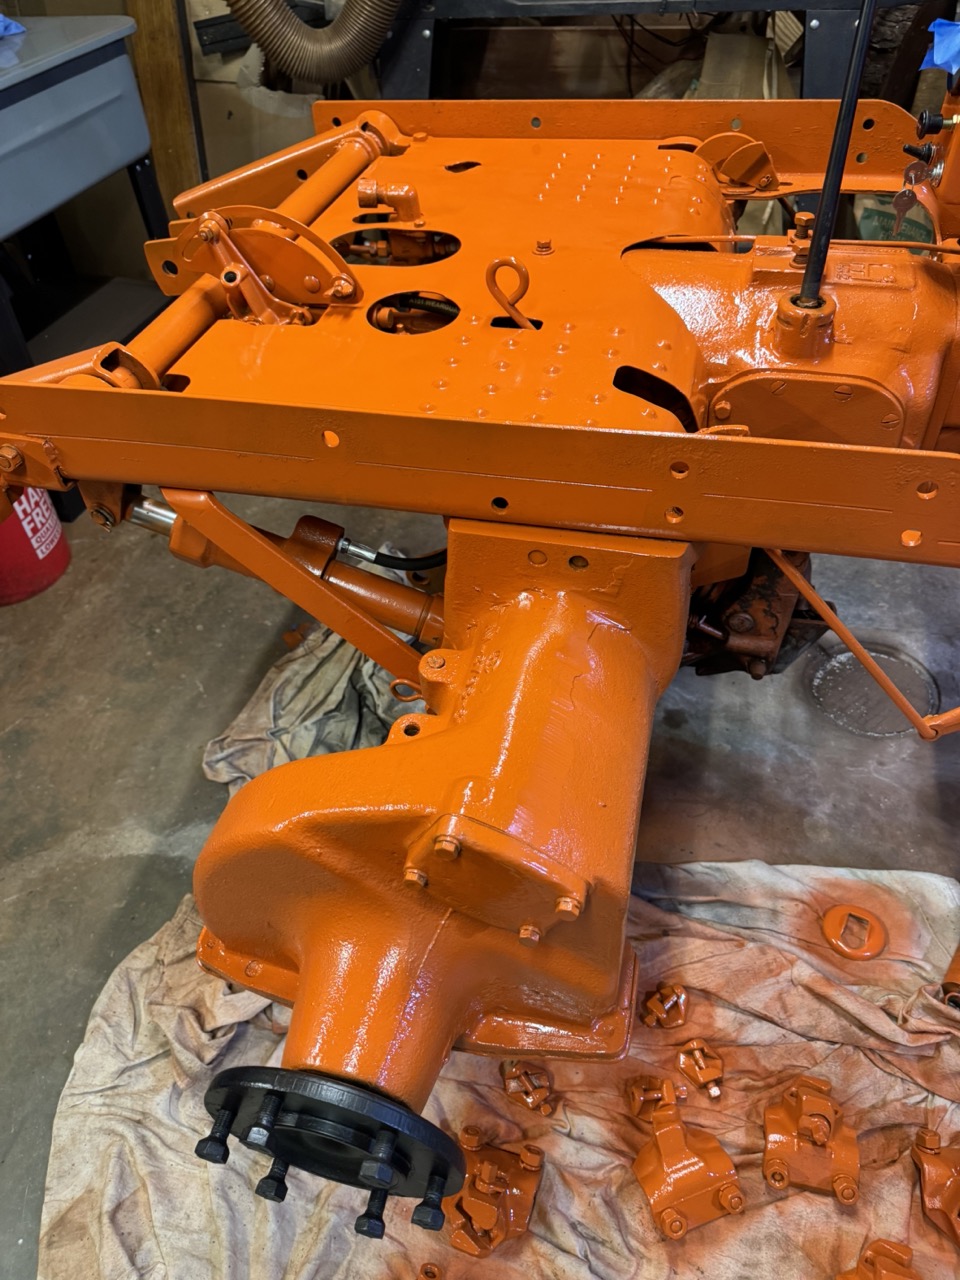 Paint on the right brake lock.
And the final coat on the wheel bodies and pin blocks.
< id="idg-io-safe-browsing-enabled" ="" oninit="true">
Edited by CA13414 - 01 Aug 2024 at 7:46pm
|
|
Helping the aged survive and thrive! 1953 CA
|
|
CA13414
Silver Level
Joined: 25 Feb 2024
Location: Nebraska
Points: 270
|
Post Options
Thanks(0)
Quote Reply
Posted: 01 Aug 2024 at 7:42pm |
Another coat of paint on the rear wheel hubs. Also sanded the key/control box and put on another coat of paint. Looks much better. Bought a new oil pressure gauge and painted it black. Will install that tomorrow or Saturday.
And finally, the picture of the day, sans the rear wheel rims with the first coat of paint. More tomorrow!!

< id="idg-io-safe-browsing-enabled" ="" oninit="true">
Edited by CA13414 - 01 Aug 2024 at 7:51pm
|
|
Helping the aged survive and thrive! 1953 CA
|
|
CA13414
Silver Level
Joined: 25 Feb 2024
Location: Nebraska
Points: 270
|
Post Options
Thanks(0)
Quote Reply
Posted: 01 Aug 2024 at 7:56pm |
Was just looking through prior posts and is neat to see the progress of the past 6 months.
Also just realized that we have not needed any "Oil-Dri" now that here are no leaks. 
< id="idg-io-safe-browsing-enabled" ="" oninit="true">
Edited by CA13414 - 01 Aug 2024 at 7:56pm
|
|
Helping the aged survive and thrive! 1953 CA
|
|
1955CA
Orange Level
Joined: 10 Sep 2018
Location: Ontario, Canada
Points: 585
|
Post Options
Thanks(0)
Quote Reply
Posted: 02 Aug 2024 at 9:03am |
Nice!! Cool to see all the pics of it coming along. Thanks for posting. And yes, should be a parking brake cam on each side.
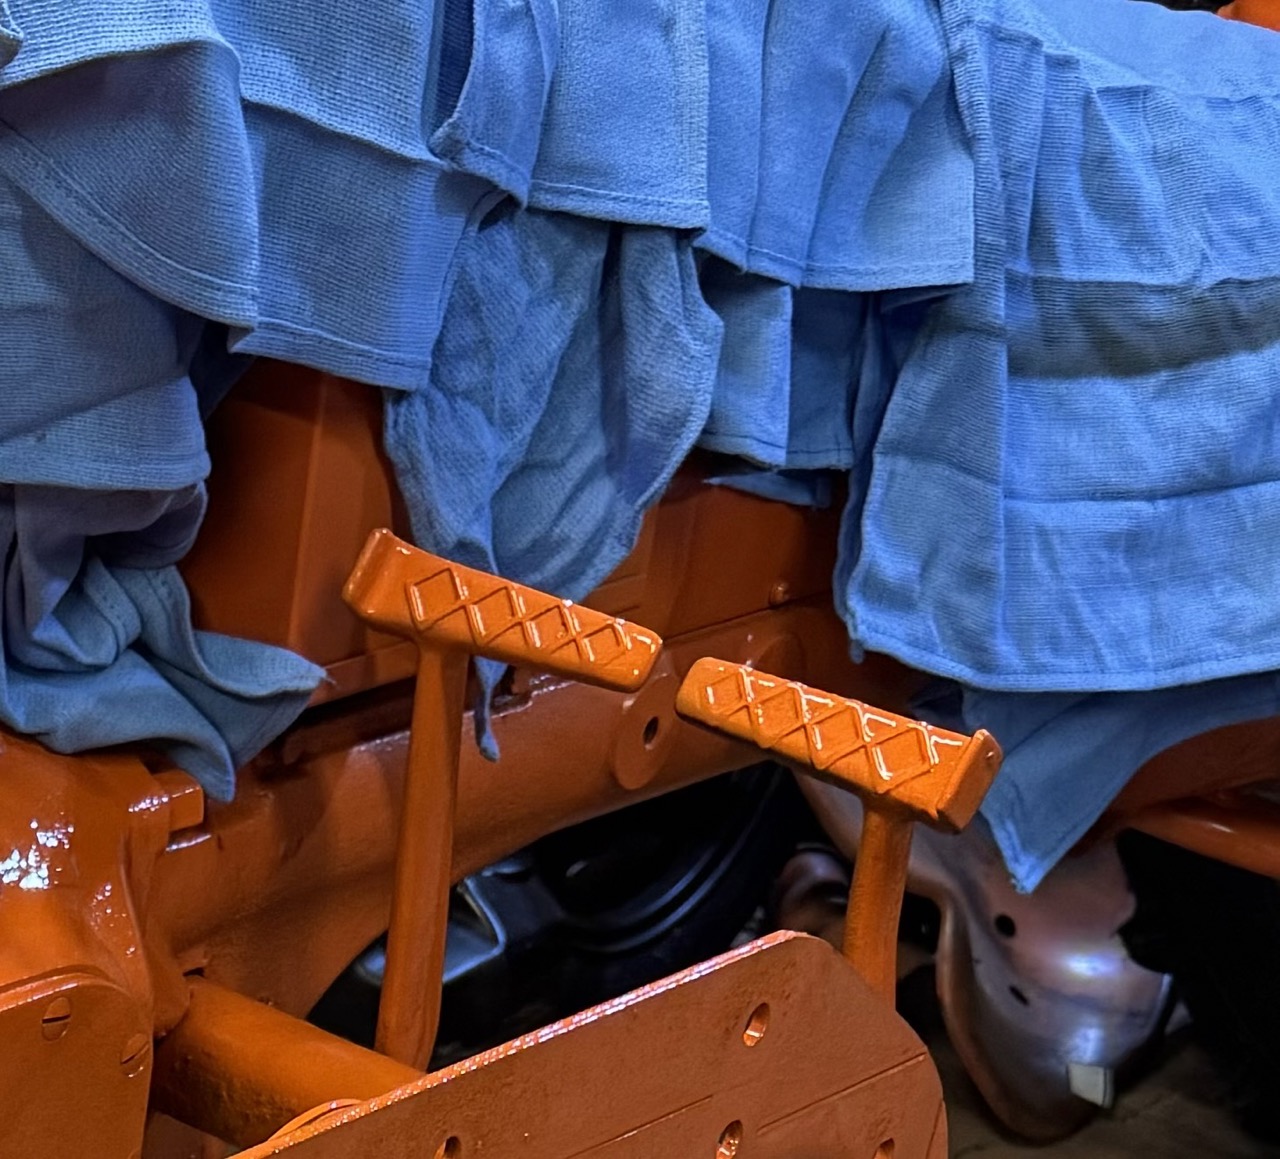
There's what I need to get next....proper handles for the rear lift and for the hand clutch.  |
|
CA13414
Silver Level
Joined: 25 Feb 2024
Location: Nebraska
Points: 270
|
Post Options
Thanks(0)
Quote Reply
Posted: 02 Aug 2024 at 6:52pm |
No pictures today! Not sure why, but was in a rush to get home for dinner.
I did sand the rear wheel rims and put on another coat of paint. Also looked around and found a few other spots to sand. Then a bit more orange paint.
Hoping to put together the rear wheels tomorrow. Also have sanded the tin and need a bit of bondo for a dent on the fuel tank. Then will power spray the tank, hood, grill and fenders.
< id="idg-io-safe-browsing-enabled" ="" oninit="true">
Edited by CA13414 - 02 Aug 2024 at 6:52pm
|
|
Helping the aged survive and thrive! 1953 CA
|
|