| Author |
 Topic Search Topic Search  Topic Options Topic Options
|
Jtaylor 
Bronze Level

Joined: 11 Oct 2021
Location: Barrie, Ontario
Points: 194
|
 Post Options Post Options
") Thanks(0) Thanks(0)
 Quote Quote  Reply Reply
 Posted: 31 Aug 2022 at 3:46pm Posted: 31 Aug 2022 at 3:46pm |
Well Guys,
I am Back! a few months of working on tractors without actually updating the forum.. Time to update!
Got the fuel tank, grille and air cleaner primed and painted
As well as installed onto the tractor. didn't take long to install that is for sure!
I had repaired the original hood, Purchased new fenders from DJS as well as a toolbox. Took apart the snap coupler setup and painted all of it orange. Lots and lots of bodywork went into those fenders to make them smooth.. I could have hammered steel into a fender smoother than that! pretty disappointed with the fenders. First tin purchased online and it was almost worthy of repairing the old ones with the amount of work i had into them..
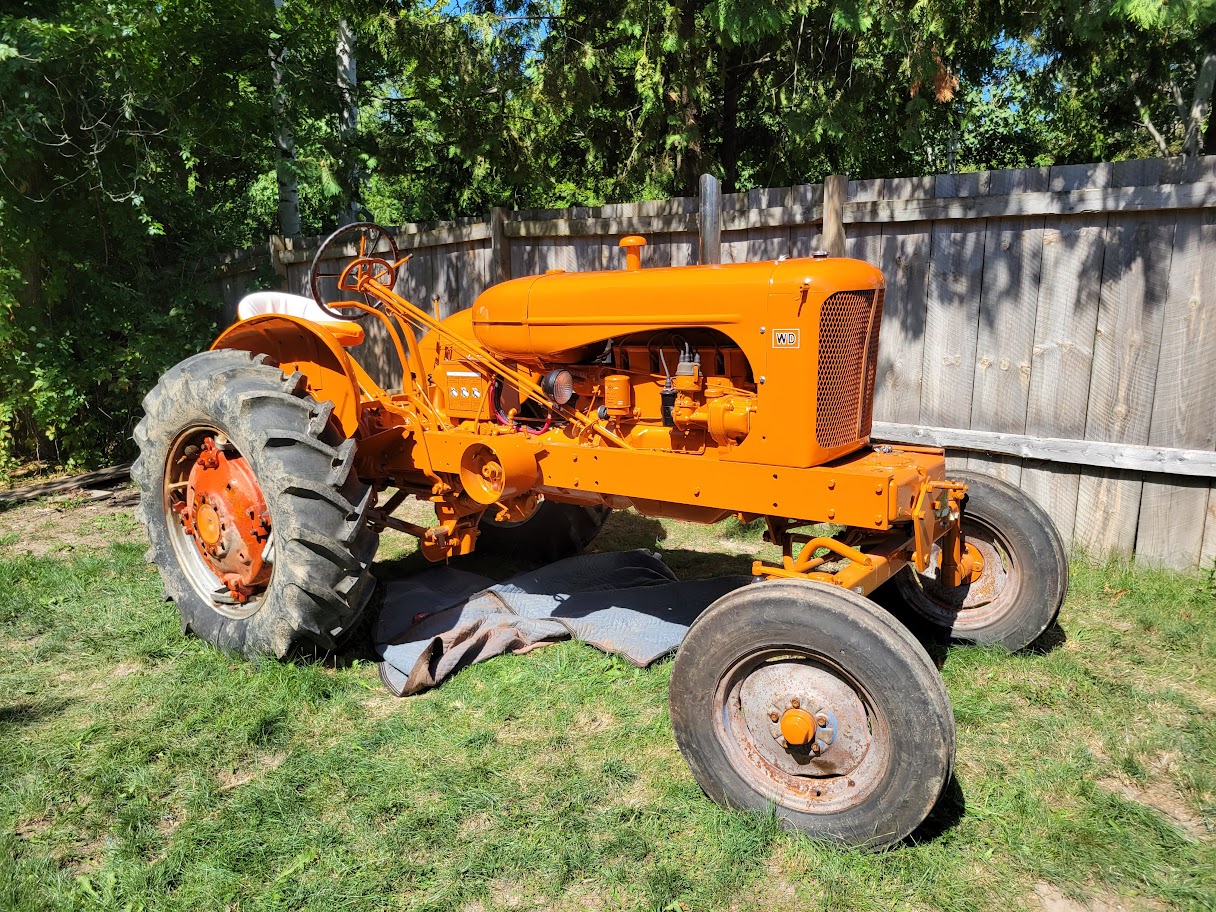
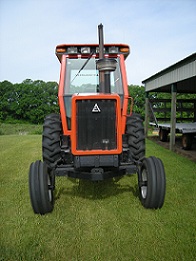
Here the tractor sits after all the pieces were painted about a day earlier.
I was able to get some decals on about 1 week after all the items were painted. They turned out pretty good. After researching for hours on the decal placement.
Rim repair was next. Man was I dreading this!! I was able to get the tires removed by the local tire shop, about 600lbs of calcium was removed.. I then started with repairs using my donor 24" rim. After about 8 hours i had the rims repaired and ready for paint. pretty tight timeline on tire installation (12 hours after painting) but I was already booked in and had to make things work. The rims were painted with Rustoleum Hammered silver finish paint. That is the closest thing to galvanized i could find. 3 coats did me well.
While i was getting these tires taken care of, Allie was looking a bit upset to be back on blocks... but hey! at least the jack matches!
Here is the tires while i was at the tire shop, I went with BKT tires all around, 5.50-16 up front and 14.9x28 bias ply in the rear
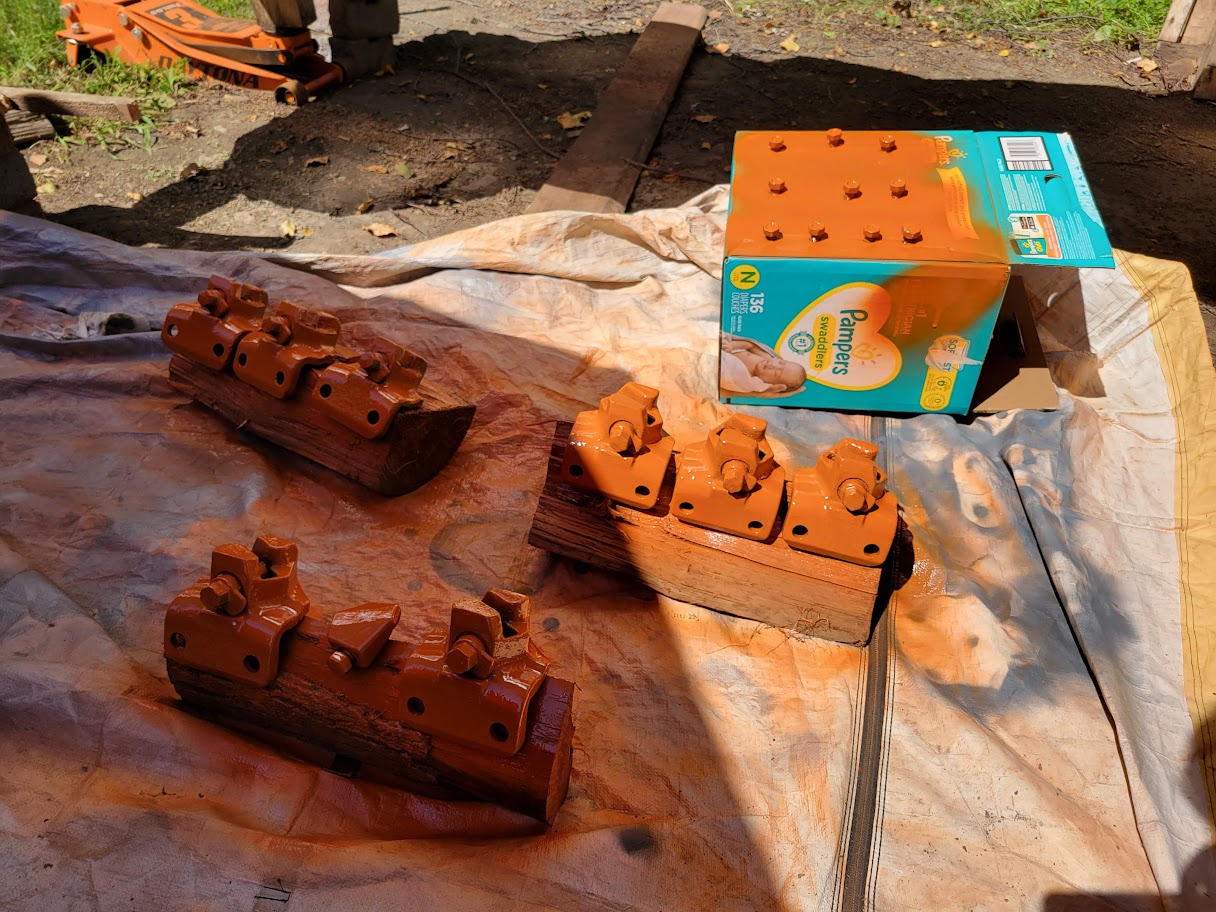
Once the tires were taken care of, It was onto the rim centers, Front rim paint and power shift guides. These powershift guides were so seized, I had to smash them apart and heat the snot out of them while impacting to get them loose. took about 5 hours for 8 pieces. Thankfully they all came free. Upon installation i gobbed them with antiseize so we wouldn't run into this issue again!
I went with silver outsides, orange insides on the front rims. I really like the look of them matching the rears, So.. I just went with it! this was the rustoleum hammered silver and Persian #1 orange.
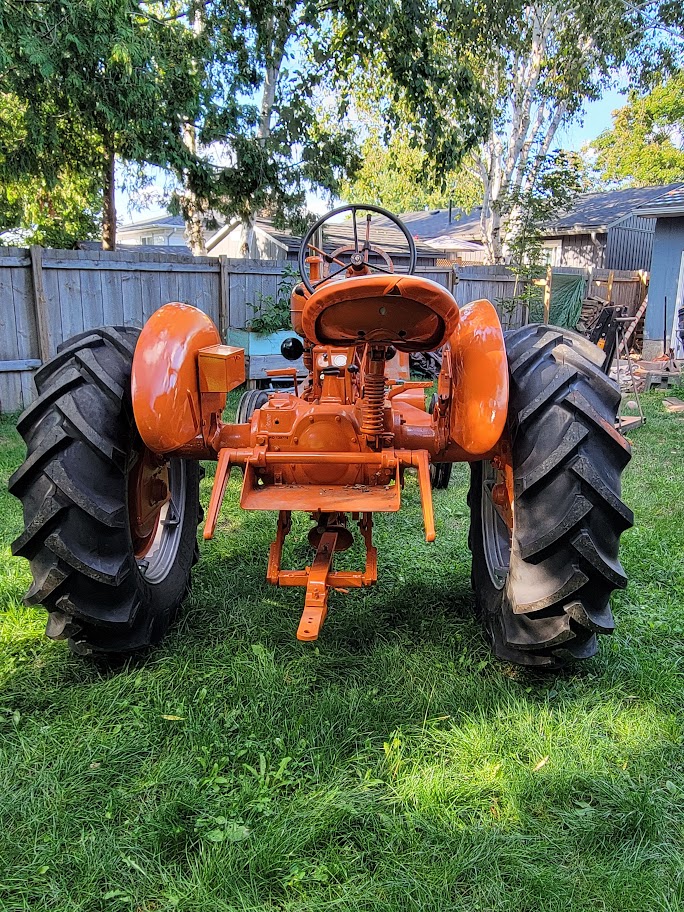
And, After the rear rims were installed and powershift was locked, I was able to tour around the yard with Allie. Here are some "finished" photos of the tractor. I still have a few items outstanding that i will get to another day, But for now, The tractor is pretty much Pulling ready for our first event this weekend.
Allie did take a bit of a trailer ride yesterday to get weighted, came in at 3880lbs with myself on the tractor. I have an appointment tomorrow to get the tires filled with about 520 lbs of ballast. bringing the total weight to just around 4400 lbs finished.
Also.. Almost forgot! The cherry on top for pulling season here. A D17 gas governor spring. after some adjustments to the governor and throttle rod, We should be all set to go for this weekend.
Stay tuned for some more updates here and there after we get some use out of Allie.
|
 |
|
Sponsored Links
|
|
|
DrAllis
Orange Level Access

Joined: 12 Sep 2009
Points: 19499
|
Post Options
Thanks(0)
Quote Reply
Posted: 31 Aug 2022 at 3:56pm |
|
Turn your governor/carb link rod around !! That is bass-ackwards and sometimes will rub on the carb body effecting governor action.
|
|
Jtaylor
Bronze Level
Joined: 11 Oct 2021
Location: Barrie, Ontario
Points: 194
|
Post Options
Thanks(0)
Quote Reply
Posted: 31 Aug 2022 at 4:09pm |
 DrAllis wrote: DrAllis wrote:
Turn your governor/carb link rod around !! That is bass-ackwards and sometimes will rub on the carb body effecting governor action. |
You are 150% right on that one. Not sure how i skipped that. I will switch that over ASAP.
|
|
steve(ill)
Orange Level Access

Joined: 11 Sep 2009
Location: illinois
Points: 77700
|
Post Options
Thanks(0)
Quote Reply
Posted: 31 Aug 2022 at 4:15pm |
|
NICE.......... what brand and type of paint did you use ?
|
|
Like them all, but love the "B"s.
|
|
Jtaylor
Bronze Level
Joined: 11 Oct 2021
Location: Barrie, Ontario
Points: 194
|
Post Options
Thanks(0)
Quote Reply
Posted: 31 Aug 2022 at 4:24pm |
steve(ill) wrote:
NICE.......... what brand and type of paint did you use ? |
I used the following:
Primer: Proform 2K grey epoxy primer/sealer
Paint: PPG MTX Omni single stage 60080 paint code with proform reducers and hardeners
|
|
55allis
Orange Level
Joined: 30 Jun 2020
Location: Southwest IA
Points: 545
|
Post Options
Thanks(0)
Quote Reply
Posted: 01 Sep 2022 at 11:15am |
|
Are you using rim guard in the back tires?
Otherwise you will run in to the same problem of rusty rims....
|
|
Eric B
Orange Level

Joined: 09 Feb 2012
Location: British Columbi
Points: 888
|
Post Options
Thanks(0)
Quote Reply
Posted: 02 Sep 2022 at 11:23pm |
You have done an amazing job to your tractor!! Have you kept track of the number of hours you put into this? (We won't even mention $$ :) Your many skills and your tenacity would be wishful thinking for many of us. The power steering you installed was especially interesting!! What would be fun for us on here would be if you take a video of the tractor running and showing us the power steering working by using just one finger. You could either post it on this thread or the thread about the power steering, thanks. Again, thank you for taking the time to post all the pictures of your progress and giving us details to go along. Eric.
|
|
Currently- WD,WC,3WF's,2 D14's B. Previously- I 600,TL745,200,FL9,FR12,H3,816 LBH. Earth has no sorrow that Heaven cannot heal!
|
|
AllisFreak MN
Orange Level Access
Joined: 07 Dec 2009
Location: Minnesota
Points: 1499
|
Post Options
Thanks(0)
Quote Reply
Posted: 03 Sep 2022 at 8:01am |
|
Beautiful job on this WD. One thing you may want watch for is water entering the manifold when you wash it or if it's out in the rain. OEM WD mufflers have a skirt at the bottom to help prevent that. Probably not enough would get in to cause harm though so maybe it's a non issue.
|
|
'49 A-C WD, '51 A-C WD, '63 A-C D17 Series III, 1968 A-C One-Seventy, '82 A-C 6060, '75 A-C 7040, A-C #3 sickle mower, 2 A-C 701 wagons, '78 Gleaner M2
|
|
Jtaylor
Bronze Level
Joined: 11 Oct 2021
Location: Barrie, Ontario
Points: 194
|
Post Options
Thanks(0)
Quote Reply
Posted: 12 Sep 2022 at 8:24am |
55allis wrote:
Are you using rim guard in the back tires?
Otherwise you will run in to the same problem of rusty rims.... |
I am running Calcium. I debated running rim guard but where i am, Rimguard is about 3 times the price and was roughly $950 to add 500lbs to the tractor. suitcase weights were actually cheaper.. I figured since it took them 60 years to rot out the first time, I will revisit this rim repair in the next 60 years or in 2080...
|
|
Jtaylor
Bronze Level
Joined: 11 Oct 2021
Location: Barrie, Ontario
Points: 194
|
Post Options
Thanks(0)
Quote Reply
Posted: 12 Sep 2022 at 8:27am |
Eric B wrote:
You have done an amazing job to your tractor!! Have you kept track of the number of hours you put into this? (We won't even mention $$ :) Your many skills and your tenacity would be wishful thinking for many of us. The power steering you installed was especially interesting!!What would be fun for us on here would be if you take a video of the tractor running and showing us the power steering working by using just one finger. You could either post it on this thread or the thread about the power steering, thanks. Again, thank you for taking the time to post all the pictures of your progress and giving us details to go along. Eric. |
Eric,
I tried to keep up with the hours the best as possible.. No way to fully go over every hour, but i would figure i was well into the 250-350 hour mark. well into the $8000 mark to restore including tires and paint.
I will be sure to update the forum with power steering videos and photos when i have some free time. i have since outfit another wd45 with power steering in a bit nicer fashion. it works really well and i am impressed.
|
|
55allis
Orange Level
Joined: 30 Jun 2020
Location: Southwest IA
Points: 545
|
Post Options
Thanks(0)
Quote Reply
Posted: 12 Sep 2022 at 9:40am |
Jtaylor wrote:
55allis wrote:
Are you using rim guard in the back tires?
Otherwise you will run in to the same problem of rusty rims.... |
I am running Calcium. I debated running rim guard but where i am, Rimguard is about 3 times the price and was roughly $950 to add 500lbs to the tractor. suitcase weights were actually cheaper.. I figured since it took them 60 years to rot out the first time, I will revisit this rim repair in the next 60 years or in 2080... |
Just as a warning, plan on replacing the valve stems every couple of years, the the fluid will rot them out and if not caught will drain all your fluid+air over night.
|
|
Jtaylor
Bronze Level
Joined: 11 Oct 2021
Location: Barrie, Ontario
Points: 194
|
Post Options
Thanks(0)
Quote Reply
Posted: 12 Sep 2022 at 9:56am |
55allis wrote:
Jtaylor wrote:
55allis wrote:
Are you using rim guard in the back tires?
Otherwise you will run in to the same problem of rusty rims.... |
I am running Calcium. I debated running rim guard but where i am, Rimguard is about 3 times the price and was roughly $950 to add 500lbs to the tractor. suitcase weights were actually cheaper.. I figured since it took them 60 years to rot out the first time, I will revisit this rim repair in the next 60 years or in 2080... |
Just as a warning, plan on replacing the valve stems every couple of years, the the fluid will rot them out and if not caught will drain all your fluid+air over night. |
I will keep an eye on things but at this point and time not overly concerned about it.. i think i may unload them in the future and switch to movable weight for pulling, still pondering though..
|
|
Sugarmaker
Orange Level

Joined: 12 Jul 2013
Location: Albion PA
Points: 8167
|
Post Options
Thanks(0)
Quote Reply
Posted: 12 Sep 2022 at 7:34pm |
J, Awesome job on your WD! I sure hope it pulls as good as it looks too. Thanks for the updates. Regards, Chris
|
|
D17 1958 (NFE), WD45 1954 (NFE), WD 1952 (NFE), WD 1950 (WFE), Allis F-40 forklift, Allis CA, Allis D14, Ford Jubilee, Many IH Cub Cadets, 32 Ford Dump, 65 Comet.
|
|
Dirt Farmer
Silver Level Access

Joined: 15 Sep 2020
Location: Illinois
Points: 279
|
Post Options
Thanks(0)
Quote Reply
Posted: 12 Sep 2022 at 10:06pm |
|
Great job on Allie, you did an excellent job of restoring your tractor and thanks for documenting the progress for those of us following along. How did you and Allie do at the tractor pull and how many classes were you able to get into? Perhaps a video of the pull for your fans on here. Have you got another project in the works yet. Keep up the great work
Edited by Dirt Farmer - 12 Sep 2022 at 10:12pm
|
|
55allis
Orange Level
Joined: 30 Jun 2020
Location: Southwest IA
Points: 545
|
Post Options
Thanks(0)
Quote Reply
Posted: 12 Sep 2022 at 10:19pm |
|
Yes it is a awesome job of a tractor, every tractors dream!!!
|
|
Jtaylor
Bronze Level
Joined: 11 Oct 2021
Location: Barrie, Ontario
Points: 194
|
Post Options
Thanks(0)
Quote Reply
Posted: 13 Sep 2022 at 8:17am |
Dirt Farmer wrote:
Great job on Allie, you did an excellent job of restoring your tractor and thanks for documenting the progress for those of us following along. How did you and Allie do at the tractor pull and how many classes were you able to get into? Perhaps a video of the pull for your fans on here. Have you got another project in the works yet. Keep up the great work |
I appreciate the feedback. Allie didn't do too bad at the pulls last weekend. a very slippery track and the sled wasn't setup correctly.. ended up 10th out of 18. I expect to do a bit better this weekend with a more clay-like track. I am also expecting more now that the tractor has had a couple of good heat and pull cycles allowing the rings to be seated.
No project in the works yet. I think this will be the last one for a bit unless a decently straight CA comes available locally. Im interested in working at getting some suitcase weights for Allie to be competitive in the 4500 and 5500 lb class here so that will be the focus. also fabricating some removable weight mounts.
|
|
sunsation288
Bronze Level
Joined: 02 Dec 2022
Location: quebec
Points: 26
|
Post Options
Thanks(0)
Quote Reply
Posted: 02 Dec 2022 at 12:19pm |
|
i dig this thread two time !!!, incredible job you have done , and thanks for taking time to documenting the progress ..... beautiful WD45
|
|