| Author |
 Topic Search Topic Search  Topic Options Topic Options
|
AJ 
Orange Level

Joined: 31 Oct 2010
Location: mo
Points: 5244
|
 Post Options Post Options
") Thanks(0) Thanks(0)
 Quote Quote  Reply Reply
 Topic: How does one get this off? Topic: How does one get this off?
Posted: 08 Jul 2017 at 1:10pm |
The nut/bolt that's holding the steering wheel on my D12. Need to rebuild the box so this has to come off. 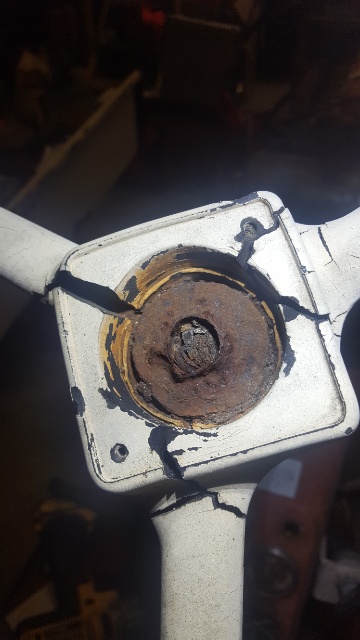
|
|
Can't fix stupid
|
 |
|
Sponsored Links
|
|
|
jaybmiller
Orange Level Access
Joined: 12 Sep 2009
Location: Greensville,Ont
Points: 24694
|
Post Options
Thanks(0)
Quote Reply
Posted: 08 Jul 2017 at 1:30pm |
|
Hmm a little worse than the rider I had to do this week,sigh..
In my case ,I cut the steering shaft into two pieces,so could hold 'stub' shaft in BF vice and spent an hour being 'creative' and got the steering wheel off. I did have a spare shaft laying about but in your case I'd weld a new 'stub' onto the original AFTER I'd threaded it for the proper nut.
Ask around, maybe someone has a 'spare' shaft they'll sell or take the 2 pieces to a GREAT welder who'll come out at 2AM if ir ever breaks at HIS weld .
Jay
|
|
3 D-14s,A-C forklift, B-112
Kubota BX23S lil' TOOT( The Other Orange Tractor)
Never burn your bridges, unless you can walk on water
|
|
Hubert (Ga)engine7
Orange Level

Joined: 12 Sep 2009
Location: Jackson Cnty,GA
Points: 6468
|
Post Options
Thanks(0)
Quote Reply
Posted: 08 Jul 2017 at 1:35pm |
|
What Jay says, or get out the blue wrench.
|
|
Just an old country boy saved by the grace of God.
|
|
JoeO(CMO)
Orange Level

Joined: 11 Sep 2009
Location: Cent Missouri
Points: 2696
|
Post Options
Thanks(0)
Quote Reply
Posted: 14 Jul 2017 at 6:18am |
|
They have some thin cutting wheels for hand grinders that would easily slice that off, but you would need a little more warmth added to it.
Edited by JoeO(CMO) - 14 Jul 2017 at 6:21am
|
|
|
|
Butch(OH)
Orange Level
Joined: 11 Sep 2009
Location: Lucerne Ohio
Points: 3842
|
Post Options
Thanks(0)
Quote Reply
Posted: 14 Jul 2017 at 6:27am |
|
If you can get that off without destroying the steering wheel be sure to share how you did it.
If it were me I would first order a new steering wheel and a nice new emblem from one of the site sponsors and once that is done I would put a cut off disk in the big die grinder and begin slicing away the wheel beginning with the spokes and then slicing into the hub and nut until it will fall off. The thread on the shaft isnt a standard bolt thread so your not going to have a die or thread chaser that fits. Thus some caution is prudent when cutting but a few nicks dont hurt anything.
|
|
LeonR2013
Orange Level

Joined: 01 Jan 2013
Location: Fulton, Mo
Points: 3500
|
Post Options
Thanks(0)
Quote Reply
Posted: 14 Jul 2017 at 6:39am |
|
I think cut it in half and press the stub out of the steering wheel. Then grind each end like a chisel and weld back together, first one side then the other. you can keep it straight this way. A thin cut off wheel on a die grinder and lots of patience would work to get the nut and steering wheel off. You can buy them at HF real cheap, plus the die grinder. You've probably been wanting one anyway, and a new compressor.
|
|
corbinstein
Orange Level
Joined: 31 Jul 2014
Location: Oklahoma
Points: 796
|
Post Options
Thanks(0)
Quote Reply
Posted: 14 Jul 2017 at 6:50am |
Are you replacing the steering wheel with another one? if so, I'd break out my HF 4" angle grinder, cut the spokes, then cut the center section of the wheel from top to bottom in 3 sections, being careful to not cut too far into the splines in the center. A couple raps with a good hammer and it should fall off after that, of course in pieces.
|
|
AJ
Orange Level
Joined: 31 Oct 2010
Location: mo
Points: 5244
|
Post Options
Thanks(0)
Quote Reply
Posted: 14 Jul 2017 at 8:28am |
|
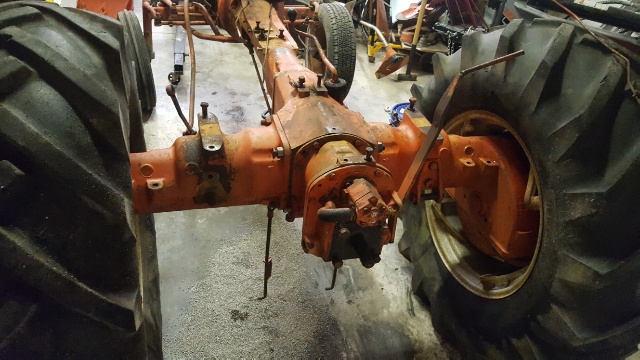
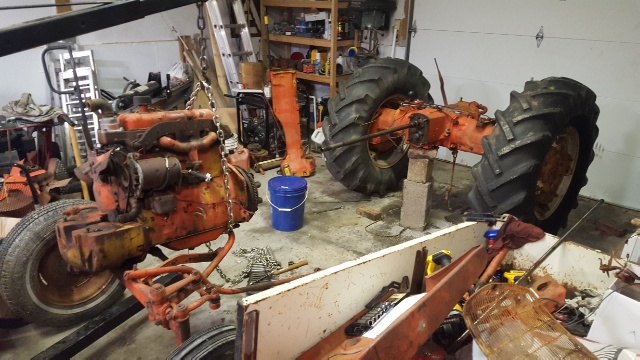
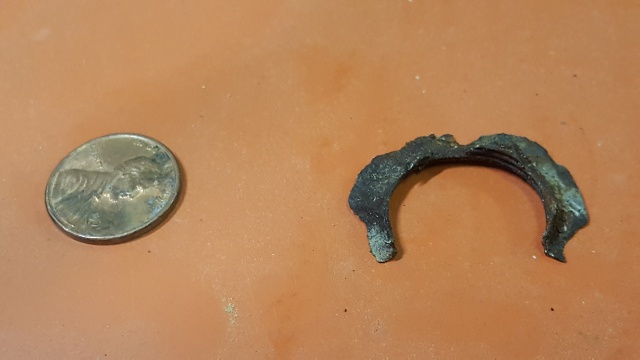
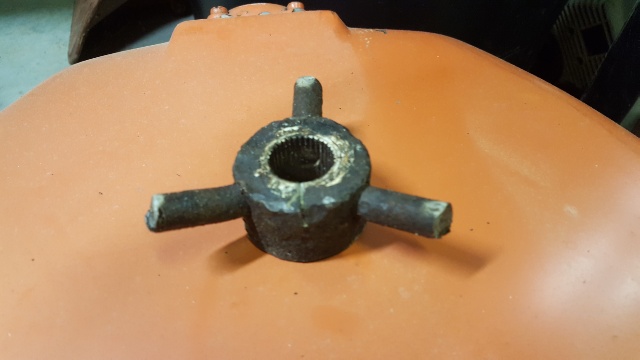
I was successful on getting it off. Had to patient for little over an hour and drink about three beers in the process. Walked away once too. I busted off the plastic off the steering wheel frame and cut the wheel off leaving about three inches on the three "legs" to use to beat on with a hammer just in case. I took my grinder with a cut off wheel on it and put a slice into it very carefully not to go too deep. Took a small chisel and slowly and carefully beat around where I thought the edges of the nut were. Finally, saw a seem of it and took a very small flat head screwdriver and pried around the edge of it slowly working it loose. Go what was left of the nut (about the equivalent of a penny). Then started to beat on the left over of the steering wheel alternating the three legs. took about 20 minutes a full beer to get that off. Had a significant level of accomplishment after that. I'll try to get you all some pictures later today of everything.
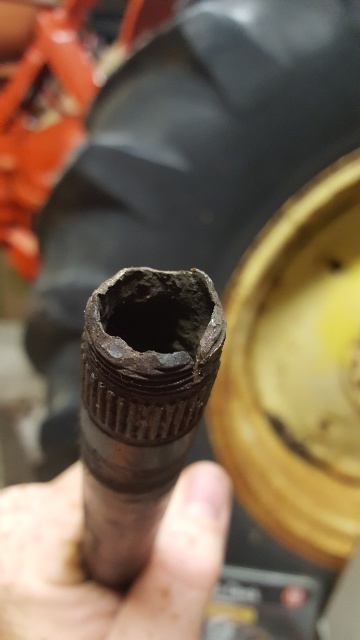
Gonna have to cut and weld on a new end to the steering shaft because there isn't much threads on the end that are worth anything from the rust. Gotta find a D15/17/19 shaft I can cut a piece off of to use. Got new seals/gaskets for the steering box. Hope to be putting it back together this weekend. Gotta send my fenders off to have them rebuilt. Gas tank, hood and nose are at the body shop now. Torque tube is at another shop getting worked. Ment to fix this and that but ended up completely dismantling her. Figured I'm this far guess I'll go ahead and paint her.
Edited by AJ - 14 Jul 2017 at 8:33am
|
|
Can't fix stupid
|
|
AJ
Orange Level
Joined: 31 Oct 2010
Location: mo
Points: 5244
|
Post Options
Thanks(0)
Quote Reply
Posted: 14 Jul 2017 at 8:37am |
|
|
|
Can't fix stupid
|
|
Charlie175
Orange Level
Joined: 11 Sep 2009
Location: Shenandoah, VA
Points: 6369
|
Post Options
Thanks(0)
Quote Reply
Posted: 14 Jul 2017 at 8:51am |
|
Be careful with the Quill shaft!
|
|
Charlie
'48 B, '51 CA, '56 WD45 '61 D17, '63 D12, '65 D10 , '68 One-Ninety XTD
|
|
Hockeygoon
Orange Level

Joined: 13 Sep 2016
Location: Manhattan, KS
Points: 1210
|
Post Options
Thanks(0)
Quote Reply
Posted: 14 Jul 2017 at 9:28am |
 corbinstein wrote: corbinstein wrote:
Are you replacing the steering wheel with another one?if so, I'd break out my HF 4" angle grinder, cut the spokes, then cut the center section of the wheel from top to bottom in 3 sections, being careful to not cut too far into the splines in the center. A couple raps with a good hammer and it should fall off after that, of course in pieces. |
That's how I would do it - except maybe I 'd use the saw blade on my Rotozip to make a smaller cut. That steering wheel looks like it toast anyway.
|
|
TimNearFortWorth
Orange Level

Joined: 12 Dec 2009
Points: 2014
|
Post Options
Thanks(0)
Quote Reply
Posted: 14 Jul 2017 at 9:34am |
|
X2 on Charlie's comment; ended up with a slight but noticeable rattling growl after buttoning up the D12 some years back. Machinist where it was at trying to sort the EI issues split it and made a new bushing as worn on interface at quill shaft. Quiet as a church mouse after . . . .
|
|
AJ
Orange Level
Joined: 31 Oct 2010
Location: mo
Points: 5244
|
Post Options
Thanks(0)
Quote Reply
Posted: 14 Jul 2017 at 9:45am |
Charlie175 wrote:
Be careful with the Quill shaft! |
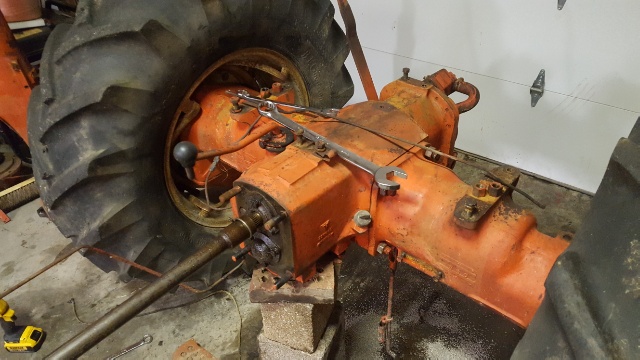
Quill shaft the shaft that runs from clutch to hydraulic pump inside the main drive shaft?
|
|
Can't fix stupid
|
|
AJ
Orange Level
Joined: 31 Oct 2010
Location: mo
Points: 5244
|
Post Options
Thanks(0)
Quote Reply
Posted: 14 Jul 2017 at 10:15am |
|
What bushing did you have issues with Tim? Might go ahead and replace it now since I'm this far. Already dumped $160 in seals/gaskets in the drive train, have more on order. Thought I was thorough on my last restoration but ended up have an oil leak after all was done. Frustrating.
My goal is to not have a single leak on the tractor.
Edited by AJ - 14 Jul 2017 at 10:16am
|
|
Can't fix stupid
|
|
TimNearFortWorth
Orange Level
Joined: 12 Dec 2009
Points: 2014
|
Post Options
Thanks(0)
Quote Reply
Posted: 14 Jul 2017 at 11:14am |
AJ, The noise heard was during initial running after re-assembly and I mentioned it to the fella that we carried the tractor to because of EI modules frying. Excellent machinist/engine builder (former A-C dealer mechanic) that sorted the EI issues (pulled it after frying the original plus two spare modules he had) on a Friday. Called me Saturday afternoon to come by and he had already split it, installed a brass bushing and buttoned up the tractor. If memory serves, it was in the quill shaft as I recall but he could have made/installed a bushing at the front of the rear. May have to pull a parts breakdown to see as it sounded like a wear item he had fixed on a number of units previously and unfortunately, he passed a few years ago . . . . Before the pro-EI guys get upset about ground points/bad connections, etc. on that EI, tractor had been sandblasted bare during rebuild and entire wiring harness was a new custom made marine grade wire unit. This engine builder at the time had run many EI units on pulling engines he had built and reached out numerous times to Petronix before calling "no joy", the points were put back in and no issues.
|
|
AJ
Orange Level
Joined: 31 Oct 2010
Location: mo
Points: 5244
|
Post Options
Thanks(0)
Quote Reply
Posted: 14 Jul 2017 at 12:43pm |
|
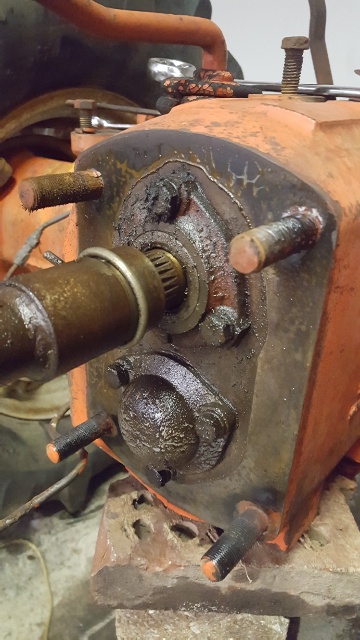
On agco site there is nothing called a quill shaft. There is a clutch shaft assembly which runs off the flywheel to the transmission. Then there is a shaft that goes from the flywheel to the PTO for live power. This shaft goes inside the hollow clutch shaft. There is a bushing at the front of the clutch shaft I guess inside the flywheel area from what the picture look.
|
|
Can't fix stupid
|
|
TimNearFortWorth
Orange Level
Joined: 12 Dec 2009
Points: 2014
|
Post Options
Thanks(0)
Quote Reply
Posted: 14 Jul 2017 at 2:30pm |
|
Pulled the package on that tractor when re-worked and Dealer Parts Catalog (1962) we referenced shows the bushing at front of the Clutch Shaft; only thing I can recall he made one for and if memory serves he mentioned knocking one out of brass on the lathe. This unit threw us a few times as it is s/n 2460 and reportedly, live pto/hydraulics were not available until s/n 3001. PO advised his father purchased the tractor new so who can say for sure.
|
|
AJ
Orange Level
Joined: 31 Oct 2010
Location: mo
Points: 5244
|
Post Options
Thanks(0)
Quote Reply
Posted: 14 Jul 2017 at 2:37pm |
|
So I need to check that bushing out well. Thanks Tim.
|
|
Can't fix stupid
|
|
AJ
Orange Level
Joined: 31 Oct 2010
Location: mo
Points: 5244
|
Post Options
Thanks(0)
Quote Reply
Posted: 14 Jul 2017 at 2:47pm |
|
Just check and apparently that bushing was only used in the 3001 serial numbers and prior. After doesn't appear to have them. Guess there is a special hole for the end of that shaft to go into the flywheel
Edited by AJ - 14 Jul 2017 at 3:08pm
|
|
Can't fix stupid
|
|
Gary
Orange Level Access
Joined: 13 Sep 2009
Location: Peterborough,On
Points: 5900
|
Post Options
Thanks(0)
Quote Reply
Posted: 14 Jul 2017 at 7:30pm |
|
If I remember correctly !! the solid inner shaft is splined into the flywheel.
That is where the 'live PTO' and 'Live Hydraulic' comes from.
Gary
|
|
Travis2766
Silver Level

Joined: 26 Aug 2015
Location: Amherst, Wi
Points: 434
|
Post Options
Thanks(0)
Quote Reply
Posted: 14 Jul 2017 at 8:20pm |
|
I cut mine off on my D17 with a grinder and thin cutting wheel. Made a slice almost all the way thru and then split it open with a chisel.
|
|
190XT Series III, D17 Series IV, D15 Series II, All Crop 66 and a whole mess of equipment.
|
|
AJ
Orange Level
Joined: 31 Oct 2010
Location: mo
Points: 5244
|
Post Options
Thanks(0)
Quote Reply
Posted: 14 Jul 2017 at 9:39pm |
Gary wrote:
If I remember correctly !! the solid inner shaft is splined into the flywheel.
That is where the 'live PTO' and 'Live Hydraulic' comes from.
Gary |
Yep, that's exactly right
|
|
Can't fix stupid
|
|
AJ
Orange Level
Joined: 31 Oct 2010
Location: mo
Points: 5244
|
Post Options
Thanks(0)
Quote Reply
Posted: 15 Jul 2017 at 4:26pm |
|
|
|
Can't fix stupid
|
|