This site is not affiliated with AGCO Inc., Duluth GA., Allis-Chalmers Co., Milwaukee, WI., or any surviving or related corporate entity. All trademarks remain the property of their respective owners. All information presented herein should be considered the result of an un-moderated public forum with no responsibility for its accuracy or usability assumed by the users and sponsors of this site or any corporate entity.
The Forum Parts and Services Unofficial Allis Store Tractor Shows Serial Numbers History
Forum Home Forum Home > Allis Chalmers > Farm Equipment
  New Posts New Posts
  FAQ FAQ  Forum Search   Events   Register Register  Login Login


CA engine rebuild

 Post Reply Post Reply Page  <1 234
Author
Message Reverse Sort Order
 Rating: Topic Rating: 1 Votes, Average 5.00  Topic Search Topic Search  Topic Options Topic Options
littlemarv View Drop Down
Orange Level
Orange Level


Joined: 10 Jun 2013
Location: Wisconsin
Points: 1826
Post Options Post Options   Thanks (0) Thanks(0)   Quote littlemarv Quote  Post ReplyReply Direct Link To This Post Posted: 24 Nov 2018 at 9:41pm
Well, momma took the youngsters to a high school basketball game, and I am stuck in town on call, so I might as well go pop the carb and generator off tonight.
 
Yeah right, an hour and a half later I was holding the pistons.
 
Unbolted everything around the outside.
 
 
 I had to stare at the coil and distributor a little bit. I ain't never had nothing new enough to have all this here newfangled ignition system! Guess I will learn the timing process upon reassembly.
 
Took the head off, cylinders look good. Even the rocker pads don't look that worn.


With the engine blocked up like this, I found I can just lift one end, remove the wood block, then balance and spin the engine around on the drain plug. Block it back up, and flop it over.
 
 
Looks pretty clean inside, not much gunk on the pickup screen.


Never seen these jamnuts on the rod bolts before.
 
 
I always get confused on these engines, because the pinch bolt on the piston pin goes one way on one cylinder and the opposite on another.
 
You just have to remember, the rod bolts go towards the nearest main bearing. Kind of hard to tell by this picture though.
 
 
One thing I noticed when driving this tractor, is there is an engine noise under load. Not as loud as a knock, but more worrisome than a tick. I only heard it when it was up to temp and working hard, or at least as hard as a lawnmower tractor has to work. Kind of another reason to delve into the inside of the engine.
 
Well, I think I found it. #2 is scored a little on one side, and quite bad on the other.


And I think I know the reason why. The piston pin is so tight you have to hold the piston and push quite firmly to get it to move. The other three flop around like normal.
 
Here you can see when I set them on the bench, the other three rods fall to one side, while #2 isn't going anywhere!


When I took the pan off and saw how clean everything was inside, I really thought maybe I should just do the liner O-rings and put it back together, but now that I see this, I may just go with a full overhaul, and get the rods sized and mains line bored to eliminate the shims. We will see once I get everything apart and measured.
 
Anyways, anybody know anything about this shaft, it looks like it may be the oil leak on the front of the engine?
 
 
So there, so much for my nice clean work benches...


I use these containers to keep everything organized on these long projects, lest I forget where stuff goes.
 
 
Thanks for looking!


The mechanic always wins.

B91131, WC23065, WD89101, CA29479, B1, Early B10, HB212, 416H
Back to Top
Sponsored Links


Back to Top
Ted J View Drop Down
Orange Level
Orange Level
Avatar

Joined: 05 Jul 2010
Location: La Crosse, WI
Points: 18727
Post Options Post Options   Thanks (0) Thanks(0)   Quote Ted J Quote  Post ReplyReply Direct Link To This Post Posted: 24 Nov 2018 at 9:28pm
Well,,,,,,,,,,,it won't be the worst thing you can do!!  I'm already lookin for a THIRD one!!
BUT, lets not get ahead of ourselves....
You're gonna have to borrow that makeshift contraption next summer when I have to split  the 2nd CA apart so I can put a new ring gear in it.  THEN I'll have to pull the rear end apart to fix whatever is wrong with the hand clutch in it.  It just flops around.....don't do nothin!

NOW, for the BIG QUESTION of the day,,,,,did YOU actually clean all of them off BY YOURSELF!!??  Or did jr. help a lot?

Speaking of ring gears,,,,yours doesn't look too good either.  NOT as bad as mine, but enough....rather than file those few bad ones off, I'd take the time now to put a new one on!!  Only take 10 minutes extra now!


Edited by Ted J - 01 Dec 2018 at 8:59am
"Allis-Express"
19?? WC / 1941 C / 1952 CA / 1956 WD45 / 1957 WD45 / 1958 D-17
Back to Top
1955CA View Drop Down
Silver Level
Silver Level
Avatar

Joined: 10 Sep 2018
Location: Ontario, Canada
Points: 496
Post Options Post Options   Thanks (0) Thanks(0)   Quote 1955CA Quote  Post ReplyReply Direct Link To This Post Posted: 24 Nov 2018 at 8:26pm
Thanks for posting. Being a new CA owner myself, here is more i can see and learn about them.
Back to Top
Dave(inMA) View Drop Down
Orange Level
Orange Level
Avatar

Joined: 12 Sep 2009
Location: Grafton, MA
Points: 2395
Post Options Post Options   Thanks (0) Thanks(0)   Quote Dave(inMA) Quote  Post ReplyReply Direct Link To This Post Posted: 24 Nov 2018 at 7:59pm
I'll be following your progress, littlemarv! These are fun threads. I was about to post asking you what form of magic you employed to hold up the back 2/3 of the tractor while removing the engine and installing your nifty bracket....when I finally spotted the jack under the bell housing! Anyway, thanks for starting this project and letting us follow along.
WC, CA, D14, WD45
Back to Top
IBWD MIke View Drop Down
Orange Level
Orange Level
Avatar

Joined: 08 Apr 2012
Location: Newton Ia.
Points: 3469
Post Options Post Options   Thanks (0) Thanks(0)   Quote IBWD MIke Quote  Post ReplyReply Direct Link To This Post Posted: 24 Nov 2018 at 7:44pm
Yep, just get a second CA, that's my plan!
Back to Top
littlemarv View Drop Down
Orange Level
Orange Level


Joined: 10 Jun 2013
Location: Wisconsin
Points: 1826
Post Options Post Options   Thanks (0) Thanks(0)   Quote littlemarv Quote  Post ReplyReply Direct Link To This Post Posted: 24 Nov 2018 at 4:18pm
Thanks for the link to the manual. I think I may have printed it out before, but now its probably lost in my pile of manuals!
 
I thought about buying the cheapest engine stand I could find and removing the wheels, then chopping it down a little to make a "tabletop" version! Really though, once you get all the parts off that you can unbolt, it isn't too hard to roll it around on the table.
 
Sugarmaker-  I bought this CA instead of just a C due to the hand clutch when mowing, it really is sweet to use. I also thought, "I will pop the mower off so I can use it in the woods and for my play farming."  Well, after I got it home and saw how much it takes to "off with the mower and back on with the snap coupler" I kind of gave up on that. So now I want another one. Ask Ted J. how that works. If you are going to buy a CA, may as well pick up a second one right away. Especially with all the stuff I see you doing with your tractors!
 
 
The mechanic always wins.

B91131, WC23065, WD89101, CA29479, B1, Early B10, HB212, 416H
Back to Top
B26240 View Drop Down
Orange Level
Orange Level


Joined: 21 Nov 2009
Location: mn
Points: 3860
Post Options Post Options   Thanks (0) Thanks(0)   Quote B26240 Quote  Post ReplyReply Direct Link To This Post Posted: 24 Nov 2018 at 4:16pm
Nice work Marv !!  I look forward to progress pictures as you go, you do first rate work !!    Mark
Back to Top
Sugarmaker View Drop Down
Orange Level
Orange Level
Avatar

Joined: 12 Jul 2013
Location: Albion PA
Points: 8168
Post Options Post Options   Thanks (0) Thanks(0)   Quote Sugarmaker Quote  Post ReplyReply Direct Link To This Post Posted: 24 Nov 2018 at 1:05pm
Llttlemarv,
Great pictures and documentation as usual. I will be watching too. Thanks for posting your moves and progress. I like the way you temp put the tractor back together with the frame, very nice.
Occasionally I think a CA maybe in my future Allis collection too.
Regards,
 Chris


Edited by Sugarmaker - 25 Nov 2018 at 8:38am
D17 1958 (NFE), WD45 1954 (NFE), WD 1952 (NFE), WD 1950 (WFE), Allis F-40 forklift, Allis CA, Allis D14, Ford Jubilee, Many IH Cub Cadets, 32 Ford Dump, 65 Comet.
Back to Top
Dick L View Drop Down
Orange Level
Orange Level
Avatar

Joined: 12 Sep 2009
Location: Edon Ohio
Points: 5082
Post Options Post Options   Thanks (0) Thanks(0)   Quote Dick L Quote  Post ReplyReply Direct Link To This Post Posted: 24 Nov 2018 at 1:04pm
You did good! If you have room for a motor stand it would make the rebuild easier. Doesn't look like it though in you last picture.

Edited by Dick L - 24 Nov 2018 at 1:07pm
Back to Top
Gerald J. View Drop Down
Orange Level
Orange Level


Joined: 12 Sep 2009
Location: Hamilton Co, IA
Points: 5636
Post Options Post Options   Thanks (0) Thanks(0)   Quote Gerald J. Quote  Post ReplyReply Direct Link To This Post Posted: 24 Nov 2018 at 10:36am
Back to Top
littlemarv View Drop Down
Orange Level
Orange Level


Joined: 10 Jun 2013
Location: Wisconsin
Points: 1826
Post Options Post Options   Thanks (0) Thanks(0)   Quote littlemarv Quote  Post ReplyReply Direct Link To This Post Posted: 24 Nov 2018 at 9:48am

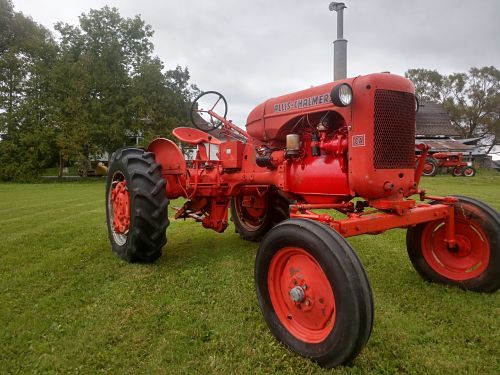
When I bought this CA earlier this summer, Walt told me that it gets coolant in the oil over the winter. I am assuming some liner O-rings are shrinking in the cold and letting coolant down into the oil. He also told me that he had the head off to replace something in it awhile back (like 10 years ago) and one of the liners lifted up when he turned the crankshaft. Well, that could certainly be the culprit. I told him I could pop it apart and just replace the O-rings like I did on dad's B, but he said "No, its time to go through the whole motor again". Fair enough, it will be a nice winter project. 

I have been watching it all summer, and there hasn't been any coolant in the oil as of yet.
 
I have also given up on "Indian summer" to get my leaves done. They are just snowed in for the year, we will see them again come spring.
 
 
Might as well pop the motor out and get it downstairs, put the tractor in storage, and get my pickup back in the garage for the winter.
 
Drained the coolant. Looks nice and green in the radiator, but is nasty brown/black on the bottom.
 
 
Removed the hood, muffler, air cleaner, radiator hoses, choke rod, fuel line, throttle rod, and wire harness.
 
Found this wire hanging out under the hood. My first guess is its for headlights and it goes to this stud as kind of a junction block?


I was going to leave the radiator in place, but the lower mount is in the way to get at the four nuts that hold the pedestal onto the motor. I could have maybe got in there with a wrench or flex socket, but I just removed it, less chance of it getting damaged that way.


I didn't know it was the cover for the steering as well.
 
 
Hung the pedestal with a comealong,


Put my custom engine lifting bracket on. Its drilled for both 125 CI and 201 CI studs, so I can use it on B, C, CA, WC, WD, and WD45 engines, maybe more.


Eased the pedestal forward, after I took the belt off for clearance.
 
 
And swung the motor out. In retrospect, when I go back together, I am going to take the extra 3 seconds and knock the steering arm apart to make more room. The long throttle rod fought the entire process and may have gotten tweaked a little.
 
 
Chopped up a piece of frame rail to make this little contraption for pulling engines on tractors that don't have frame rails.


It needs to be refined, but it will work for now.
 
 
The neighbor stopped over and asked if he could borrow a screwdriver, so I had him grab one end of the two wheeled cart and we made the journey down the stairs with the engine.
 
This project deserves a nice fresh piece of cardboard!
 
 
Put my chain hoist in the floor joists again, and up on the table it goes.
 
 
Upon outward inspection, the foot clutch looks pretty good as far as lining goes. And the bolts look new.
 
 
So there is this winters project. Took the tractor and put in storage next to the camper and the WC. Time to hibernate for the year, unless we start cutting popple again!
 
Thanks for looking!


The mechanic always wins.

B91131, WC23065, WD89101, CA29479, B1, Early B10, HB212, 416H
Back to Top
 Post Reply Post Reply Page  <1 234
  Share Topic   

Forum Jump Forum Permissions View Drop Down

Forum Software by Web Wiz Forums® version 11.10
Copyright ©2001-2017 Web Wiz Ltd.

This page was generated in 0.063 seconds.


Help Support the
Unofficial Allis Forum