| Author |
 Topic Search Topic Search  Topic Options Topic Options
|
DaveKamp 
Orange Level Access

Joined: 12 Apr 2010
Location: LeClaire, Ia
Points: 6117
|
 Post Options Post Options
") Thanks(0) Thanks(0)
 Quote Quote  Reply Reply
 Topic: Power-shift wheel primer Topic: Power-shift wheel primer
Posted: 27 May 2010 at 6:59am |
|
Hi Guys!
Okay, since I have this beastie running, my next step is to make it less of a safari to walk-around. The previous owner had rear wheels cranked out to full-reach, so I'd like to tuck them in a bit. There are a few important things to cover before I shift 'em back in:
1) I've never done this before... never seen how the unlocking mechanism works, and can't see much of anything on these. I HAVE seen an advertising clip showing the wheel moving, but never DONE it, and I didn't stay at a Holiday Inn Express last night.
2) These things are pretty crusty... If hosed 'em down with penetrant, I hope they'll move.
3) The fasteners on the mechanisms... some have nuts (or something) welded to 'em. I'm not sure what they were SUPPOSED to look like before, but they look like alien dog turds now. I assume it takes an alien dog-turd wrench to turn them?
So before I break something or kill myself, I'll seek sage advice on not only how the mechanism principle works, but also what the reasoning for the welding, etc., and what I should expect when trying to retract wheels that've been in the full-reach position for better'n 35 years...
|
 |
|
Sponsored Links
|
|
|
Bob-Maine
Orange Level

Joined: 11 Sep 2009
Location: Central Maine
Points: 922
|
Post Options
Thanks(0)
Quote Reply
Posted: 27 May 2010 at 7:20am |
|
Well, Dave, you may want to set aside a day or two for this. I don't recall the correct nomenclature for all the parts, but have done this a few times so here goes. The penetrating oil usually is not enough. If it doesn't work, You may want to jack her up and remove the wheel centers along with the rims and clamps. Then unbolt the clamps (still attached to the rims) from the wheel centers. Then the clamps will come off the rims. Don't lose any parts, like the eccentric in the clamps. There used to be a square headed adjustment screw (might have a nut welded to ot on yours. Pound on this with a big hammer after it has been lathered with your favorite penetrant (I like PB Blaster). Then attach an impact wrench and have at it. This may get it to turn. If not, go back to penetrant, hammer, then impact wrench again.
Now, one of the better versed AC fans will come on with better advice. Good luck. Bob@allisdowneast
|
|
GregLawlerMinn
Orange Level

Joined: 11 Sep 2009
Location: Lawler, Mn
Points: 1226
|
Post Options
Thanks(0)
Quote Reply
Posted: 27 May 2010 at 9:45am |
Dave
Bob has good advice. From your description of the condition, best for you to remove the rear wheels. Lay the tire on the ground (outside up) and remove the bolts holding the clamps to the center (and the rims stops...the thingys that are bolted to the rail ahead/behind the rail clamp). Obtain a BFH and block of wood and pound the center out. The clamps and wedges will drop out. You are now ready to free up the eccentric pin from the clamps. Begin by removing the clip from the pin on the back side, then try loosening the pin with a wrench or impact wrench; chances are you will have to soak them in your favorite snake oil (I usually mix up a batch of Acetone and ATF...50-50 mix...so I can soak the clamps/pins for a few days. Try again to turn and remove the pins from the clamps, if not successful, you can try tapping the pin from the inside out (use a pin so as not to damage the retainer clip groove). Alternativly (and my favorite), a shop press works real good once you get the pin to move a little. It sometimes takes several days to get the pins out (no surprise considering they have seen some real rough conditions for 50+ years). Once the pins are out, clean them up real good with a wire wheel, and use Never-Seize on the when reassembling them. Now that you have the pins in the housings, time to put the clamps back on the tire rim. I lean the tire against a wall so that it is essentially verticle and the tire facing the direction you want to install on the tractor and start at the bottom (best if you have a friend help with this). Place a wedge in the clamp then set the clamp on the rail at the 6 Oclock position, lift the center onto the clamp and hold in position and finger tight install the two bolts. Continue doing the other three the same way, the 12 Oclock position should be last and the clamp may have to be placed on the rail and slid into position on the center. Tighten the clamp bolt Goot-n-Tite and install the tire.
|
|
What this country needs is more unemployed politicians-and lawyers.
Currently have: 1 D14 and a D15S2.
With new owners: 2Bs,9CAs,1WD,2 D12s,5D14s,3D15S2s, 2D17SIVs,D17D,1D19D;1 Unstyled WC
|
|
Skyhighballoon(MO)
Orange Level

Joined: 11 Sep 2009
Location: Pilot Grove, MO
Points: 3115
|
Post Options
Thanks(0)
Quote Reply
Posted: 27 May 2010 at 9:49am |
|
I so love the newer style spin outs on my D17's and 180, none of these issues to deal with. The only problem I've ever had is the wheel stops rusting up and twisting off the bolts when you go to unloosen them to move holes. Mike
|
|
1981 Gleaner F2 Corn Plus w 13' flex
1968 Gleaner EIII w 10' & 330
1969 180 gas
1965 D17 S-IV gas
1963 D17 S-III gas
1956 WD45 gas NF PS
1956 All-Crop 66 Big Bin
303 wire baler, 716H, 712H mowers
|
|
Brian Jasper co. Ia
Orange Level
Joined: 11 Sep 2009
Location: Prairie City Ia
Points: 10508
|
Post Options
Thanks(0)
Quote Reply
Posted: 27 May 2010 at 12:03pm |
Sounds like Greg does it the way I did my CA and one wheel on my D17D. The "clamps" are really wedges. They expand when turned clockwise and contract the other way. I knocked the centers out and used my favorite "Loose Juice", BG In Force, and worked the eccentrics back and forth with an impact before taking them apart and sandblasting/painting everything. To do the adjusting, it's simply a matter of loosening the wedges, placing the stop in the location you want, and hold the brake on the opposite side. Put the tractor in 1st or R whichever way you need it to go.
|
|
"Any man who thinks he can be happy and prosperous by letting the government take care of him better take a closer look at the American Indian." Henry Ford
|
|
Dave(inMA)
Orange Level

Joined: 12 Sep 2009
Location: Grafton, MA
Points: 2399
|
Post Options
Thanks(0)
Quote Reply
Posted: 27 May 2010 at 12:32pm |
|
Holy cow, Dave - did you have ANY idea how much fun this could be???!?!!??? I can't wait to try this on my CA or maybe the WD45......maybe the D14 will be easier if it's similar to the D17 mentioned above!
|
|
WC, CA, D14, WD45
|
|
Dusty MI
Orange Level

Joined: 13 Sep 2009
Location: Charlotte, Mi
Points: 5061
|
Post Options
Thanks(0)
Quote Reply
Posted: 27 May 2010 at 12:34pm |
The WD series had 6 point heads. My D 10 has square heads. If yours has 6 points, I'd use a 6 point socket. If yours have square heads I don't think you will have much luck finding a 4 point socket, but one can find 8 point sockets.
Good Luck, Dusty
|
|
917 H, '48 G, '65 D-10 series III "Allis Express"
|
|
DaveKamp
Orange Level Access
Joined: 12 Apr 2010
Location: LeClaire, Ia
Points: 6117
|
Post Options
Thanks(0)
Quote Reply
Posted: 27 May 2010 at 1:21pm |
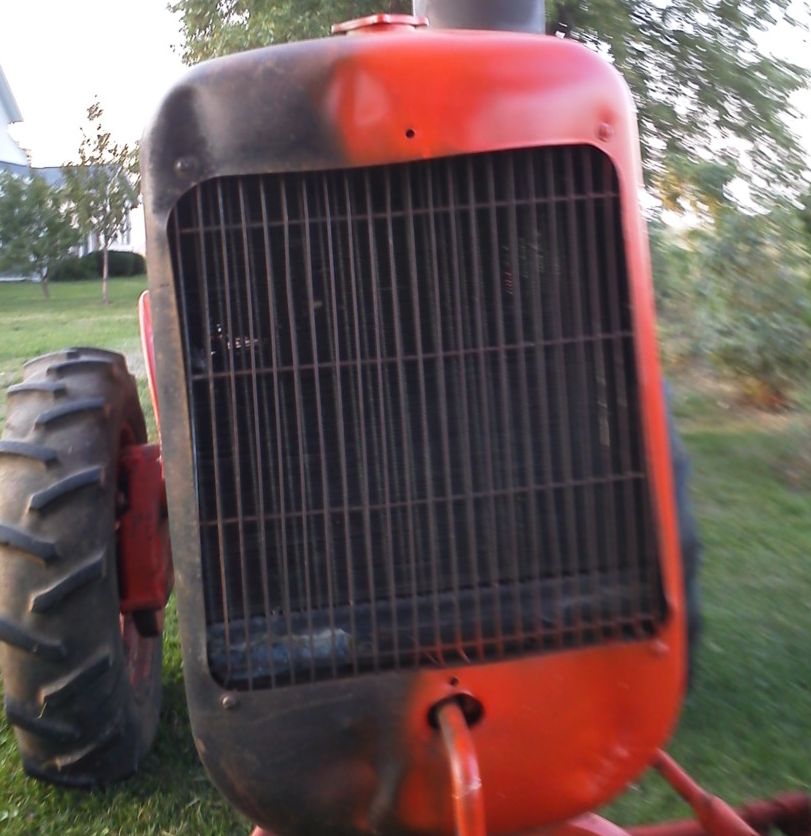
Here's what mine look like right now... 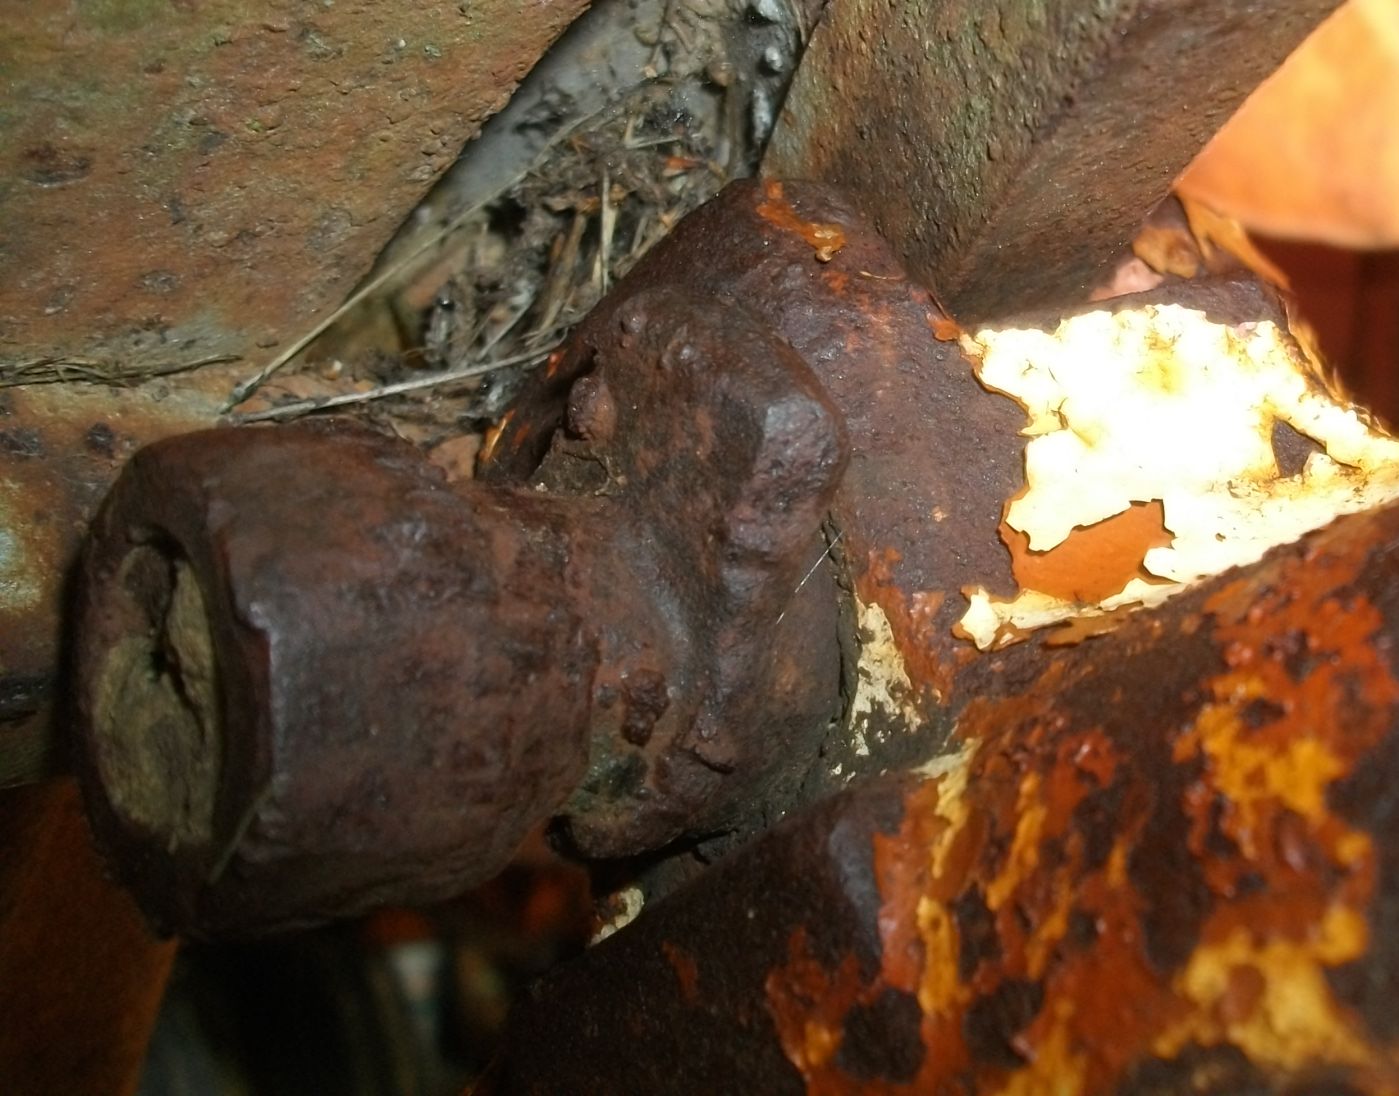
|
|
DaveKamp
Orange Level Access
Joined: 12 Apr 2010
Location: LeClaire, Ia
Points: 6117
|
Post Options
Thanks(0)
Quote Reply
Posted: 27 May 2010 at 1:26pm |
And this: 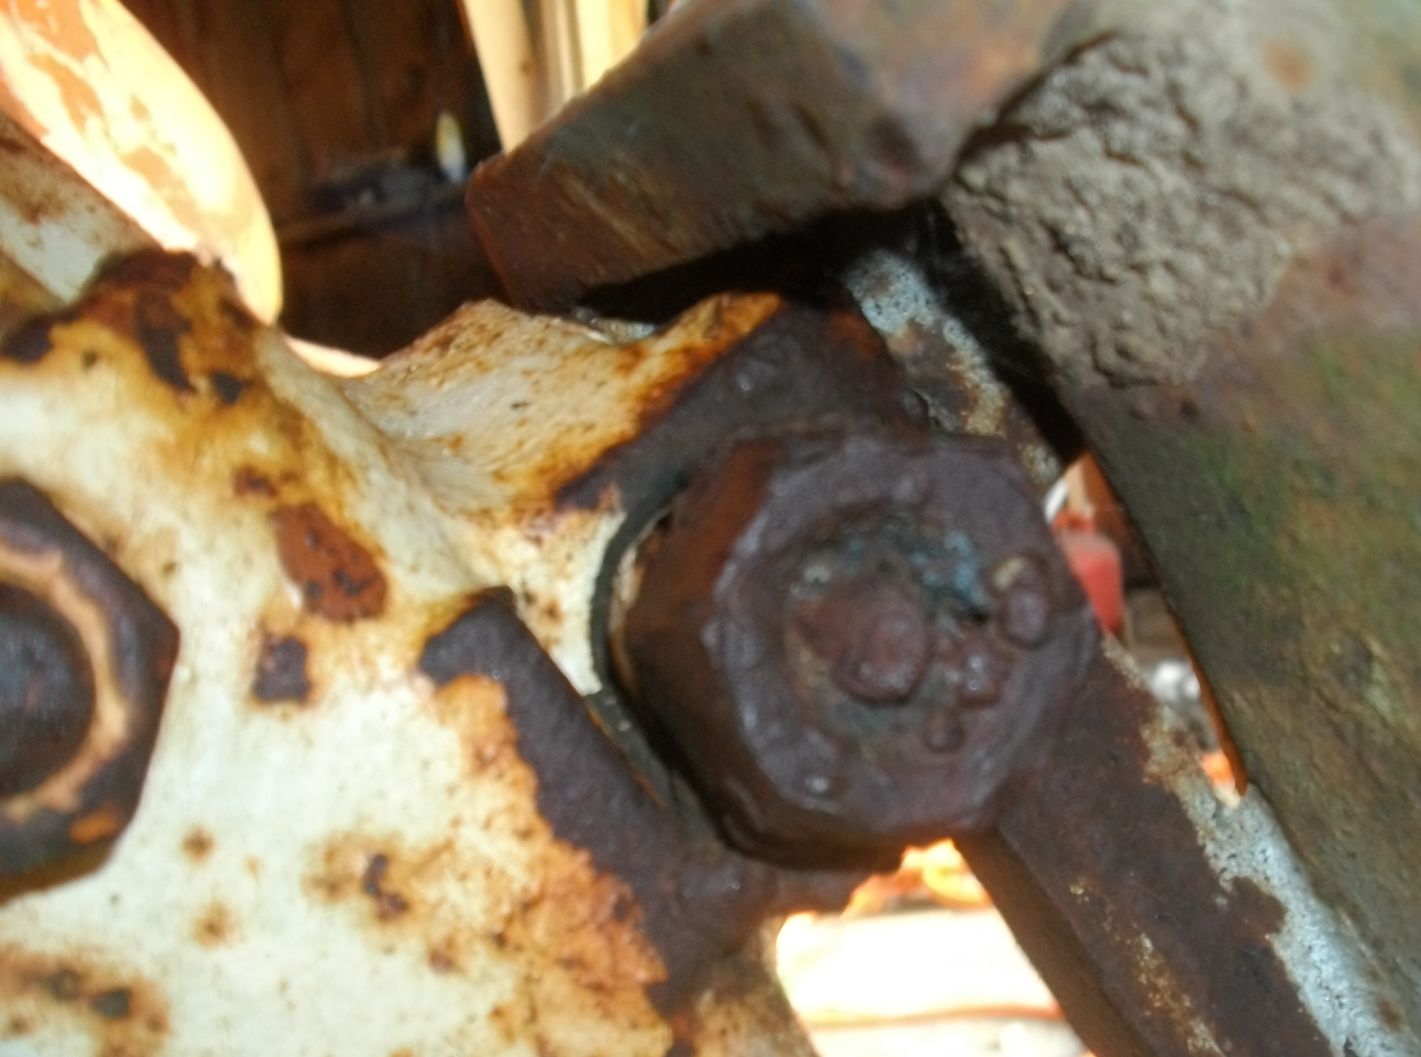
|
|
DaveKamp
Orange Level Access
Joined: 12 Apr 2010
Location: LeClaire, Ia
Points: 6117
|
Post Options
Thanks(0)
Quote Reply
Posted: 27 May 2010 at 1:29pm |
|
Well, I'm not sure whethere I'll need a six or four point socket, mebbie a three, five, or seven point socket... or mebbie I'll be welding a tab on 'em and using a pipe wrench? hee hee... Fortunately, if I can get these apart, and find ONE good example in the bunch, I can probably make a replacement fastener.
|
|
Bob-Maine
Orange Level
Joined: 11 Sep 2009
Location: Central Maine
Points: 922
|
Post Options
Thanks(0)
Quote Reply
Posted: 27 May 2010 at 4:36pm |
|
Dave(in MA) My D-14 came from my wife's family. It had sat in a shed for 13 years while the calcium rotted the rims and tires. A friend found used PA rims in a salvage yard in Stow, NY. We tried to install the rims and tires but the clamps were rusted tight. I needed to get on the road to Maine so I went to that salvage yard to buy clamps. The owner asked why I neede them and I said mine were beyond salvation. He took them and gave them to his yard bird along with instructions on how to pound on them and put the 1" drive impact on them. An hour later and $25 lighter, I went about my business happier than a pig in ****. I've used the lesson since. Bob@allisdowneast
|
|
Thad in AR.
Orange Level Access

Joined: 12 Sep 2009
Location: Arkansas
Points: 9731
|
Post Options
Thanks(0)
Quote Reply
Posted: 27 May 2010 at 5:41pm |
|
One of my tractors had the square bolt heads so I put a 1/2" drive socket inside another and welded them so I had a 1/2" female on both ends to fit the square bolt and my impact wrench. A little hot wrench action seems to help sometimes also.
|
|
CTuckerNWIL
Orange Level

Joined: 11 Sep 2009
Location: NW Illinois
Points: 22825
|
Post Options
Thanks(0)
Quote Reply
Posted: 27 May 2010 at 7:13pm |
|
Looks like it used to have 6 points. You might get lucky with a 6 point impact socket. All 4 of these have to turn c'clockwise about 180 degrees to free up the eccentrics. Then you just spin the wheel in. I'm gonna bet you will have to take the rim off by unbolting the wheel centers from the eccentric bracket thingy. You got a long weekend and good weather. I'd say you should be done some time Monday if not sooner. LOL
I almost drove through LeClaire on my way home from Iowa City this afternoon. I went up to Dewitt and through Clinton instead of taking the scenic route
|
|
|
|
DaveKamp
Orange Level Access
Joined: 12 Apr 2010
Location: LeClaire, Ia
Points: 6117
|
Post Options
Thanks(0)
Quote Reply
Posted: 27 May 2010 at 11:02pm |
|
The 180-degree info is priceless- that's one of the questions that was kinda stuck in the back of my head.
I'm sure I could warm 'em up if that suits the program. I'll see what I can do for an impact socket... I suppose I could always MIG something to this mess to give me a gripping surface, and then once out, cut it all apart and straighten it out.
Better to go up 61- I-80 eastbound is closed at the bridge in LeClaire. If you're passin' thru, gimmie a shout- I'm only 2 miles off 80... and about 6 miles east of 61. Dial Joe-died-01-i to reach me on the mobile phone.
Edited by DaveKamp - 27 May 2010 at 11:04pm
|
|


