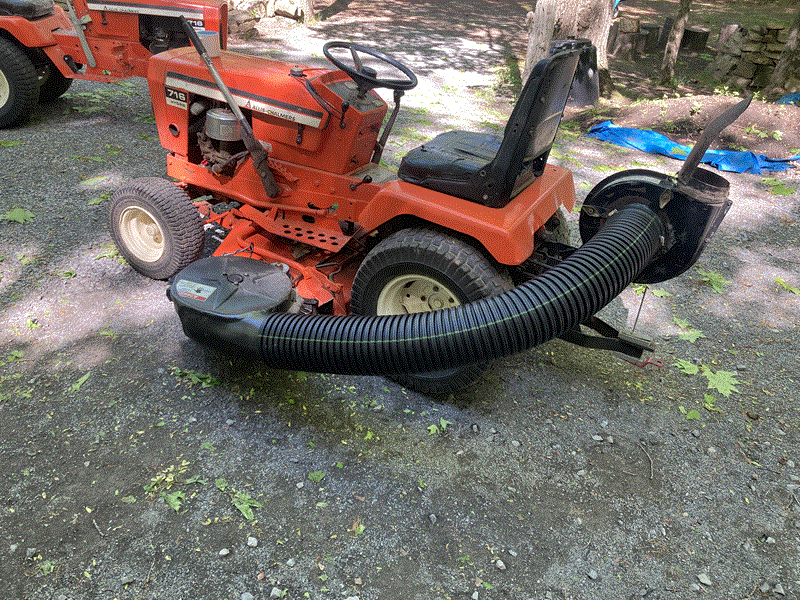
I have added a second blower to my 716H leaf vacuum system. The rear PTO driven blower worked very well for the past few years, but adding the mower deck blower has really improved the leaf gathering performance
Left hand mower deck blowers are very hard to find these days as the industry moved to right hand deck discharge many years ago. I purchased a RIGHT HAND mower deck blower on eBay from a supplier in South Bend, Indiana (excellent supplier). The blower was in great shape (used) but pointing in the wrong direction for my setup!!! (Simplicity Model 1694304)
I cut the lower half of the HDPE housing chute apart from the blower housing and basically turned the lower half inside out to transition to LH orientation. I heated the chute in my BBQ to about 250F to soften up the material so it could be re-shaped. I used a blowtorch for smaller area work, but the BBQ was a perfect heat chamber for the larger component. Insulated gloves and a simple bending platform (2X4) helped in the reshaping. The HDPE bends easily at 250F and holds the new shape as it cools, being held in the new position.
Once I got the new shape I wanted it fit back together perfectly with the blower cover housing.
I drilled holes thru the HDPE and slowly stitched it back together with zip ties. Minor reshaping was needed with the blowtorch to get a satisfactory seal at the butt joint. Copper wire threaded thru the holes replaced the plastic zip ties to hold the joint tight
I roughed up the area around the joint and applied fiberglass epoxy to cover the copper wire and seal the joint, inside and outside the joint area. Minor smoothing of the fiberglass and some spray paint finished the RH to LH conversion
I should mention all of the above work was completed with the entire HDPE assembly (blower cover and bottom chute) removed from the metal frame of the blower/support arm etc
I made up a mount bracket to support the blower assembly from the existing 716H 48" deck, and added a drive pulley and spacers to the existing mower spindle pulley. Minor adjustment to the belt idler arm completed the attachment to the mower deck
The pipe between the two blowers is 6" NON-PERFORATED drainage tile
The rear blower discharges into a small garden cart with trampoline netting
I can more pics if you are interested


 Topic Options

 Post Options
 Thanks(0)


