| Author |
 Topic Search Topic Search  Topic Options Topic Options
|
DMiller 
Orange Level Access

Joined: 14 Sep 2009
Location: Hermann, Mo
Points: 35738
|
 Post Options Post Options
") Thanks(0) Thanks(0)
 Quote Quote  Reply Reply
 Topic: My 180D Front End Topic: My 180D Front End
Posted: 24 Oct 2024 at 6:28pm |
Back when I first got the tractor, late 2005, I worked the extendable front axles loose as were frozen in place, Tie Rods were already loose in Ball Ends so also replaced those and had one Cracked the other loose on spindle steering arms. Bought what could find thru a Local AGCo Dealer and thought received good parts in 2006. No so good as it ends up.
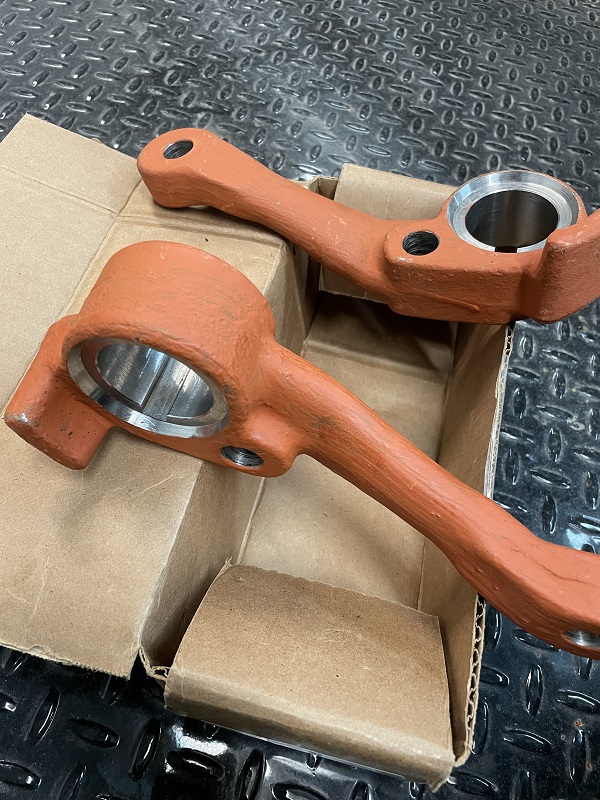
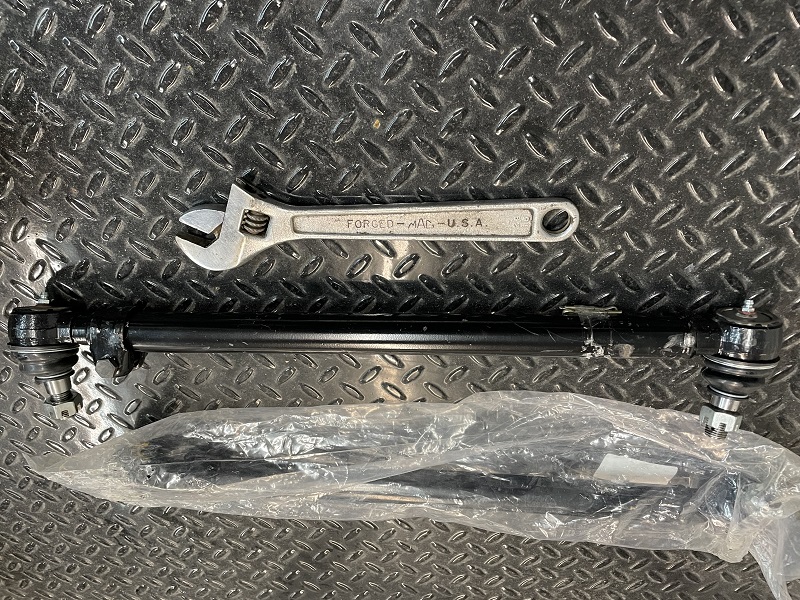
Last few years had issues with Outer Tie Rod ends coming loose in Arms and having to retighten nuts, Cotter pins ended up outside the castle nuts, then noted they were wiggling IN the taper hole in the arm. Pulled loose as was fighting Locust Thorn Flats last week to find the holes wallowed out. Tie Rod Ends are ALL loose in sockets so ordered new tie rods and Steer Arms. Tie Rods came from Reliable Aftermarket Parts and to me appear heavier than the last ones. The Steer Arms came from All States AG Parts, are not simple Castings as my last ones, these are Forged and Machined included the Axle Drift hole to slide the axles in or out. Will grab photos as get it fully apart and back together.
|
 |
|
Sponsored Links
|
|
|
DrAllis
Orange Level Access
Joined: 12 Sep 2009
Points: 22851
|
Post Options
Thanks(0)
Quote Reply
Posted: 24 Oct 2024 at 7:25pm |
|
Are you using a 1/2" impact wrench to tighten those tie rod ends into the tapered holes ??
|
|
DMiller
Orange Level Access
Joined: 14 Sep 2009
Location: Hermann, Mo
Points: 35738
|
Post Options
Thanks(0)
Quote Reply
Posted: 26 Oct 2024 at 4:49am |
|
Nope
As with any tie rod tighten with a 3/8 air ratchet, check torque on nut and align cotter pin. These do not need to be hammered into place.
|
|
DrAllis
Orange Level Access
Joined: 12 Sep 2009
Points: 22851
|
Post Options
Thanks(0)
Quote Reply
Posted: 26 Oct 2024 at 6:47am |
|
They do when they keep working loose. I'm just saying.......seen it before.
|
|
DanWi
Orange Level Access

Joined: 18 Sep 2009
Location: wttn
Points: 2082
|
Post Options
Thanks(1)
Quote Reply
Posted: 26 Oct 2024 at 8:42am |
|
Those tie rod ends run out of threads if they have been loose and get a little wear. I have found to get them tight, put a washer that is big enough to fit over the taper, not just the bolt threads. And then tighten it down.
|
|
DrAllis
Orange Level Access
Joined: 12 Sep 2009
Points: 22851
|
Post Options
Thanks(0)
Quote Reply
Posted: 26 Oct 2024 at 8:57am |
|
Agreed. I too have added a hard flat washer between the nut and arm on some to make it stay tight from being loose. Tightening with a 3/8" air ratchet won't get it there. A cheap 1/2" impact gun will. You CAN overdo it and break things off I suppose, but tighter is better.
|
|
Clay
Orange Level

Joined: 11 Sep 2009
Location: Udall, Kansas
Points: 10419
|
Post Options
Thanks(0)
Quote Reply
Posted: 26 Oct 2024 at 1:50pm |
Clean and roughen the tapered bore. Tape the threads of the tie rod with one wrap of electrical tape. Coat the tapered end of the tie rod with release agent (wax). Smear some Belzona 1111 (Super Metal) or Belzona 1221 (Ceramic R Metal) inside the bore and on the taper of the tie rod. Insert into tie rod into the bore. Place a socket on the top of the tie rod give a light tap with a hammer. Let the Belzona cure about 20 minutes. Carefuly remove excess Belzona, without moving the tie rod. Remove the tape off the threads. After the Belzona cures (using cure times from the instruction sheet), clean up any excess. Torque the tie rod nut.
I have used Belzona for irregular shims in a multitude of applications.
|
|
DMiller
Orange Level Access
Joined: 14 Sep 2009
Location: Hermann, Mo
Points: 35738
|
Post Options
Thanks(0)
Quote Reply
Posted: 26 Oct 2024 at 6:46pm |
|
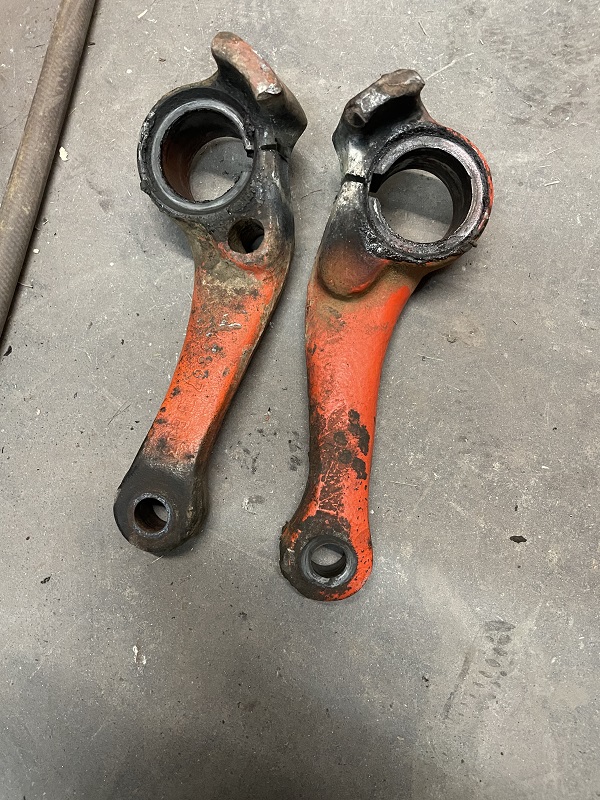
Sockets on tie rods took a beating, are getting changed, will take the arms off as well as have new. Run this on county road more often than not so do not feel comfortable patching steering.
Got tie rods off today, holes in the arms are close to .130 oversize to taper on new ones. Fo appreciate all the suggestions, had run the same thought myself but depend of the old girl.
|
|
DMiller
Orange Level Access
Joined: 14 Sep 2009
Location: Hermann, Mo
Points: 35738
|
Post Options
Thanks(0)
Quote Reply
Posted: 27 Oct 2024 at 12:49pm |
All swapped this morning, As to the Torque, a 1/2nc" hardened thread should torque at 100lbs +/-, 5/8nc to 150 where these are 9/16nc" thread, larger 7/8" nut. Torqued to 120-140lbs should be effective.
Rattle guns have their place, just some places I do not go with them.
And Yes, I cheated to get the old ones off, 4 1/2" cut off wheel at Key slot, crack last little bit with cold chisel in that slot slide right off.
|
|