This site is not affiliated with AGCO Inc., Duluth GA., Allis-Chalmers Co., Milwaukee, WI., or any surviving or related corporate entity. All trademarks remain the property of their respective owners. All information presented herein should be considered the result of an un-moderated public forum with no responsibility for its accuracy or usability assumed by the users and sponsors of this site or any corporate entity. | ||||||
The Forum | Parts and Services | Unofficial Allis Store | Tractor Shows | Serial Numbers | History |
WD45 electrical |
Post Reply |
Author | |
sadmyentist
Bronze Level Joined: 19 Jan 2018 Location: WI Points: 100 |
Post Options
Thanks(0)
Posted: 24 Jan 2018 at 9:06am |
Hi all,
I'm working through the electrical system of my 1956 WD45 and I have some questions as well as things to share. IDENTIFYING GENERATOR First question - how do I identify the generator that I have? It's still 6v pos ground and switch controlled field, but there doesn't appear to be a number plate on the genny, including under the cutout relay. I ask because I'd like to upgrade to a regulator at some point. SECOND QUESTION How on earth do I take apart the taillight? I need to get the socket out and replace wire. It LOOKS like the stud would just drive out from the bottom to the inside, but I'd rather not break it if I can avoid it.
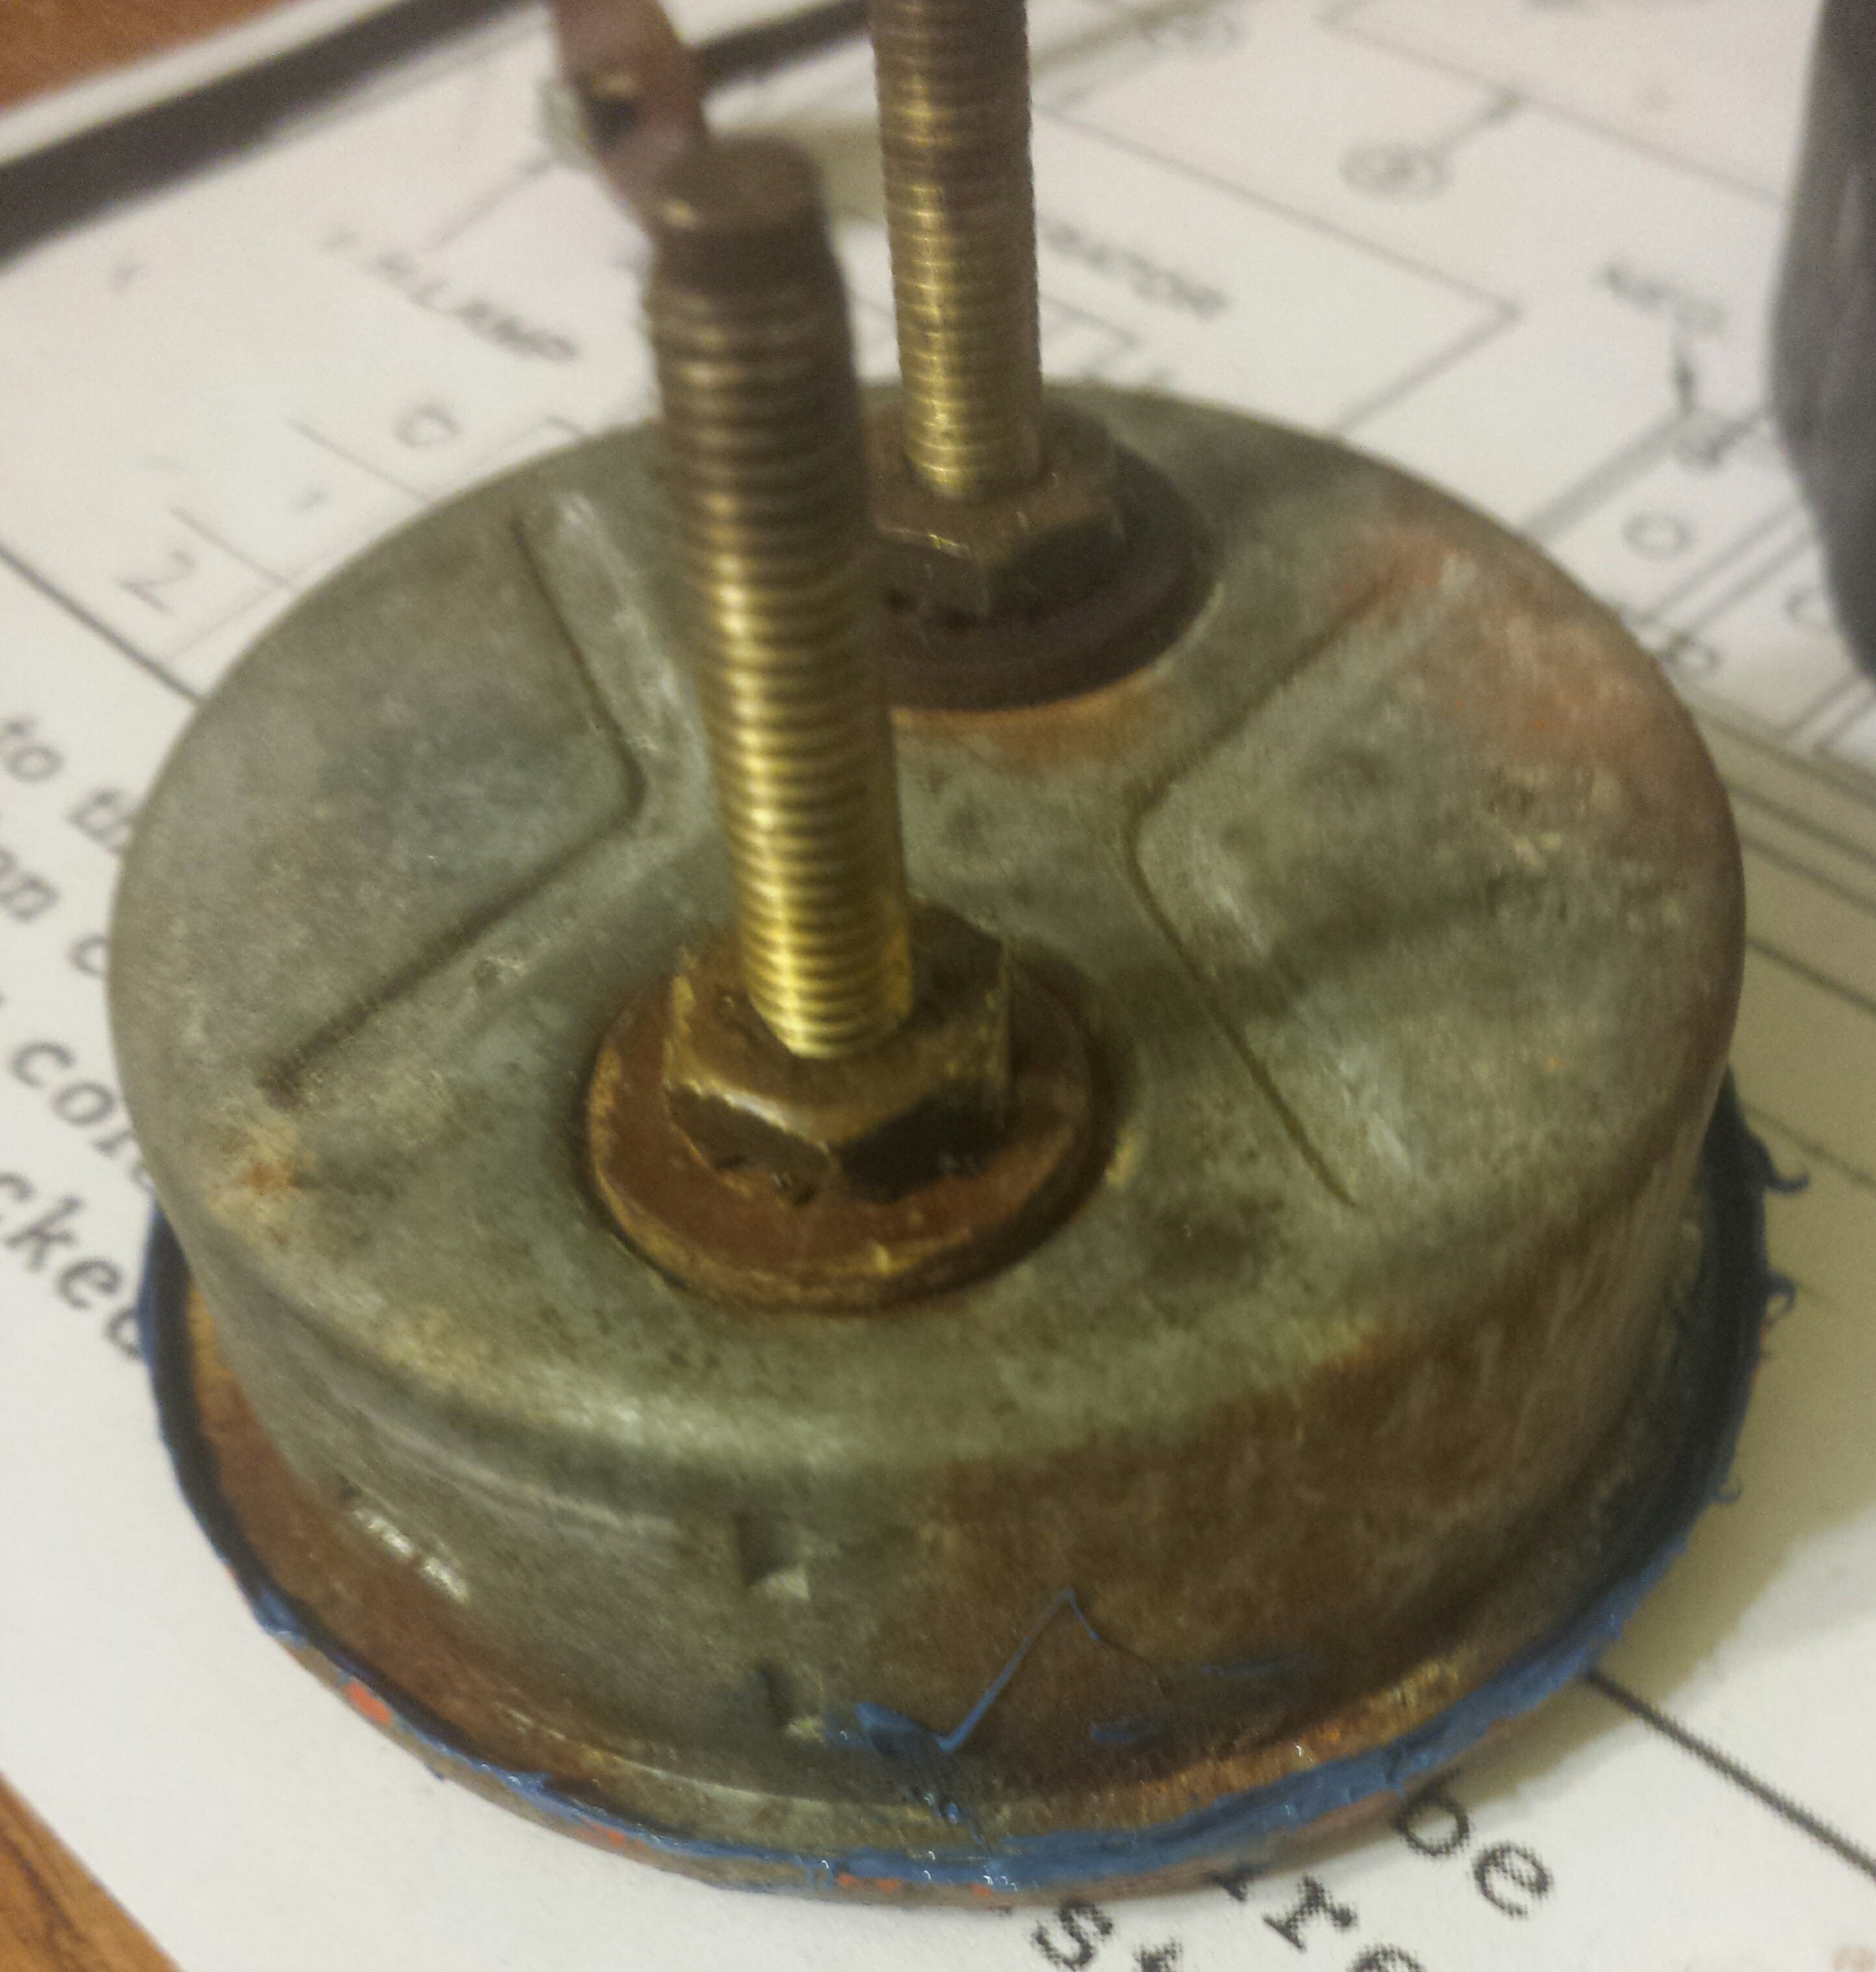
 AMMETER The ammeter wasn't working, which is bad news with a manual charging control. I took off the glass cover and knocked out a bunch of grit. Now it works! The gasket came apart so I put the cover back on with some RTV before crimping it. LIGHT TERMINALS 
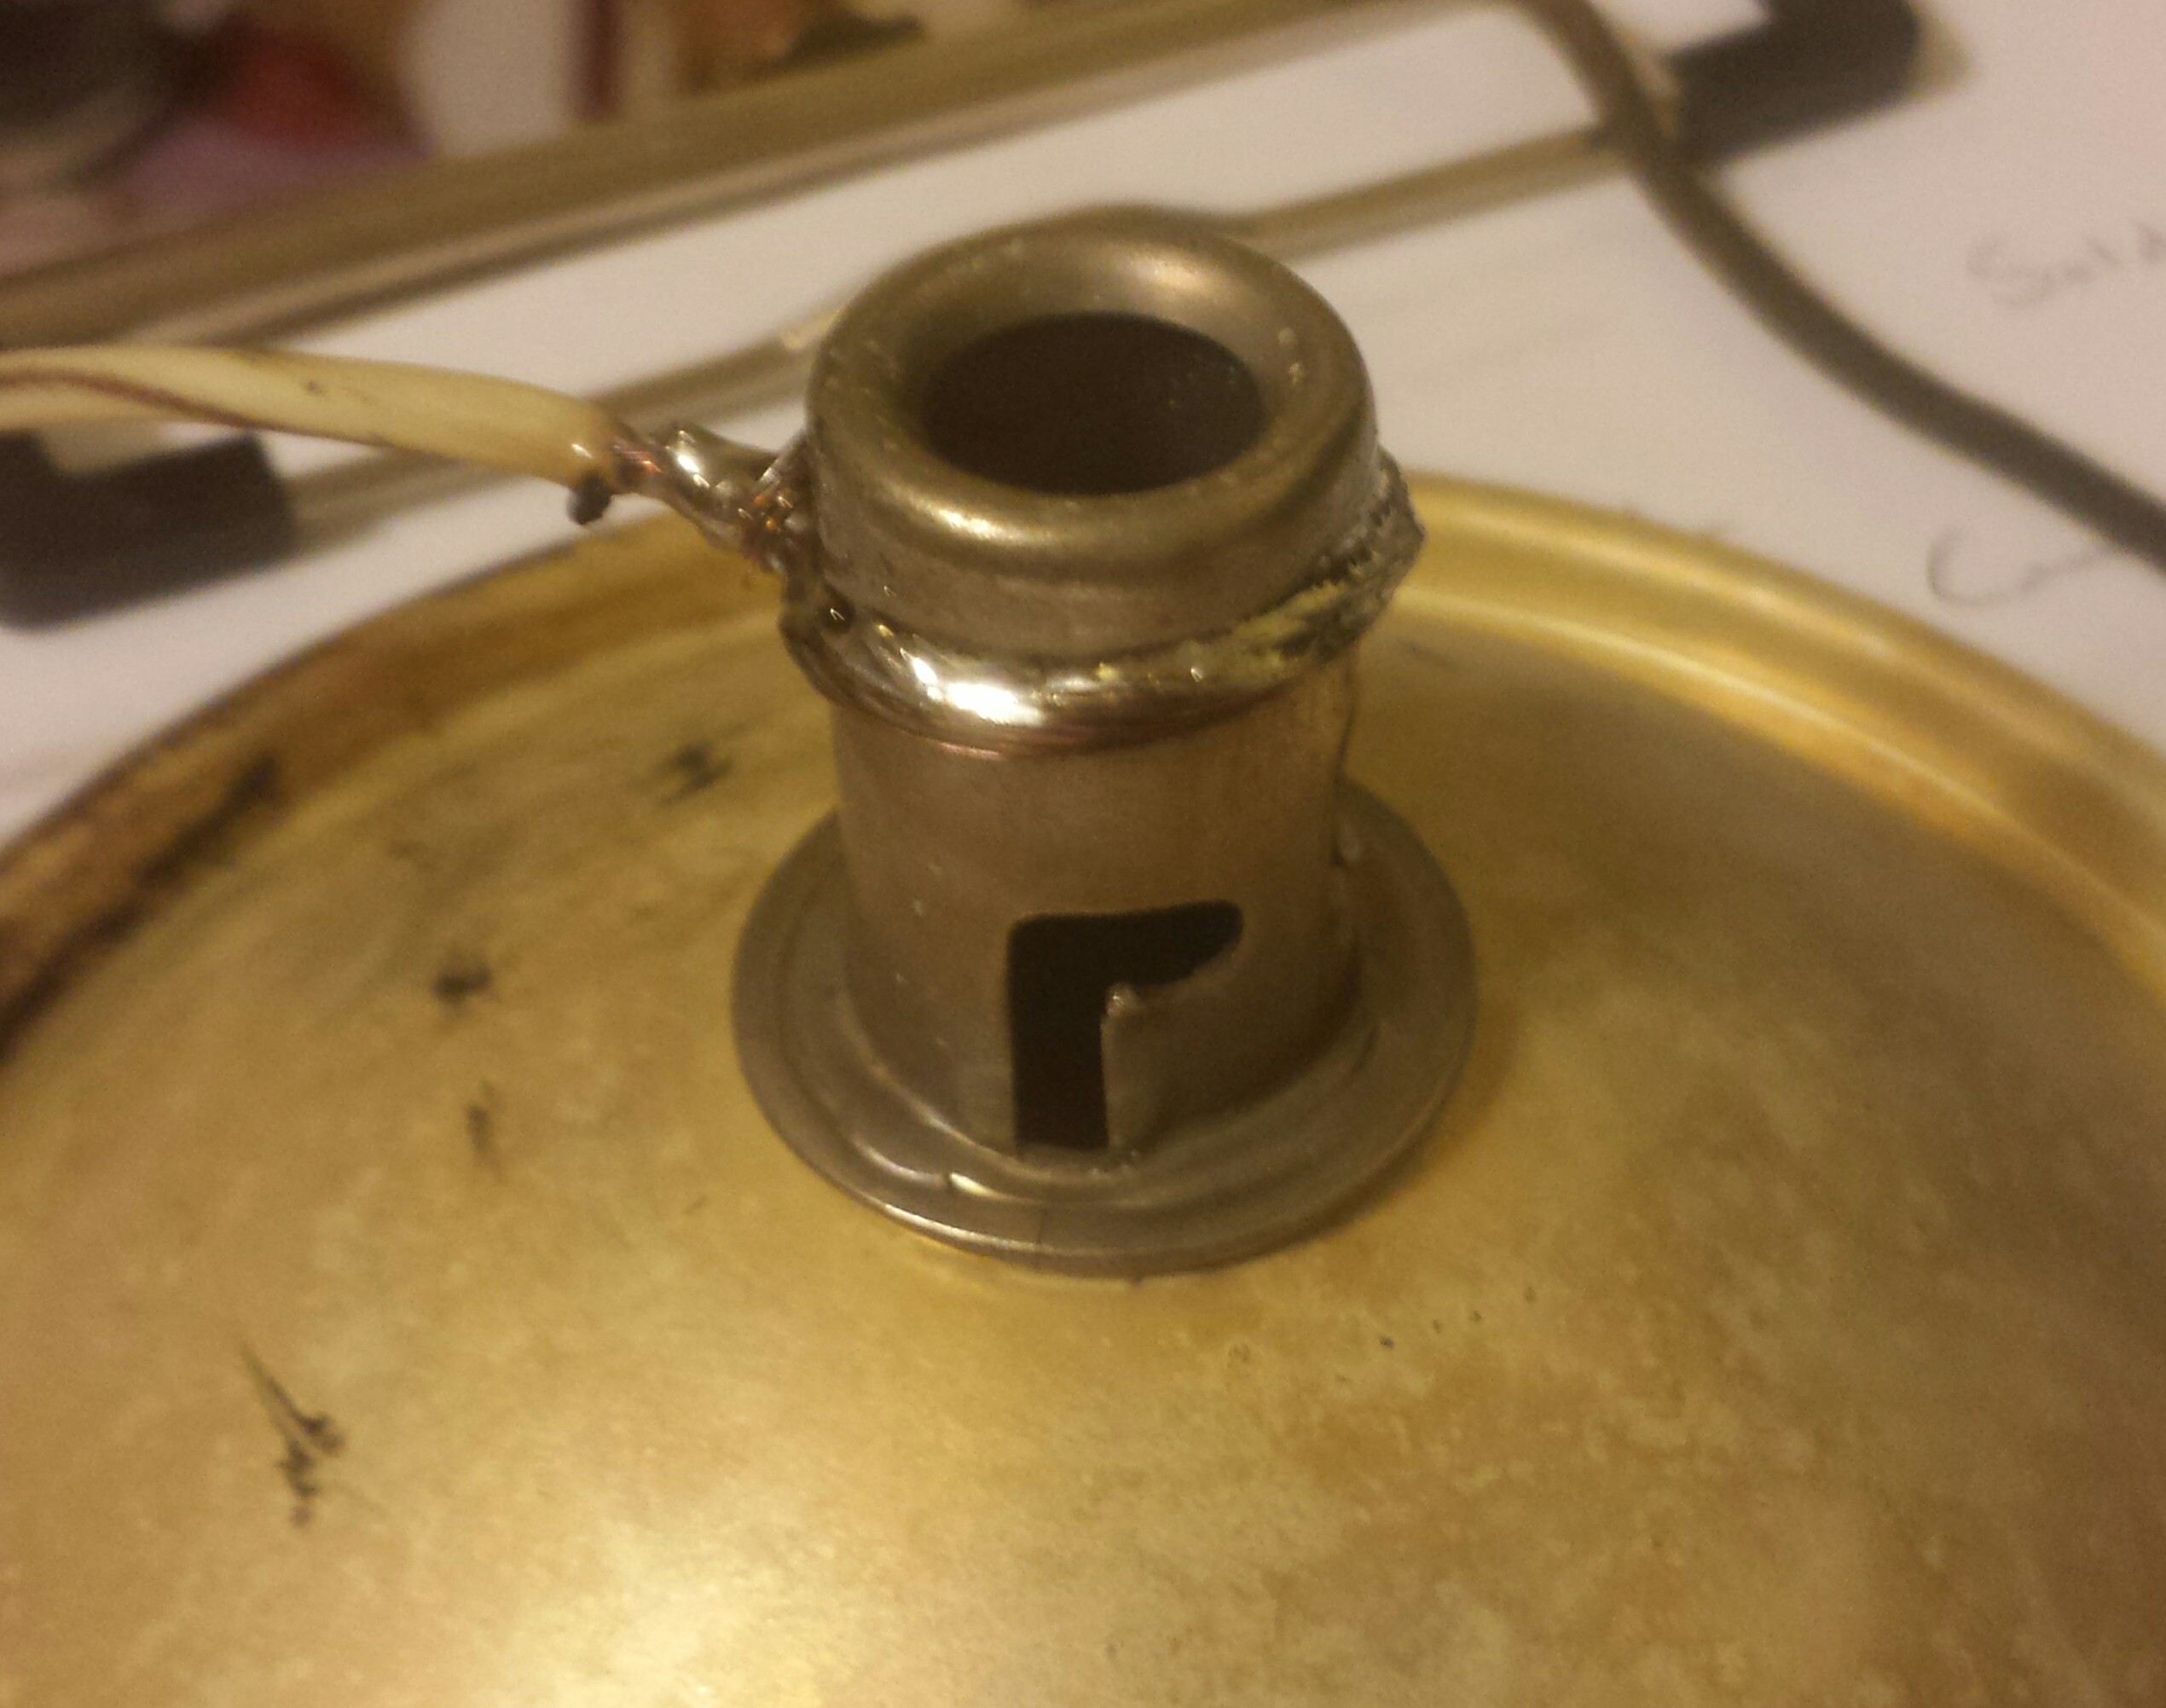
The insulation was crumbling in spots on the wires to the headlights. I also took the opportunity to solder a ground wire to the socket. This is likely to be more reliable that relying on the setscrew for ground. Note that you need a pretty big soldering iron to do this or VERY careful work with a propane torch. 
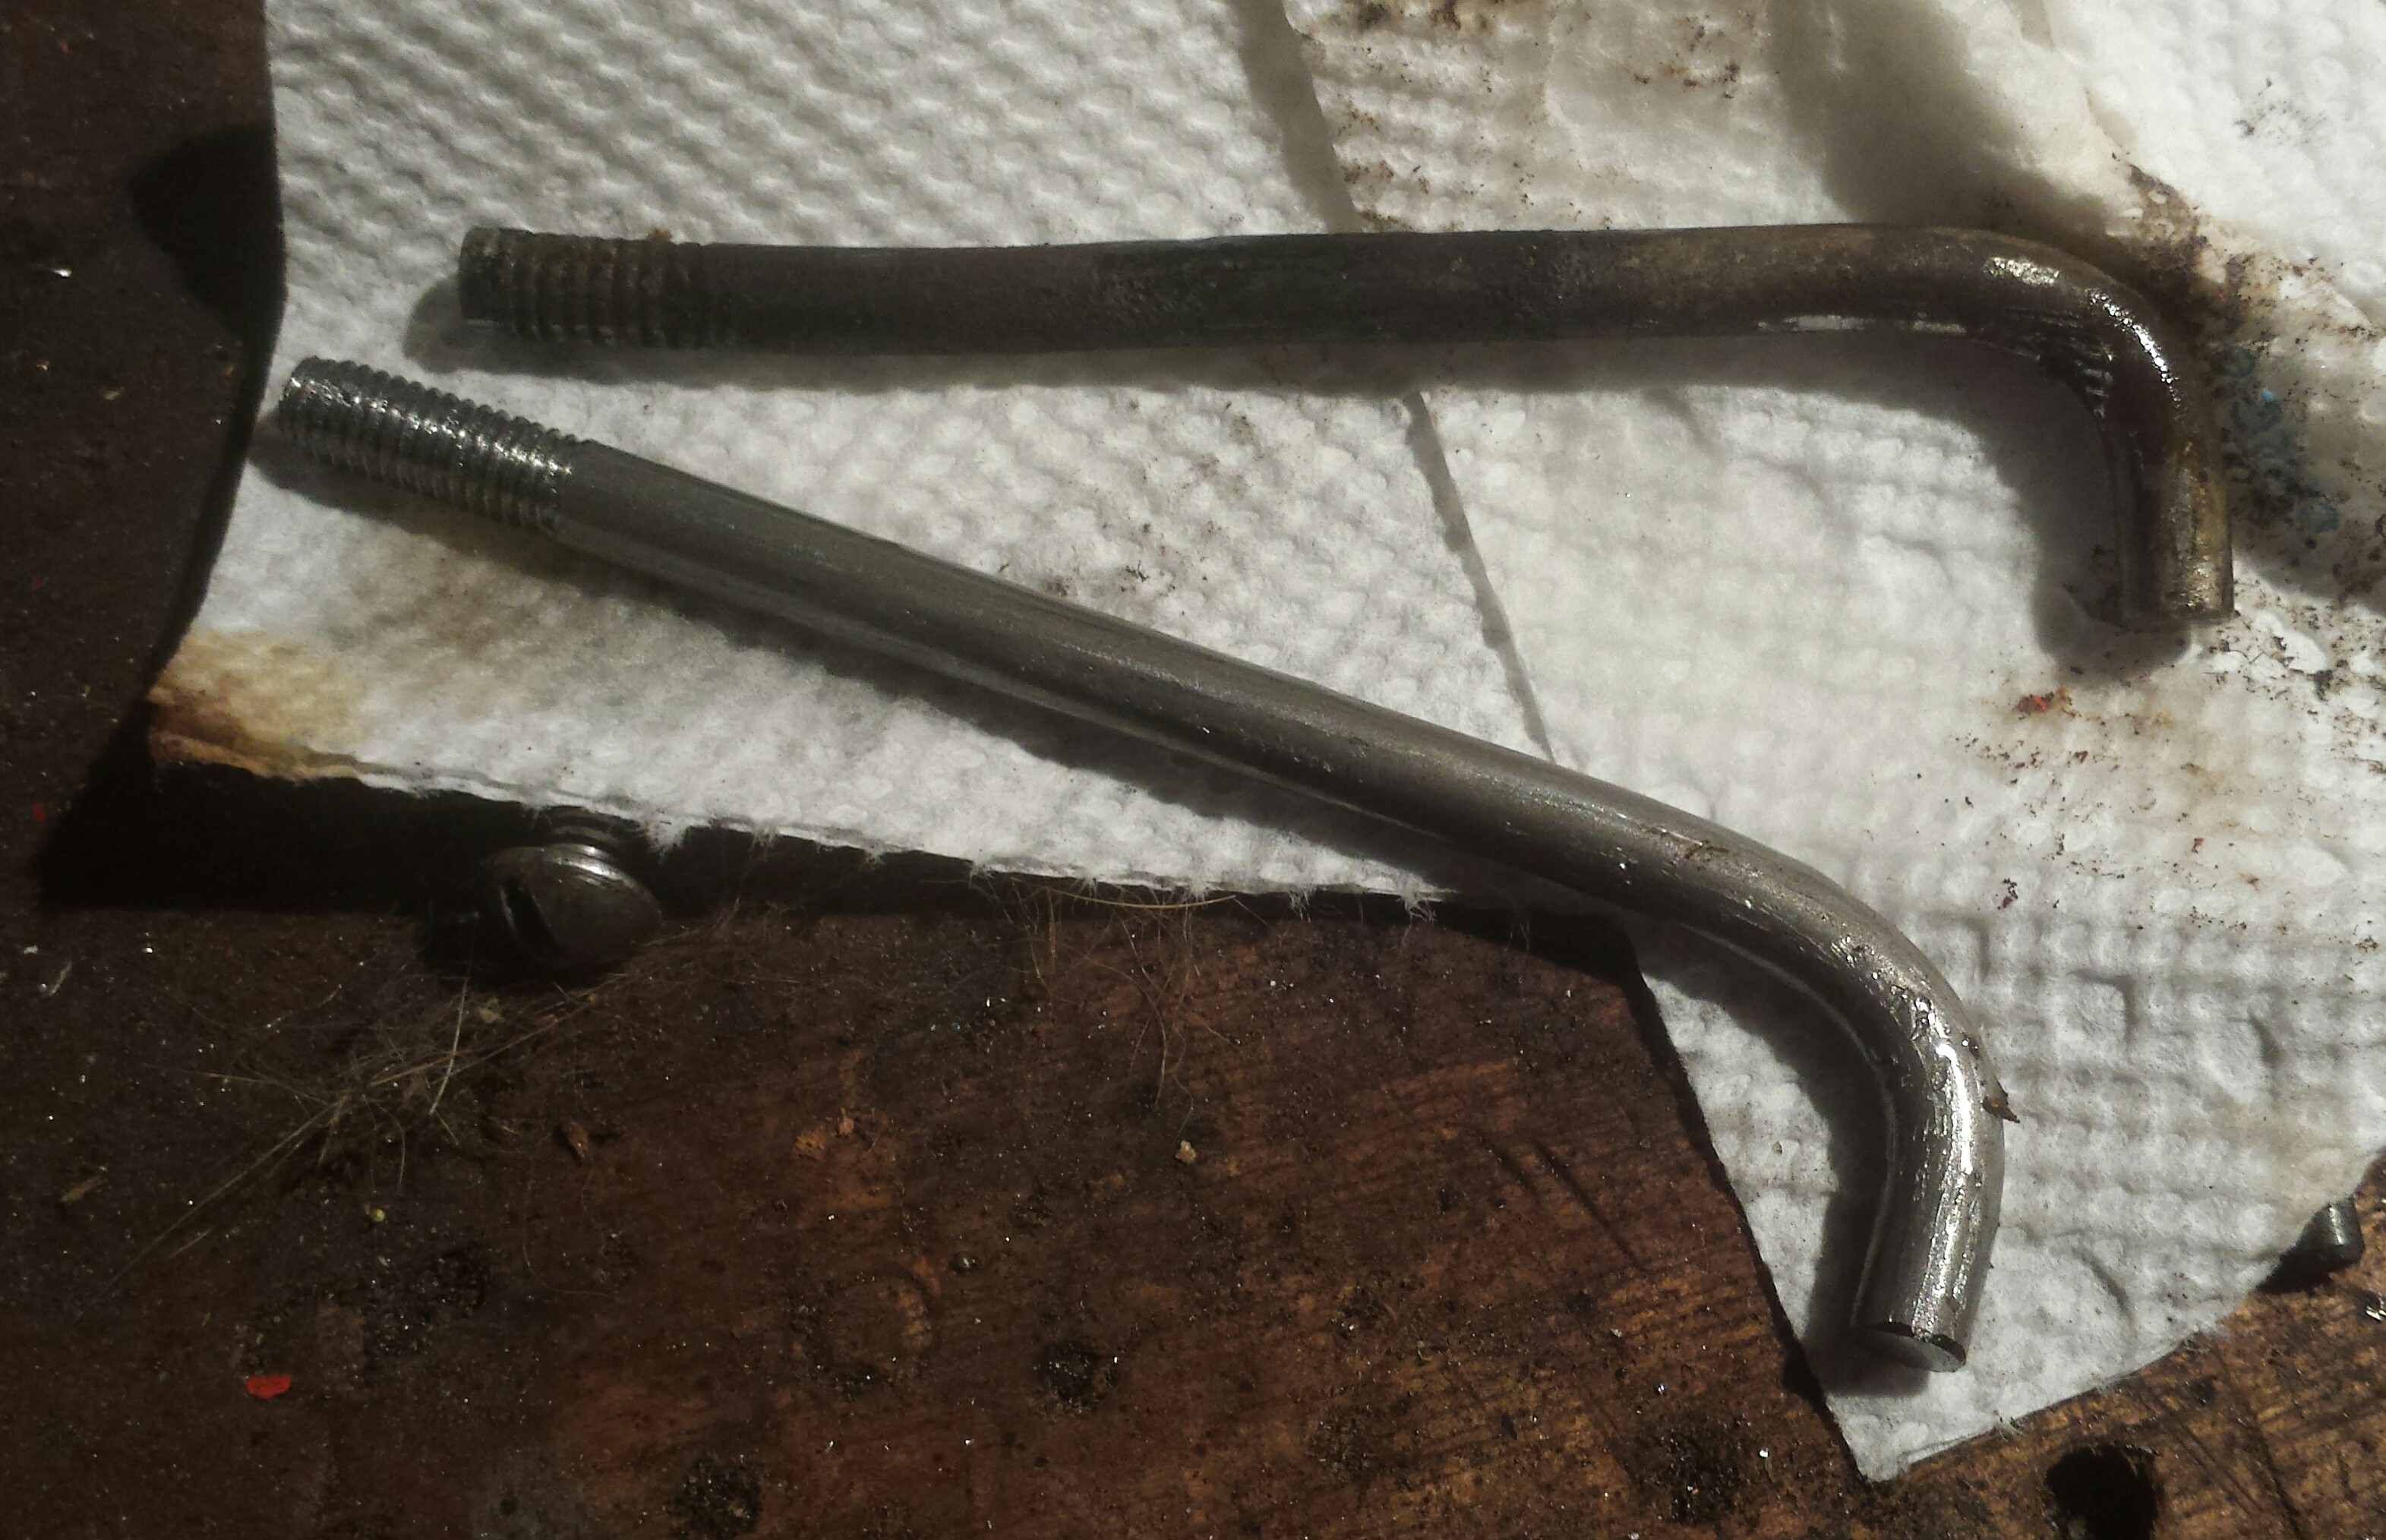
I also had to replace one of the light wires entirely. For the terminal I used a small copper rivet soldered to the end of the wire. Here's a comparison with the original.
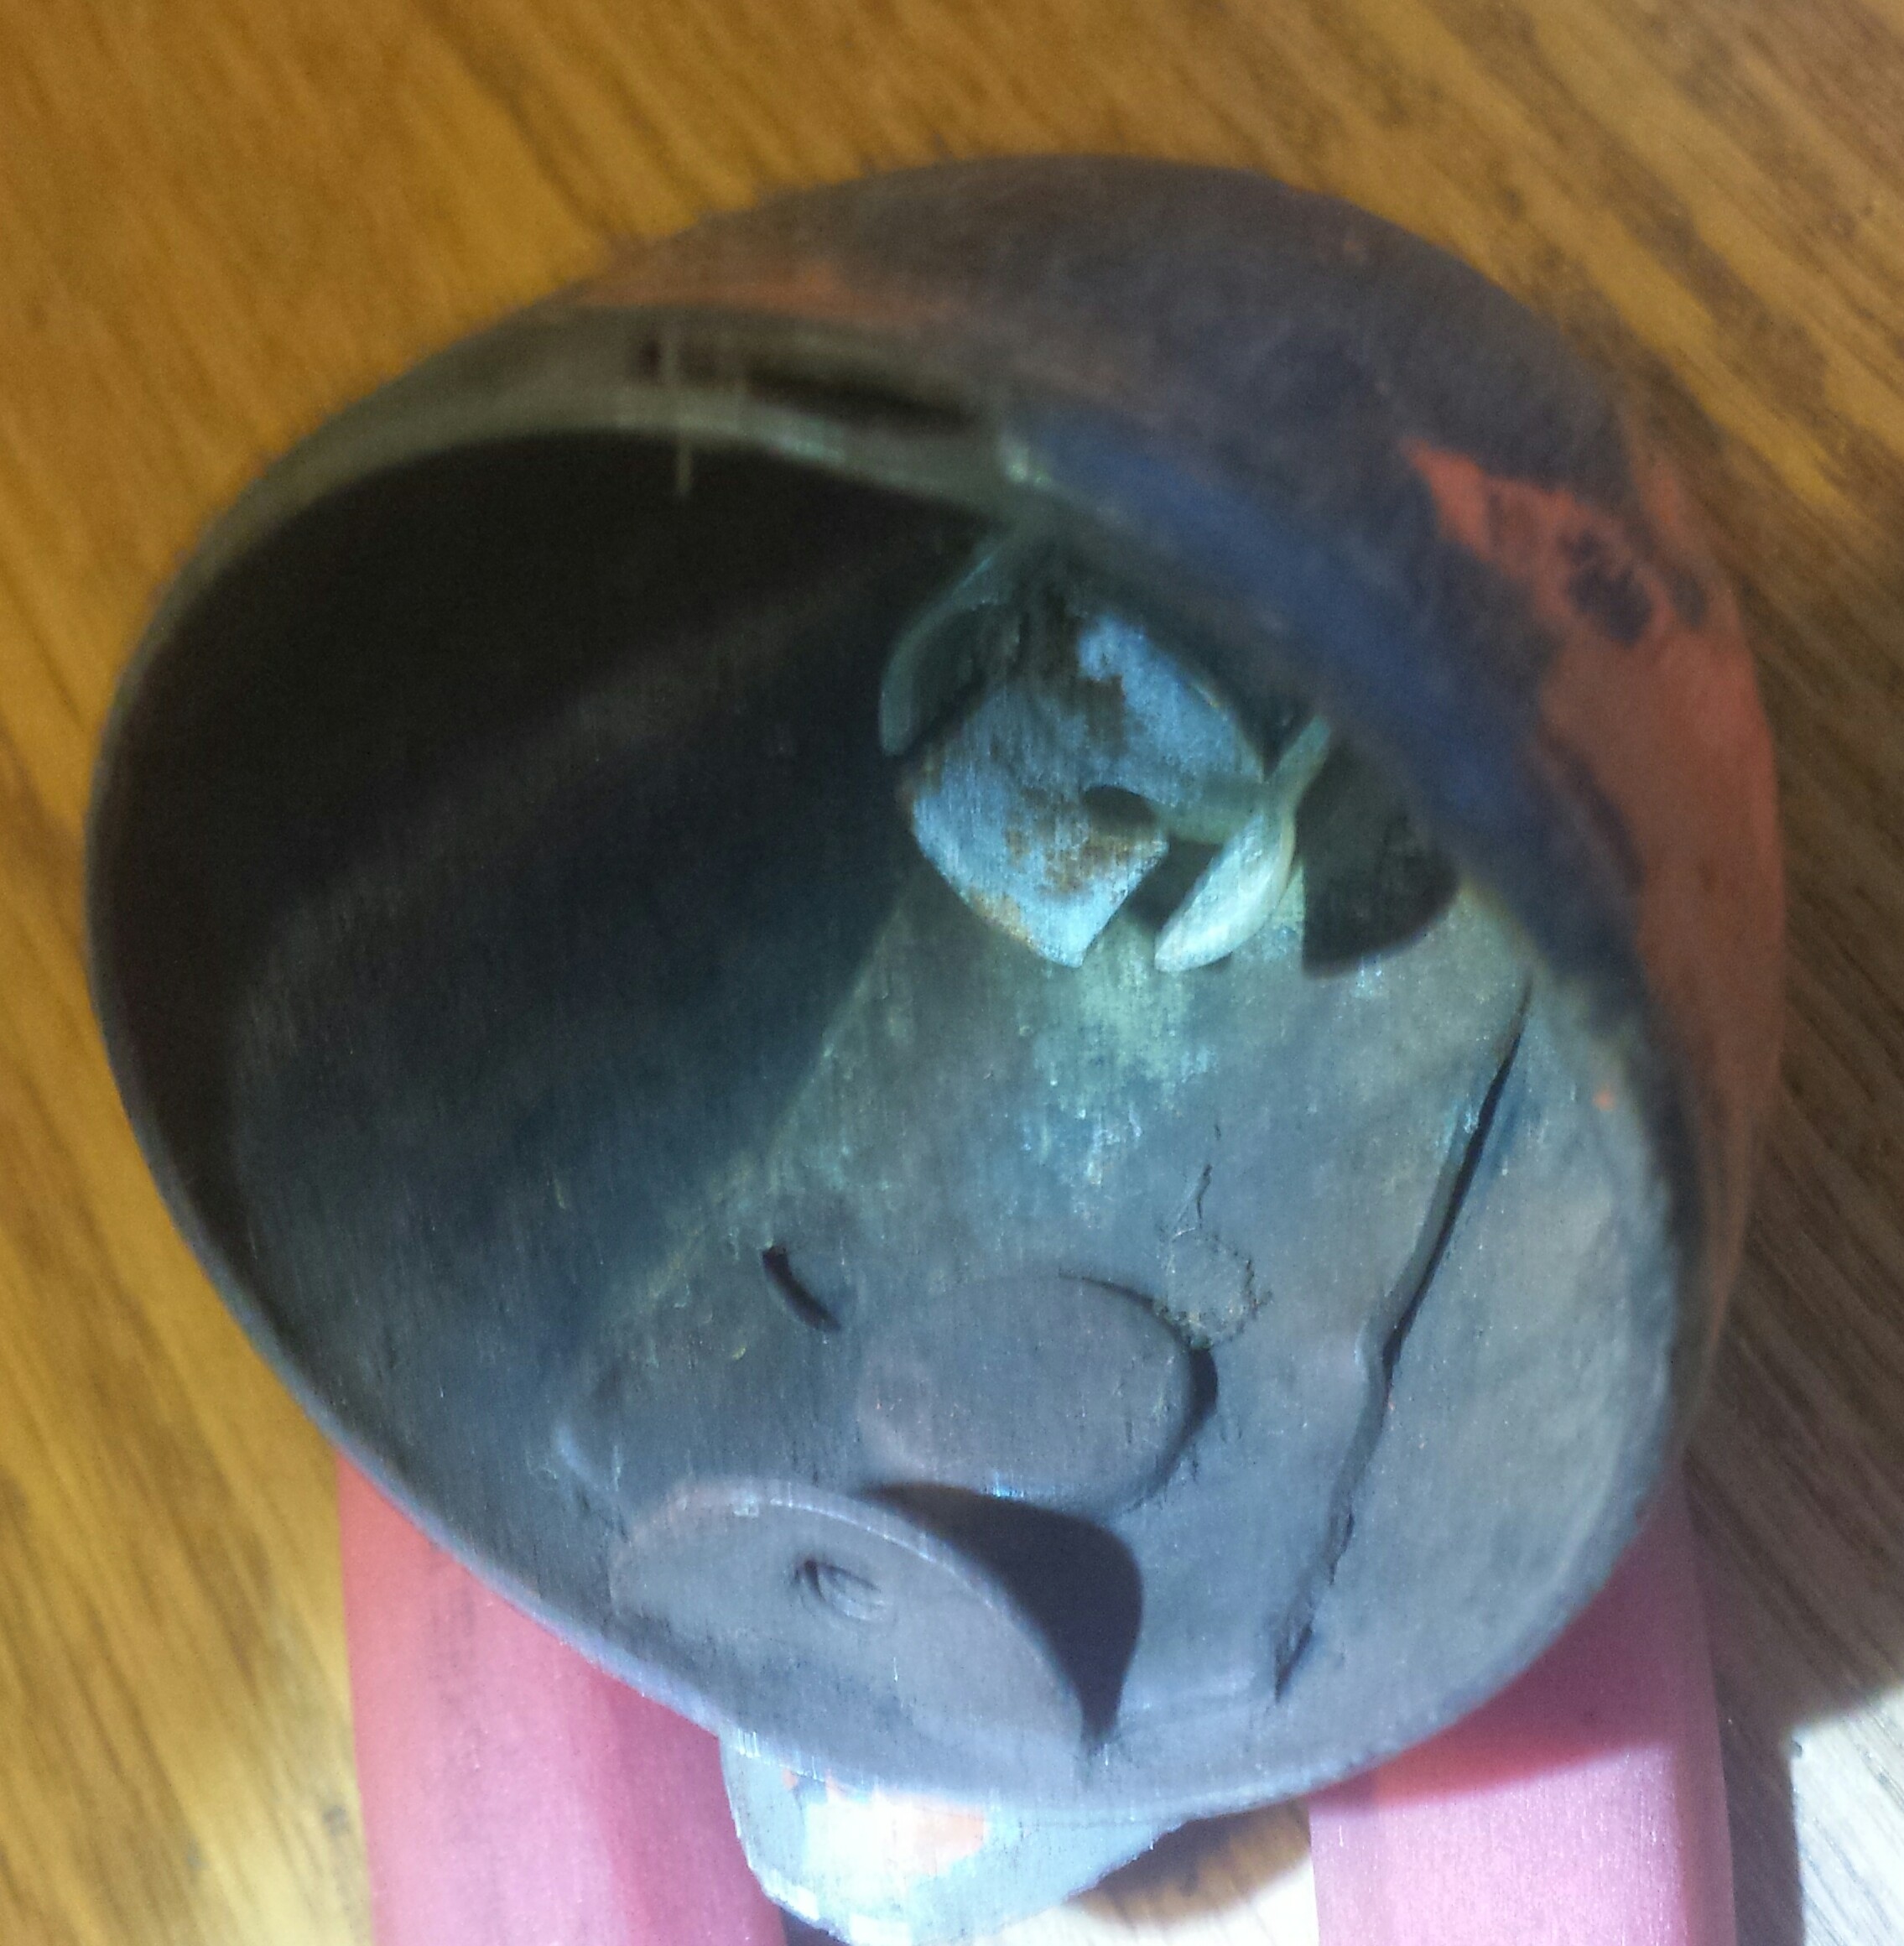
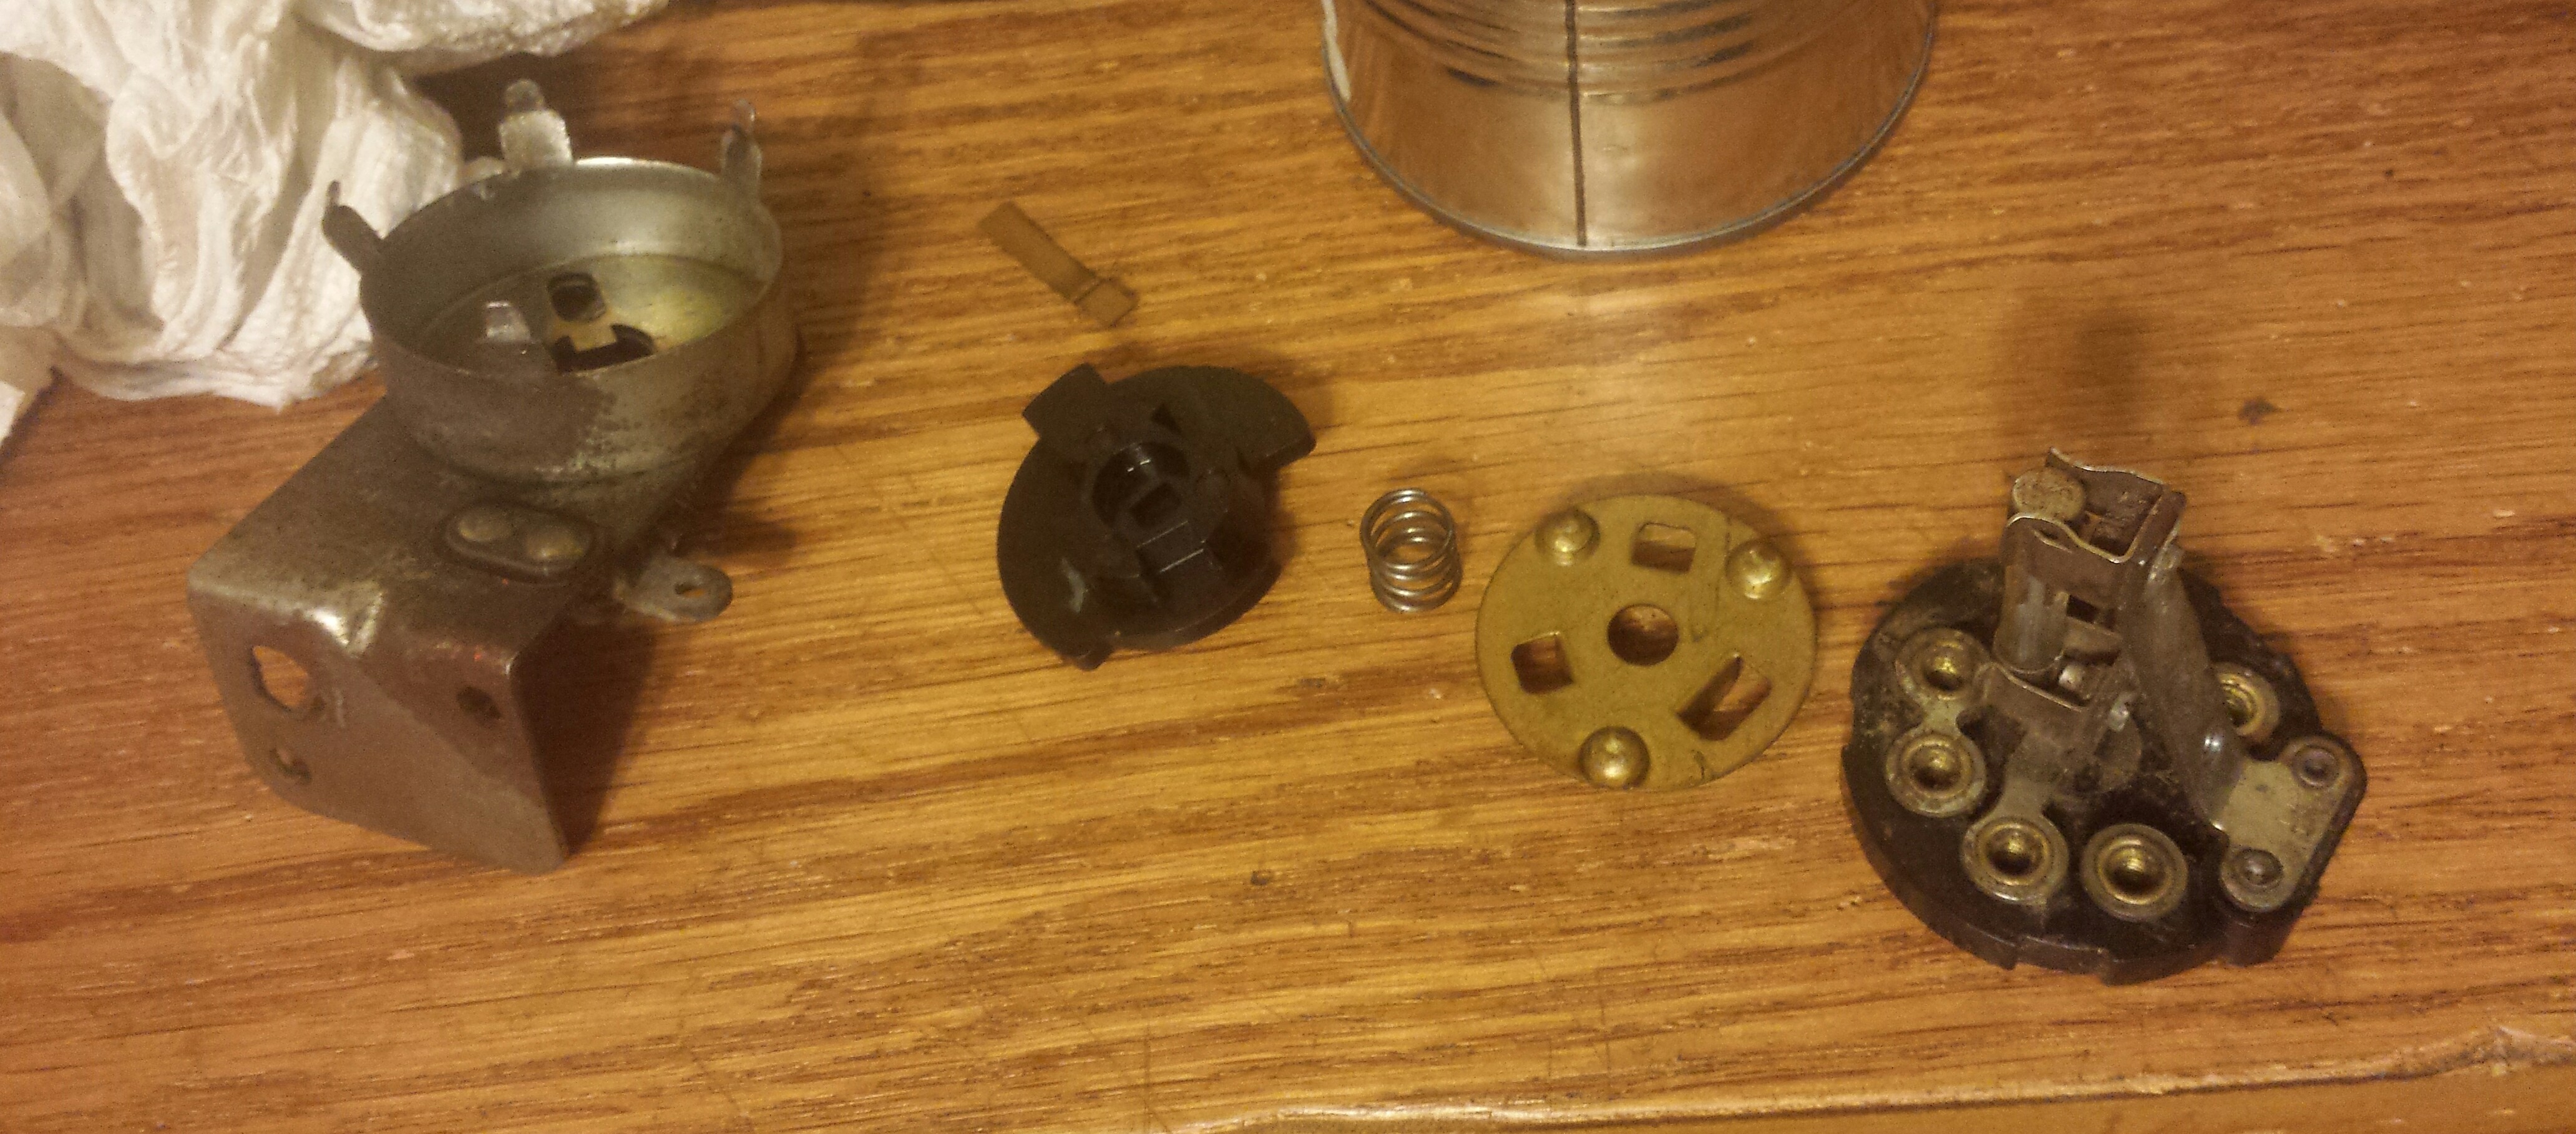
 LIGHT SWITCH REHAB 
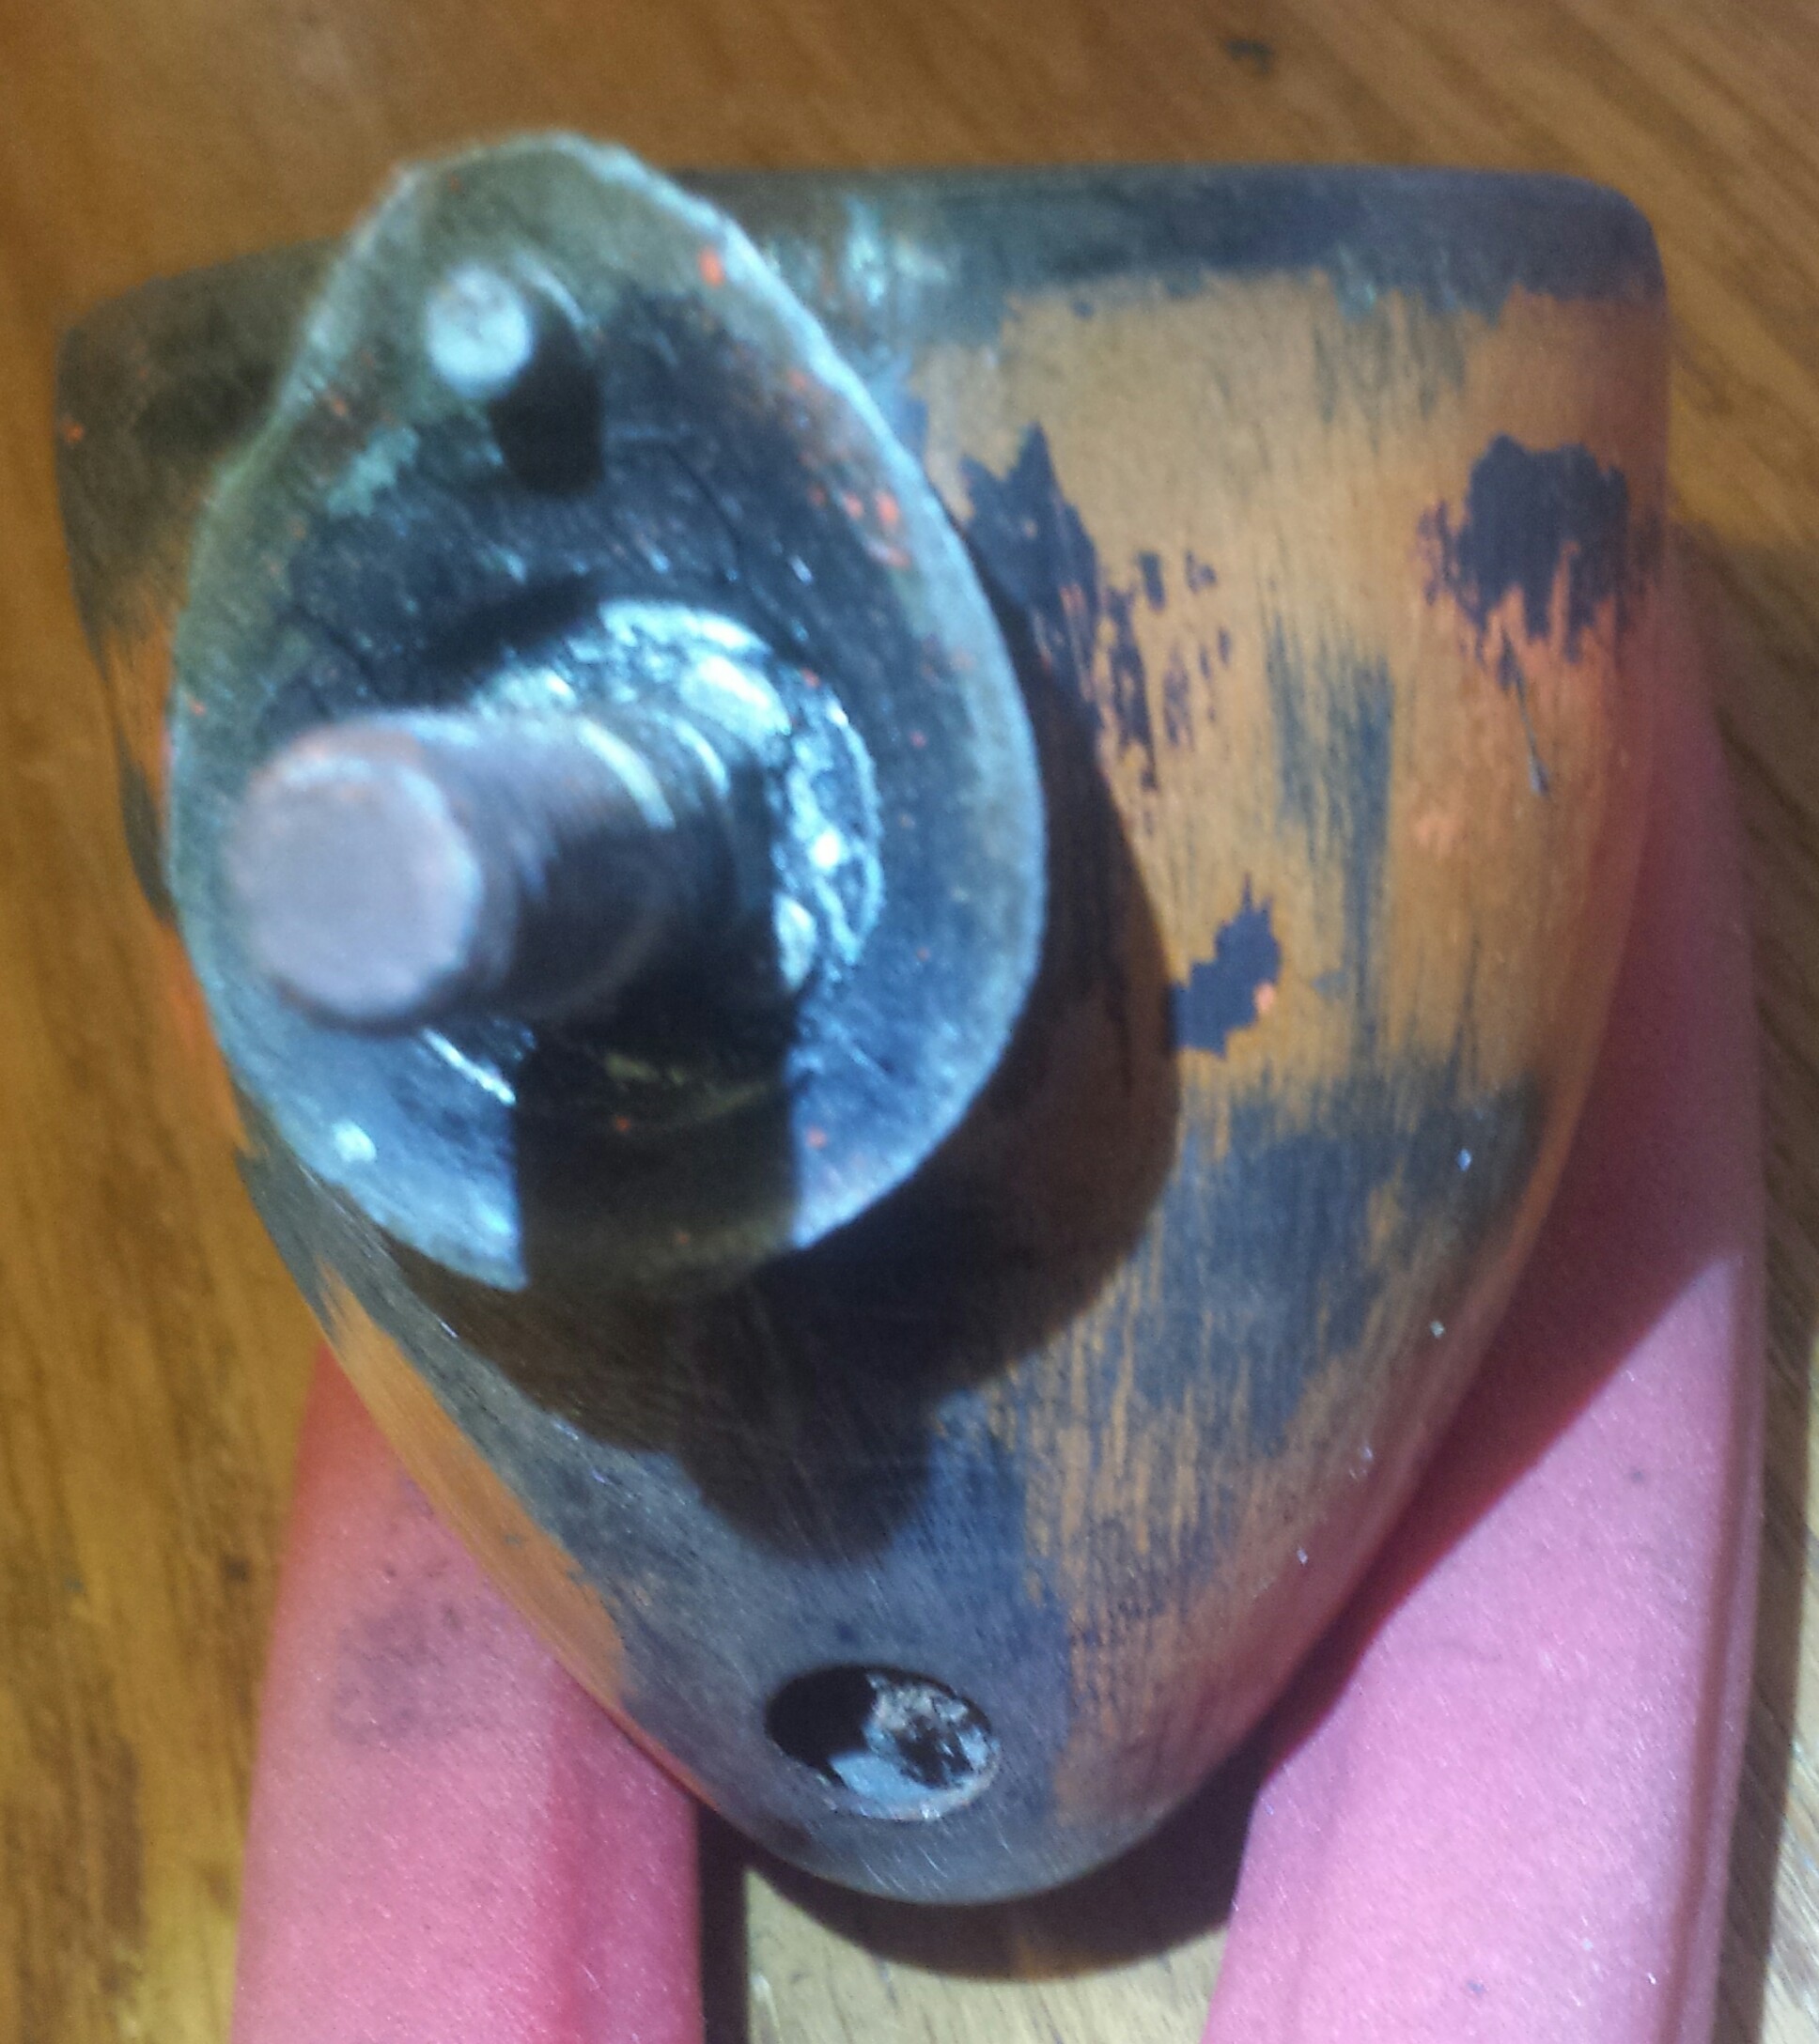
The light switch was totally inoperable when I brought it home. Fortunately I have a lot of experience with old electronics (e.g. restoring Hammond organs). The main issue with the switch was a bent and rusted actuator stem. I bent and threaded some 3/16" rod and voila....new stem. The other issue was a broken axle lug on the plastic rotating bit inside the switch. That's the black part in this pic. 
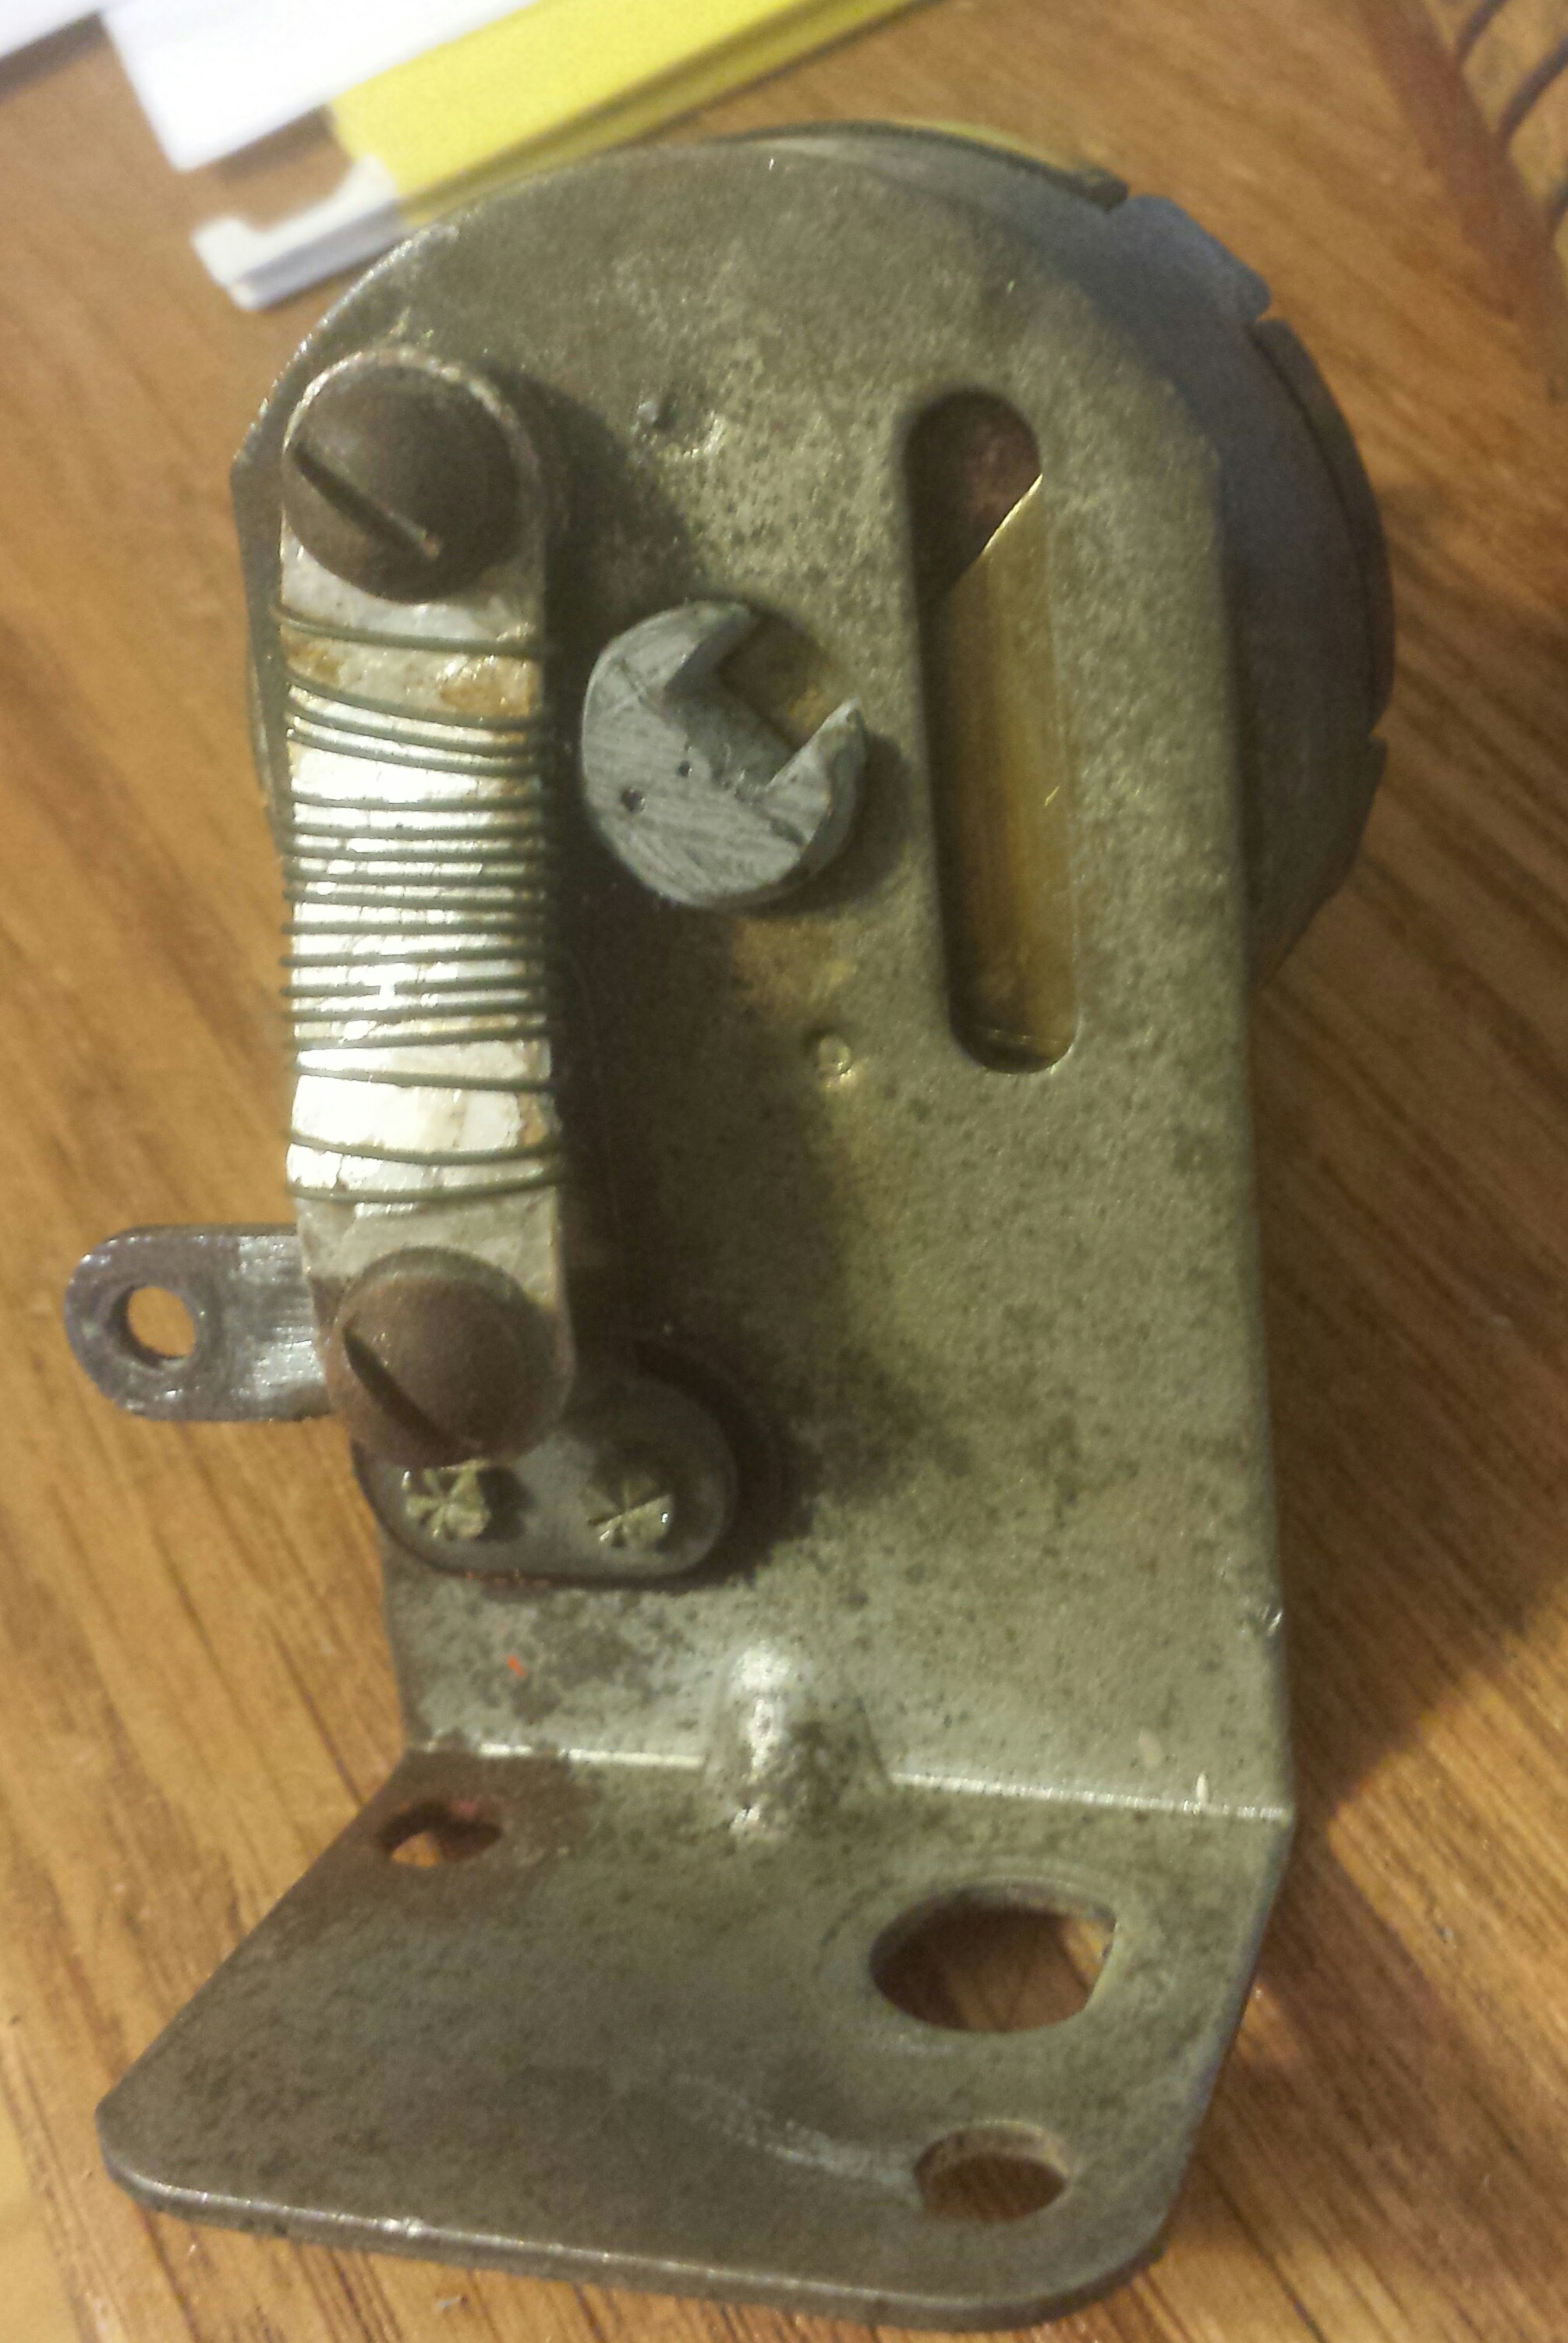
To fix it I cleaned thoroughly with acetone and built a dam of rope caulk to cast some JB weld. I filed to shape and recut the keyway with a utility knife. Here it is reassembled. It works perfectly now, though I imagine Steve in NJ will have some thoughts on whether this can be expected to last very long. If not, it's not such a big deal to me since I hope to upgrade to a regulator once I figure out which genny I have. At that point a simple toggle switch will do fine turning the lights on and off. Speaking of which, the ignition switch was a toggle when I got it. Hold your ears originality police, but as a working tractor I plan to replace that with a dead man kill switch and lanyard. I think every machine should have one, to be honest. Thanks all, Rob in WI |
|
Sponsored Links | |
Gerald J.
Orange Level Joined: 12 Sep 2009 Location: Hamilton Co, IA Points: 5636 |
Post Options
Thanks(0)
|
If the wires vibrate or bend in use, they are likely to break at the soldered connections because solder wicks into the stranded wire and makes it stiff beyond the lug. That's why the automotive and military elecronics and aircraft world uses only crimp lugs.
Gerald J. |
|
sadmyentist
Bronze Level Joined: 19 Jan 2018 Location: WI Points: 100 |
Post Options
Thanks(0)
|
Good point, Gerald. Typically for something like this I'd create a strain relief by hot-gluing the wire to whatever it is soldered to. Too hot inside the enclosure for that to work here, though. Certainly a crimped connector would be a better solution if one existed. I suppose I could run some bare wire under the edge of the reflector with the chassis ground tab.
|
|
Sugarmaker
Orange Level Joined: 12 Jul 2013 Location: Albion PA Points: 8337 |
Post Options
Thanks(0)
|
sad,
Great work looks like what I do when I get a new toy! Good job! That rear light is a welded assembly I believe. They do make replacements. FYI your pictures are a little big even for my big screen. If your reducing them try the next size smaller. (I use 640 x 480 but that may be smaller than you want) Nice work re casting the switch plastic part! Regards, Chris Edited by Sugarmaker - 24 Jan 2018 at 12:33pm |
|
D17 1958 (NFE), WD45 1954 (NFE), WD 1952 (NFE), WD 1950 (WFE), Allis F-40 forklift, Allis CA, Allis D14, Ford Jubilee, Many IH Cub Cadets, 32 Ford Dump, 65 Comet.
|
|
sadmyentist
Bronze Level Joined: 19 Jan 2018 Location: WI Points: 100 |
Post Options
Thanks(0)
|
Thanks for the pixel size! I knew I was too big but not what to aim for.
|
|
sadmyentist
Bronze Level Joined: 19 Jan 2018 Location: WI Points: 100 |
Post Options
Thanks(0)
|
Quick update on the taillight - I drilled out the fastener and it appears to be a carriage bolt with the corners staked. I think I can refurb it with a regular carriage bolt and a pigtail from NAPA. It will just need to be reinstalled with the lens and bulb removed. Also, planning to run it with an LED 1156 lamp from superbrightleds.com
|
|
sadmyentist
Bronze Level Joined: 19 Jan 2018 Location: WI Points: 100 |
Post Options
Thanks(0)
|
Another little update. The battery box was rusted away, so I fabbed this from the box's rear panel & some scrap steel.
|
|
Sugarmaker
Orange Level Joined: 12 Jul 2013 Location: Albion PA Points: 8337 |
Post Options
Thanks(0)
|
Sad,
Picture size is much better for me anyway!:) You might even be able to go one size bigger. I just got stuck on 640 x 480 years ago and have stayed with it. Good fab work to be much more functional and safe! Yes most of these old gril's need a new battery box at least once in there life. I have to do that on the WD45 I bought last fall. I may just go with a complete repro box. A little pricey but cleans up the whole area nicely. Regards, Chris
|
|
D17 1958 (NFE), WD45 1954 (NFE), WD 1952 (NFE), WD 1950 (WFE), Allis F-40 forklift, Allis CA, Allis D14, Ford Jubilee, Many IH Cub Cadets, 32 Ford Dump, 65 Comet.
|
|
Sugarmaker
Orange Level Joined: 12 Jul 2013 Location: Albion PA Points: 8337 |
Post Options
Thanks(0)
|
Sad,
Good rebuild of the rear light! Put up some pictures too. The LED wount hurt. they are not very big or bright. Dont forget the SMV sign on the back too. Regards, Chris
Edited by Sugarmaker - 28 Jan 2018 at 11:33am |
|
D17 1958 (NFE), WD45 1954 (NFE), WD 1952 (NFE), WD 1950 (WFE), Allis F-40 forklift, Allis CA, Allis D14, Ford Jubilee, Many IH Cub Cadets, 32 Ford Dump, 65 Comet.
|
|
sadmyentist
Bronze Level Joined: 19 Jan 2018 Location: WI Points: 100 |
Post Options
Thanks(0)
|
Anyone have ideas on how to get the taillight wire *out* of the fender channel? It is seized in with rust and/or dirt. I couldn't even get acetone to penetrate this plug.
|
|
Post Reply | |
Tweet
|
Forum Jump | Forum Permissions You cannot post new topics in this forum You cannot reply to topics in this forum You cannot delete your posts in this forum You cannot edit your posts in this forum You cannot create polls in this forum You cannot vote in polls in this forum |