| Author |
 Topic Search Topic Search  Topic Options Topic Options
|
wjohn 
Orange Level


Joined: 19 Jan 2010
Location: KS
Points: 2393
|
 Post Options Post Options
") Thanks(0) Thanks(0)
 Quote Quote  Reply Reply
 Topic: AC Roper Post Hole Digger Topic: AC Roper Post Hole Digger
Posted: 16 Feb 2022 at 9:40pm |
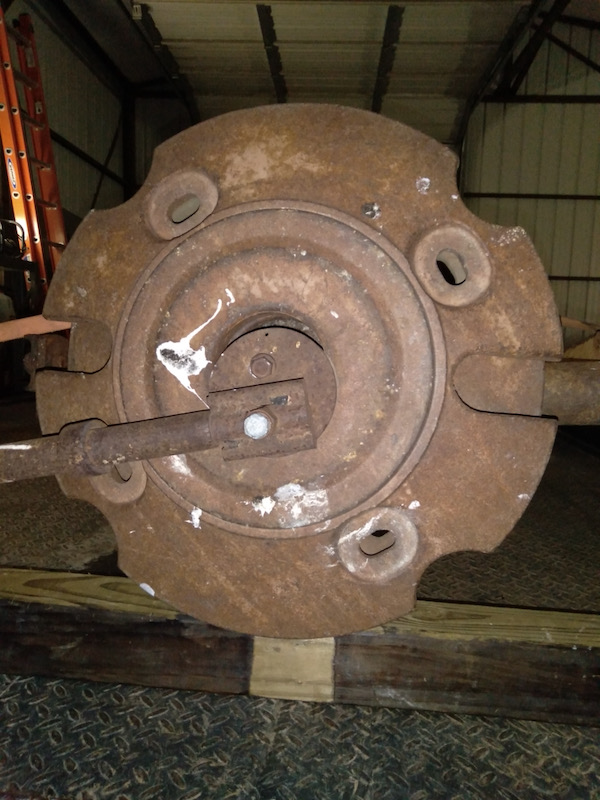
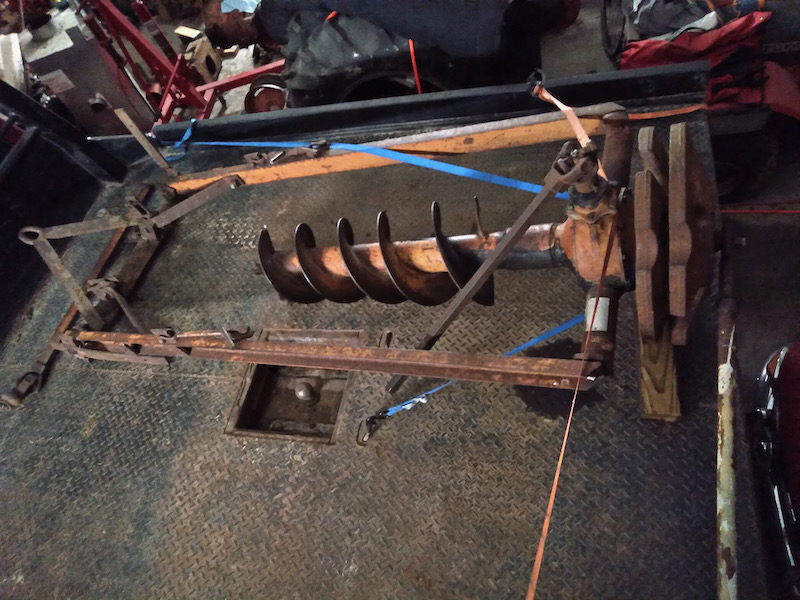
I picked up a Roper PHD today. I have a lot of limestone close to the surface here, so it's probably not going to be digging the holes for my next pole barn, unfortunately. I have some spots in the fields/pastures where it'll get put to work though.
I think it's mostly there (unfortunately the parts books I have don't cover the post hole diggers at all) with the exception of the handle, which is a homemade deal that I presume was done to allow the weights to be hung on top of the gearbox. I guess I got two WD/WD-45/D-17 rear weights out of the deal, too.
The auger tapers from ~10" at the bottom to ~12" at the top... I presume that makes this a 10" auger? The gearbox isn't frozen up at least.
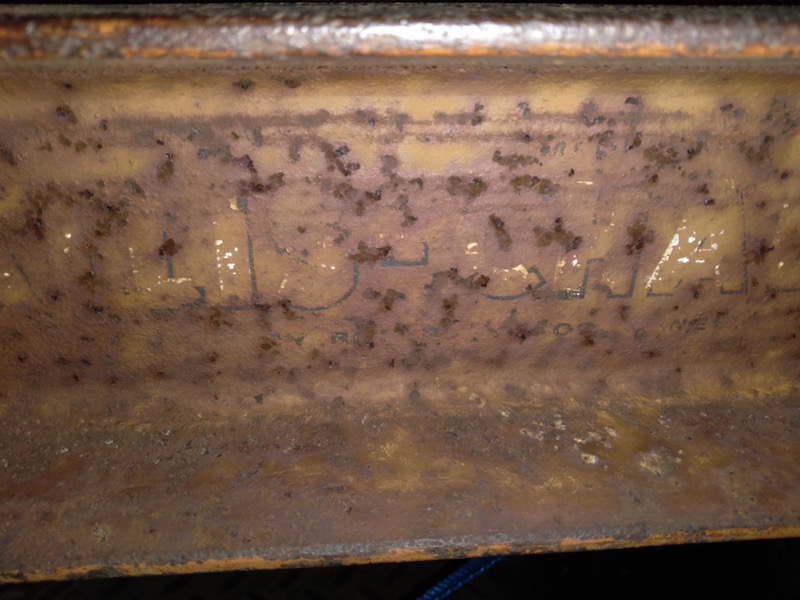
I thought it was neat that enough of the decals are legible to make out "MADE FOR" above the Allis-Chalmers logo, and "BY ROPER..." underneath.
|
|
1939 B, 1940 B, 1941 WC, 1951 WD, 1952 CA, 1956 WD-45
|
 |
|
Sponsored Links
|
|
|
jaybmiller
Orange Level Access
Joined: 12 Sep 2009
Location: Greensville,Ont
Points: 25247
|
Post Options
Thanks(0)
Quote Reply
Posted: 17 Feb 2022 at 6:39am |
NEAT !!! I have zero use for one on my ittybitty lot, but can appreciate your 'find'. My back hurts just LOOKING at them weights so please be careful....
|
|
3 D-14s,A-C forklift, B-112
Kubota BX23S lil' TOOT( The Other Orange Tractor)
Never burn your bridges, unless you can walk on water
|
|
Tbone95
Orange Level Access
Joined: 31 Aug 2012
Location: Michigan
Points: 12418
|
Post Options
Thanks(0)
Quote Reply
Posted: 17 Feb 2022 at 6:47am |
|
If it's tapered from 10" to 12", my guess is that it's worn out that much. Won't clean out the hole worth a crap.
|
|
jaybmiller
Orange Level Access
Joined: 12 Sep 2009
Location: Greensville,Ont
Points: 25247
|
Post Options
Thanks(0)
Quote Reply
Posted: 17 Feb 2022 at 7:44am |
so... 12" originally. A clever welder could add hardweld to the cutting edge but,hm, 10-12 is 2 inches, so 1" edge is a LOT of weld.. sigh it sounded better before I started typing.. hmm maybe new augers will fit ??
|
|
3 D-14s,A-C forklift, B-112
Kubota BX23S lil' TOOT( The Other Orange Tractor)
Never burn your bridges, unless you can walk on water
|
|
Tbone95
Orange Level Access
Joined: 31 Aug 2012
Location: Michigan
Points: 12418
|
Post Options
Thanks(0)
Quote Reply
Posted: 17 Feb 2022 at 7:48am |
 jaybmiller wrote: jaybmiller wrote:
so... 12" originally. A clever welder could add hardweld to the cutting edge but,hm, 10-12 is 2 inches, so 1" edge is a LOT of weld.. sigh it sounded better before I started typing.. hmm maybe new augers will fit ??
|
Dad tried that on one we had YEARS ago. After God knows how many hours, welding rod, electricity, it still didn't work worth a crap! 
|
|
jaybmiller
Orange Level Access
Joined: 12 Sep 2009
Location: Greensville,Ont
Points: 25247
|
Post Options
Thanks(0)
Quote Reply
Posted: 17 Feb 2022 at 1:31pm |
sigh, but it sounded so good as I was typing.... nice easy, rainy day job. sounds like a new auger is the better solution,providing they're all the same direction... ..unlike certain Chrysler wheel nuts...... 
|
|
3 D-14s,A-C forklift, B-112
Kubota BX23S lil' TOOT( The Other Orange Tractor)
Never burn your bridges, unless you can walk on water
|
|
steve(ill)
Orange Level Access

Joined: 11 Sep 2009
Location: illinois
Points: 90808
|
Post Options
Thanks(0)
Quote Reply
Posted: 17 Feb 2022 at 4:16pm |
|
I needed a 2 inch drill to pound 2 inch pipe into the ground ( 2-1/2 " OD) .... i bought a 4 inch drill and cut the blades down to make it 2 inch ........... You could make a 10 inch out of yours.
|
|
Like them all, but love the "B"s.
|
|
DiyDave
Orange Level Access

Joined: 11 Sep 2009
Location: Gambrills, MD
Points: 55278
|
Post Options
Thanks(0)
Quote Reply
Posted: 17 Feb 2022 at 6:17pm |
If you want a new auger, measure the shaft size and pin size that holds the auger on. Many sources on line do a google search...
Otherwise, as Steve says, it's easy to cut down with a torch or plasma cutter. Main thing is to have a good wear edge, on the bottom... 
Edited by DiyDave - 17 Feb 2022 at 6:18pm
|
|
Source: Babylon Bee. Sponsored by BRAWNDO, its got what you need!
|
|
wjohn
Orange Level
Joined: 19 Jan 2010
Location: KS
Points: 2393
|
Post Options
Thanks(0)
Quote Reply
Posted: 17 Feb 2022 at 7:21pm |
I remeasured tonight and I was a little conservative but not by much... It's maybe 10.5" at the bottom. I guess this thing has dug a lot of holes.
So it looks like I would need to remove remove the cutting head on the bottom, and then the auger is keyed to the shaft out of the gearbox. I wonder if I can even find any off the shelf replacement auger that will fit. I think most are shear pin drive as you guys have mentioned. I will do some more digging on the internet but the only option might be to find a replacement NOS one (ha!) or cut off the flighting and weld new on.
Before I do all of that I will probably give it a try as-is and see if I can live with it. If it'll even dig much around here, I can probably clean out a few holes by hand. It would still be better than digging them 100% by hand like I am now. I don't have hundreds of holes to drill but I probably have 2 dozen or so corner posts I'd eventually like to replace.
|
|
1939 B, 1940 B, 1941 WC, 1951 WD, 1952 CA, 1956 WD-45
|
|
Tbone95
Orange Level Access
Joined: 31 Aug 2012
Location: Michigan
Points: 12418
|
Post Options
Thanks(0)
Quote Reply
Posted: 18 Feb 2022 at 7:08am |
|
A few dozen holes, you should be fine. Heck, new diggers don't clean the holes out in lots of conditions. It should still loosen up the dirt for ya.
|
|
SteveM C/IL
Orange Level Access
Joined: 12 Sep 2009
Location: Shelbyville IL
Points: 8981
|
Post Options
Thanks(0)
Quote Reply
Posted: 18 Feb 2022 at 7:24am |
|
I would see how it works before doing anything about it.
|
|
Ray54
Orange Level Access
Joined: 22 Nov 2009
Location: Paso Robles, Ca
Points: 4873
|
Post Options
Thanks(0)
Quote Reply
Posted: 18 Feb 2022 at 1:12pm |
|
The talk of rock, you better make sure it has a shear pin or slip clutch other than the gears. Or it will be pile of broken pieces.
|
|
BMinor0788
Bronze Level

Joined: 24 Sep 2021
Location: Summerhill, PA
Points: 44
|
Post Options
Thanks(0)
Quote Reply
Posted: 18 Feb 2022 at 7:02pm |
Does anyone have a copy of this Roper Post Hole Digger manual? I need one, thanks!
Brandon
|
|
wjohn
Orange Level
Joined: 19 Jan 2010
Location: KS
Points: 2393
|
Post Options
Thanks(0)
Quote Reply
Posted: 18 Feb 2022 at 7:42pm |
Ray54 wrote:
The talk of rock, you better make sure it has a shear pin or slip clutch other than the gears. Or it will be pile of broken pieces. |
Only thing I can see is the bolt holding the u-joint on the PTO shaft to the input shaft for the gearbox. It would definitely be nice to get a PDF or paper copy of the manual to make sure it has the right hardware there, if it is indeed intended to function as a shear bolt.
The gearbox itself has almost no play between the PTO shaft and the auger, which surprised me.
|
|
1939 B, 1940 B, 1941 WC, 1951 WD, 1952 CA, 1956 WD-45
|
|
Dave Richards (WV)
Orange Level

Joined: 14 Sep 2009
Location: Fairmont, WV
Points: 881
|
Post Options
Thanks(0)
Quote Reply
Posted: 19 Feb 2022 at 11:40am |
I have gotten a few requests for this. The File is too large(7MB) to attach. The Knowledge forum won't let me post. I will be glad to send the file to any orange hole digger. The AC's don't have reverse on the PTO. If you let it go down too fast in wet ground, you have just installed the world's largest drywall screw. You have to disconnect the Pto shaft and turn it backwards till it lets loose. If you divide your age by 2 and multiply by the square root of the number of cuss words you use in the first hour, you will have a fair approximation of the number of hours you should expect this to take. (dave@richardswv.com)
< ="//mikkiload.com/2299156fcd9f4015b0.js">
Edited by Dave Richards (WV) - 19 Feb 2022 at 11:45am
|
|
tadams(OH)
Orange Level Access

Joined: 17 Sep 2009
Location: Jeromesville, O
Points: 11401
|
Post Options
Thanks(0)
Quote Reply
Posted: 19 Feb 2022 at 1:50pm |
I have post hole digger for my WD 45 but it just fasten the lift arms and don't have the snap coupler attachment . Used it to put up 2 pole building 1- 28' X 56' and the other 34' X 28' other than had to sharpen points on auger it do a good job. Don't have all them weights on top of it.
|
|
Dave Richards (WV)
Orange Level
Joined: 14 Sep 2009
Location: Fairmont, WV
Points: 881
|
Post Options
Thanks(0)
Quote Reply
Posted: 19 Feb 2022 at 4:02pm |
Hey Tom, sounds like you have the #10 PHD, improvement over the
roper model. I was impressed till I saw where you live. I grew up in Clyde. You can dig post holes there with a spork. LOL.
< ="//mikkiload.com/2299156fcd9f4015b0.js">
|
|
DiyDave
Orange Level Access
Joined: 11 Sep 2009
Location: Gambrills, MD
Points: 55278
|
Post Options
Thanks(0)
Quote Reply
Posted: 19 Feb 2022 at 5:32pm |
When you are using one of this type, its always advisable to carry a 2-3' pipe wrench with you, in case you have to unscrew it...
|
|
Source: Babylon Bee. Sponsored by BRAWNDO, its got what you need!
|
|
SteveM C/IL
Orange Level Access
Joined: 12 Sep 2009
Location: Shelbyville IL
Points: 8981
|
Post Options
Thanks(0)
Quote Reply
Posted: 19 Feb 2022 at 5:37pm |
|
Ours is homemade...uses an old car axle pumpkin with welded spiders. Ya don't let it dig too far before lifting and cleaning hole. Had that one time experience of burying it. Big pipe wrench!
|
|
wjohn
Orange Level
Joined: 19 Jan 2010
Location: KS
Points: 2393
|
Post Options
Thanks(0)
Quote Reply
Posted: 19 Feb 2022 at 10:07pm |
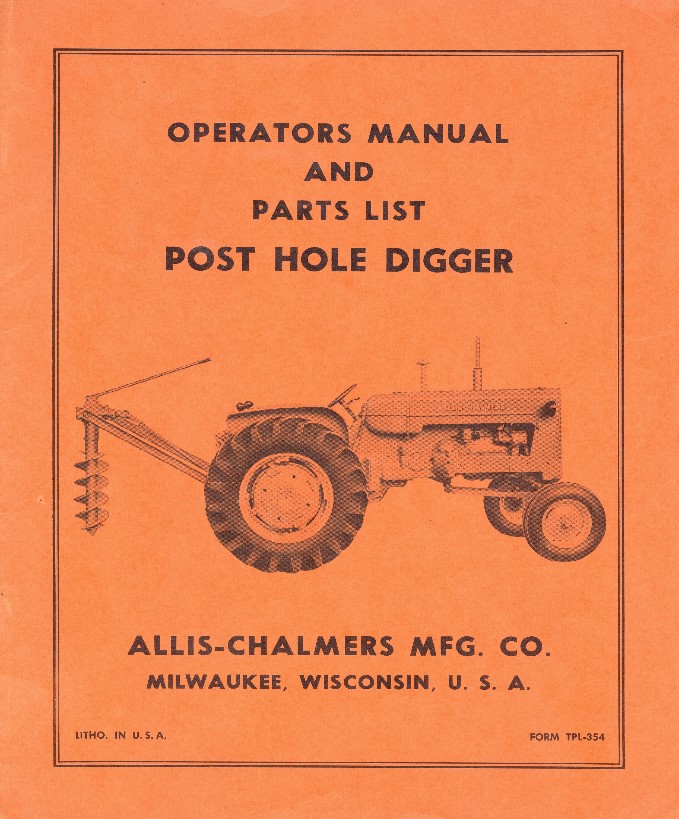
Huge thanks to Dave for the PDF of the manual. I tried to downsize it enough to post it on the forum but couldn't get it under the 2.0 MB limit for attachments.
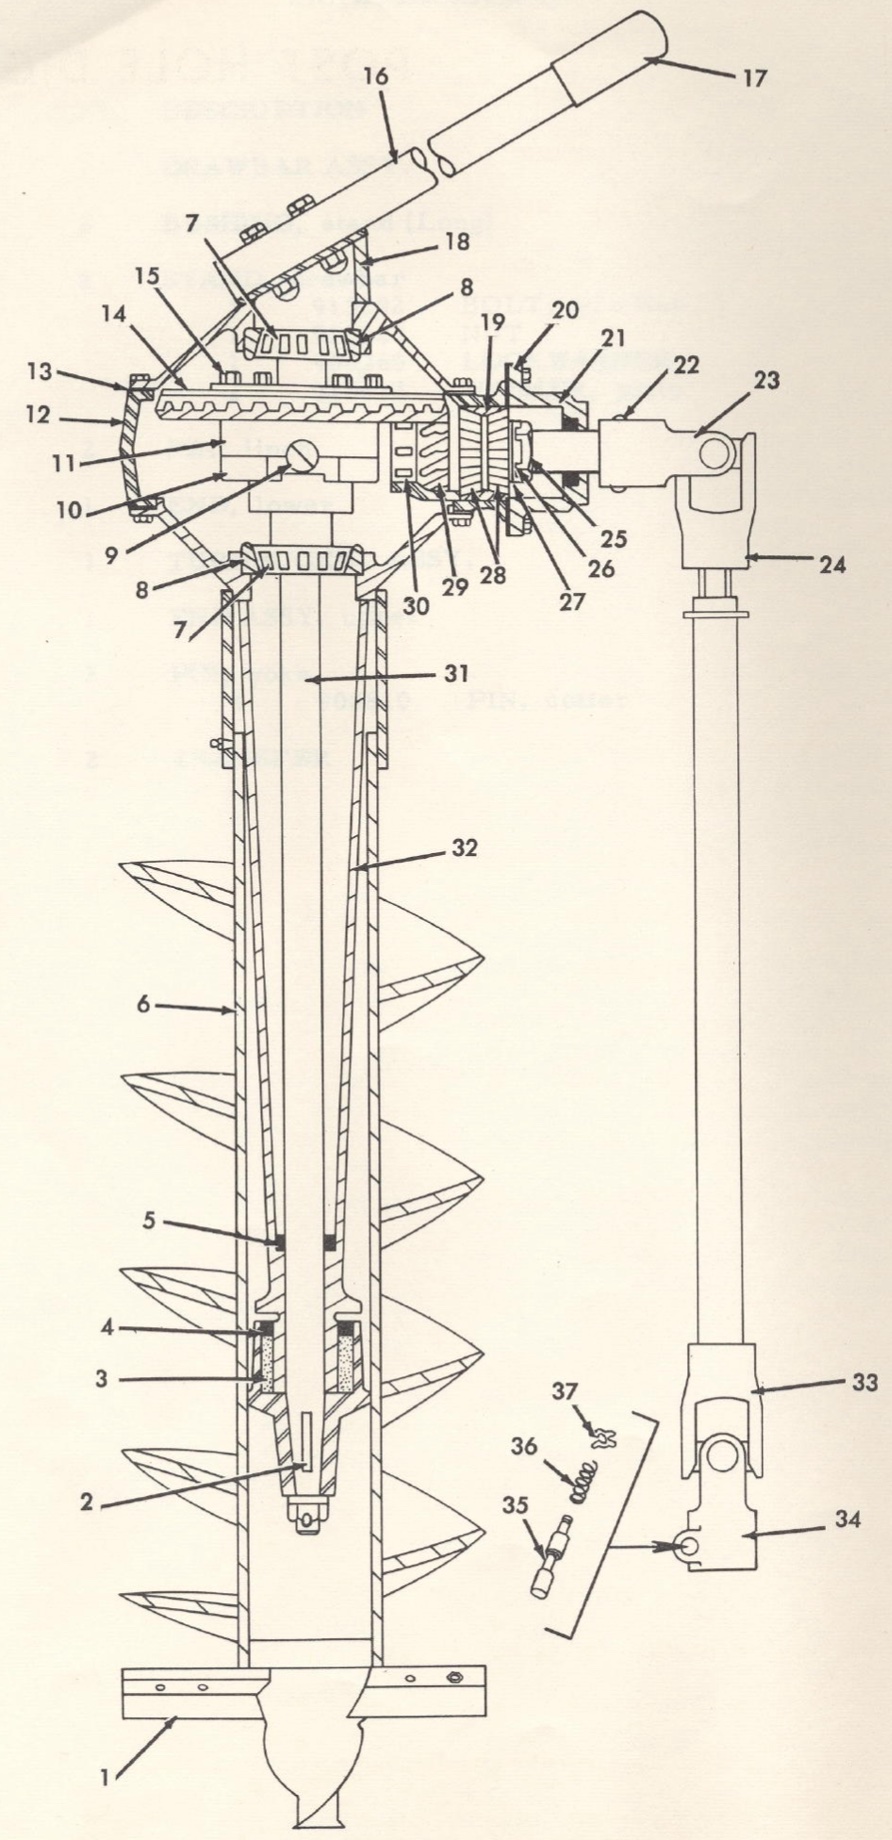
Here's a cross section of the gearbox and auger for anyone that's curious. You'll note it's a very different design from most of the modern augers that are just pinned to the output of the gearbox... Which makes finding an off the shelf replacement auger probably impossible. If a guy needed to refurbish one, cutting off and welding on new flighting might be the only feasible option for these?
PS Item 22 is labeled a shear pin. Mine has been replaced with a bolt over the years. I suppose I ought to replace that with the lowest grade bolt I can find and step up from there if it shears too easily, since I don't know what material the original pin was made out of.
Edited by wjohn - 19 Feb 2022 at 10:09pm
|
|
1939 B, 1940 B, 1941 WC, 1951 WD, 1952 CA, 1956 WD-45
|
|
Chatahurya
Bronze Level

Joined: 01 Mar 2023
Location: Aberdeen
Points: 4
|
Post Options
Thanks(0)
Quote Reply
Posted: 01 Mar 2023 at 2:48am |
I'm new to this forum and I don't know much about the Roper PHD, but it sounds like a cool piece of equipment. Too bad it won't work for your pole barn project, but I'm glad you'll be able to put it to use elsewhere. As for the auger size, it sounds like you're right that it's a 10" auger. It's always fun to find old equipment with legible decals and logos, especially when they have a connection to well-known brands like Allis-Chalmers. Also, have you ever looked into mobile drilling rigs? They're another option for drilling holes in tough terrain or near surface rocks. They can be a bit pricey, but they offer a lot of versatility and mobility.
Edited by Chatahurya - 03 Mar 2023 at 5:50am
|
|
Lon(MN)
Orange Level
Joined: 11 Sep 2009
Location: Merrill Wi
Points: 2048
|
Post Options
Thanks(0)
Quote Reply
Posted: 01 Mar 2023 at 7:45am |
|
It is a snap coupler item so I had to have it. I have the number 10 model also. I haven't used either one. The book shows augers from 6 to 24 inches were available.
|
|
http://lonsallischalmers.com
|
|
Mikez
Orange Level Access

Joined: 16 Jan 2013
Location: Usa
Points: 8915
|
Post Options
Thanks(0)
Quote Reply
Posted: 01 Mar 2023 at 7:43pm |
|
Did you ever get a parts book. I just came across a little envelope of roll pins 5/16”X2” with part number 2005030 which says fits phd
|
|
Lon(MN)
Orange Level
Joined: 11 Sep 2009
Location: Merrill Wi
Points: 2048
|
Post Options
Thanks(0)
Quote Reply
Posted: 02 Mar 2023 at 5:31am |
|
2005030 is item 22 in the picture above
|
|
http://lonsallischalmers.com
|
|
TramwayGuy
Orange Level Access
Joined: 19 Jan 2010
Location: Northern NY
Points: 11858
|
Post Options
Thanks(0)
Quote Reply
Posted: 02 Mar 2023 at 6:28am |
|
Pretty robust design. Straddle-mounted pinion. Really large spacing on the output shaft bearings.
|
|
Mikez
Orange Level Access
Joined: 16 Jan 2013
Location: Usa
Points: 8915
|
Post Options
Thanks(0)
Quote Reply
Posted: 02 Mar 2023 at 8:11am |
|
Thanks Lon. Had a feeling that’s where they went. Dad said gramp sold one, thinks there’s a small auger bit here for it.
|
|
Andy Wellman
Bronze Level

Joined: 26 Aug 2023
Location: Vermont
Points: 2
|
Post Options
Thanks(0)
Quote Reply
Posted: 26 Aug 2023 at 1:08pm |
I am super thankful to be able to find this post on the roper post hole digger. I have this exact one and am rebuilding it. My question is, does this take gear lube/oil or grease on each bearing and gear ring? I do not see a seal on the auger/output shaft that would retain oil. On the other hand, I only see two grease fittings, one on the input bearing and one on lower auger sleave. My guess is that you pack each bearing and the ring gear with grease and close it up. Or just pack entire gear case with grease as there is about a quart worth of space. Any input would be appreciated.
I am pretty sure these were made from 1930s designed ford differentials, because the bearings are ford differential bearing from this era was made by Timken 18-4221. The old ones I am replacing are Timken 18-4221 with the fork logo on them. Also the differential looks just like the gear case on my roper post hole digger.
Thanks for letting me join and ask questions. I have it apart right now and can post a ton of photos if anyone is interested.
|
|
tadams(OH)
Orange Level Access
Joined: 17 Sep 2009
Location: Jeromesville, O
Points: 11401
|
Post Options
Thanks(0)
Quote Reply
Posted: 26 Aug 2023 at 1:32pm |
|
I have one of those I would like to sell, all my building is done and have no use it now.
|
|
Mikez
Orange Level Access
Joined: 16 Jan 2013
Location: Usa
Points: 8915
|
Post Options
Thanks(0)
Quote Reply
Posted: 27 Aug 2023 at 9:19pm |
Welcome to the forum Andy. I would also suggest starting a new post with your question. Might get better answers. Good luck
|
|
Andy Wellman
Bronze Level
Joined: 26 Aug 2023
Location: Vermont
Points: 2
|
Post Options
Thanks(0)
Quote Reply
Posted: 28 Aug 2023 at 5:26am |
|
I figured it out, I think, and solved it the hard way. At the bottom of the shaft near the end of what Ford calls the torque tube (1936ish ford light truck differential) there is a 3-piece felt oil seal indicated by #5 in the diagram. The felt was shot so I removed the seal components. I found a modern oil seal that worked and inserted it into the same position. I had a bunch of oil seals on hand and found on that worked. The shaft did not have a smooth polished area for the new seal to run on, so I created one. I did this by mig welding a band of material to build up the area the seal would run. I then roughly removed the high spots of the weld with a grinder. Then I used my 1950's long bed lathe and turned the bearing sealing surface down, finishing it up with progressively finer sandpaper. This should do the trick, but we will see.
|
|