201 engine assembly
Printed From: Unofficial Allis
Category: Allis Chalmers
Forum Name: Farm Equipment -Knowledge Base
Forum Description: Long term storage of technical article, etc
URL: https://www.allischalmers.com/forum/forum_posts.asp?TID=118485
Printed Date: 25 Feb 2026 at 7:21pm
Software Version: Web Wiz Forums 11.10 - http://www.webwizforums.com
Topic: 201 engine assembly
Posted By: littlemarv
Subject: 201 engine assembly
Date Posted: 02 Feb 2016 at 10:23pm
|
Thought I would start a new topic just for the engine portion of my WC resurrection. Start with a nice clean line bored block, sitting on my tractor table downstairs behind the furnace, where I can work day or night in a climate controlled environment. http://s304.photobucket.com/user/rsommer1/media/Mobile%20Uploads/IMG_20160129_211755710_zpspaxcmkdf.jpg.html" rel="nofollow -  How am I going to get a complete engine out of my basement, you ask? Don't worry, we'll cross that bridge (or, climb those stairs, when we get to it). Lets start with the cam bearings. Got a set of 0.002" undersize cam bearings from Norm Meinert. http://s304.photobucket.com/user/rsommer1/media/Mobile%20Uploads/IMG_20160202_200223586_HDR_zpsmaze2pwe.jpg.html" rel="nofollow -  I've been told when installing cam bearings, as long as you have half the hole lined up you should be fine. As OCD as I am, that will never happen. (By the way, it should be called CDO, that way the letters are in the correct order). So, what I do, is to take a square and draw a line through the holes in the block and the holes in the bearing. That way, you just align the lines and drive them home, so the holes line up no matter what kind of goofy angle you are driving them from. http://s304.photobucket.com/user/rsommer1/media/Mobile%20Uploads/IMG_20160202_201013726_zpsoqpaopib.jpg.html" rel="nofollow -  http://s304.photobucket.com/user/rsommer1/media/Mobile%20Uploads/IMG_20160202_200600752_zpsvdmi8kq3.jpg.html" rel="nofollow -  http://s304.photobucket.com/user/rsommer1/media/Mobile%20Uploads/IMG_20160202_201537091_zpslcfqliq6.jpg.html" rel="nofollow -  http://s304.photobucket.com/user/rsommer1/media/Mobile%20Uploads/IMG_20160202_201603956_HDR_zpsfvlvqqxp.jpg.html" rel="nofollow -  O.K., all set. Pop them babies in the freezer for a half an hour, and they will slide right home. Per the manual, the middle bearing gets centered in the web of the block. I drew that one in with the puller. Oil hole location came out good. http://s304.photobucket.com/user/rsommer1/media/Mobile%20Uploads/IMG_20160202_211252322_HDR_zpszc6bmiqe.jpg.html" rel="nofollow -  The front one should be flush with the front of the block. This one came out good too. http://s304.photobucket.com/user/rsommer1/media/Mobile%20Uploads/IMG_20160202_211750800_HDR_zpsk72mudxn.jpg.html" rel="nofollow -  The rear one should be flush with the expansion plug bore. Oil hole looks good. http://s304.photobucket.com/user/rsommer1/media/Mobile%20Uploads/IMG_20160202_212121122_HDR_zpssxah7h2z.jpg.html" rel="nofollow -  Picked up a 2 1/2" welch plug. Use a Q tip to put a little anaerobic sealer on the plug and the bore, being careful to keep it away from the drain hole. If you inadvertently plug that drain hole, I'd imagine the oil pressure would hydraulically pop that plug right out. http://s304.photobucket.com/user/rsommer1/media/Mobile%20Uploads/IMG_20160202_213010236_zpsldkxuxe5.jpg.html" rel="nofollow -  Tap the plug into the bore, then give it one good whack to distort it a little, should be good. http://s304.photobucket.com/user/rsommer1/media/Mobile%20Uploads/IMG_20160202_213129293_zpsdvpdsm0j.jpg.html" rel="nofollow -  I couldn't get a picture while I was doing it, but I looked in from the front of the motor and stuck this wire back there to make sure the hole is clear- O.K. http://s304.photobucket.com/user/rsommer1/media/Mobile%20Uploads/IMG_20160202_213431325_zpsbjpi40xv.jpg.html" rel="nofollow -  Couldn't find a spec for lifter or bore diameter, so in they go. I have been told that Lubriplate will clog an oil filter, but I have no idea how long this engine is going to sit before it runs, so I will use it sparingly. Probably going to run the engine up to temp to set the valves and will change oil then anyways. http://s304.photobucket.com/user/rsommer1/media/Mobile%20Uploads/IMG_20160202_214020301_HDR_zpsazmgijs7.jpg.html" rel="nofollow -  http://s304.photobucket.com/user/rsommer1/media/Mobile%20Uploads/IMG_20160202_214453979_HDR_zpsomzppnx5.jpg.html" rel="nofollow -  So there. Enough for now, I set the block on corrosion resistant paper, throw a layer on top, and cover it with plastic when I'm not working on it. That damn OCD, I mean CDO. http://s304.photobucket.com/user/rsommer1/media/Mobile%20Uploads/IMG_20160202_214548979_HDR_zpsmpxjrypz.jpg.html" rel="nofollow -  Thanks for looking! ------------- The mechanic always wins. B91131, WC23065, WD89101, CA29479, B1, Early B10, HB212, 416H |
Replies:
Posted By: Allis dave
Date Posted: 03 Feb 2016 at 7:29am
| Thanks Marv, looks like a good start. Wish I could set and work on mine next to the stove. |
Posted By: Don(MO)
Date Posted: 03 Feb 2016 at 9:07am
|
Looks like you are going at it right, keep up the good work and post more on your engine rebuild.
------------- 3 WD45's with power steering,G,D15 fork lift,D19, W-Speed Patrol, "A" Gleaner with a 330 corn head,"66" combine,roto-baler, and lots of Snap Coupler implements to make them work for their keep. |
Posted By: littlemarv
Date Posted: 21 Feb 2016 at 1:06am
|
The nice thing about the parts manual is it gives you exact sizes of all the bolts. Got three new bolts and lockwashers, torqued the cam gear on. Alright sonny boy, lets get a little grease on your hands. http://s304.photobucket.com/user/rsommer1/media/Mobile%20Uploads/IMG_20160208_194837626_HDR_zpsxm45u7rf.jpg.html" rel="nofollow -  http://s304.photobucket.com/user/rsommer1/media/Mobile%20Uploads/IMG_20160208_194504450_zpsqhmksciu.jpg.html" rel="nofollow -  Watched Dons video on the rear main seal again to brush up on it. Before he made that video, he actually talked me through the process over the phone a couple years ago. Set this on the rear main seal for an hour, just for everyones benefit, it does not work. You have to compress them in a vise to really get them thin. http://s304.photobucket.com/user/rsommer1/media/Mobile%20Uploads/IMG_20160220_223336358_zpsq2bm0q5j.jpg.html" rel="nofollow -  Cleaned and trued up the upper rear main carrier. You can see when I started sanding the only contact was around the bolt holes. http://s304.photobucket.com/user/rsommer1/media/Mobile%20Uploads/IMG_20160205_141915639_zps12tt2vns.jpg.html" rel="nofollow -  Got it cleaned up nice. http://s304.photobucket.com/user/rsommer1/media/Mobile%20Uploads/IMG_20160205_151527822_zps7bemb0hv.jpg.html" rel="nofollow -  So, bolted that on, glue the upper half in, lubed the seal with oil and the bearings with Lubriplate, and set the crank home. http://s304.photobucket.com/user/rsommer1/media/Mobile%20Uploads/IMG_20160220_231505124_HDR_zps7bfefocm.jpg.html" rel="nofollow -  http://s304.photobucket.com/user/rsommer1/media/Mobile%20Uploads/IMG_20160220_233837107_zps81egt6ee.jpg.html" rel="nofollow -  The manual says anything under 0.011" end play is acceptable. I've got about 0.003" on the crank. Laid the engine over on its side for cylinder kit installation. http://s304.photobucket.com/user/rsommer1/media/Mobile%20Uploads/IMG_20160221_240150721_zpstywqpwf0.jpg.html" rel="nofollow -  Got these Tisco kits with the tractor. http://s304.photobucket.com/user/rsommer1/media/Mobile%20Uploads/IMG_20160221_240322468_zpsrlogimfj.jpg.html" rel="nofollow -  Slid one in without the O-rings to check liner protrusion. Don't have my good gauge here, so I checked it with my dial calipers. Manual says 0.002" to 0.004" is O.K., I come up with 0.003". Sweet. http://s304.photobucket.com/user/rsommer1/media/Mobile%20Uploads/IMG_20160221_240218247_zpsaan2psag.jpg.html" rel="nofollow -  Oh yeah, pulled the oil wick out of the crank and plugged both ends with a cork, since I will be using a sealed pilot bearing. http://s304.photobucket.com/user/rsommer1/media/Mobile%20Uploads/IMG_20160220_233828743_HDR_zpsbh9cbq8m.jpg.html" rel="nofollow -  http://s304.photobucket.com/user/rsommer1/media/Mobile%20Uploads/IMG_20160205_152359901_zpswybn5hoa.jpg.html" rel="nofollow -  I really thought about taking down my "tractor table" and putting an engine stand down here, but this table is too darn handy. I originally built it to work on a garden tractor during the winter. http://s304.photobucket.com/user/rsommer1/media/Picture%20002_zpsmd3aolyb.jpg.html" rel="nofollow - Since then, I have restored one garden tractor on it, fixed about 20 other garden tractor parts, rebuilt one two cylinder Kohler, built a doll house, painted a bunch of parts, and done umpteen other projects on it. What you don't see in these engine build pictures, is the fact that I had to shove my stuff into a pile so SOMEONE could work on a wooden model.... http://s304.photobucket.com/user/rsommer1/media/Mobile%20Uploads/IMG_20160216_192321169_HDR_zpscr7j1ss9.jpg.html" rel="nofollow -  What can I say. Thanks for looking! ------------- The mechanic always wins. B91131, WC23065, WD89101, CA29479, B1, Early B10, HB212, 416H |
Posted By: AaronSEIA
Date Posted: 21 Feb 2016 at 6:33am
|
Nice work. Good job getting the kids involved. AaronSEIA |
Posted By: ac45dave
Date Posted: 21 Feb 2016 at 8:01am
lookin good bud. keep the updates coming.  ------------- 54 wd-45gas ; 56 wd-45d N/F w/fact p/s ; 63 d-17 sIII N/F gas ; 60 D14 N/F ; 67 d-17 sIV N/F gas ; 63D15 sII W/F; 39rc#667 ; 2021 massey 4710 fwa ; gravely 2 wheel tractors |
Posted By: mjbower
Date Posted: 21 Feb 2016 at 8:11am
|
Love the attention to details there. And getting the youth involved.thanks for the pictures |
Posted By: Hubnut
Date Posted: 21 Feb 2016 at 8:11am
|
Nice pictures. I learned a few things here. If you use the freezer technique for the cam bearings, do they slide right in by hand, or do you still need the installer to drive them in properly? Just curious because those tools are rather expensive and I've always had the machine shop do the cam bearings.
------------- 1940 B "Lucy" 1941 B w/ Woods L59 "Flavia" 1942 B w/ finish mower "Dick" 1941 C w/ 3-point "Maggie" 1947 C SFW w/ L306 "Trixie" 1972 314H |
Posted By: littlemarv
Date Posted: 21 Feb 2016 at 8:19am
|
No, they definitely do not slide in by hand! Just a figure of speech that I guess maybe I should not have used. With anything press fit, throwing the inner part in the freezer makes things go a little easier. I think if a cam bearing ever went in by hand, it would spin pretty quick once the motor was run. ------------- The mechanic always wins. B91131, WC23065, WD89101, CA29479, B1, Early B10, HB212, 416H |
Posted By: Hubnut
Date Posted: 21 Feb 2016 at 11:22am
|
Thank you--makes sense.
------------- 1940 B "Lucy" 1941 B w/ Woods L59 "Flavia" 1942 B w/ finish mower "Dick" 1941 C w/ 3-point "Maggie" 1947 C SFW w/ L306 "Trixie" 1972 314H |
Posted By: SteveM C/IL
Date Posted: 21 Feb 2016 at 1:06pm
| It probably don't matter on this engine but those liners should be clamped down to measure projection. |
Posted By: littlemarv
Date Posted: 21 Feb 2016 at 1:13pm
|
Yes, checking it with the dial indicator isn't the most accurate. I'm going to flip the block upright when I actually install them. ------------- The mechanic always wins. B91131, WC23065, WD89101, CA29479, B1, Early B10, HB212, 416H |
Posted By: littlemarv
Date Posted: 24 Feb 2016 at 10:54pm
|
Tried my hand at safety wiring, looks O.K. I guess, without having a pair of twisting pliers. http://s304.photobucket.com/user/rsommer1/media/Mobile%20Uploads/IMG_20160223_213204365_zpsikxfeosc.jpg.html" rel="nofollow -  Brought home my good gauges, so I can measure things properly. Crank end play came out at 0.004", so good to go there. http://s304.photobucket.com/user/rsommer1/media/Mobile%20Uploads/IMG_20160223_221607164_zpsffjgxwm6.jpg.html" rel="nofollow -  Flipped the block upright, plunked the liners in with no O-rings. I'm getting 0.005" or 0.006" protrusion. Hmmmmmm. After a conference call with Don(MO), I scraped the counter bores with a razor blade, actually got a little crud out of there.... Much better. http://s304.photobucket.com/user/rsommer1/media/Mobile%20Uploads/IMG_20160224_205828658_zpshacqthoc.jpg.html" rel="nofollow -  Put Vaseline on the lower lead in chamfers, put canola oil on the O-rings. Should be a slippery enough combination. http://s304.photobucket.com/user/rsommer1/media/Mobile%20Uploads/IMG_20160224_212924809_zps6icy04cx.jpg.html" rel="nofollow -  Put the liners in, give them a spin at the end to ease the O-rings down into place. Hopefully these liners have found their new home for the next 50 years or so.... http://s304.photobucket.com/user/rsommer1/media/Mobile%20Uploads/IMG_20160224_213956105_zpsylgp1idm.jpg.html" rel="nofollow -  Thanks for looking! ------------- The mechanic always wins. B91131, WC23065, WD89101, CA29479, B1, Early B10, HB212, 416H |
Posted By: B26240
Date Posted: 25 Feb 2016 at 9:17am
| Looks great Marv, love it you got your son helping, one big thing he will learn from you is no dirt allowed! As for getting it out of the basement is they make a two wheel cart with "stair climbing ability" maybe you can rent one from a rental outfit? Guy in the neighborhood who sells and installs wood stoves has one and he uses it on stoves weighing in the 450# range. Thanks for the update. Mark |
Posted By: littlemarv
Date Posted: 25 Feb 2016 at 11:31pm
|
Junior taking care of a little body work, http://s304.photobucket.com/user/rsommer1/media/Mobile%20Uploads/IMG_20160225_184112157_zpskorg1weq.jpg.html" rel="nofollow -  "Connecting rods with Courtney" http://s304.photobucket.com/user/rsommer1/media/Mobile%20Uploads/IMG_20160225_180905481_zpsyeaskteg.jpg.html" rel="nofollow -  And the old man on pistons. http://s304.photobucket.com/user/rsommer1/media/Mobile%20Uploads/IMG_20160225_183725656_HDR_zps1izmgwj7.jpg.html" rel="nofollow -  Found a universal ring compressor that should work. These are Conformatic aluminum pistons, no long bosses, and no arrows. Well, they have arrows now, so the pistons all go in the same way. Got the pistons on the rods per the manual. Kind of neat how you do it, depending on which number cylinder it is, you push the pin to one side of the piston, then push the rod the same way. Torque the pinch bolt to 35 ft. lbs., then slide it away about 1/8". Then the pin is pretty much centered when the rod is offset. http://s304.photobucket.com/user/rsommer1/media/Mobile%20Uploads/IMG_20160225_190834022_HDR_zpsjfvprsw3.jpg.html" rel="nofollow -  http://s304.photobucket.com/user/rsommer1/media/Mobile%20Uploads/IMG_20160225_190902575_HDR_zpstvczyrii.jpg.html" rel="nofollow -  http://s304.photobucket.com/user/rsommer1/media/Mobile%20Uploads/IMG_20160225_190916541_zps1jvgn51p.jpg.html" rel="nofollow -  These were the first wrist pins I have ever installed that didn't have snap rings, so I was a little worried about keeping the wrist pins away from the cylinder walls. Cause if you make a mistake there, you are starting all over. But, looks like it should work. http://s304.photobucket.com/user/rsommer1/media/Mobile%20Uploads/IMG_20160225_192533137_HDR_zpsnuvdwb8k.jpg.html" rel="nofollow -  Here's where I really could use an engine stand. Put it up on blocks a little higher, made a disposable drain pan out of tinfoil, and stuck some towels under there to catch all the drips. http://s304.photobucket.com/user/rsommer1/media/Mobile%20Uploads/IMG_20160225_211637432_zpsnbf5rq7q.jpg.html" rel="nofollow -  My teacher in overhaul class at tech school taught me to soak pistons completely in oil prior to installation. You can't get much more complete lubrication than that. It is a bit messy, but its the only way I've ever done it. http://s304.photobucket.com/user/rsommer1/media/Mobile%20Uploads/IMG_20160225_212920356_zpsedcjbnpk.jpg.html" rel="nofollow -  http://s304.photobucket.com/user/rsommer1/media/Mobile%20Uploads/IMG_20160225_213155955_HDR_zpstk6rnymo.jpg.html" rel="nofollow -  Just snugged the rod bolts with a ratchet for now. I'm going to let it drip overnight, then I will flip it up so I can torque the rod bolts. http://s304.photobucket.com/user/rsommer1/media/Mobile%20Uploads/IMG_20160225_213740905_zpsb4hieetf.jpg.html" rel="nofollow -  After I got them all in, just for kicks, checked the rolling torque. I don't think there is a spec, but we can file this away in the "useless info" category. Averaged 250 inch pounds, more or less. http://s304.photobucket.com/user/rsommer1/media/Mobile%20Uploads/IMG_20160225_221457281_HDR_zpsrebe3ktq.jpg.html" rel="nofollow -  Ironic- the torque wrench probably cost more new than the tractor.... ------------- The mechanic always wins. B91131, WC23065, WD89101, CA29479, B1, Early B10, HB212, 416H |
Posted By: Allis dave
Date Posted: 26 Feb 2016 at 7:11am
| Great once again. This is a good guide for me to follow when assembling my 226 soon (maybe soon)... |
Posted By: Bill_MN
Date Posted: 26 Feb 2016 at 9:26am
Looking great, just a couple points- you should not put any oil or petroleum based lubricants on those o-rings, it will cause the rubber to swell and actually distort the liners believe it or not. Clean the bore and sleeve to an inch of it's life and use a little dish soap only, it is plenty slippery and when it dries up it actually causes them to stick to the sides of the bore sealing them better. I'm a bit concerned about the safety wire on the left, doesn't look like it's tied together?? The proper way is to do a figure 8 between the bolt heads so if one bolt loosens, the other bolt turns the opposite way and tightens. Not trying to be critical, just don't want anything to ruin that beautiful rebuild 
------------- 1951 WD #78283, 1918 Case 28x50 Thresher #76738, Case Centennial B 2x16 Plow |
Posted By: littlemarv
Date Posted: 26 Feb 2016 at 11:05pm
|
The safety wire on the left is twisted, you just can't see it due to the oil drain hole in the main cap. It would be a lot easier if there were three sets of holes instead of just one in each bolt. I couldn't do a nice neat figure 8 on the end ones, but it will work perfect on the middle one. I think the liner O-rings will be alright. It says in the instructions to use oil on them. I've used dish soap, vegetable oil, engine oil, and even coolant for assembly on various engines. I know if you TWIST an o-ring, it can distort a liner. http://s304.photobucket.com/user/rsommer1/media/Mobile%20Uploads/IMG_20160226_210817929_zpsgjnhwagj.jpg.html" rel="nofollow -  So, laid the block down, torqued the rod bolts to 40 ft.lbs. and installed cotter pins, checked for rod side clearance, good to go there. Redid the safety wire on the middle cap as well. http://s304.photobucket.com/user/rsommer1/media/Mobile%20Uploads/IMG_20160226_214933149_zpsw8vjtlyo.jpg.html" rel="nofollow -  So there, on to the cylinder head. Got a little thinking to do here, as I have the 3" head, which would be CORRECT for the age of tractor, and, I have a 4" head, which is a later vintage with some design improvements. Either way, a cleaning, pressure testing, decking, valve train kit, and valve job is pretty much in order. I have the rockers and pedestals for each. I guess it boils down to CORRECT or IMPROVED DESIGN. You can see how they moved the spark plugs toward the center of the chamber on the thicker head. http://s304.photobucket.com/user/rsommer1/media/Mobile%20Uploads/IMG_20160226_220351452_zps3nq4mb3r.jpg.html" rel="nofollow -  Hmmmmmmm..... ------------- The mechanic always wins. B91131, WC23065, WD89101, CA29479, B1, Early B10, HB212, 416H |
Posted By: Allis dave
Date Posted: 29 Feb 2016 at 7:31am
| Going from memory reading the service manual a few days ago. I think the castle nut rod bolt are supposed to be torqued to 70ft/lb and the newer self locking nuts are 40ft/lb |
Posted By: CAL(KS)
Date Posted: 29 Feb 2016 at 8:49am
|
per an older discussion in pulling forum, no noticable gain from taller head, besides maby for high flow porting applications. ------------- Me -C,U,UC,WC,WD45,190XT,TL-12,145T,HD6G,HD16,HD20 Dad- WD, D17D, D19D, RT100A, 7020, 7080,7580, 2-8550's, 2-S77, HD15 |
Posted By: littlemarv
Date Posted: 29 Feb 2016 at 2:20pm
|
Well, I guess I will have to do a little research, cause rod bolts are something you need to be sure about. 70 sure sounds like a lot for those little bolts.. ------------- The mechanic always wins. B91131, WC23065, WD89101, CA29479, B1, Early B10, HB212, 416H |
Posted By: B26240
Date Posted: 29 Feb 2016 at 2:45pm
| Marv did you use any plastigauge to check bearing clearance? Mark |
Posted By: littlemarv
Date Posted: 29 Feb 2016 at 3:06pm
|
No, with having it line bored and the rods sized to eliminate shims, theres nothing I can do about it anyways.... ------------- The mechanic always wins. B91131, WC23065, WD89101, CA29479, B1, Early B10, HB212, 416H |
Posted By: dawntreader74
Date Posted: 29 Feb 2016 at 7:56pm
| the small bolts are 25- to 30 in the old book'' ac-wc. |
Posted By: ac45dave
Date Posted: 29 Feb 2016 at 9:32pm
------------- 54 wd-45gas ; 56 wd-45d N/F w/fact p/s ; 63 d-17 sIII N/F gas ; 60 D14 N/F ; 67 d-17 sIV N/F gas ; 63D15 sII W/F; 39rc#667 ; 2021 massey 4710 fwa ; gravely 2 wheel tractors |
 littlemarv wrote:
Posted By: Alex09(WI)
Date Posted: 01 Mar 2016 at 12:53am
|
Great job on the rebuild, looks like a quality job! I have also read 70 lbs for castleated nuts. Good choice to see you going with castleated nuts instead of self locking. I have seen the self locking nuts let go and put a hole in the block. Good luck with the rest. ------------- www.awtractor.com A&W TRACTOR 920-598-1287 KEEPING ALLIS-CHALMERS IN THE FIELDS THROUGH THE 21ST CENTURY |
Posted By: Stan IL&TN
Date Posted: 01 Mar 2016 at 7:17am
You are doing it right but one thing is bugging me. How the heck do you get it out of the basement?  ------------- 1957 WD45 dad's first AC 1968 one-seventy 1956 F40 Ferguson |
Posted By: B26240
Date Posted: 01 Mar 2016 at 11:08am
| Stan I am wondering that also but maybe he has some big friends, if you read my earlier post I suggested renting a stair climbing dolly, neighbor has one he uses to haul wood stoves in the 450# range up stairs when he sells them. I saw him use it this winter, it has a battery on it and went right up the steps with a wood stove no problem. With all the good pictures Marv is sharing I expect on of it going up the stairs !! |
Posted By: littlemarv
Date Posted: 05 Mar 2016 at 12:17am
|
Well, after doing a little research and talking to several people on the connecting rod bolt torque, here is what I have come up with. This is a theory, NOT fact. The castle nuts got torqued to 70 foot pounds. They were cranked down so tight because the rods were shimmed with soft brass shims, and if the shims ever fretted out and your rod caps start clunking around, all hell was gonna break loose pretty quick. With the introduction of sized rods and precision insert bearings, the self locking nuts could be torqued to 40 ft. lbs. only. Really, there isn't any stress per say on a rod bolt, other than actually pulling the piston down on the intake stroke. I think 70 ft. lbs. is a lot, even for a new 7/16" fine thread fastener. I'm not going to put that on bolts that are this old. So, here's what I did. Pulled the cotter pins out, loosened the rod bolts, torqued them to 50 foot pounds, and turned them whichever way was closest to get a new cotter pin in. Installed the timing cover seal, I always pack the backside of the seal with something if it has a garter spring in it. On axles you can use regular grease, on engines I use Lubriplate. http://s304.photobucket.com/user/rsommer1/media/Mobile%20Uploads/IMG_20160304_113918176_zps1dile4ch.jpg.html" rel="nofollow -  I was going to make a sleeve to locate the front cover like Don said in his video, but since I can flip the engine up, I just installed the seal in the cover, and slid the cover into place, it should be about as centered as you can get... http://s304.photobucket.com/user/rsommer1/media/Mobile%20Uploads/IMG_20160304_220504413_zps7pnvr8c9.jpg.html" rel="nofollow -  I happen to have two covers. Took the cam plugs out of both. One is stuck tight, the other one moves but has no spring tension behind it. Took them both apart, and took the best pieces to make one good one. http://s304.photobucket.com/user/rsommer1/media/Mobile%20Uploads/IMG_20160303_204502585_zpskreiinye.jpg.html" rel="nofollow -  http://s304.photobucket.com/user/rsommer1/media/Mobile%20Uploads/IMG_20160229_213515418_HDR_zpst9lawruz.jpg.html" rel="nofollow -  Tightened the plug down, back it off 3/4 of a turn, and lock down the jam nut. Cleaned up the head studs and put them in. Waiting for the machine shop to give the head a once over. I took the valves out, they look pretty good, and the stems measure good. http://s304.photobucket.com/user/rsommer1/media/Mobile%20Uploads/IMG_20160304_225458161_HDR_zps7b1fwrct.jpg.html" rel="nofollow -  http://s304.photobucket.com/user/rsommer1/media/Mobile%20Uploads/IMG_20160226_222024858_zpsta1ff8f5.jpg.html" rel="nofollow -  With every part I bolt on, I grin a little. Two reasons: 1. I'm getting closer to driving a tractor that I built. 2. Gives me more room on my bench for more junk! (Carb and mag both need a good going through) Concerned about how I'm going to get the engine out of the basement, eh? Oh, don't worry, that little spectacle won't go undocumented, trust me. ------------- The mechanic always wins. B91131, WC23065, WD89101, CA29479, B1, Early B10, HB212, 416H |
Posted By: B26240
Date Posted: 05 Mar 2016 at 6:19am
| Fun watching your steady progress, and good work you are doing. Mark |
Posted By: Ted J
Date Posted: 16 Mar 2016 at 7:07am
|
Nice job so far Marv!! Good documentation and the pics are great! Not out of focus or anything. GREAT job! I've got a good idea how you're going to get it out of the basement....... I did it with a piano once....  ------------- "Allis-Express" 19?? WC / 1941 C / 1952 CA / 1956 WD45 / 1957 WD45 / 1958 D-17 |
Posted By: steve(ill)
Date Posted: 18 Mar 2016 at 3:11pm
|
you mentioned a rolling resistance of 250 inch pounds with the pistons and bearings installed.... I have measured 20- 25 ft pounds in the past, which is similar... I agree. ------------- Like them all, but love the "B"s. |
Posted By: allischalmerguy
Date Posted: 20 Mar 2016 at 4:49pm
|
Marv, I am enjoying your photo documentary. It is very interesting to me. I did not grow up with a Dad who could do this, or near a shop that did it. I find it very fascinating and way above my head. I wish I could of learned this skill. Thanks for sharing. Mike ------------- It is great being a disciple of Jesus! 1950 WD, 1957 D17...retired in Iowa, |
Posted By: littlemarv
Date Posted: 26 Mar 2016 at 8:53pm
|
O.K., got the head back. I thought everything looked pretty good, but they really went through it. All new guides, 4 new seats, added valve stem seals, pressure tested, resurfaced, cleaned, and new frost plugs. http://s304.photobucket.com/user/rsommer1/media/Mobile%20Uploads/IMG_20160322_215745816_HDR_zpsyeen3fm7.jpg.html" rel="nofollow -  http://s304.photobucket.com/user/rsommer1/media/Mobile%20Uploads/IMG_20160322_215826267_zpsceywklme.jpg.html" rel="nofollow -  I also dropped off the manifold as well. I really only wanted it baked and blasted to get all the crud out of the intake side, but they gave it the once over as well. They machined the carb gasket surface, the manifold surface, and took the cover off and pulled the studs and machined that surface too. I have heard stories of the manifold being machined too much and then the carb hits the block? Also heard of machining it at an angle to prevent that? At any rate, we will see how that turns out- I am not putting on the manifold yet, I plan on taking the engine outside and priming every nook and cranny before bolting the manifold and the mag on.  Does anyone make a gasket for the manifold cover, otherwise I can make one... http://s304.photobucket.com/user/rsommer1/media/Mobile%20Uploads/IMG_20160322_215631095_zpsntj12fji.jpg.html" rel="nofollow -  So, gave the headgasket a snort of copper coat, http://s304.photobucket.com/user/rsommer1/media/Mobile%20Uploads/IMG_20160322_220836244_zpsyvnwcucu.jpg.html" rel="nofollow -  and laid it down. The gasket was stamped "UP", but that had XXXXXX printed over it, and "THIS SIDE UP" was printed on the opposite side. I had a 50/50 chance, so I put the printed side up. http://s304.photobucket.com/user/rsommer1/media/Mobile%20Uploads/IMG_20160322_221106462_zpszp5px4yj.jpg.html" rel="nofollow -  They also reground the radius on all the rocker arms. Those were very worn. Good as new! http://s304.photobucket.com/user/rsommer1/media/Mobile%20Uploads/IMG_20160322_224515362_HDR_zpsragqupsx.jpg.html" rel="nofollow -  Got the rockers put back together. http://s304.photobucket.com/user/rsommer1/media/Mobile%20Uploads/IMG_20160322_225734661_HDR_zpsvrjz9t26.jpg.html" rel="nofollow -  Torqued the head to 70 foot pounds, installed the water manifold, push rods, and rocker shaft assembly. Torqued the rockers to 25 foot pounds, and set the valves to 0.014" cold. I figure that should be close enough until I can run it to check it hot, and retorque the head while I'm in there. Trued up the oil filter base, because that had been way overtightened, like pretty much every other one. http://s304.photobucket.com/user/rsommer1/media/Mobile%20Uploads/IMG_20160323_240323826_zps40yidkwm.jpg.html" rel="nofollow -  Installed the dipstick bushing, oil pressure regulator, pushrod cover, filter base, and oil lines. http://s304.photobucket.com/user/rsommer1/media/Mobile%20Uploads/IMG_20160323_243202736_HDR_zpse8x8vrmk.jpg.html" rel="nofollow -  ------------- The mechanic always wins. B91131, WC23065, WD89101, CA29479, B1, Early B10, HB212, 416H |
Posted By: Allis dave
Date Posted: 26 Mar 2016 at 9:45pm
| Making great progress again. Looks like you had a good Easter weekend. It's good to see everything coming together nicely. |
Posted By: allischalmerguy
Date Posted: 27 Mar 2016 at 9:40pm
|
Great work very educational. Thank you for sharing and the photos! ------------- It is great being a disciple of Jesus! 1950 WD, 1957 D17...retired in Iowa, |
Posted By: Phil48ACWC
Date Posted: 28 Mar 2016 at 8:21am
|
Check video below. This is the proper way to safety wire. You don't need the expensive spinner pliers. https://www.youtube.com/watch?v=XktwpWPFvHs |
Posted By: BenGiBoy
Date Posted: 28 Mar 2016 at 9:39am
|
https://www.youtube.com/watch?v=XktwpWPFvHs" rel="nofollow - https://www.youtube.com/watch?v=XktwpWPFvHs
------------- '39 Model B Tractors are cheaper than girls, remember that! |
Posted By: Sugarmaker
Date Posted: 01 Apr 2016 at 12:13pm
|
Marv, Just awesome documentation on a WC engine build. Maybe even I could do one someday too. Thanks for taking the time to do this. Glad to see the kids helping too. Regards, Chris ------------- D17 1958 (NFE), WD45 1954 (NFE), WD 1952 (NFE), WD 1950 (WFE), Allis F-40 forklift, Allis CA, Allis D14, Ford Jubilee, Many IH Cub Cadets, 32 Ford Dump, 65 Comet. |
Posted By: LeonR2013
Date Posted: 03 Apr 2016 at 3:50pm
| I'm a clean freak also. But I don't have leaks so there is benefit. Have you ever seen a set of bearings that were installed in a dirty engine? NOT good. That's why I like to spin the pump if possible. It can wash some of the dirt out left in inadvertenly. Good job. Leon R Cmo |
Posted By: SteveM C/IL
Date Posted: 03 Apr 2016 at 8:42pm
| littlemarv,I'm not certain here,but I believe it has been said not to use seals on valves on these engines because the guides will wear quickly.Need to check with MACK or Drallis or any other know quanity.... |
Posted By: structures
Date Posted: 04 Apr 2016 at 2:18pm
|
Great build. Great detail and pics! On the head gasket for my 160cu in D15II the gasket was almost reversible. There was a hole at the back of the block but also the water path holes were progressively larger from back to front. It appears your gasket might be similar. ------------- Robert http://www.allischalmers.com/forum/forum_posts.asp?TID=82702&KW=structures&title=structures-1964-allis-d15-series-ii" rel="nofollow - 1964 D15 Series II |
Posted By: littlemarv
Date Posted: 09 Apr 2016 at 11:50pm
|
Installed an oil filter (made sure it is the stuffed kind, not pleated paper) and built a custom lifting bracket. Also installed a 1 ton chain hoist in the ceiling of the basement. http://s304.photobucket.com/user/rsommer1/media/Mobile%20Uploads/IMG_20160330_153536461_zpsxuwb6e1u.jpg.html" rel="nofollow -  Borrowed the preluber from work. You put oil in the tank, pressurize it with compressed air, hook it into the oil galley, and fill the oil system to eliminate dry startups. http://s304.photobucket.com/user/rsommer1/media/Mobile%20Uploads/IMG_20160409_221248689_HDR_zpsxz8mc2qp.jpg.html" rel="nofollow -  Plumbed in where the oil pump delivery line from the oil pump goes. http://s304.photobucket.com/user/rsommer1/media/Mobile%20Uploads/IMG_20160409_223105885_zpslavosjr8.jpg.html" rel="nofollow -  Took awhile to fill the system, but eventually I had oil coming out all the mains, the rods, and all the rockers. Its neat how oil runs down the rockers to lubricate the push rod sockets and valve stems. http://s304.photobucket.com/user/rsommer1/media/Mobile%20Uploads/IMG_20160409_222316335_HDR_zps7qixgjq3.jpg.html" rel="nofollow -  http://s304.photobucket.com/user/rsommer1/media/Mobile%20Uploads/IMG_20160409_222002794_zpsbu2kxx12.jpg.html" rel="nofollow -  Not sure if the preluber is higher pressure and lower flow versus the oil pump, but the relief valve opened right away, so I plugged the ports with my fingers, and then the gauge would register. We'll see how it acts when I fire it up......someday. http://s304.photobucket.com/user/rsommer1/media/Mobile%20Uploads/IMG_20160409_222449792_zpspohtpzjn.jpg.html" rel="nofollow -  ------------- The mechanic always wins. B91131, WC23065, WD89101, CA29479, B1, Early B10, HB212, 416H |
Posted By: TomMN
Date Posted: 11 Apr 2016 at 9:08am
| Very nice. I have only seen the oil flowing up top with the engine running and the cover off. Fun to see it in a steady state as the oil flows through where the designers intended. |
Posted By: littlemarv
Date Posted: 24 Apr 2016 at 1:02am
|
Flipped the engine over. http://s304.photobucket.com/user/rsommer1/media/Mobile%20Uploads/IMG_20160423_213234624_HDR_zpsgchkyrvg.jpg.html" rel="nofollow -  http://s304.photobucket.com/user/rsommer1/media/Mobile%20Uploads/IMG_20160423_214126148_zpsajqsir2m.jpg.html" rel="nofollow -  I thought the safety wire videos were really neat, so I redid those. http://s304.photobucket.com/user/rsommer1/media/Mobile%20Uploads/IMG_20160423_220530282_HDR_zpstazciqw8.jpg.html" rel="nofollow -  http://s304.photobucket.com/user/rsommer1/media/Mobile%20Uploads/IMG_20160423_220538168_zpsmluicg4k.jpg.html" rel="nofollow -  http://s304.photobucket.com/user/rsommer1/media/Mobile%20Uploads/IMG_20160423_220547695_zpsquzmfoii.jpg.html" rel="nofollow -  Installed the oil pump. Yes, that is Don's oil pan video in the background. http://s304.photobucket.com/user/rsommer1/media/Mobile%20Uploads/IMG_20160423_221221373_HDR_zpsp9uvv5xf.jpg.html" rel="nofollow -  Put the pan on, torqued the bolts to 18 foot pounds. http://s304.photobucket.com/user/rsommer1/media/Mobile%20Uploads/IMG_20160423_225603929_HDR_zpsxjsaz7vj.jpg.html" rel="nofollow -  Flipped it back up, put the valve cover on just snug, and installed these stands I welded up out of some scrap iron I had laying around. http://s304.photobucket.com/user/rsommer1/media/Mobile%20Uploads/IMG_20160424_240606759_HDR_zpspwserit2.jpg.html" rel="nofollow -  http://s304.photobucket.com/user/rsommer1/media/Mobile%20Uploads/IMG_20160424_240620835_zpsopwslyca.jpg.html" rel="nofollow -  So there it is. I think I will put the water pump on, then up the stairs she goes, out to the garage for a coat of primer. Thanks for looking! ------------- The mechanic always wins. B91131, WC23065, WD89101, CA29479, B1, Early B10, HB212, 416H |
Posted By: Don(MO)
Date Posted: 24 Apr 2016 at 8:16am
|
She is looking good, I'm happy to see you rewired the main cap bolts. I have built lots of engine stands so the engine can ship and you have a nice set built. Now it's time to move her out of the house and please post some shots of it going up the steps and out the door. lol
------------- 3 WD45's with power steering,G,D15 fork lift,D19, W-Speed Patrol, "A" Gleaner with a 330 corn head,"66" combine,roto-baler, and lots of Snap Coupler implements to make them work for their keep. |
Posted By: BenGiBoy
Date Posted: 25 Apr 2016 at 7:15am
|
Definitely some pictures of 'the trip out'! ------------- '39 Model B Tractors are cheaper than girls, remember that! |
Posted By: BenGiBoy
Date Posted: 25 Apr 2016 at 7:16am
|
Lookin' real good, by the way. It is fun to watch your progress!! ------------- '39 Model B Tractors are cheaper than girls, remember that! |
Posted By: IBWD MIke
Date Posted: 25 Apr 2016 at 10:14am
| When I rebuilt the engine for my 45 I had to use a WD block. Learning how to safety wire was one of the more interesting parts of the job. |
Posted By: littlemarv
Date Posted: 29 Apr 2016 at 10:26pm
|
When I got the manifold back, they had taken the cover off and cleaned it out. I never thought to look closely, I just thought "Huh, looks like I need to get some exhaust gasket paper and make one for this, so the intake and exhaust gases don't mix." So, I picked up a sheet of exhaust gasket paper. Boy is that some crap to work with. It has metal in it so custom trimming is pretty tough. At any rate, now that I look at it, that upper chamber does nothing. I thought that was the intake side of the manifold, but it is more or less a sealed chamber. Nothing goes in and out of it as far as I can tell. Whats it even for? Does that have something to do with the "G" or "K" covers you can get? http://s304.photobucket.com/user/rsommer1/media/Mobile%20Uploads/IMG_20160429_211800500_zps1ynsm7gf.jpg.html" rel="nofollow -  Anyways, made a gasket and installed the cover with some new brass nuts. Masked off the carb surface, out to the paint booth tomorrow, for some extra high temp primer and paint. I don't know how hot the old manifold will get, but I figure the stuff rated for 3000 degrees ought to cover it. (Yeah right)  http://s304.photobucket.com/user/rsommer1/media/Mobile%20Uploads/IMG_20160429_215207988_HDR_zps9cbt76sb.jpg.html" rel="nofollow - ------------- The mechanic always wins. B91131, WC23065, WD89101, CA29479, B1, Early B10, HB212, 416H |
Posted By: SteveM C/IL
Date Posted: 29 Apr 2016 at 10:35pm
| Yes it does.the K cover is made so the exhaust heats the intake pipe which doesn't work so good for gasoline. |
Posted By: BenGiBoy
Date Posted: 30 Apr 2016 at 12:05pm
|
K stands for Kerosene probably. ------------- '39 Model B Tractors are cheaper than girls, remember that! |
Posted By: cdweirrick
Date Posted: 30 Apr 2016 at 3:26pm
|
I have loved reading this thread. As someone who is new to all of this and looking forward to learning, it has been full of valuable information. I cant wait to see the finished product! ------------- Grandpa's 1950 WD 1950 G |
Posted By: littlemarv
Date Posted: 01 May 2016 at 8:44pm
|
Time to get the motor outside. I had to take the valve cover back off, because now that I put the pan and stands on, its too tall. Put a piece of pipe up in the floor joists to hang my hoist from. Big brother stopped by, and we lifted the engine and ever so gently slid it off the bench. Set the two wheeled cart under it and lowered it down. http://s304.photobucket.com/user/rsommer1/media/Mobile%20Uploads/IMG_20160501_151638261_zpsbx3b3axp.jpg.html" rel="nofollow -  Ratchet strapped it to the cart, and up the stairs we went. He was pulling, and I would lift up each step, and it really went pretty good. Didn't have a photographer when we really needed it, and our hands were definitely full! But here it is rolling out the kitchen door... http://s304.photobucket.com/user/rsommer1/media/Mobile%20Uploads/IMG_20160501_152714125_zpspyqsclmw.jpg.html" rel="nofollow -  So there, a successful trip out. Needs to go out to the paint booth for a coat of primer. Then the chassis needs to come into the garage and we can set her home. http://s304.photobucket.com/user/rsommer1/media/Mobile%20Uploads/IMG_20160501_172631739_zpsasxctqgv.jpg.html" rel="nofollow -  ------------- The mechanic always wins. B91131, WC23065, WD89101, CA29479, B1, Early B10, HB212, 416H |
Posted By: B26240
Date Posted: 02 May 2016 at 6:16am
| Less dramatic than I thought the trip up the stairs would be, all I can say is you and your brother must be some "heavy duty guys". My fear would be getting it up to stair number four and running out of gas. Mark |
Posted By: KenBWisc
Date Posted: 03 May 2016 at 8:43am
|
I don't understand why the pics of your rolling chassis don't appear here as they did in an E-mail notification I received. But,,, in relation to steering wheel slop; find the bearing adjusting bolt under the pedestal and between the two front wheels. Tighten this a bit at a time while checking for reduced slop. It may take care of it for you.
------------- '34 WC #629, '49 G, '49 B, '49 WD, '62 D-19, '38 All Crop 60 and still hunting! |
Posted By: CAL(KS)
Date Posted: 03 May 2016 at 9:46am
|
Doing a great job documenting this project. Curious why you opted to stay with the old style water outlet instead of the later with thermostat for automatic temp control. ------------- Me -C,U,UC,WC,WD45,190XT,TL-12,145T,HD6G,HD16,HD20 Dad- WD, D17D, D19D, RT100A, 7020, 7080,7580, 2-8550's, 2-S77, HD15 |
Posted By: littlemarv
Date Posted: 03 May 2016 at 3:13pm
|
I went with the no thermostat one for a couple reasons. First off, I have three thermostat housings, three of which became perforated when I tried to clean them up. Second, I'm not sure how many combinations of water manifold-head thickness-radiator necks there are. But I think this is original? Not sure, we will see once I get the motor in and radiator set down. I may have to change something. ------------- The mechanic always wins. B91131, WC23065, WD89101, CA29479, B1, Early B10, HB212, 416H |
Posted By: Sugarmaker
Date Posted: 03 May 2016 at 7:28pm
|
Very nice documentation on your engine build! Thanks for posting the details. Regards, Chris ------------- D17 1958 (NFE), WD45 1954 (NFE), WD 1952 (NFE), WD 1950 (WFE), Allis F-40 forklift, Allis CA, Allis D14, Ford Jubilee, Many IH Cub Cadets, 32 Ford Dump, 65 Comet. |
Posted By: LeonR2013
Date Posted: 06 May 2016 at 7:01am
| Something I do is that on any exhaust and the four on that plate, I use stainless nuts and lock washers. They don't rust in place as bad, which can give you headache. Leon R Cmo |
Posted By: DaveKamp
Date Posted: 06 May 2016 at 11:59am
Actually, BOTH gasoline and distillate fuels (kerosene) get exhaust heat... Kerosene, however, gets more, because of two reasons: 1) Kerosene's flashpoint is much higher than gasoline 2) Kerosene's burn temperature us much lower than gasoline Because of the presence of high velocity airflow through the venturi, there is a pressure drop, and commensurate lowering of temperature in the intake manifold. It's a natural result of Combined Gas Law... air is going from ambient pressure and temp, to substantially lower pressure, thus, temperature. The end result is that moisture IN the air becomes frost, and will rapidly fill up the interior of the intake if additional heat isn't added. SINCE distillate fuel's exhaust temp is lower, it takes more heat at the manifold. Go out early in the morning, start her up, and get it up to half throttle and watch what happens to the intake, and you'll immediately understand. The K-model has pathways for more exhaust heat to be directed to the intake, just for these reasons. NOW... Notice that in this manifold, you've got a HOT side of the casting, and a COLD side. IF you EVER have an engine that acts like it has a vacuum leak, but you cannot FIND it by any of the usual tricks, there's a good possibility that the vacuum leak is from the exhaust chamber, through a crack in the casting, to the intake side. It is also not unusual for a leak in this area to be totally variable... like, sealed up tight when the temp is cold, and really leaky when warm, the crack is opening up as the casting warms up. Very few people check this, and understandably so... it's not an easy thing to fix... oftentimes, guys just change the manifold. BTW, awesome thread- great pictures! ------------- Ten Amendments, Ten Commandments, and one Golden Rule solve most every problem. Citrus hand-cleaner with Pumice does the rest. |
Posted By: littlemarv
Date Posted: 13 May 2016 at 9:26am
|
Better than Christmas! Got a present from Rick. Should be everything I need to set the engine into the chassis. Pilot bearing, throwout bearing, clutch disk, and water pump. I already have a pressure plate, and a trans input seal, which is just a piece of cork. I think that's everything I need..... http://s304.photobucket.com/user/rsommer1/media/Mobile%20Uploads/IMG_20160504_210409024_HDR_zpsfbebzrhx.jpg.html" rel="nofollow -  Strung a chain out back for my hoist, http://s304.photobucket.com/user/rsommer1/media/Mobile%20Uploads/IMG_20160513_075917744_zpsa6afahmd.jpg.html" rel="nofollow -  And applied an amount of primer comparable to what was used on the Titanic. Not too worried about looks at this point, just trying to cover up all the bare metal. http://s304.photobucket.com/user/rsommer1/media/Mobile%20Uploads/IMG_20160513_085147130_zps3un6uuq7.jpg.html" rel="nofollow -  http://s304.photobucket.com/user/rsommer1/media/Mobile%20Uploads/IMG_20160513_085204983_zpsr4gyvcwc.jpg.html" rel="nofollow -  Got the manifold primed and painted with high temp paint. http://s304.photobucket.com/user/rsommer1/media/Mobile%20Uploads/IMG_20160511_212032988_HDR_zpsvzqmjakv.jpg.html" rel="nofollow -  I've never installed a manifold on one of these engines. I'm assuming the two gaskets on the left are for a 45 or something, and are not used in my application. How do the gaskets go? My best guess is the paper gasket goes in the metal piece, then that goes on the manifold, and the metal pieces are steel on steel to the head? Made some carb mounting studs.  http://s304.photobucket.com/user/rsommer1/media/Mobile%20Uploads/IMG_20160511_212325121_zpscwjhl3ze.jpg.html" rel="nofollow - http://s304.photobucket.com/user/rsommer1/media/Mobile%20Uploads/IMG_20160511_212325121_zpscwjhl3ze.jpg.html" rel="nofollow -
------------- The mechanic always wins. B91131, WC23065, WD89101, CA29479, B1, Early B10, HB212, 416H |
Posted By: allischalmerguy
Date Posted: 13 May 2016 at 8:09pm
|
Great job! ------------- It is great being a disciple of Jesus! 1950 WD, 1957 D17...retired in Iowa, |
Posted By: Sugarmaker
Date Posted: 13 May 2016 at 8:32pm
|
Marv, That's looking very good! The WC will be up and going soon at this pace and new parts too! Your rounding the corner when you start getting things painted. Regards, Chris ------------- D17 1958 (NFE), WD45 1954 (NFE), WD 1952 (NFE), WD 1950 (WFE), Allis F-40 forklift, Allis CA, Allis D14, Ford Jubilee, Many IH Cub Cadets, 32 Ford Dump, 65 Comet. |
Posted By: Bodnarboy
Date Posted: 20 May 2016 at 12:20pm
|
Hey everybody!! I am ALMOST ready to assemble my WC that was my grandfather's. Got it back in family in Oct. after 30 some years for FREE!! Sad thing was, #2 had bent rod as it appears to have filled with water and I assuming ppl who had it before I got it back tried to tow start and bent the rod terrible!! So..after the Tisco kit and machine shop work on head and turned the crank, I am ready for assembly, you post on here is AMAZING!! I was wondering you mentioned "Videos from Don" Is that on the site here somewhere? PS. crank was turned .030 on mains, .020 on rods, I bought a set of wd45 rods, have all matching bearings, I bought the laminate pack of shims for mains, as I was told the rods won't need them? what is the correct process for installing the shims? Thanks in advance!! Billy Bodnar Denton, Maryland. |
Posted By: Allis dave
Date Posted: 23 May 2016 at 6:18am
|
Bodnarboy, Welcome to the forum and good luck with that motor! The video form Don is the oil pan install video in the knowledgebase section. WC's and WD's originally had shim in the mains and rods. WD45's had no rod shims. You should always check your tolerances with a plastigauge no matter what we tell you. You never know what was done to this motor before you had it. |
Posted By: allischalmerguy
Date Posted: 30 May 2016 at 9:28am
|
Marv, You are such an improvisor! That engine hoist is unreal! Mike ------------- It is great being a disciple of Jesus! 1950 WD, 1957 D17...retired in Iowa, |
Posted By: dawntreader74
Date Posted: 30 May 2016 at 11:24pm
marv'' i thought you would be driving that wc- around the yard by now' i want to see you ride it 
|
Posted By: littlemarv
Date Posted: 31 May 2016 at 2:38pm
|
Yeah, I thought so too. The rest of my life keeps getting in the way. This weekend the tractor rolls in the shed and then I will get more done. The radiator is at the shop and I have to get the mag up to snuff, and clean out a fuel tank, and then it should be just nuts and bolts. (Famous last words). ------------- The mechanic always wins. B91131, WC23065, WD89101, CA29479, B1, Early B10, HB212, 416H |
Posted By: dawntreader74
Date Posted: 31 May 2016 at 9:22pm
| GOOD-LUCK '' i want to see you ride that WC marv' |
Posted By: Bodnarboy
Date Posted: 01 Jun 2016 at 12:09pm
|
I have all my head studs in and oil pump put back together. Anybody know what nuts I need for head studs? I would naturally go grade 8, do I use lock or regular washers? Thanks, Billy |
Posted By: Allis dave
Date Posted: 01 Jun 2016 at 12:45pm
|
The head stud nuts just take a regular grade 8 nut. No washers. Edit - Head bolts should use washers. |
Posted By: Bodnarboy
Date Posted: 02 Jun 2016 at 8:19am
|
Thanks Allis dave!! I did get confused it appeared that littlemerv had washers underneath his bolts in his pictures above. I do have a really important question yet stupid on my part. I am ready to assemble my cam gear back to the camshaft, however, I have zero idea what position it goes on as the 3 holes could allow it to be assembled 3 different ways. I imagine this is a very important step....I bought the WC Service manual but didn't locate any information on it. Thanks Billy Bodnar |
Posted By: littlemarv
Date Posted: 02 Jun 2016 at 3:57pm
|
It appears that I have washers under the nuts because I DO have washers under the nuts. Page 4 of the WC parts and operating instructions book. Item number 32, quantity 12. Take a close look at those three holes on the cam and gear. They should only line up one way. ------------- The mechanic always wins. B91131, WC23065, WD89101, CA29479, B1, Early B10, HB212, 416H |
Posted By: Bodnarboy
Date Posted: 02 Jun 2016 at 5:18pm
|
Littlemarv, I apologize for spelling your name wrong in last post! You truly are a life saver! I have come a long way on my build thus far and don't want to fail now. I will definitely take a close look tonight after supper :-) Your post has been a huge help! Thank you Billy |
Posted By: WDDave
Date Posted: 02 Jun 2016 at 7:55pm
|
New to the forum, Great job littlemarv with your rebuld, I will get there one day. I wanted to ask DaveKamp if there are any fixes for a crack between the intake and exaust port as he described other than head replacement? I will know better when I get 1/2" of grease scrapped off but I think I have a crack in that area. I have a 1950 WD with 4" tall head. |
Posted By: Bodnarboy
Date Posted: 02 Jun 2016 at 8:29pm
|
Littlemarv, Took that second look and lined up like a charm! Thanks a MILLION! Billy |
Posted By: Sugarmaker
Date Posted: 02 Jun 2016 at 9:06pm
|
Littlemarv, You have a WD group following you! Welcome Forum newcomers, sounds like your lost in the 50's like me! (With 7 tractors from the 50's) Regards, Chris ------------- D17 1958 (NFE), WD45 1954 (NFE), WD 1952 (NFE), WD 1950 (WFE), Allis F-40 forklift, Allis CA, Allis D14, Ford Jubilee, Many IH Cub Cadets, 32 Ford Dump, 65 Comet. |
Posted By: littlemarv
Date Posted: 04 Jun 2016 at 1:01am
|
The pilot bearing fit pretty easily, so I staked the bore a little with a center punch. That, and a little green Loctite should take care of it. http://s304.photobucket.com/user/rsommer1/media/Mobile%20Uploads/IMG_20160603_223557856_HDR_zpsc4e67uon.jpg.html" rel="nofollow -  Torqued the flywheel on, and marked the two "F" marks, and the TDC one that lines up with the setscrew on the front pulley. Not sure if I will need them or not, but they are easier to see. http://s304.photobucket.com/user/rsommer1/media/Mobile%20Uploads/IMG_20160603_230722946_HDR_zps5jezbpzm.jpg.html" rel="nofollow -  Lined up the disk and bolted the pressure plate on. http://s304.photobucket.com/user/rsommer1/media/Mobile%20Uploads/IMG_20160603_231139664_zpsw6uw4rxm.jpg.html" rel="nofollow -  http://s304.photobucket.com/user/rsommer1/media/Mobile%20Uploads/IMG_20160603_232117562_zps9wi0bjko.jpg.html" rel="nofollow -  Got the manifold on as well. Made my own studs. The short ones are from a 3406 Cat, and the two long ones are from Fastenal. Also got some thick 3/8" washers, and two 7/16" washers for the center two studs. http://s304.photobucket.com/user/rsommer1/media/Mobile%20Uploads/IMG_20160517_174454375_zpsr7ipzyfv.jpg.html" rel="nofollow -  http://s304.photobucket.com/user/rsommer1/media/Mobile%20Uploads/IMG_20160603_235000396_zpsajwyc88b.jpg.html" rel="nofollow -  ------------- The mechanic always wins. B91131, WC23065, WD89101, CA29479, B1, Early B10, HB212, 416H |
Posted By: Bodnarboy
Date Posted: 08 Jun 2016 at 8:31am
|
Hey guys.....I made rookie boo boo and trimmed my rear main felt seal BEFOFRE I watched Don's video. New one be here tomorrow..Question for Littlemarv..I would like to use a sealed pilot bearing like yourself as it appears there was a lot of leakage judging by the inside of my clutch housing. Was it a direct fit? and if you don't mind what is there any special procedure for plugging the crank with the cork? I greatly appreciate all of your help thus far. I plastigauged my crank and the shim kit from Sandy Lake worked great. I have water jacket and rocker assembly installed. Your post has been a lifesaver!! Billy |
Posted By: littlemarv
Date Posted: 08 Jun 2016 at 12:47pm
|
To plug the crank I picked up some tapered corks from the local hardware store. Dug out as much of the wick as I could reach with a small pick. I put one cork in the front side, and think I actually drove two in from the back. The pilot bearing almost slid in by hand, so I took a center punch, and staked or peened the bore where the bearing goes. That raises little metal to hold the bearing in. Make sure the end of the input shaft fits into the bearing before installation. ------------- The mechanic always wins. B91131, WC23065, WD89101, CA29479, B1, Early B10, HB212, 416H |
Posted By: trackicker
Date Posted: 18 Jul 2016 at 4:30pm
|
Hello, I'm a new-be to this site. Enjoying this engine build. I have an H3 crawler with a 149cu I'm overhauling and wondering if anyone has some technical specs or at least experience with the block deck height. First, I have no idea if the block was surfaced in the past. It was warped .005, I knew someone with a mill and though I was ahead of the game expense wise...but it came back to bit me. It's unclear how much was taken off and will take a bit more to get squared up again. So now I'm wondering how much can be taken off before it becomes a problem, I don't want to end up needing av-gas to run thing.  any 2 cents is welcome... |
Posted By: SteveM C/IL
Date Posted: 27 Jul 2016 at 12:51pm
| I would say the compression increase would be negligible.You will likely find the counter bores are not square will the deck now(deeper on one side). |
Posted By: Skyhighballoon(MO)
Date Posted: 27 Jul 2016 at 1:37pm
Welcome! If you want to get some additional answers to your question, please go create a new post in the "Farm Equipment" section and ask the exact same question (even though this is a crawler - same engine as some tractors) - you will get far more responses. Posting this question in someone else's post is not considered good form. This particular post is here in the knowledge base to help others doing an identical engine and the original poster is updating his progress as he goes along. Interjecting your question in the middle breaks the flow of his rebuild story. Good luck. Mike ------------- 1981 Gleaner F2 Corn Plus w 13' flex 1968 Gleaner EIII w 10' & 330 1969 180 gas 1965 D17 S-IV gas 1963 D17 S-III gas 1956 WD45 gas NF PS 1956 All-Crop 66 Big Bin 303 wire baler, 716H, 712H mowers |
Posted By: littlemarv
Date Posted: 12 Aug 2016 at 9:49pm
|
Well, I had a fellow I work with rebuild the mag for me. I meant for him to show me how, but the two of us are so busy we could never find an hour to set down and go through the dang thing. He has all the parts in stock and rebuilds them regularly. So, got the set screw on the crank straight down, pointed the rotor at the plastic tab, and bolted it up. Had to modify the gasket, as it didn't have a hole for the locating pin. http://s1380.photobucket.com/user/rsommer11/media/Mobile%20Uploads/IMG_20160812_155855533_zps01vgi6px.jpg.html" rel="nofollow"> 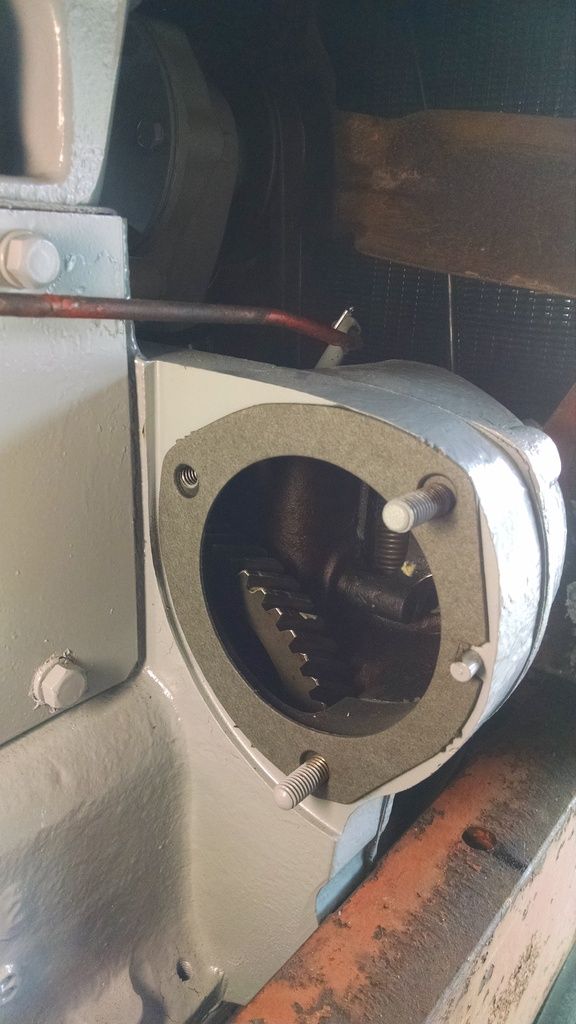 Got a universal wire set from Fleet, and some Autolite 295s. http://s1380.photobucket.com/user/rsommer11/media/Mobile%20Uploads/IMG_20160812_162237590_zpsmqef9gwc.jpg.html" rel="nofollow"> 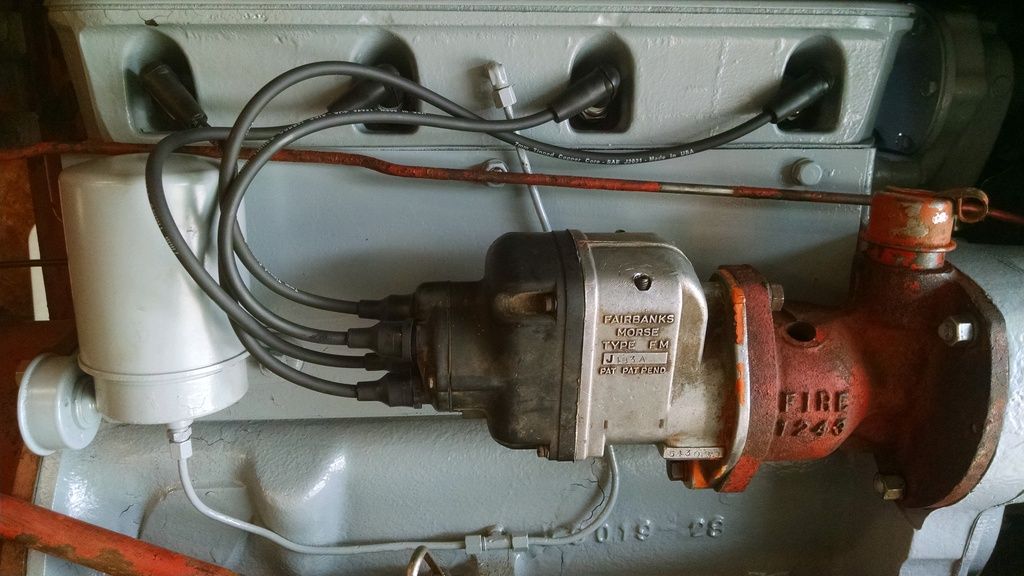 Dumped in 5 quarts of 10w-30 and a bottle of zinc, http://s1380.photobucket.com/user/rsommer11/media/Mobile%20Uploads/IMG_20160812_164855599_zpsy2edjmtp.jpg.html" rel="nofollow"> 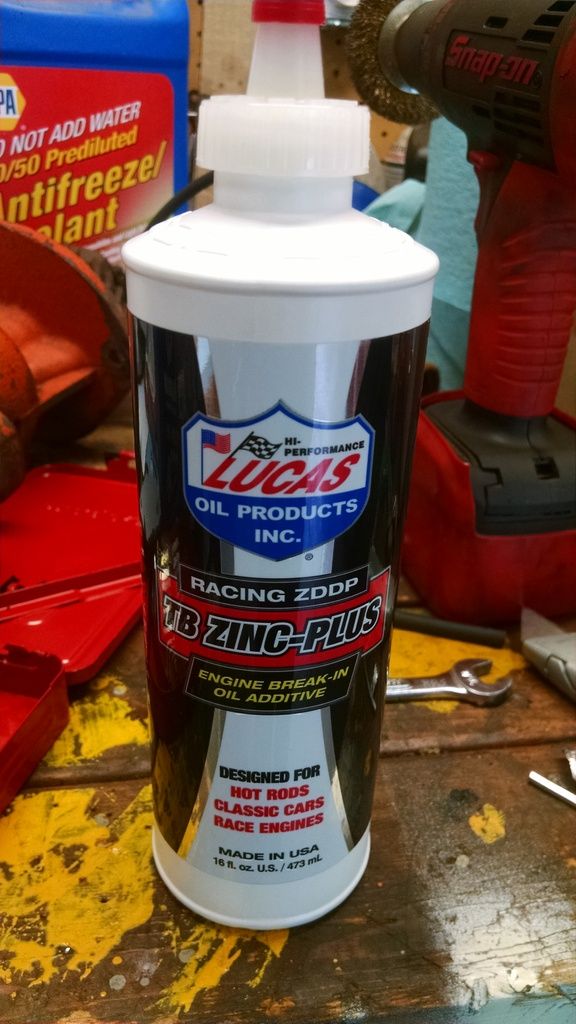 I plan on running 15-40 in this motor, but figured I'd run 10w-30 for a break in oil. Filled the radiator, and the air cleaner cup, dumped a few gallons of non ethanol in the tank. Checked the tranny oil as well. Hooked up a mechanical gauge just to be sure on the oil pressure. http://s1380.photobucket.com/user/rsommer11/media/Mobile%20Uploads/IMG_20160812_164909809_HDR_zps8wad8225.jpg.html" rel="nofollow"> 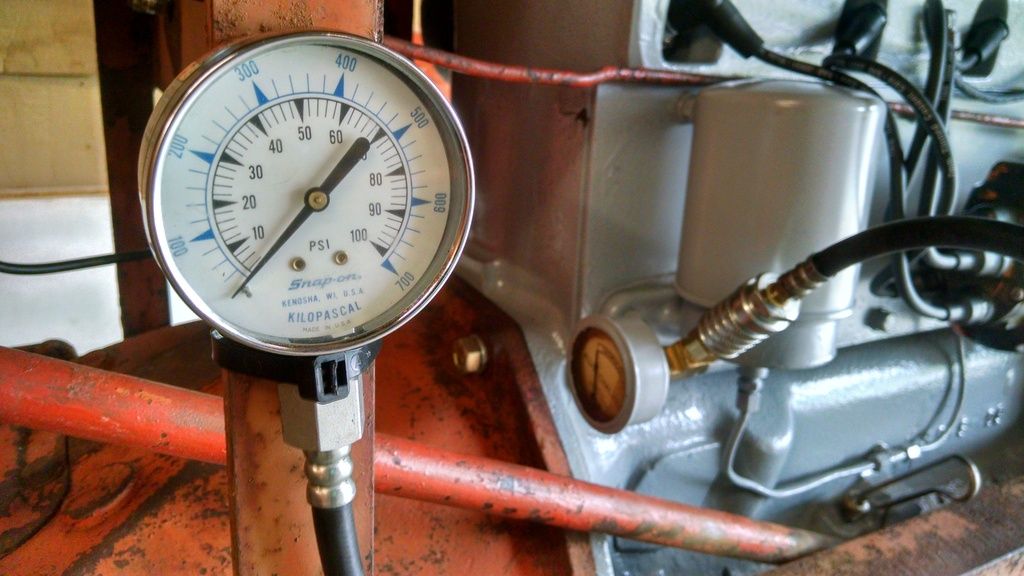 And cranked her over. Actually started pretty good, I think. I shot a video of it running, but I'll be danged if I can get it to upload. It has about 12 psi oil pressure, might add a shim to try and bring that up. Coolant temp at the water manifold seemed to settle in to 150 degrees. Of course, I hopped on and took it for a spin up the street quick. All gears seem good. I loosened the mag, and moved it back and forth. It seems to run the best when I pull the top of the mag away from the block, like this. http://s1380.photobucket.com/user/rsommer11/media/Mobile%20Uploads/IMG_20160812_184804477_zpswekpibvj.jpg.html" rel="nofollow"> 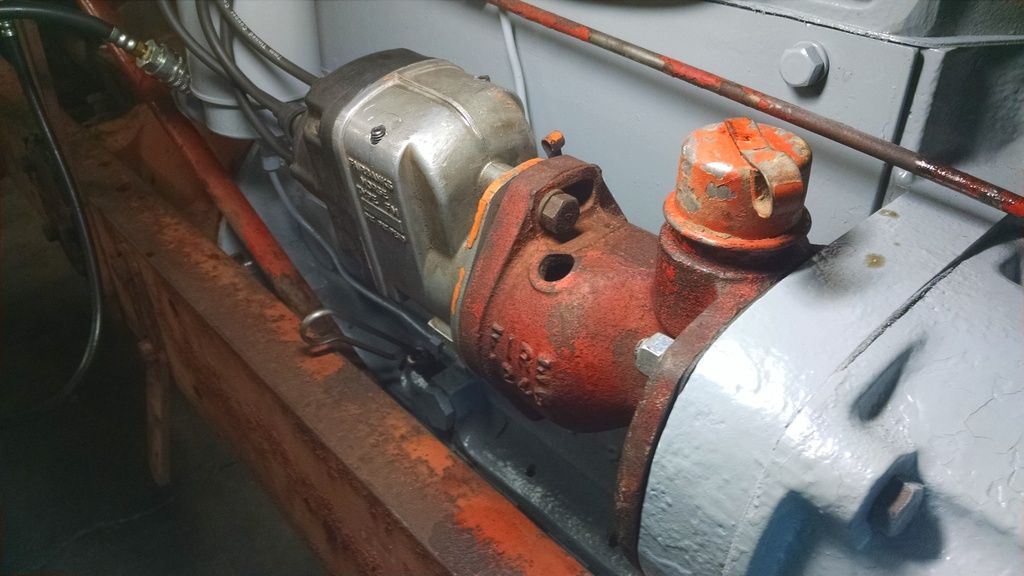 Now the bad news. There is oil leaking out of the governor shaft. I knew this was egged out, but didn't think there was that much oil up there, Apparently the governor and gear train must fling it around in there pretty good. Can a guy drill that out and bush it or something? http://s1380.photobucket.com/user/rsommer11/media/Mobile%20Uploads/IMG_20160812_184842665_HDR_zps2gft4odd.jpg.html" rel="nofollow"> 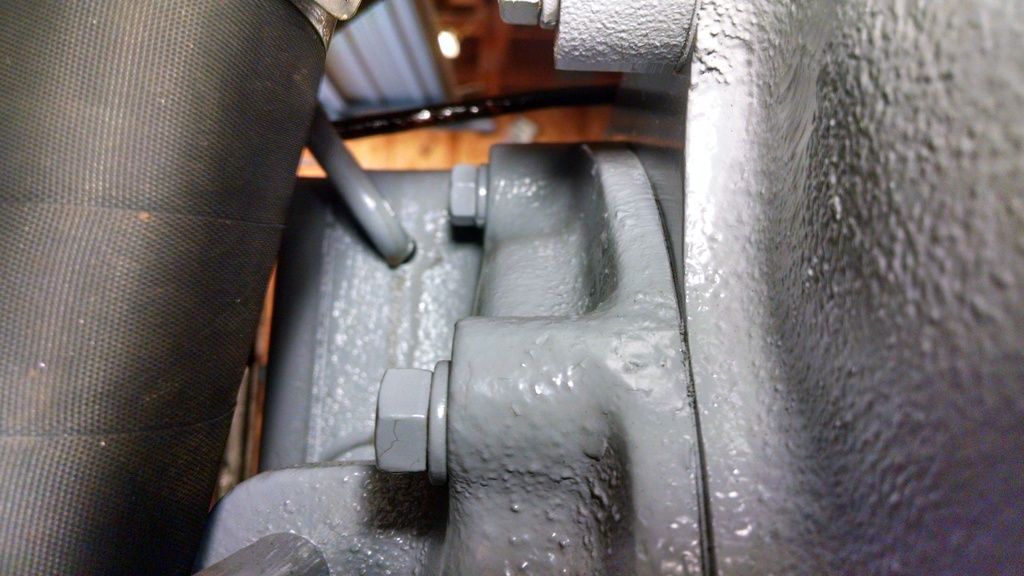 More to come.... thanks for looking! ------------- The mechanic always wins. B91131, WC23065, WD89101, CA29479, B1, Early B10, HB212, 416H |
Posted By: allischalmerguy
Date Posted: 12 Aug 2016 at 10:03pm
|
Way to go! ------------- It is great being a disciple of Jesus! 1950 WD, 1957 D17...retired in Iowa, |
Posted By: BenGiBoy
Date Posted: 13 Aug 2016 at 3:24pm
|
Hip Hip Hip Hooray!!! She's running!! Hope that the oil leaking around the governor shaft is an easy fix.... (Famous last words, but I still hope that....) ------------- '39 Model B Tractors are cheaper than girls, remember that! |
Posted By: TomMN
Date Posted: 15 Aug 2016 at 9:21am
|
Great pictures! To get your mag to be vertical when timed correctly the mag drive slot needs to be horizontal when at TDC.  If you point the rotor at the tab for one that is when it will fire while running and will be 30 degrees before TDC. I would mount the governor with mag drive first then put the mag on it, with the mag at horizontal you will see the rotor is a bit after the timing tab in the cap. |
Posted By: TomMN
Date Posted: 15 Aug 2016 at 9:25am
On that oil leak, since there is no seal there they will all leak there. The front of these engines all would be very caked with oiled grime there. Factory designed flush system. 
|
Posted By: littlemarv
Date Posted: 15 Aug 2016 at 11:54am
|
Thanks Tom. I will try retiming the mag because that bothers me that it runs the best when pulled all the way out. Makes me wonder if it would run better if I could move it more.... I may even start it, and remove the two bolts and turn the mag past the slots to see if it gets any better. It starts good, and I think it runs good, but I just wonder if it couldn't be better. I have to do something on that governor shaft. The fan is blowing the oil onto the rear fenders. I have a nice thick square cut rubber grommet that I may slip on there to at least slow it down. Has anyone ever heard of using newer spark plug wires causing problems because the spark actually gets to the plug faster, which actually advances your timing? Because when you pull out on the top of the mag you are retarding it, no? ------------- The mechanic always wins. B91131, WC23065, WD89101, CA29479, B1, Early B10, HB212, 416H |
Posted By: TomMN
Date Posted: 15 Aug 2016 at 4:27pm
|
The only way to fix the timing is to move the governor gear. You'll need to pull that out again and get the drive slot horizontal when your pulley set screw is pointing at the floor or at the ceiling. It seems odd that there would be so much oil coming out from that small shaft that it would make a mess anywhere but the front of the engine. |
Posted By: Don(MO)
Date Posted: 15 Aug 2016 at 5:52pm
|
I use wire core spark plug wires on all mags. ------------- 3 WD45's with power steering,G,D15 fork lift,D19, W-Speed Patrol, "A" Gleaner with a 330 corn head,"66" combine,roto-baler, and lots of Snap Coupler implements to make them work for their keep. |
Posted By: Allis dave
Date Posted: 15 Aug 2016 at 8:23pm
| Way to go Marv! There's nothing like hearing your engine run for the first time. Hope you can get the oil leak fixed. I never saw one leak like that. The WD45's even had an oil line dumping oil on top the gear and they didn't leak that much, |
Posted By: littlemarv
Date Posted: 31 Aug 2016 at 11:12pm
|
O.K., finally got some time to mess with the video of the engine running. I created a youtube account and up loaded it there. So lets try this- https://youtu.be/Kx8D3ydmMsg" rel="nofollow - https://youtu.be/Kx8D3ydmMsg I will try and make a better video when I get some free time. ------------- The mechanic always wins. B91131, WC23065, WD89101, CA29479, B1, Early B10, HB212, 416H |
Posted By: DaveKamp
Date Posted: 15 Sep 2016 at 8:16am
|
Sounds excellent- it's hitting very evenly on every cylinder. Now, it could be the audio quality, could be sound level... and it could be that it's just still breaking in... but it sounds like it's laboring a bit. How much advance is it indicating now when running? ------------- Ten Amendments, Ten Commandments, and one Golden Rule solve most every problem. Citrus hand-cleaner with Pumice does the rest. |
Posted By: littlemarv
Date Posted: 15 Sep 2016 at 6:27pm
|
That video was shot like 10 seconds after the initial startup. I had the mag in centered in the slot. Since then I moved the mag all the way out and it does sound much better. I tried to retime it the way Tom said above, but didn't seem to make a difference. I still have to have it out all the way to run its best. But yes, you are correct. If you move the mag back, it does sound like it's laboring. ------------- The mechanic always wins. B91131, WC23065, WD89101, CA29479, B1, Early B10, HB212, 416H |
Posted By: DaveKamp
Date Posted: 18 Sep 2016 at 6:33am
|
Using resistance plugs have an immeasurable effect on ignition timing. what they Do affect, is mag coil inter winding voltage. When resistance wire or plugs are in a mag circuit, the voltage which appears in the mag coil is substantially higher. it's very hard on the coil insulation. the reason for resistance wires or plugs, is to suppress harmonics... dining between the plug gap and ignition coil of a battery-coil system. when a high tension coil arcs across a gap, the magnetic field of the coil collapses rapidly, and it tends to ring like striking a bell. this running causes incredible radio interference, which doesn't play well with radio receivers, computers, and other electronics. ------------- Ten Amendments, Ten Commandments, and one Golden Rule solve most every problem. Citrus hand-cleaner with Pumice does the rest. |
Posted By: littlemarv
Date Posted: 22 Aug 2017 at 9:57pm
|
I am going to fix the pictures in this post as time allows. ------------- The mechanic always wins. B91131, WC23065, WD89101, CA29479, B1, Early B10, HB212, 416H |
Posted By: ihscout
Date Posted: 15 Dec 2018 at 2:23pm
|
Sorry to slip into your subject matter here but for some reason they won't let me start a new topic. I'm rebuilding the 125 cubic inch engine in my 1940 B tracker anybody got ideas as to the best and cheapest rebuild kit ------------- '40 AC B - My Pappy always told me "Use your head for something other than a tack hammer!" I did. It makes a great 16 pound sledge hammer. |
Posted By: WF owner
Date Posted: 15 Dec 2018 at 3:46pm
|
It depends on what you need. I found a set of sleeves. pistons, rings and O rings at a real good price. After I bought a gasket set, main bearings, rod bearings and cam bearings, I had more money in it than if I had bought a complete kit.
After I took the head to the machine shop, I found out I needed a complete valve set. Now I'm way over what I could have bought a kit for. |