My 1927 Allis 20-35
Printed From: Unofficial Allis
Category: Allis Chalmers
Forum Name: Farm Equipment
Forum Description: everything about Allis-Chalmers farm equipment
URL: https://www.allischalmers.com/forum/forum_posts.asp?TID=109121
Printed Date: 20 Mar 2026 at 8:04pm
Software Version: Web Wiz Forums 11.10 - http://www.webwizforums.com
Topic: My 1927 Allis 20-35
Posted By: Jacob (WI,ND)
Subject: My 1927 Allis 20-35
Date Posted: 17 Jul 2015 at 8:18pm
|
Hi all! I have some great news, I finally found myself a 20-35. I've been looking for one of these for a few years now, and finally came across one that was in my price range, the condition was what I was looking for (a project), and location and timing worked out! It is a 1927. serial number 8861. Engine number 33554. It was delivered last Thursday when I made a trip back home to be there for the big day. I got to spend three good days with Dad assessing the condition of everything and starting to fix a few things that need attention. Here are a bunch of pics and a couple of videos: https://photos.google.com/share/AF1QipMw-W2_yghlqdtaQTxKWwnjA2jQPZ4rec8kTtiRGnDvSvFkHie9t4jmlkD6DbqUew?key=b1kyNl92RG81NVRZeDZ0OHNpYWxYTFNsb0JxVzB3" rel="nofollow - https://photos.google.com/share/AF1QipMw-W2_yghlqdtaQTxKWwnjA2jQPZ4rec8kTtiRGnDvSvFkHie9t4jmlkD6DbqUew?key=b1kyNl92RG81NVRZeDZ0OHNpYWxYTFNsb0JxVzB3 It will need a lot of work, but so far I am very happy with it, and it shows much potential for being restored. For the record, this one will be left in its original paint/patina for the foreseeable future. I have no interest in painting over that history, they are only original once... So far we have taken apart the front wheels to get some bearing numbers. The bearings on the right side were robbed at some point, so we got some new ones ordered. Still having a hard time tracking down the dust cover on the outside of the bearing by the felt seal if anyone knows a source for this or has an original one for sale? We took apart the steering box and got that all cleaned up. Everything looks very good, there is basically NO wear on the parts. The only thing we will have to do is drill and put a oversize pin in the worm gear to steering shaft joint, that one is a little loose and worn. Still have to get the drag link ends apart, they are stuck GOOD! I'm wondering if they have ever even been apart? If you note the front axle pivot is different than normal, I'm guessing this is custom? But it seems I read somewhere that a few other people have this type of hook on the front of the old AC tractors, did I read this here at one time? Pulled the transmission cover off and drained the goo that was in there out (took over a day). Dumped some diesel in there and started to clean things up, it's gonna take a while. So far what I can see looks good. It shifts beautifully and nothing growled or made any bad noises as we drug it to the barn. Engine needs a lot of work, but we haven't gotten to that yet. One piston is missing. One head is missing all the valve train as well. Took the governor and water pump off. The water pump is needing work. The shaft and impeller are shot, and were not even pinned to each other anymore. We are speculating that this may have been why the tractor was parked back in the day. Overheating issues? The governor spins nice and the linkages work free, but we haven't gotten it taken apart yet. This will be a long term project, but I wanted to show you all what I have been up to. I'll keep you updated on this post. Thanks, and any comments and suggestions are welcome, as I'm still learning about these big guys! I can tell you this though, I'm in love!  ------------- Jacob Swanson 1920 6-12; 1925,1926 20-35 longfenders; 1925,1926 15-25's; 1927,1929 20-35 shortfenders; C; B's; IB; WC's; WD; WD45 |
Replies:
Posted By: Butch(OH)
Date Posted: 17 Jul 2015 at 8:27pm
|
You will know that tractor inside and out when your done, Great project! Lots of knowledge on the forum for that model so guidance is close at hand. Good luck |
Posted By: Jacob (WI,ND)
Date Posted: 17 Jul 2015 at 8:36pm
I'll start a list of things I'm looking for here too. I have some leads on some of these things, but if you have any of this stuff for sale, PM or Email (in my info) me and we'll talk  I'll update this as I collect the parts, so if it's still listed here, chances are I'm still looking, Thanks! -Hood -One hood strap -Upper water manifold (that connects to the heads) -Magneto (Eisemann G4 is I believe what is needed, anticlockwise rotation I am told) -Magneto and Carb control quadrant and linkages (I think I have just one of the linkages) -Radiator shroud -All the valve parts and valve train for one head (assuming my head checks out ok to rebuild) -Oil gauge -One front hub cap (the one with three mounting holes) -inner bearing dust shield next to the felt washer -the wire piece that holds the radiator cap closed -two engine side covers -drawbar (We'll probably just make this) -toolbox -the pipe for the air cleaner -One piston (and who knows what else once we get into the engine?) -Sleeves I'll add to this as I discover more things I need. Thanks! ------------- Jacob Swanson 1920 6-12; 1925,1926 20-35 longfenders; 1925,1926 15-25's; 1927,1929 20-35 shortfenders; C; B's; IB; WC's; WD; WD45 |
Posted By: LAG
Date Posted: 17 Jul 2015 at 9:18pm
|
Jacob,
Congrats on your purchase. I have a '28 20-35 and just love it.
There's a pair of front hub caps for the 20-35 on e-bay right now. $55 or offer for the pair. They look good. I don't have the item number, but just search " allis-chalmers 20-35" and they'll pop up.
Les. ------------- '39 B,'28 20-35,'63 B-10, '85 920(diesel), Spoker D,Nickel D, AOS, GP, BR 2- 10-20 Titans, and brass era cars |
Posted By: Jacob (WI,ND)
Date Posted: 17 Jul 2015 at 9:42pm
|
Here is a little walk around video I did after I got it. http://www.youtube.com/watch?v=cpwGZAZvlFo" rel="nofollow - http://www.youtube.com/watch?v=cpwGZAZvlFo ------------- Jacob Swanson 1920 6-12; 1925,1926 20-35 longfenders; 1925,1926 15-25's; 1927,1929 20-35 shortfenders; C; B's; IB; WC's; WD; WD45 |
Posted By: TedBuiskerN.IL.
Date Posted: 17 Jul 2015 at 9:47pm
|
Norm Meinert can help you with many of the engine parts. I know he has valves, sleeves and pistons and manifolds. 815-238-4506 ------------- Most problems can be solved with the proper application of high explosives. |
Posted By: Gary(WI)
Date Posted: 18 Jul 2015 at 8:31am
| Should have water manifold,hub cap, and the engine side covers. If interested give me a call Gary 920 two five three 8192 |
Posted By: Alberta Phil
Date Posted: 18 Jul 2015 at 9:53am
|
You have a great project there! It has all the bits that are usually missing, especially the original air cleaner assembly. Congratulations on your find. I have a few of these tractors. I noticed that one head has been replaced. You have one original with the priming cups on it and a later one without them. I have a parts '27 here and may have one of the original heads left. I have quite a few 20-35 parts also. Norm Meinert is the source for many new replacement parts and also repairs on some parts. |
Posted By: K.Novak
Date Posted: 22 Jul 2015 at 12:31am
|
Let the fun and games begin!!!! ------------- 1934 WC SN# 2123,Factory WFE 1935 25-40 SN# 25557, TS 1938 WF SN# 506, Full Steel 1967 I400 SN# 1302 |
Posted By: Pat the Plumber CIL
Date Posted: 22 Jul 2015 at 7:01am
|
What are you going to name it ? ------------- You only need to know 3 things to be a plumber;Crap rolls down hill,Hot is on the left and Don't bite your fingernails 1964 D-17 SIV 3 Pt.WF,1964 D-15 Ser II 3pt.WF ,1960 D-17 SI NF,1956 WD 45 WF. |
Posted By: K.Novak
Date Posted: 22 Jul 2015 at 3:40pm
Looks like you're running out of names as your collection grows!  ------------- 1934 WC SN# 2123,Factory WFE 1935 25-40 SN# 25557, TS 1938 WF SN# 506, Full Steel 1967 I400 SN# 1302 |
 Pat the Plumber CIL wrote:
Posted By: Jacob (WI,ND)
Date Posted: 22 Jul 2015 at 8:19pm
Ha! No, not run out, only the special ones get names. We've started to affectionately refer to him as Big Al though, I think its gonna stick...  ------------- Jacob Swanson 1920 6-12; 1925,1926 20-35 longfenders; 1925,1926 15-25's; 1927,1929 20-35 shortfenders; C; B's; IB; WC's; WD; WD45 |
Posted By: Jacob (WI,ND)
Date Posted: 25 Jul 2015 at 6:22pm
|
Hi all, I wanted to thank you all for the info and support and PM's so far, I've been checking out some parts with some of you, and haven't gotten around to contacting others yet, but I will. Wanted to give you an update and ask some more questions. I've also uploaded a few more pages of pictures on my Google Photos account for those that care to check them out (link in first post). I've disassembled the oil filter and cleaned it all up and put it back together. But I have some questions. This was not on the tractor when I got it, it just came with the tractor. First of all, in looking at other pics on the internet, my oil filter is different than most you see. There is no bolt running down through the center of the canister in mine, rather there are two bolts and a hand knob on the outside that clamp the canister down to the housing. Is this even the correct oil filter? It has original green paint on it, so I assume it is? It is a purOlator type B. I understand that the top hole mounts to the valve lifter cover nut, but how does it mount to the tractor on the bottom? Is there a part missing? And what is the "horseshoe" cutout on the bottom mounting plate for? I've also started to disassemble the carb. I haven't gotten it all apart yet, but so far things look decent. The one tube has a crack along the side of it, there is a picture of it. But other than that I haven't found anything broken.
------------- Jacob Swanson 1920 6-12; 1925,1926 20-35 longfenders; 1925,1926 15-25's; 1927,1929 20-35 shortfenders; C; B's; IB; WC's; WD; WD45 |
Posted By: Jacob (WI,ND)
Date Posted: 31 Jul 2015 at 6:03pm
|
Hi all, Today was a good day! I got to spend a good chunk of my time calling fellow AC collectors and parts suppliers tracking down the things I need. I have to say, there is a great bunch of people here! I don't have any parts in my hand yet, but I have coordinated to get a good bunch of them at Turtle Lake WI GOTO in a couple of weeks. I also have a bunch of guys "checking out what they have" that are going to get back to me soon.  As of right now, there are just a few things that I haven't been able to track down. So if you have any of the following, please let me know, Thanks! -Control quadrant for the magneto and carb. I believe it should look like this one: http://www.smokstak.com/forum/attachment.php?attachmentid=164932&d=1368146887" rel="nofollow - http://www.smokstak.com/forum/attachment.php?attachmentid=164932&d=1368146887 -An original Hood -A magneto, Eisman G4 anticlockwise rotation But most of the other things I think I have taken care of. If anyone can come up with a pic or info on how my particular oil filter mounts on the bottom, I would appreciate it, that search has been lacking so far... Thanks all for the support and help!
------------- Jacob Swanson 1920 6-12; 1925,1926 20-35 longfenders; 1925,1926 15-25's; 1927,1929 20-35 shortfenders; C; B's; IB; WC's; WD; WD45 |
Posted By: Dan73
Date Posted: 31 Jul 2015 at 8:27pm
| Wow really nice project you have there. It is really great to see these old girls come back to life. Great find!!! |
Posted By: WDman1951
Date Posted: 31 Jul 2015 at 8:32pm
| Your from nd Jacob what part? |
Posted By: Jacob (WI,ND)
Date Posted: 31 Jul 2015 at 9:28pm
I'm in Kenmare, ND  <---------- ------------- Jacob Swanson 1920 6-12; 1925,1926 20-35 longfenders; 1925,1926 15-25's; 1927,1929 20-35 shortfenders; C; B's; IB; WC's; WD; WD45 |
Posted By: Jacob (WI,ND)
Date Posted: 21 Aug 2015 at 4:02pm
|
Hi all, Just thought I'd give you an update on my progress on my 20-35. I got to head home before the GOTO in Turtle Lake and spend a few days working on disassembling the engine. Dad and I got the entire block out of the tractor and stripped down except for the pistons and sleeves. Every part of this tractor is HEAVY! LOL! I posted a bunch more pics in my Google Photos if anyone is interested in checking them out. https://photos.google.com/share/AF1QipMw-W2_yghlqdtaQTxKWwnjA2jQPZ4rec8kTtiRGnDvSvFkHie9t4jmlkD6DbqUew?key=b1kyNl92RG81NVRZeDZ0OHNpYWxYTFNsb0JxVzB3" rel="nofollow - https://photos.google.com/share/AF1QipMw-W2_yghlqdtaQTxKWwnjA2jQPZ4rec8kTtiRGnDvSvFkHie9t4jmlkD6DbqUew?key=b1kyNl92RG81NVRZeDZ0OHNpYWxYTFNsb0JxVzB3 We also got the radiator flushed out the first go around, I will end up taking the top and bottom tanks off and cleaning everything out well, because there was a whole mess of mouse nests that came out, ick.... Got the hand crank handle off the radiator bottom tank so the spinner could be freed up. Now we need to straighten it a bit and get the spinner welded up (broken). Got one of the pins of the break band out, and still working on getting the other two out so we can get the break all free and working as it should. Removed the oil pump from the oil pan, still need to free that up as it is stuck tight. Discovered that the oil pan, and the bottom cover on the pan were both cracked. But I got a replacement for both at the GOTO. I also picked up a fan shroud, a set of 5" pistons (plan to bore out my original 4 3/4" sleeves), and one connecting rod, also the water manifold, some valve train parts, and hood strap that I was missing. I got all of this from Matt Scott, so if you are ever looking for parts, ask Matt, he is a good guy to deal with! Thanks Matt! Gary also brought me the wire piece that holds the radiator cap shut, thanks Gary! I also bought me a slew of parts and gaskets from Norm, so I have actually rounded up the vast majority of the things I have been looking for so far. I'm still on the hunt for the throttle quadrant that I mentioned in an earlier post (with pic). And some valve train parts. And a magneto. I believe that I have solved the oil filter mystery, as it bolts up perfectly to the manifold bolts, and I found an ad that has a drawing of this type of filter. I also talked with a guy at the GOTO that says he has seen a couple of other tractors with this type of filter on them as well. Got to meet and talk with a bunch of new people at the show, several of them are on the forum here. I actually spent more time talking than looking at tractors I think! Lots of good headway was made, but there is still a long road ahead of me, thanks for all of the support so far!
------------- Jacob Swanson 1920 6-12; 1925,1926 20-35 longfenders; 1925,1926 15-25's; 1927,1929 20-35 shortfenders; C; B's; IB; WC's; WD; WD45 |
Posted By: littlemarv
Date Posted: 22 Aug 2015 at 6:04am
|
So far, so good! Keep going! ------------- The mechanic always wins. B91131, WC23065, WD89101, CA29479, B1, Early B10, HB212, 416H |
Posted By: ryanschott
Date Posted: 22 Aug 2015 at 8:22pm
| i have a model u with a continental motor that looks in the same shape but i dont have sleeves and that one looks the same my question is how did you get the pistons out i have been trying for ever even soaked them in everything. i have been pounding and beating and everything and cant get them out. |
Posted By: Jacob (WI,ND)
Date Posted: 22 Aug 2015 at 8:42pm
Well Ryan, I have actually not gotten the pistons out yet. This engine has removable sleeves like the smaller AC's do. So we are going to remove the sleeves with the pistons stuck in them from the block, then put them in the press to get them out. The only reason we didn't get the sleeves out of the block is they are stuck in there good! We beat on them with a big chunk of hardwood and a sledgehammer and they didn't budge, so we are going to press them out of the block. The kicker is, we didn't have a press to do this. So we set out to build one! We've been collecting "parts" (chunks of iron, etc....) to build one for years, but hadn't gotten around to it. So this was a good excuse to finally put the press together. We have it 98% done, just have to do the final little details, then we can use it. I would imagine this would be a good option for you, to press them out. I have heard guys using a chunk of chain around the block and a porta power with some ingenuity and press them out that way. This might be an option for you too? I have no experience with the Continentals, but think this would work. Be sure to start a post with your project if you haven't already, I love to see how others are progressing on there projects, it keeps me motivated to work on mine! Plus I like the U's and like seeing more info on them ------------- Jacob Swanson 1920 6-12; 1925,1926 20-35 longfenders; 1925,1926 15-25's; 1927,1929 20-35 shortfenders; C; B's; IB; WC's; WD; WD45 |
Posted By: ryanschott
Date Posted: 22 Aug 2015 at 8:52pm
| sorry the one pic looked like the pistons were missing. i need to take some more pics and update my progress even though it has been slow. i was thinking of cutting the piston down the side since i broken the top off one and see if i can somehow break the piston and then it should come out easy i just cant wreck the cylinder walls |
Posted By: Jacob (WI,ND)
Date Posted: 22 Aug 2015 at 9:09pm
Well, you are partially right. One of my four pistons is out. It was that way when I got it. Someone must have robbed some parts off of this tractor in a past life unfortunately. I'd say some type of press or hydraulic jack setup would be best. Applying consistent even pressure is best in situations like this. You can beat on something all day and not have it move, but apply the even pressure in the correct place and it will come right apart (or go right together). That's why machinists use presses and not sledgehammers, right? "Work smarter, not harder" comes to mind------------- Jacob Swanson 1920 6-12; 1925,1926 20-35 longfenders; 1925,1926 15-25's; 1927,1929 20-35 shortfenders; C; B's; IB; WC's; WD; WD45 |
Posted By: Jacob (WI,ND)
Date Posted: 22 Aug 2015 at 9:18pm
|
As long as we are talking working smarter and not harder, does anyone have any tips or tricks on how to get the lifters out of my block? They are all stuck. This engine has been without ANY oil in it for what we can only presume is many many years. We keep soaking them in oil, but I'm not sure how the best way to free them up to get them out and clean them up is? With the cam in the way getting a good shot to punch them out from the bottom is hard. And the cam can not come out until the lifters are freed up, it's a catch 22. Anyone been here and done that? ------------- Jacob Swanson 1920 6-12; 1925,1926 20-35 longfenders; 1925,1926 15-25's; 1927,1929 20-35 shortfenders; C; B's; IB; WC's; WD; WD45 |
Posted By: SHAMELESS
Date Posted: 23 Aug 2015 at 4:21am
| that's an excellent project for you....especially when you can do it with your DAD! enjoy! and keep the pics coming! |
Posted By: Jacob (WI,ND)
Date Posted: 23 Aug 2015 at 5:16pm
|
You're exactly right Shameless, working on this with Dad is making the project even more special for me. I just talked with him, he just about has the press done, just has to round up one more plate for the bottom of the jack, then we are in business. He got the gas cap unstuck too! How do you like the setup he used? Ingenious I thought. https://photos.google.com/share/AF1QipMw-W2_yghlqdtaQTxKWwnjA2jQPZ4rec8kTtiRGnDvSvFkHie9t4jmlkD6DbqUew/photo/AF1QipMElHRc7G94zl60luHX5ZnOjfviXUNVgHH97siR?key=b1kyNl92RG81NVRZeDZ0OHNpYWxYTFNsb0JxVzB3" rel="nofollow - https://photos.google.com/share/AF1QipMw-W2_yghlqdtaQTxKWwnjA2jQPZ4rec8kTtiRGnDvSvFkHie9t4jmlkD6DbqUew/photo/AF1QipMElHRc7G94zl60luHX5ZnOjfviXUNVgHH97siR?key=b1kyNl92RG81NVRZeDZ0OHNpYWxYTFNsb0JxVzB3 From what he says the tank is rusty, but only what you would expect to see, it should clean up. There is also a baffle in the tank from what he tells me, which I didn't know.
I worked on the governor this weekend. I got it taken apart and all cleaned up. It is amazing how much original paint is under the gunk and rust once you clean everything up! https://photos.google.com/share/AF1QipMw-W2_yghlqdtaQTxKWwnjA2jQPZ4rec8kTtiRGnDvSvFkHie9t4jmlkD6DbqUew/photo/AF1QipOy1XcscqEUS57Vfj0Vd8v7a8xUmSoitxEXqMGI?key=b1kyNl92RG81NVRZeDZ0OHNpYWxYTFNsb0JxVzB3" rel="nofollow - https://photos.google.com/share/AF1QipMw-W2_yghlqdtaQTxKWwnjA2jQPZ4rec8kTtiRGnDvSvFkHie9t4jmlkD6DbqUew/photo/AF1QipOy1XcscqEUS57Vfj0Vd8v7a8xUmSoitxEXqMGI?key=b1kyNl92RG81NVRZeDZ0OHNpYWxYTFNsb0JxVzB3 Things look pretty good, there are a couple of pins that I will probably have to replace because they are worn fairly bad. But for as old as it is, it's really amazing things aren't in worse shape. As usual, I added a handful more pics for you all to see what I've been up to, and what the inside of these old machines looks like. https://photos.google.com/share/AF1QipMw-W2_yghlqdtaQTxKWwnjA2jQPZ4rec8kTtiRGnDvSvFkHie9t4jmlkD6DbqUew?key=b1kyNl92RG81NVRZeDZ0OHNpYWxYTFNsb0JxVzB3" rel="nofollow - https://photos.google.com/share/AF1QipMw-W2_yghlqdtaQTxKWwnjA2jQPZ4rec8kTtiRGnDvSvFkHie9t4jmlkD6DbqUew?key=b1kyNl92RG81NVRZeDZ0OHNpYWxYTFNsb0JxVzB3 ------------- Jacob Swanson 1920 6-12; 1925,1926 20-35 longfenders; 1925,1926 15-25's; 1927,1929 20-35 shortfenders; C; B's; IB; WC's; WD; WD45 |
Posted By: Jacob (WI,ND)
Date Posted: 18 Sep 2015 at 1:16pm
|
Hi all! Time for another update, as progress has been good. I took another trip home and got some good wrenching time in on Big AL. The good news is I got a bunch of things done, the bad is that now I probably won't get a chance to go back until Christmas time. I started by getting the break band and pedal assembly off of the tractor. Getting the pin out was a chore, as it was stuck tight. A tip for doing this, tape a nut onto the end of the pry bar to press the pin out. The band needs a new lining, but all else looks good. https://photos.google.com/share/AF1QipMw-W2_yghlqdtaQTxKWwnjA2jQPZ4rec8kTtiRGnDvSvFkHie9t4jmlkD6DbqUew/photo/AF1QipPpGFeik8Ih3tFVwADi1T7yhJ-ZMjcQB--n1Nvq?key=b1kyNl92RG81NVRZeDZ0OHNpYWxYTFNsb0JxVzB3" rel="nofollow - https://photos.google.com/share/AF1QipMw-W2_yghlqdtaQTxKWwnjA2jQPZ4rec8kTtiRGnDvSvFkHie9t4jmlkD6DbqUew/photo/AF1QipPpGFeik8Ih3tFVwADi1T7yhJ-ZMjcQB--n1Nvq?key=b1kyNl92RG81NVRZeDZ0OHNpYWxYTFNsb0JxVzB3 I got the torch out and fixed and disassembled a few things. I got the front left fender bracket straightened out, and a good chunk of the dented fender popped back out, but it still needs a ton of work. https://photos.google.com/share/AF1QipMw-W2_yghlqdtaQTxKWwnjA2jQPZ4rec8kTtiRGnDvSvFkHie9t4jmlkD6DbqUew/photo/AF1QipN8XWbjboqnRQiiIXsh0HvjGDCGGk9JJX2NRP3o?key=b1kyNl92RG81NVRZeDZ0OHNpYWxYTFNsb0JxVzB3" rel="nofollow - https://photos.google.com/share/AF1QipMw-W2_yghlqdtaQTxKWwnjA2jQPZ4rec8kTtiRGnDvSvFkHie9t4jmlkD6DbqUew/photo/AF1QipN8XWbjboqnRQiiIXsh0HvjGDCGGk9JJX2NRP3o?key=b1kyNl92RG81NVRZeDZ0OHNpYWxYTFNsb0JxVzB3 Got both ends of the drag link taken apart. https://photos.google.com/share/AF1QipMw-W2_yghlqdtaQTxKWwnjA2jQPZ4rec8kTtiRGnDvSvFkHie9t4jmlkD6DbqUew/photo/AF1QipNDYbsUIl1YG2i8x3lT9Upa4_4bPefK-2TLCfAq?key=b1kyNl92RG81NVRZeDZ0OHNpYWxYTFNsb0JxVzB3" rel="nofollow - https://photos.google.com/share/AF1QipMw-W2_yghlqdtaQTxKWwnjA2jQPZ4rec8kTtiRGnDvSvFkHie9t4jmlkD6DbqUew/photo/AF1QipNDYbsUIl1YG2i8x3lT9Upa4_4bPefK-2TLCfAq?key=b1kyNl92RG81NVRZeDZ0OHNpYWxYTFNsb0JxVzB3 Got the pivot pin for the front axle removed, and all the nuts off for the radius rods so that could be taken all apart. We straightened the one bent radius rod. Anyone know what the paint stripe on the back of the pivot point is about? https://photos.google.com/share/AF1QipMw-W2_yghlqdtaQTxKWwnjA2jQPZ4rec8kTtiRGnDvSvFkHie9t4jmlkD6DbqUew/photo/AF1QipMHXvNaVeYikmqifd-sa98ycm-IRiyYrFTh-Va-?key=b1kyNl92RG81NVRZeDZ0OHNpYWxYTFNsb0JxVzB3" rel="nofollow - https://photos.google.com/share/AF1QipMw-W2_yghlqdtaQTxKWwnjA2jQPZ4rec8kTtiRGnDvSvFkHie9t4jmlkD6DbqUew/photo/AF1QipMHXvNaVeYikmqifd-sa98ycm-IRiyYrFTh-Va-?key=b1kyNl92RG81NVRZeDZ0OHNpYWxYTFNsb0JxVzB3 https://photos.google.com/share/AF1QipMw-W2_yghlqdtaQTxKWwnjA2jQPZ4rec8kTtiRGnDvSvFkHie9t4jmlkD6DbqUew/photo/AF1QipP4SNFArwd539_b9cLO468P1hLYMnqlEC8SZ54u?key=b1kyNl92RG81NVRZeDZ0OHNpYWxYTFNsb0JxVzB3" rel="nofollow - https://photos.google.com/share/AF1QipMw-W2_yghlqdtaQTxKWwnjA2jQPZ4rec8kTtiRGnDvSvFkHie9t4jmlkD6DbqUew/photo/AF1QipP4SNFArwd539_b9cLO468P1hLYMnqlEC8SZ54u?key=b1kyNl92RG81NVRZeDZ0OHNpYWxYTFNsb0JxVzB3 We were going to remove the steering spindles so new king pin washers can be done, but we ran out of Oxygen for the torch, so that put a stop to that. Got the fan hub taken apart, so that can be cleaned up and put a new seal in it. https://photos.google.com/share/AF1QipMw-W2_yghlqdtaQTxKWwnjA2jQPZ4rec8kTtiRGnDvSvFkHie9t4jmlkD6DbqUew/photo/AF1QipOCqL3aYKhTQPDaqE9Rkv9lTDVirxShhUUBwb8-?key=b1kyNl92RG81NVRZeDZ0OHNpYWxYTFNsb0JxVzB3" rel="nofollow - https://photos.google.com/share/AF1QipMw-W2_yghlqdtaQTxKWwnjA2jQPZ4rec8kTtiRGnDvSvFkHie9t4jmlkD6DbqUew/photo/AF1QipOCqL3aYKhTQPDaqE9Rkv9lTDVirxShhUUBwb8-?key=b1kyNl92RG81NVRZeDZ0OHNpYWxYTFNsb0JxVzB3 I removed the gas tank and started to clean that out. Put a chunk of chain in and started to slosh it around to get all the loose rust out. It is dirty. Unfortunately too, a hole appeared under where the rear mounting bracket goes on the bottom of the tank, so this will need to be fixed now too. I took a big brass punch and knocked all the stuck lifters up so the cam could be removed from the block. The cam is looking good, but the lifters are all shot. Fortunately I already located another set of lifters. https://photos.google.com/share/AF1QipMw-W2_yghlqdtaQTxKWwnjA2jQPZ4rec8kTtiRGnDvSvFkHie9t4jmlkD6DbqUew/photo/AF1QipNqzqaGGiHaf6XGit1XO8MX3kCLfs0JpVRsk7m-?key=b1kyNl92RG81NVRZeDZ0OHNpYWxYTFNsb0JxVzB3" rel="nofollow - https://photos.google.com/share/AF1QipMw-W2_yghlqdtaQTxKWwnjA2jQPZ4rec8kTtiRGnDvSvFkHie9t4jmlkD6DbqUew/photo/AF1QipNqzqaGGiHaf6XGit1XO8MX3kCLfs0JpVRsk7m-?key=b1kyNl92RG81NVRZeDZ0OHNpYWxYTFNsb0JxVzB3 Pressing the pistons out of the sleeves was a treat. They were stuck good! But they are all out now, so now the next step is to decide were to bring my sleeves to have bored out for my new 5" pistons. https://photos.google.com/share/AF1QipMw-W2_yghlqdtaQTxKWwnjA2jQPZ4rec8kTtiRGnDvSvFkHie9t4jmlkD6DbqUew/photo/AF1QipN1hfV6N6bLLCy78LrWpH2n4uJE0WNyY7lRFPcU?key=b1kyNl92RG81NVRZeDZ0OHNpYWxYTFNsb0JxVzB3" rel="nofollow - https://photos.google.com/share/AF1QipMw-W2_yghlqdtaQTxKWwnjA2jQPZ4rec8kTtiRGnDvSvFkHie9t4jmlkD6DbqUew/photo/AF1QipN1hfV6N6bLLCy78LrWpH2n4uJE0WNyY7lRFPcU?key=b1kyNl92RG81NVRZeDZ0OHNpYWxYTFNsb0JxVzB3 Got the main shaft pressed out of the oil pump, but the other gear is still stuck. I got the wire for the radiator cap fit. It needed to be trimmed down a bit. There must be more than one size of these wires? The one I got was only 5" between the ends, mine needed to be about 5 1/4". Another thing we've noted, that my rad cap has two slotted screws to hold the gasket and washer to the inside of the cap, where most have just the single hole with a rivet to hold the gasket. Is this a '27 difference again? https://photos.google.com/share/AF1QipMw-W2_yghlqdtaQTxKWwnjA2jQPZ4rec8kTtiRGnDvSvFkHie9t4jmlkD6DbqUew/photo/AF1QipP4pRB2GdDl2btWC4bH8NHjHrc24TCoKrwry11L?key=b1kyNl92RG81NVRZeDZ0OHNpYWxYTFNsb0JxVzB3" rel="nofollow - https://photos.google.com/share/AF1QipMw-W2_yghlqdtaQTxKWwnjA2jQPZ4rec8kTtiRGnDvSvFkHie9t4jmlkD6DbqUew/photo/AF1QipP4pRB2GdDl2btWC4bH8NHjHrc24TCoKrwry11L?key=b1kyNl92RG81NVRZeDZ0OHNpYWxYTFNsb0JxVzB3 We also plugged the outlets for the radiator and filled it with vinegar to clean it out good before we disassemble it. After setting filled with vinegar for a few days we drained it and flushed it a bunch more. Found a couple of tiny leaks, but fortunately they are where the tank top and bottom meet the core, so should fix themselves with new gaskets I hope. Things have been going good, and it was pointed out to me the other day that I have only had this tractor about 2 months at this point, so that makes me feel even better about the amount of progress that has been made. The pipe dream is to have this tractor up and running for next summers show season, but I know that we have a LONG way to go before that is going to happen. If things go really good, I hope to get to put some things back INTO the block when I'm home for Christmas time, but we'll see...... As usual, I added a ton more pics to my Google Photos: https://photos.google.com/share/AF1QipMw-W2_yghlqdtaQTxKWwnjA2jQPZ4rec8kTtiRGnDvSvFkHie9t4jmlkD6DbqUew?key=b1kyNl92RG81NVRZeDZ0OHNpYWxYTFNsb0JxVzB3" rel="nofollow - https://photos.google.com/share/AF1QipMw-W2_yghlqdtaQTxKWwnjA2jQPZ4rec8kTtiRGnDvSvFkHie9t4jmlkD6DbqUew?key=b1kyNl92RG81NVRZeDZ0OHNpYWxYTFNsb0JxVzB3 ------------- Jacob Swanson 1920 6-12; 1925,1926 20-35 longfenders; 1925,1926 15-25's; 1927,1929 20-35 shortfenders; C; B's; IB; WC's; WD; WD45 |
Posted By: Jacob (WI,ND)
Date Posted: 18 Sep 2015 at 4:59pm
|
I started another post looking for info on oil pressure gauges here: http://www.allischalmers.com/forum/forum_posts.asp?TID=112148&PID=904079󜮏" rel="nofollow - http://www.allischalmers.com/forum/forum_posts.asp?TID=112148&PID=904079󜮏 check it out, thanks ------------- Jacob Swanson 1920 6-12; 1925,1926 20-35 longfenders; 1925,1926 15-25's; 1927,1929 20-35 shortfenders; C; B's; IB; WC's; WD; WD45 |
Posted By: Jacob (WI,ND)
Date Posted: 18 Sep 2015 at 6:03pm
|
Ok, let's talk fan shrouds now, I picked up this shroud for my tractor, but have now noticed a small difference between it and other shrouds on 20-35's. https://photos.google.com/share/AF1QipMw-W2_yghlqdtaQTxKWwnjA2jQPZ4rec8kTtiRGnDvSvFkHie9t4jmlkD6DbqUew/photo/AF1QipPg7254U1XKtPRywBEhiSNG4xWBA5znCKIIfSSw?key=b1kyNl92RG81NVRZeDZ0OHNpYWxYTFNsb0JxVzB3" rel="nofollow - https://photos.google.com/share/AF1QipMw-W2_yghlqdtaQTxKWwnjA2jQPZ4rec8kTtiRGnDvSvFkHie9t4jmlkD6DbqUew/photo/AF1QipPg7254U1XKtPRywBEhiSNG4xWBA5znCKIIfSSw?key=b1kyNl92RG81NVRZeDZ0OHNpYWxYTFNsb0JxVzB3 https://photos.google.com/share/AF1QipMw-W2_yghlqdtaQTxKWwnjA2jQPZ4rec8kTtiRGnDvSvFkHie9t4jmlkD6DbqUew/photo/AF1QipOtS-FVbOVU7SxOlCsL_kPI2na3kOrU1axPLmIw?key=b1kyNl92RG81NVRZeDZ0OHNpYWxYTFNsb0JxVzB3" rel="nofollow - https://photos.google.com/share/AF1QipMw-W2_yghlqdtaQTxKWwnjA2jQPZ4rec8kTtiRGnDvSvFkHie9t4jmlkD6DbqUew/photo/AF1QipOtS-FVbOVU7SxOlCsL_kPI2na3kOrU1axPLmIw?key=b1kyNl92RG81NVRZeDZ0OHNpYWxYTFNsb0JxVzB3 https://photos.google.com/share/AF1QipMw-W2_yghlqdtaQTxKWwnjA2jQPZ4rec8kTtiRGnDvSvFkHie9t4jmlkD6DbqUew/photo/AF1QipOki3JSzU-9C79sQO4nm9_lGRIllsI92kzmrtHG?key=b1kyNl92RG81NVRZeDZ0OHNpYWxYTFNsb0JxVzB3" rel="nofollow - https://photos.google.com/share/AF1QipMw-W2_yghlqdtaQTxKWwnjA2jQPZ4rec8kTtiRGnDvSvFkHie9t4jmlkD6DbqUew/photo/AF1QipOki3JSzU-9C79sQO4nm9_lGRIllsI92kzmrtHG?key=b1kyNl92RG81NVRZeDZ0OHNpYWxYTFNsb0JxVzB3 On this shroud the inside lip (on the round hole) has a flat bend of 90* which has four square nuts welded to it, which we speculate was for a place to mount a screen or guard to protect you from putting your hand in the fan, like seen on the earlier tractors. There was an L at the GOTO in turtle lake with a guard like this, but I didn't get a pic. If this is the case, anyone have a pic of what this screen should look like? Most shrouds I looked at on other 20-35's have this lip rolled over a small piece of wire so there is no means to fasten a guard in this location. What is the story on this? Is this an early '27 difference thing again? Those with 20-35's, what does your tractor have on it?
------------- Jacob Swanson 1920 6-12; 1925,1926 20-35 longfenders; 1925,1926 15-25's; 1927,1929 20-35 shortfenders; C; B's; IB; WC's; WD; WD45 |
Posted By: Jacob (WI,ND)
Date Posted: 08 Jan 2016 at 5:36pm
|
Time for an update: I was back home over the holidays and got some tractor wrenching time worked into the schedule. Not sure where I left off, but as of now the engine has been completely broken down and I hauled all of the parts that need machining down to the machine shop. Hopefully this next week or so they will get a chance to look things over and get working on it. They are going to be boring out the original 4 3/4" sleeves to fit the new (used) 5" pistons. They are also going to work over the crank and all the bearings as needed. The cam, if good enough to regrind, will be reground. The heads will get new valve seats, and fly cut the head surfaces and manifold surfaces. The rocker arms will also need some rework from them being worn. So hopefully in a month or two I'll be making another quick trip home to get the finished parts. I'll keep you updated While home I took apart the tie rod and drag link and cleaned them up and put them all back together, so they are ready to go now. I also removed the one broken extension rim so it can be welded up. We got a new bottle of oxygen for the torch, so we finished disassembling the front axle spindles. They need some new bushing, then they will be ready to reassemble as well. Finally got the oil pump freed up. Letting things soak for a length of time here was the key. Once it was all apart, and cleaned up, things looked good so that was a nice surprise! Like I mentioned, I had gotten the heads stripped down before bringing them to the machine shop. My magneto is going to be headed to Matt Scott to rebuild in a couple of weeks when my sister is going through that way, and she'll pick up some more parts that I'll need from him. My buddy Kyle came up to visit and see this project, and I sent him back with my governor. He is going to remake a few parts for it, so that should be back in tip top shape before long as well. Things are starting to fall together it seems, I brought a few more little parts back with me to clean up when I have a minute. I'm feeling more confident about getting this tractor back together and running for show season this summer. ------------- Jacob Swanson 1920 6-12; 1925,1926 20-35 longfenders; 1925,1926 15-25's; 1927,1929 20-35 shortfenders; C; B's; IB; WC's; WD; WD45 |
Posted By: WDman1951
Date Posted: 09 Jan 2016 at 11:50pm
|
I'll have to make the trip up there sometime and see it not often I get to see tractors that old cool looking unit quiet the big beast it'll be cool to see here breathe new life. ------------- 1951 WD 1945 C 1936 WC |
Posted By: Sugarmaker
Date Posted: 10 Jan 2016 at 9:03am
|
Jacob, Great documentation on the work you have done on Big AL! Great that you are working on this with your dad too. One thing I did not hear was "we are done" or "this is now Yard art"! You have a positive attitude and I am sure the 25-30 with run and drive again. Good luck with the rebuild! Regards, Chris ------------- D17 1958 (NFE), WD45 1954 (NFE), WD 1952 (NFE), WD 1950 (WFE), Allis F-40 forklift, Allis CA, Allis D14, Ford Jubilee, Many IH Cub Cadets, 32 Ford Dump, 65 Comet. |
Posted By: Alberta Phil
Date Posted: 10 Jan 2016 at 9:50am
|
Good to see you're making progress on the 'ol girl. I'll be watching this thread with interest as the 20-35's are my favorite Allis!
|
Posted By: HudCo
Date Posted: 10 Jan 2016 at 10:08am
| that is going to be somthing very proud of especalily getting to do it with dad , i realy enjoy watching your progress |
Posted By: Jacob (WI,ND)
Date Posted: 14 Feb 2016 at 3:05pm
|
Hi all! A few little updates on the 20-35. Dad dropped off the new set of valves, new sleeve seals, flywheel, used lifters, and new crank seals at the machine shop on Saturday. Things are coming along nicely with the engine work. They have all the old sleeves bored out. The crank has been turned down and the original babbitt bearings are being fit to it now. I plan on making a quick trip home to WI the end of this week, so HOPEFULLY the short block will be ready to pick up by then. The heads might not be quite done, but that is ok. They still need to machine the valve guides and new valve seats to the new valves. But the heads both checked out ok, so that was great news! Thanks again Phil for selling me the '27 head I was needing for this project! https://photos.google.com/share/AF1QipMw-W2_yghlqdtaQTxKWwnjA2jQPZ4rec8kTtiRGnDvSvFkHie9t4jmlkD6DbqUew/photo/AF1QipOYXNERQIrTeSK0mNp5-rwsUIcNwTsp7SPpdXFO?key=b1kyNl92RG81NVRZeDZ0OHNpYWxYTFNsb0JxVzB3" rel="nofollow - https://photos.google.com/share/AF1QipMw-W2_yghlqdtaQTxKWwnjA2jQPZ4rec8kTtiRGnDvSvFkHie9t4jmlkD6DbqUew/photo/AF1QipOYXNERQIrTeSK0mNp5-rwsUIcNwTsp7SPpdXFO?key=b1kyNl92RG81NVRZeDZ0OHNpYWxYTFNsb0JxVzB3 https://photos.google.com/share/AF1QipMw-W2_yghlqdtaQTxKWwnjA2jQPZ4rec8kTtiRGnDvSvFkHie9t4jmlkD6DbqUew/photo/AF1QipN8NV0C8kk12AWDejGQd5jJa5gnN2lEgnvLYxgZ?key=b1kyNl92RG81NVRZeDZ0OHNpYWxYTFNsb0JxVzB3" rel="nofollow - https://photos.google.com/share/AF1QipMw-W2_yghlqdtaQTxKWwnjA2jQPZ4rec8kTtiRGnDvSvFkHie9t4jmlkD6DbqUew/photo/AF1QipN8NV0C8kk12AWDejGQd5jJa5gnN2lEgnvLYxgZ?key=b1kyNl92RG81NVRZeDZ0OHNpYWxYTFNsb0JxVzB3 I finished disassembling the Carb and got it all cleaned up. https://photos.google.com/share/AF1QipMw-W2_yghlqdtaQTxKWwnjA2jQPZ4rec8kTtiRGnDvSvFkHie9t4jmlkD6DbqUew/photo/AF1QipPkNY-PVT2RmIABF1WfjFeIiVrCktadWi79huwG?key=b1kyNl92RG81NVRZeDZ0OHNpYWxYTFNsb0JxVzB3" rel="nofollow - https://photos.google.com/share/AF1QipMw-W2_yghlqdtaQTxKWwnjA2jQPZ4rec8kTtiRGnDvSvFkHie9t4jmlkD6DbqUew/photo/AF1QipPkNY-PVT2RmIABF1WfjFeIiVrCktadWi79huwG?key=b1kyNl92RG81NVRZeDZ0OHNpYWxYTFNsb0JxVzB3 Unfortunately I broke the Venturi removing it. https://photos.google.com/share/AF1QipMw-W2_yghlqdtaQTxKWwnjA2jQPZ4rec8kTtiRGnDvSvFkHie9t4jmlkD6DbqUew/photo/AF1QipP46Tpr4t8Ya9VnF27LSlVsW_Tnpm5st-COxQ2n?key=b1kyNl92RG81NVRZeDZ0OHNpYWxYTFNsb0JxVzB3" rel="nofollow - https://photos.google.com/share/AF1QipMw-W2_yghlqdtaQTxKWwnjA2jQPZ4rec8kTtiRGnDvSvFkHie9t4jmlkD6DbqUew/photo/AF1QipP46Tpr4t8Ya9VnF27LSlVsW_Tnpm5st-COxQ2n?key=b1kyNl92RG81NVRZeDZ0OHNpYWxYTFNsb0JxVzB3 So the venturi and the wore out throttle shaft are at the local machine shop being looked at. They think they can make some new parts for me, I should hear more next week. Matt Scott has my mag and is rebuilding it for me https://photos.google.com/share/AF1QipMw-W2_yghlqdtaQTxKWwnjA2jQPZ4rec8kTtiRGnDvSvFkHie9t4jmlkD6DbqUew/photo/AF1QipNROA1yefWiYBBXlmIkv1yXlS7BCLdFkuyAy1z7?key=b1kyNl92RG81NVRZeDZ0OHNpYWxYTFNsb0JxVzB3" rel="nofollow - https://photos.google.com/share/AF1QipMw-W2_yghlqdtaQTxKWwnjA2jQPZ4rec8kTtiRGnDvSvFkHie9t4jmlkD6DbqUew/photo/AF1QipNROA1yefWiYBBXlmIkv1yXlS7BCLdFkuyAy1z7?key=b1kyNl92RG81NVRZeDZ0OHNpYWxYTFNsb0JxVzB3 Unfortunately he discovered that the main housing was damaged beyond repair, so he is locating another housing for me. Those are the little surprises you encounter with a machine this old. He'll get it good as new though! I have some of the broken cast parts with a friend in welding school. She is going to try her best to fix them up. Cross your fingers. All in all progress has been slow but steady. I keep joking that by spring all we'll have to do is bolt it together and start it up. Easy as that right? As usual, a bunch more pics added to my Google Photo account. ------------- Jacob Swanson 1920 6-12; 1925,1926 20-35 longfenders; 1925,1926 15-25's; 1927,1929 20-35 shortfenders; C; B's; IB; WC's; WD; WD45 |
Posted By: Jacob (WI,ND)
Date Posted: 27 Feb 2016 at 8:47pm
|
Hi all, Got some more updates if anyone is interested. I made a quick trip back home to WI last weekend. The machine shop was done with my engine, so Dad and I made a trip down to pick it up! https://photos.google.com/share/AF1QipMw-W2_yghlqdtaQTxKWwnjA2jQPZ4rec8kTtiRGnDvSvFkHie9t4jmlkD6DbqUew/photo/AF1QipNBDTWx4OG-L-2YVOCyMFK5Bum13XnnWcc0WcsW?key=b1kyNl92RG81NVRZeDZ0OHNpYWxYTFNsb0JxVzB3" rel="nofollow - https://photos.google.com/share/AF1QipMw-W2_yghlqdtaQTxKWwnjA2jQPZ4rec8kTtiRGnDvSvFkHie9t4jmlkD6DbqUew/photo/AF1QipNBDTWx4OG-L-2YVOCyMFK5Bum13XnnWcc0WcsW?key=b1kyNl92RG81NVRZeDZ0OHNpYWxYTFNsb0JxVzB3 So with the sleeves bored, the crank ground, cam polished, the bearings all gone through and refit, and the rotating assembly all final assembled, we have the engine back in our garage. We can take over from here! The heads were not quite done yet, so we'll have to get them another trip. But with the engine we can at least start getting things put back together. Had the new set of used lifters resurfaced. https://photos.google.com/share/AF1QipMw-W2_yghlqdtaQTxKWwnjA2jQPZ4rec8kTtiRGnDvSvFkHie9t4jmlkD6DbqUew/photo/AF1QipN-hT9lHqCmaVqv-ewYgTiJcsv_Io-vlGnzimW0?key=b1kyNl92RG81NVRZeDZ0OHNpYWxYTFNsb0JxVzB3" rel="nofollow - https://photos.google.com/share/AF1QipMw-W2_yghlqdtaQTxKWwnjA2jQPZ4rec8kTtiRGnDvSvFkHie9t4jmlkD6DbqUew/photo/AF1QipN-hT9lHqCmaVqv-ewYgTiJcsv_Io-vlGnzimW0?key=b1kyNl92RG81NVRZeDZ0OHNpYWxYTFNsb0JxVzB3 Back here in Kenmare, ND I got the parts back from the local machine shop for my carb. I am fighting a cold so I haven't gotten around to putting it back together yet, but I did make it to the hardware store and round up some seals for the shafts. Cross your fingers what I found works. https://photos.google.com/share/AF1QipMw-W2_yghlqdtaQTxKWwnjA2jQPZ4rec8kTtiRGnDvSvFkHie9t4jmlkD6DbqUew/photo/AF1QipMmVksvZrr4ly4SvoFO-bmtF5b6RhZrXr14iRFX?key=b1kyNl92RG81NVRZeDZ0OHNpYWxYTFNsb0JxVzB3" rel="nofollow - https://photos.google.com/share/AF1QipMw-W2_yghlqdtaQTxKWwnjA2jQPZ4rec8kTtiRGnDvSvFkHie9t4jmlkD6DbqUew/photo/AF1QipMmVksvZrr4ly4SvoFO-bmtF5b6RhZrXr14iRFX?key=b1kyNl92RG81NVRZeDZ0OHNpYWxYTFNsb0JxVzB3 https://photos.google.com/share/AF1QipMw-W2_yghlqdtaQTxKWwnjA2jQPZ4rec8kTtiRGnDvSvFkHie9t4jmlkD6DbqUew/photo/AF1QipPFKmJpRQSbQc7-matUZYLDDNSCV40ws8lG1o1Y?key=b1kyNl92RG81NVRZeDZ0OHNpYWxYTFNsb0JxVzB3" rel="nofollow - https://photos.google.com/share/AF1QipMw-W2_yghlqdtaQTxKWwnjA2jQPZ4rec8kTtiRGnDvSvFkHie9t4jmlkD6DbqUew/photo/AF1QipPFKmJpRQSbQc7-matUZYLDDNSCV40ws8lG1o1Y?key=b1kyNl92RG81NVRZeDZ0OHNpYWxYTFNsb0JxVzB3 And a quick flashback to when I got it back in July https://photos.google.com/share/AF1QipMw-W2_yghlqdtaQTxKWwnjA2jQPZ4rec8kTtiRGnDvSvFkHie9t4jmlkD6DbqUew/photo/AF1QipO8lk5f124XG2f7fvPctDRi5oJHCii0N8xWsWz0?key=b1kyNl92RG81NVRZeDZ0OHNpYWxYTFNsb0JxVzB3" rel="nofollow - https://photos.google.com/share/AF1QipMw-W2_yghlqdtaQTxKWwnjA2jQPZ4rec8kTtiRGnDvSvFkHie9t4jmlkD6DbqUew/photo/AF1QipO8lk5f124XG2f7fvPctDRi5oJHCii0N8xWsWz0?key=b1kyNl92RG81NVRZeDZ0OHNpYWxYTFNsb0JxVzB3 I think we're doing pretty good for being about 7 months into this project now. And that is with me being 10 hours away from the tractor! But spring is coming soon, and I still have a lot to do..... I'm still on the hunt for that elusive '27 throttle quadrant at this time. I've rounded up about everything else, or have arranged to get it in the near future. As usual, more new pics posted on my Google Photos: https://photos.google.com/share/AF1QipMw-W2_yghlqdtaQTxKWwnjA2jQPZ4rec8kTtiRGnDvSvFkHie9t4jmlkD6DbqUew?key=b1kyNl92RG81NVRZeDZ0OHNpYWxYTFNsb0JxVzB3" rel="nofollow - https://photos.google.com/share/AF1QipMw-W2_yghlqdtaQTxKWwnjA2jQPZ4rec8kTtiRGnDvSvFkHie9t4jmlkD6DbqUew?key=b1kyNl92RG81NVRZeDZ0OHNpYWxYTFNsb0JxVzB3 ------------- Jacob Swanson 1920 6-12; 1925,1926 20-35 longfenders; 1925,1926 15-25's; 1927,1929 20-35 shortfenders; C; B's; IB; WC's; WD; WD45 |
Posted By: Jacob (WI,ND)
Date Posted: 06 Mar 2016 at 12:11pm
|
Good Morning everyone! I have a couple little updates to add. I ordered up some brake lining material from McMaster-Carr http://www.mcmaster.com/#brake-lining/=11f95ld" rel="nofollow - http://www.mcmaster.com/#brake-lining/=11f95ld And shortly after it was delivered back home, Dad text me some pics showing me he had it installed on the original brake band. That was a nice surprise! https://photos.google.com/share/AF1QipMw-W2_yghlqdtaQTxKWwnjA2jQPZ4rec8kTtiRGnDvSvFkHie9t4jmlkD6DbqUew/photo/AF1QipM57de7ajW-kc-WLrBqkvk-Nf3XnSrSySdJplV2?key=b1kyNl92RG81NVRZeDZ0OHNpYWxYTFNsb0JxVzB3" rel="nofollow - https://photos.google.com/share/AF1QipMw-W2_yghlqdtaQTxKWwnjA2jQPZ4rec8kTtiRGnDvSvFkHie9t4jmlkD6DbqUew/photo/AF1QipM57de7ajW-kc-WLrBqkvk-Nf3XnSrSySdJplV2?key=b1kyNl92RG81NVRZeDZ0OHNpYWxYTFNsb0JxVzB3 https://photos.google.com/share/AF1QipMw-W2_yghlqdtaQTxKWwnjA2jQPZ4rec8kTtiRGnDvSvFkHie9t4jmlkD6DbqUew/photo/AF1QipPZoeMpEErOYYMQXdCs-E29iGZLxyjWuhlwICK8?key=b1kyNl92RG81NVRZeDZ0OHNpYWxYTFNsb0JxVzB3" rel="nofollow - https://photos.google.com/share/AF1QipMw-W2_yghlqdtaQTxKWwnjA2jQPZ4rec8kTtiRGnDvSvFkHie9t4jmlkD6DbqUew/photo/AF1QipPZoeMpEErOYYMQXdCs-E29iGZLxyjWuhlwICK8?key=b1kyNl92RG81NVRZeDZ0OHNpYWxYTFNsb0JxVzB3 Meanwhile, here in the prairie, I got around to assembling the carb with its new parts. I'm 99% done with it now. I just have to order up that brass tube that was cracked. A bunch of people suggested soldering it up, but with so many cracks and it being so small, I decided to just replace it with a new piece. Again, I found it on McMaster, those people have EVERYTHING! http://www.mcmaster.com/#brass/=11f9d0u" rel="nofollow - http://www.mcmaster.com/#brass/=11f9d0u https://photos.google.com/share/AF1QipMw-W2_yghlqdtaQTxKWwnjA2jQPZ4rec8kTtiRGnDvSvFkHie9t4jmlkD6DbqUew/photo/AF1QipORt8p9OBNOh-X_Q-IrVxzFZLWruD6_lRVjJ3r3?key=b1kyNl92RG81NVRZeDZ0OHNpYWxYTFNsb0JxVzB3" rel="nofollow - https://photos.google.com/share/AF1QipMw-W2_yghlqdtaQTxKWwnjA2jQPZ4rec8kTtiRGnDvSvFkHie9t4jmlkD6DbqUew/photo/AF1QipORt8p9OBNOh-X_Q-IrVxzFZLWruD6_lRVjJ3r3?key=b1kyNl92RG81NVRZeDZ0OHNpYWxYTFNsb0JxVzB3 Things are coming right along, I'll have to go start on another part now... ------------- Jacob Swanson 1920 6-12; 1925,1926 20-35 longfenders; 1925,1926 15-25's; 1927,1929 20-35 shortfenders; C; B's; IB; WC's; WD; WD45 |
Posted By: Dan73
Date Posted: 06 Mar 2016 at 1:06pm
| Mcmaster is great Granger also has a lot of that same type of stuff. Looks like you are making great progress. I love all the updates. |
Posted By: Sugarmaker
Date Posted: 06 Mar 2016 at 3:24pm
|
Nice work on the restoration! Engine looks great! Yea you just have to bolt it together this spring!:) Regards, Chris ------------- D17 1958 (NFE), WD45 1954 (NFE), WD 1952 (NFE), WD 1950 (WFE), Allis F-40 forklift, Allis CA, Allis D14, Ford Jubilee, Many IH Cub Cadets, 32 Ford Dump, 65 Comet. |
Posted By: Hubnut
Date Posted: 06 Mar 2016 at 4:43pm
|
Man, I really love looking at your progress. You're doing a cracking good job. Simply brilliant! Keep the posts coming. Best, Steve ------------- 1940 B "Lucy" 1941 B w/ Woods L59 "Flavia" 1942 B w/ finish mower "Dick" 1941 C w/ 3-point "Maggie" 1947 C SFW w/ L306 "Trixie" 1972 314H |
Posted By: Jacob (WI,ND)
Date Posted: 06 Mar 2016 at 8:22pm
|
Even the small victories are worth noting. This afternoon I tackled the radiator cap. https://photos.google.com/share/AF1QipMw-W2_yghlqdtaQTxKWwnjA2jQPZ4rec8kTtiRGnDvSvFkHie9t4jmlkD6DbqUew/photo/AF1QipM84Cq5n9RHWl-kSF1OIxl6ghe0Otz2ejuBBzMn?key=b1kyNl92RG81NVRZeDZ0OHNpYWxYTFNsb0JxVzB3" rel="nofollow - https://photos.google.com/share/AF1QipMw-W2_yghlqdtaQTxKWwnjA2jQPZ4rec8kTtiRGnDvSvFkHie9t4jmlkD6DbqUew/photo/AF1QipM84Cq5n9RHWl-kSF1OIxl6ghe0Otz2ejuBBzMn?key=b1kyNl92RG81NVRZeDZ0OHNpYWxYTFNsb0JxVzB3 I ended up drilling the old screws out and cleaning up the threads, because of course the old screws snapped off, why wouldn't they? https://photos.google.com/share/AF1QipMw-W2_yghlqdtaQTxKWwnjA2jQPZ4rec8kTtiRGnDvSvFkHie9t4jmlkD6DbqUew/photo/AF1QipOCAu_PiJYGRzBOHn4W5qOHG6qBKUeJK_-o8Vr9?key=b1kyNl92RG81NVRZeDZ0OHNpYWxYTFNsb0JxVzB3" rel="nofollow - https://photos.google.com/share/AF1QipMw-W2_yghlqdtaQTxKWwnjA2jQPZ4rec8kTtiRGnDvSvFkHie9t4jmlkD6DbqUew/photo/AF1QipOCAu_PiJYGRzBOHn4W5qOHG6qBKUeJK_-o8Vr9?key=b1kyNl92RG81NVRZeDZ0OHNpYWxYTFNsb0JxVzB3 Made a new gasket, and metal plate, a couple new screws and bingo, we have a finished radiator cap! https://photos.google.com/share/AF1QipMw-W2_yghlqdtaQTxKWwnjA2jQPZ4rec8kTtiRGnDvSvFkHie9t4jmlkD6DbqUew/photo/AF1QipMhg6s6t81ABKS3rcLwKLV1WdO_7s1PkBwqMRbG?key=b1kyNl92RG81NVRZeDZ0OHNpYWxYTFNsb0JxVzB3" rel="nofollow - https://photos.google.com/share/AF1QipMw-W2_yghlqdtaQTxKWwnjA2jQPZ4rec8kTtiRGnDvSvFkHie9t4jmlkD6DbqUew/photo/AF1QipMhg6s6t81ABKS3rcLwKLV1WdO_7s1PkBwqMRbG?key=b1kyNl92RG81NVRZeDZ0OHNpYWxYTFNsb0JxVzB3 It's worth noting that the '27 radiator cap is different than the '28 and '29 20-35's. It has two screws, where the later ones have one rivet in the center to hold the metal plate. What next? ------------- Jacob Swanson 1920 6-12; 1925,1926 20-35 longfenders; 1925,1926 15-25's; 1927,1929 20-35 shortfenders; C; B's; IB; WC's; WD; WD45 |
Posted By: Jacob (WI,ND)
Date Posted: 06 Mar 2016 at 8:36pm
|
Suppose I can tackle the Fan Hub. https://photos.google.com/share/AF1QipMw-W2_yghlqdtaQTxKWwnjA2jQPZ4rec8kTtiRGnDvSvFkHie9t4jmlkD6DbqUew/photo/AF1QipN9mWT2gzAMlFFgECyy44XaU75sQRzb7Xj1hBOz?key=b1kyNl92RG81NVRZeDZ0OHNpYWxYTFNsb0JxVzB3" rel="nofollow - https://photos.google.com/share/AF1QipMw-W2_yghlqdtaQTxKWwnjA2jQPZ4rec8kTtiRGnDvSvFkHie9t4jmlkD6DbqUew/photo/AF1QipN9mWT2gzAMlFFgECyy44XaU75sQRzb7Xj1hBOz?key=b1kyNl92RG81NVRZeDZ0OHNpYWxYTFNsb0JxVzB3 I have the Hyatt bearing style fan hub. There are three different variations of the fan hubs over the years. I have the bearing and washers taken out https://photos.google.com/share/AF1QipMw-W2_yghlqdtaQTxKWwnjA2jQPZ4rec8kTtiRGnDvSvFkHie9t4jmlkD6DbqUew/photo/AF1QipMbxaePLTDA1HiZdM0yqbtJk0KAsHx_i-hn0hK2?key=b1kyNl92RG81NVRZeDZ0OHNpYWxYTFNsb0JxVzB3" rel="nofollow - https://photos.google.com/share/AF1QipMw-W2_yghlqdtaQTxKWwnjA2jQPZ4rec8kTtiRGnDvSvFkHie9t4jmlkD6DbqUew/photo/AF1QipMbxaePLTDA1HiZdM0yqbtJk0KAsHx_i-hn0hK2?key=b1kyNl92RG81NVRZeDZ0OHNpYWxYTFNsb0JxVzB3 But am wondering what the trick is to get the sleeve out that the bearing rides in? It is a split sleeve and has three holes in it, one on either side of the slit, and one opposite. Is there a special tool to get this out? It needs to be removed so the new seal can be installed, which is located behind (or at the bottom in these pics) the sleeve. https://photos.google.com/share/AF1QipMw-W2_yghlqdtaQTxKWwnjA2jQPZ4rec8kTtiRGnDvSvFkHie9t4jmlkD6DbqUew/photo/AF1QipPHEblp6dc1ZC4t9TTGjlmvQzymisjsRVJaSXMo?key=b1kyNl92RG81NVRZeDZ0OHNpYWxYTFNsb0JxVzB3" rel="nofollow - https://photos.google.com/share/AF1QipMw-W2_yghlqdtaQTxKWwnjA2jQPZ4rec8kTtiRGnDvSvFkHie9t4jmlkD6DbqUew/photo/AF1QipPHEblp6dc1ZC4t9TTGjlmvQzymisjsRVJaSXMo?key=b1kyNl92RG81NVRZeDZ0OHNpYWxYTFNsb0JxVzB3 https://photos.google.com/share/AF1QipMw-W2_yghlqdtaQTxKWwnjA2jQPZ4rec8kTtiRGnDvSvFkHie9t4jmlkD6DbqUew/photo/AF1QipMg7fMq5NbYtee8SVE6ST-_jF_uFuLkAqS9-D5v?key=b1kyNl92RG81NVRZeDZ0OHNpYWxYTFNsb0JxVzB3" rel="nofollow - https://photos.google.com/share/AF1QipMw-W2_yghlqdtaQTxKWwnjA2jQPZ4rec8kTtiRGnDvSvFkHie9t4jmlkD6DbqUew/photo/AF1QipMg7fMq5NbYtee8SVE6ST-_jF_uFuLkAqS9-D5v?key=b1kyNl92RG81NVRZeDZ0OHNpYWxYTFNsb0JxVzB3 Thanks! ------------- Jacob Swanson 1920 6-12; 1925,1926 20-35 longfenders; 1925,1926 15-25's; 1927,1929 20-35 shortfenders; C; B's; IB; WC's; WD; WD45 |
Posted By: Jacob (WI,ND)
Date Posted: 12 Mar 2016 at 8:48pm
|
Got the fan hub the rest of the way apart, cleaned up, new seal and put back together today. One more thing that is done! https://photos.google.com/share/AF1QipMw-W2_yghlqdtaQTxKWwnjA2jQPZ4rec8kTtiRGnDvSvFkHie9t4jmlkD6DbqUew/photo/AF1QipN5FGO71v5jhEkJhu2XEGh_FUebnhbtEACczfsi?key=b1kyNl92RG81NVRZeDZ0OHNpYWxYTFNsb0JxVzB3" rel="nofollow - https://photos.google.com/share/AF1QipMw-W2_yghlqdtaQTxKWwnjA2jQPZ4rec8kTtiRGnDvSvFkHie9t4jmlkD6DbqUew/photo/AF1QipN5FGO71v5jhEkJhu2XEGh_FUebnhbtEACczfsi?key=b1kyNl92RG81NVRZeDZ0OHNpYWxYTFNsb0JxVzB3 A little trick, a piece of 1 1/2 PVC is the perfect size to drive the sleeve back into the hub https://photos.google.com/share/AF1QipMw-W2_yghlqdtaQTxKWwnjA2jQPZ4rec8kTtiRGnDvSvFkHie9t4jmlkD6DbqUew/photo/AF1QipMH1RlMG6f5Urb5MRivS9aZX-3o-6VILRvnfc4N?key=b1kyNl92RG81NVRZeDZ0OHNpYWxYTFNsb0JxVzB3" rel="nofollow - https://photos.google.com/share/AF1QipMw-W2_yghlqdtaQTxKWwnjA2jQPZ4rec8kTtiRGnDvSvFkHie9t4jmlkD6DbqUew/photo/AF1QipMH1RlMG6f5Urb5MRivS9aZX-3o-6VILRvnfc4N?key=b1kyNl92RG81NVRZeDZ0OHNpYWxYTFNsb0JxVzB3 And done! https://photos.google.com/share/AF1QipMw-W2_yghlqdtaQTxKWwnjA2jQPZ4rec8kTtiRGnDvSvFkHie9t4jmlkD6DbqUew/photo/AF1QipPFNOIW3P6kzonNhOZXkP7bioAhdtbtX-05zSzb?key=b1kyNl92RG81NVRZeDZ0OHNpYWxYTFNsb0JxVzB3" rel="nofollow - https://photos.google.com/share/AF1QipMw-W2_yghlqdtaQTxKWwnjA2jQPZ4rec8kTtiRGnDvSvFkHie9t4jmlkD6DbqUew/photo/AF1QipPFNOIW3P6kzonNhOZXkP7bioAhdtbtX-05zSzb?key=b1kyNl92RG81NVRZeDZ0OHNpYWxYTFNsb0JxVzB3 https://photos.google.com/share/AF1QipMw-W2_yghlqdtaQTxKWwnjA2jQPZ4rec8kTtiRGnDvSvFkHie9t4jmlkD6DbqUew/photo/AF1QipPhPypLa5GOMLYI5hJ8gvMYP52UDKF96y22aI6C?key=b1kyNl92RG81NVRZeDZ0OHNpYWxYTFNsb0JxVzB3" rel="nofollow - https://photos.google.com/share/AF1QipMw-W2_yghlqdtaQTxKWwnjA2jQPZ4rec8kTtiRGnDvSvFkHie9t4jmlkD6DbqUew/photo/AF1QipPhPypLa5GOMLYI5hJ8gvMYP52UDKF96y22aI6C?key=b1kyNl92RG81NVRZeDZ0OHNpYWxYTFNsb0JxVzB3 ------------- Jacob Swanson 1920 6-12; 1925,1926 20-35 longfenders; 1925,1926 15-25's; 1927,1929 20-35 shortfenders; C; B's; IB; WC's; WD; WD45 |
Posted By: Jacob (WI,ND)
Date Posted: 20 Mar 2016 at 2:52pm
|
Couple more things done on Big Al. Got the new brass tube soldered in the carb plug to replace the original cracked up one. https://photos.google.com/share/AF1QipMw-W2_yghlqdtaQTxKWwnjA2jQPZ4rec8kTtiRGnDvSvFkHie9t4jmlkD6DbqUew/photo/AF1QipORt8p9OBNOh-X_Q-IrVxzFZLWruD6_lRVjJ3r3?key=b1kyNl92RG81NVRZeDZ0OHNpYWxYTFNsb0JxVzB3" rel="nofollow - https://photos.google.com/share/AF1QipMw-W2_yghlqdtaQTxKWwnjA2jQPZ4rec8kTtiRGnDvSvFkHie9t4jmlkD6DbqUew/photo/AF1QipORt8p9OBNOh-X_Q-IrVxzFZLWruD6_lRVjJ3r3?key=b1kyNl92RG81NVRZeDZ0OHNpYWxYTFNsb0JxVzB3 So the carb is all done now, yippee! https://photos.google.com/share/AF1QipMw-W2_yghlqdtaQTxKWwnjA2jQPZ4rec8kTtiRGnDvSvFkHie9t4jmlkD6DbqUew/photo/AF1QipNFJCwiguJU9yifg5YmBHjm3Nl_NhCY06zjn-DU?key=b1kyNl92RG81NVRZeDZ0OHNpYWxYTFNsb0JxVzB3" rel="nofollow - https://photos.google.com/share/AF1QipMw-W2_yghlqdtaQTxKWwnjA2jQPZ4rec8kTtiRGnDvSvFkHie9t4jmlkD6DbqUew/photo/AF1QipNFJCwiguJU9yifg5YmBHjm3Nl_NhCY06zjn-DU?key=b1kyNl92RG81NVRZeDZ0OHNpYWxYTFNsb0JxVzB3 Also finished cleaning up the water manifold, water elbow, and intake manifold. Got a round wire wheel to put on the drill to get inside the tubes all the way. Also wire wheeled the ends where the hoses go and smeared some JB Weld in the pits. Once dried overnight I filed and sanded the ends smooth. Very nice! Smoothed the gasket surfaces on the sander too. https://photos.google.com/share/AF1QipMw-W2_yghlqdtaQTxKWwnjA2jQPZ4rec8kTtiRGnDvSvFkHie9t4jmlkD6DbqUew/photo/AF1QipM19-uE16ki8b3NbQ4o10lQ_XVDKztMCFBpa9rC?key=b1kyNl92RG81NVRZeDZ0OHNpYWxYTFNsb0JxVzB3" rel="nofollow - https://photos.google.com/share/AF1QipMw-W2_yghlqdtaQTxKWwnjA2jQPZ4rec8kTtiRGnDvSvFkHie9t4jmlkD6DbqUew/photo/AF1QipM19-uE16ki8b3NbQ4o10lQ_XVDKztMCFBpa9rC?key=b1kyNl92RG81NVRZeDZ0OHNpYWxYTFNsb0JxVzB3 https://photos.google.com/share/AF1QipMw-W2_yghlqdtaQTxKWwnjA2jQPZ4rec8kTtiRGnDvSvFkHie9t4jmlkD6DbqUew/photo/AF1QipMxjNmf0F0xhalTSnclLgT-D2pDruAuqVdR1sh5?key=b1kyNl92RG81NVRZeDZ0OHNpYWxYTFNsb0JxVzB3" rel="nofollow - https://photos.google.com/share/AF1QipMw-W2_yghlqdtaQTxKWwnjA2jQPZ4rec8kTtiRGnDvSvFkHie9t4jmlkD6DbqUew/photo/AF1QipMxjNmf0F0xhalTSnclLgT-D2pDruAuqVdR1sh5?key=b1kyNl92RG81NVRZeDZ0OHNpYWxYTFNsb0JxVzB3 Moving right along, and getting antsy to get home again... ------------- Jacob Swanson 1920 6-12; 1925,1926 20-35 longfenders; 1925,1926 15-25's; 1927,1929 20-35 shortfenders; C; B's; IB; WC's; WD; WD45 |
Posted By: Dan73
Date Posted: 20 Mar 2016 at 5:38pm
| It always amazes me to see these postings. The amount of detail you are putting into this old girl with all these repairs that are fabrication work I don't think i would know where to start on most of then. Very well done and keep us updated it gives me hope that I can fix up mu old stuff once I get the funds. |
Posted By: Dave H (NE)
Date Posted: 20 Mar 2016 at 6:12pm
| Jacob You asked for info. on the radiator shroud. The shroud you show is for a 1926 or older, the screen was used on it. At serial no. 8070 and up the shroud was changed and no screen was used. |
Posted By: Jacob (WI,ND)
Date Posted: 20 Mar 2016 at 6:22pm
Thank you Dan! It is good to hear others appreciate these posts. I know I like to read them, and see how others solved problems. Especially with pictures, hence why I try to take a ton of them. The trick is to take it piece by piece. Once I got the old boy all apart I made a point to take a few little pieces back home with me each trip. I only focused on these few pieces until they were done, and then move on to the next. It keeps a guy from getting overwhelmed! Another trick is to work on a tractor you REALLY want to be working on. I have not been good about this in the past. I have many unfinished projects in the barn, but the difference is I picked most of them up because the price was too go not to drag them home, and I bought them because of that and NOT because I HAD to have them. This I can see now was a mistake. But live and learn, I'll get to them someday. Or I might just sell them eventually if someone comes along and is willing to make me a good offer. Now my 20-35 on the other hand is a tractor I have wanted for years! There are many posts on this site that can prove that, were I have said over and over that "I will have one of them someday." So once I got one, I pulled out all the stops and knew I would get this one done no matter what! It helps that I have been tucking away some fun money for a project like this for a number of years as I looked for it. Because we all know it does take $ even if we are doing most of the work our selves, LOL! And for years I was in the no fun money boat, don't get me wrong. I'm still on the borderline of being there, LOL! I also consider this my third life (not old enough for mid life yet) crisis of sorts. I'm going to be 31 on the 29th and I kinda had to prove to myself that I can finish a big project like this, because I have started many, but finished none in years. I'll end this by saying, if I can do this, so can most anyone else. Just takes a LOT of time, and a LOT of patience. And a huge attention to detail, which I have to a fault most days.... That and set realistic goals. Lots of little realistic goals, to reach the big goals you set in life. Like having a 20-35 all mechanically restored at Hutch before the year 2022, huh Kyle? (inside bet me and Kyle have going that we set back in 2012) You better get after your 20-35 Kyle, times a ticking, and your WC will look really good in my barn if you don't get 'er done by then.... BAhahaha! ------------- Jacob Swanson 1920 6-12; 1925,1926 20-35 longfenders; 1925,1926 15-25's; 1927,1929 20-35 shortfenders; C; B's; IB; WC's; WD; WD45 |
Posted By: Jacob (WI,ND)
Date Posted: 20 Mar 2016 at 6:47pm
Thanks Dave, but respectfully I have to disagree a little bit . I've been doing a lot of research on these old ones, and I have found that you are correct in that they were changed at 8070 (the first short fender 20-35 in 1927). But the one I have is indeed for an early '27. The '26 and earlier (longfenders) had a different shroud altogether, because of course the radiators were different.The early '27's had this shroud with the 90 degree lip and four square nuts, but I have found NO proof they ever came with a screen, so you are correct there. I have spoke with others on this and we speculate that it was just a tie over from how the sheet metal guys were making them on earlier tractors. At least by '28 (maybe even sometime in '27) the shroud was changed again to have a rolled lip over a piece of wire, instead of the 90 degree lip. I have personally found (or talked with people who have) at least four other '27's besides mine with this style of 90 degree shroud, so I am confident about this. It's amazing the ton of little nuances you find once you start really looking It really is fun discovering them.Thanks! ------------- Jacob Swanson 1920 6-12; 1925,1926 20-35 longfenders; 1925,1926 15-25's; 1927,1929 20-35 shortfenders; C; B's; IB; WC's; WD; WD45 |
Posted By: K.Novak
Date Posted: 22 Mar 2016 at 8:15pm
Don't you worry my good buddy! I WILL NOT BE PONYING UP A WC! I suggest you start thinking about the terms of our next bet since it's your turn to pick. Perhaps we ought to enlist the help of the forum?!?! ------------- 1934 WC SN# 2123,Factory WFE 1935 25-40 SN# 25557, TS 1938 WF SN# 506, Full Steel 1967 I400 SN# 1302 |
Posted By: Jacob (WI,ND)
Date Posted: 22 Mar 2016 at 8:47pm
Ha! Good to hear that! The quicker we get this bet completed, the quicker we can start the next... And don't you worry yourself with what it might be, I've been thinking LONG and HARD about what it might-could-be, hehehe...This short fender bet was almost too easy. Might have to kick it up a notch next go-round. I know we both like a good challenge.... (although the old piggy bank might start getting scared... ) )Oh yeah everyone, peer pressure is also an excellent motivation to finishing projects as well! What else are friends for? ------------- Jacob Swanson 1920 6-12; 1925,1926 20-35 longfenders; 1925,1926 15-25's; 1927,1929 20-35 shortfenders; C; B's; IB; WC's; WD; WD45 |
Posted By: K.Novak
Date Posted: 23 Mar 2016 at 1:41am
Seems to me you're hinting around at a Long Fender........ Boy you weren't kidding about "kicking it up a notch"!!! How long would this bet be? Because the only long fender "near" me that I know about may take me the better part of a lifetime to own!  ------------- 1934 WC SN# 2123,Factory WFE 1935 25-40 SN# 25557, TS 1938 WF SN# 506, Full Steel 1967 I400 SN# 1302 |
Posted By: Jacob (WI,ND)
Date Posted: 16 Apr 2016 at 8:17pm
|
Time for an update on a few things. Some small, some giant steps. Dad got a new square headed bolt for the rear pivot of the front axle. https://photos.google.com/share/AF1QipMw-W2_yghlqdtaQTxKWwnjA2jQPZ4rec8kTtiRGnDvSvFkHie9t4jmlkD6DbqUew/photo/AF1QipN0V8jWvNlcgFst0CpTZ385qyjtvVx0f1lhalIR?key=b1kyNl92RG81NVRZeDZ0OHNpYWxYTFNsb0JxVzB3" rel="nofollow - https://photos.google.com/share/AF1QipMw-W2_yghlqdtaQTxKWwnjA2jQPZ4rec8kTtiRGnDvSvFkHie9t4jmlkD6DbqUew/photo/AF1QipN0V8jWvNlcgFst0CpTZ385qyjtvVx0f1lhalIR?key=b1kyNl92RG81NVRZeDZ0OHNpYWxYTFNsb0JxVzB3 Kyle has been fixing up my governor for me. He's gotten it all disassembled to replace the two worn pins and to install a new bearing. The pins were blind pinned in place, so they had to be drilled to be removed. So once he got the new ones in it could be put back together. He's checking over everything very well, so it will be good for another 90 years when it's done. Keep up the great work buddy, thanks! https://photos.google.com/share/AF1QipMw-W2_yghlqdtaQTxKWwnjA2jQPZ4rec8kTtiRGnDvSvFkHie9t4jmlkD6DbqUew/photo/AF1QipNSb_mBDnxAWOMWogIkX7MYloZqxGyUMjhGw-si?key=b1kyNl92RG81NVRZeDZ0OHNpYWxYTFNsb0JxVzB3" rel="nofollow - https://photos.google.com/share/AF1QipMw-W2_yghlqdtaQTxKWwnjA2jQPZ4rec8kTtiRGnDvSvFkHie9t4jmlkD6DbqUew/photo/AF1QipNSb_mBDnxAWOMWogIkX7MYloZqxGyUMjhGw-si?key=b1kyNl92RG81NVRZeDZ0OHNpYWxYTFNsb0JxVzB3 https://photos.google.com/share/AF1QipMw-W2_yghlqdtaQTxKWwnjA2jQPZ4rec8kTtiRGnDvSvFkHie9t4jmlkD6DbqUew/photo/AF1QipPuud1wqqlETNpw8oMGglXu6pl_wBvsAts4rwq7?key=b1kyNl92RG81NVRZeDZ0OHNpYWxYTFNsb0JxVzB3" rel="nofollow - https://photos.google.com/share/AF1QipMw-W2_yghlqdtaQTxKWwnjA2jQPZ4rec8kTtiRGnDvSvFkHie9t4jmlkD6DbqUew/photo/AF1QipPuud1wqqlETNpw8oMGglXu6pl_wBvsAts4rwq7?key=b1kyNl92RG81NVRZeDZ0OHNpYWxYTFNsb0JxVzB3 https://photos.google.com/share/AF1QipMw-W2_yghlqdtaQTxKWwnjA2jQPZ4rec8kTtiRGnDvSvFkHie9t4jmlkD6DbqUew/photo/AF1QipOQO3GyGNgMownt8KRn0GUSzCwhRpnXtRL1qVmq?key=b1kyNl92RG81NVRZeDZ0OHNpYWxYTFNsb0JxVzB3" rel="nofollow - https://photos.google.com/share/AF1QipMw-W2_yghlqdtaQTxKWwnjA2jQPZ4rec8kTtiRGnDvSvFkHie9t4jmlkD6DbqUew/photo/AF1QipOQO3GyGNgMownt8KRn0GUSzCwhRpnXtRL1qVmq?key=b1kyNl92RG81NVRZeDZ0OHNpYWxYTFNsb0JxVzB3 https://photos.google.com/share/AF1QipMw-W2_yghlqdtaQTxKWwnjA2jQPZ4rec8kTtiRGnDvSvFkHie9t4jmlkD6DbqUew/photo/AF1QipMzJOXd4dtpdEzNJmt_jiVIkIzZSdDHcjWQho7c?key=b1kyNl92RG81NVRZeDZ0OHNpYWxYTFNsb0JxVzB3" rel="nofollow - https://photos.google.com/share/AF1QipMw-W2_yghlqdtaQTxKWwnjA2jQPZ4rec8kTtiRGnDvSvFkHie9t4jmlkD6DbqUew/photo/AF1QipMzJOXd4dtpdEzNJmt_jiVIkIzZSdDHcjWQho7c?key=b1kyNl92RG81NVRZeDZ0OHNpYWxYTFNsb0JxVzB3 I made a quick trip home last weekend. I brought home the parts I had previously finished, then brought back some more to clean up and fix. While there I made time to remove the clutch from the tractor, and amazingly got the clutch housing all cleaned up! Man was that a dirty mess! https://photos.google.com/share/AF1QipMw-W2_yghlqdtaQTxKWwnjA2jQPZ4rec8kTtiRGnDvSvFkHie9t4jmlkD6DbqUew/photo/AF1QipPiP3YCskv6l6OUGBdCZjr_s3PlIss0Tu8iC7vr?key=b1kyNl92RG81NVRZeDZ0OHNpYWxYTFNsb0JxVzB3" rel="nofollow - https://photos.google.com/share/AF1QipMw-W2_yghlqdtaQTxKWwnjA2jQPZ4rec8kTtiRGnDvSvFkHie9t4jmlkD6DbqUew/photo/AF1QipPiP3YCskv6l6OUGBdCZjr_s3PlIss0Tu8iC7vr?key=b1kyNl92RG81NVRZeDZ0OHNpYWxYTFNsb0JxVzB3 https://photos.google.com/share/AF1QipMw-W2_yghlqdtaQTxKWwnjA2jQPZ4rec8kTtiRGnDvSvFkHie9t4jmlkD6DbqUew/photo/AF1QipMhV5C7eZ7-qMDVLqf2BOQDDX2yexM-Yiq59moS?key=b1kyNl92RG81NVRZeDZ0OHNpYWxYTFNsb0JxVzB3" rel="nofollow - https://photos.google.com/share/AF1QipMw-W2_yghlqdtaQTxKWwnjA2jQPZ4rec8kTtiRGnDvSvFkHie9t4jmlkD6DbqUew/photo/AF1QipMhV5C7eZ7-qMDVLqf2BOQDDX2yexM-Yiq59moS?key=b1kyNl92RG81NVRZeDZ0OHNpYWxYTFNsb0JxVzB3 https://photos.google.com/share/AF1QipMw-W2_yghlqdtaQTxKWwnjA2jQPZ4rec8kTtiRGnDvSvFkHie9t4jmlkD6DbqUew/photo/AF1QipP79OaCAuFvG5X14N5lVInEWzitGOyqNQ_PCkZ0?key=b1kyNl92RG81NVRZeDZ0OHNpYWxYTFNsb0JxVzB3" rel="nofollow - https://photos.google.com/share/AF1QipMw-W2_yghlqdtaQTxKWwnjA2jQPZ4rec8kTtiRGnDvSvFkHie9t4jmlkD6DbqUew/photo/AF1QipP79OaCAuFvG5X14N5lVInEWzitGOyqNQ_PCkZ0?key=b1kyNl92RG81NVRZeDZ0OHNpYWxYTFNsb0JxVzB3 Question for you, I assume there should be grease zerks on both ends of the clutch fork shaft? Mine are ugly, not sure what they did to it? Plugged on the left end and goobered up on the right end. https://photos.google.com/share/AF1QipMw-W2_yghlqdtaQTxKWwnjA2jQPZ4rec8kTtiRGnDvSvFkHie9t4jmlkD6DbqUew/photo/AF1QipOBmJ8srHp77ah6Gz8nHwYQQJk0rzn43-JYRlVL?key=b1kyNl92RG81NVRZeDZ0OHNpYWxYTFNsb0JxVzB3" rel="nofollow - https://photos.google.com/share/AF1QipMw-W2_yghlqdtaQTxKWwnjA2jQPZ4rec8kTtiRGnDvSvFkHie9t4jmlkD6DbqUew/photo/AF1QipOBmJ8srHp77ah6Gz8nHwYQQJk0rzn43-JYRlVL?key=b1kyNl92RG81NVRZeDZ0OHNpYWxYTFNsb0JxVzB3 https://photos.google.com/share/AF1QipMw-W2_yghlqdtaQTxKWwnjA2jQPZ4rec8kTtiRGnDvSvFkHie9t4jmlkD6DbqUew/photo/AF1QipNWAbz0C1ptu8fL3x9LRq2UvicPuLuifAK7kJti?key=b1kyNl92RG81NVRZeDZ0OHNpYWxYTFNsb0JxVzB3" rel="nofollow - https://photos.google.com/share/AF1QipMw-W2_yghlqdtaQTxKWwnjA2jQPZ4rec8kTtiRGnDvSvFkHie9t4jmlkD6DbqUew/photo/AF1QipNWAbz0C1ptu8fL3x9LRq2UvicPuLuifAK7kJti?key=b1kyNl92RG81NVRZeDZ0OHNpYWxYTFNsb0JxVzB3 OH, the good news is my heads are finally done at the machine shop! I'll get them back sometime next week, so that is exciting. I'll keep you all posted on what I get done here now that I have some parts to work on! Thanks! ------------- Jacob Swanson 1920 6-12; 1925,1926 20-35 longfenders; 1925,1926 15-25's; 1927,1929 20-35 shortfenders; C; B's; IB; WC's; WD; WD45 |
Posted By: Jacob (WI,ND)
Date Posted: 01 May 2016 at 4:43pm
|
Hi all! https://photos.google.com/share/AF1QipMw-W2_yghlqdtaQTxKWwnjA2jQPZ4rec8kTtiRGnDvSvFkHie9t4jmlkD6DbqUew/photo/AF1QipPyDrBxcb03AxJBAHMhtE2lGCSo1vfXqyQGzLa_?key=b1kyNl92RG81NVRZeDZ0OHNpYWxYTFNsb0JxVzB3" rel="nofollow - https://photos.google.com/share/AF1QipMw-W2_yghlqdtaQTxKWwnjA2jQPZ4rec8kTtiRGnDvSvFkHie9t4jmlkD6DbqUew/photo/AF1QipPyDrBxcb03AxJBAHMhtE2lGCSo1vfXqyQGzLa_?key=b1kyNl92RG81NVRZeDZ0OHNpYWxYTFNsb0JxVzB3 The other end I was more lucky, just got the old mashed up grease zerk out and the threads were ok, just chased them with a tap and good to go. https://photos.google.com/share/AF1QipMw-W2_yghlqdtaQTxKWwnjA2jQPZ4rec8kTtiRGnDvSvFkHie9t4jmlkD6DbqUew/photo/AF1QipM2Av_39P-SX7TIpJg_13R5mwgsOSM2SNauw1Wm?key=b1kyNl92RG81NVRZeDZ0OHNpYWxYTFNsb0JxVzB3" rel="nofollow - https://photos.google.com/share/AF1QipMw-W2_yghlqdtaQTxKWwnjA2jQPZ4rec8kTtiRGnDvSvFkHie9t4jmlkD6DbqUew/photo/AF1QipM2Av_39P-SX7TIpJg_13R5mwgsOSM2SNauw1Wm?key=b1kyNl92RG81NVRZeDZ0OHNpYWxYTFNsb0JxVzB3 So that part of the project is done. ------------- Jacob Swanson 1920 6-12; 1925,1926 20-35 longfenders; 1925,1926 15-25's; 1927,1929 20-35 shortfenders; C; B's; IB; WC's; WD; WD45 |
Posted By: Jacob (WI,ND)
Date Posted: 01 May 2016 at 4:50pm
|
On to the clutch. https://photos.google.com/share/AF1QipMw-W2_yghlqdtaQTxKWwnjA2jQPZ4rec8kTtiRGnDvSvFkHie9t4jmlkD6DbqUew/photo/AF1QipMysZ3MZv-alsNifxvfU5VfldNmqLyo3Xg552E8?key=b1kyNl92RG81NVRZeDZ0OHNpYWxYTFNsb0JxVzB3" rel="nofollow - https://photos.google.com/share/AF1QipMw-W2_yghlqdtaQTxKWwnjA2jQPZ4rec8kTtiRGnDvSvFkHie9t4jmlkD6DbqUew/photo/AF1QipMysZ3MZv-alsNifxvfU5VfldNmqLyo3Xg552E8?key=b1kyNl92RG81NVRZeDZ0OHNpYWxYTFNsb0JxVzB3 Shot of how the break works in the clutch area. Pull back on the clutch handle engages the clutch, clutch handle in the center the clutch is disengaged. Push the handle all the way forward and it engages the break, which stops the transmission, which stops the tractor. https://photos.google.com/share/AF1QipMw-W2_yghlqdtaQTxKWwnjA2jQPZ4rec8kTtiRGnDvSvFkHie9t4jmlkD6DbqUew/photo/AF1QipPckS_mpHSmMcaCgmG0Rv4pX3Ww3M7fy5A23R2h?key=b1kyNl92RG81NVRZeDZ0OHNpYWxYTFNsb0JxVzB3" rel="nofollow - https://photos.google.com/share/AF1QipMw-W2_yghlqdtaQTxKWwnjA2jQPZ4rec8kTtiRGnDvSvFkHie9t4jmlkD6DbqUew/photo/AF1QipPckS_mpHSmMcaCgmG0Rv4pX3Ww3M7fy5A23R2h?key=b1kyNl92RG81NVRZeDZ0OHNpYWxYTFNsb0JxVzB3 first take the gear off. https://photos.google.com/share/AF1QipMw-W2_yghlqdtaQTxKWwnjA2jQPZ4rec8kTtiRGnDvSvFkHie9t4jmlkD6DbqUew/photo/AF1QipNdfvGxf1CDc63D8DDI_39MKLBWMAz6PBnUR0fP?key=b1kyNl92RG81NVRZeDZ0OHNpYWxYTFNsb0JxVzB3" rel="nofollow - https://photos.google.com/share/AF1QipMw-W2_yghlqdtaQTxKWwnjA2jQPZ4rec8kTtiRGnDvSvFkHie9t4jmlkD6DbqUew/photo/AF1QipNdfvGxf1CDc63D8DDI_39MKLBWMAz6PBnUR0fP?key=b1kyNl92RG81NVRZeDZ0OHNpYWxYTFNsb0JxVzB3 Then the rest of the assembly can come off the shaft. https://photos.google.com/share/AF1QipMw-W2_yghlqdtaQTxKWwnjA2jQPZ4rec8kTtiRGnDvSvFkHie9t4jmlkD6DbqUew/photo/AF1QipP-iad9obvVcQWHpvmsAPZyX3KbM1zKZRuPzF2N?key=b1kyNl92RG81NVRZeDZ0OHNpYWxYTFNsb0JxVzB3" rel="nofollow - https://photos.google.com/share/AF1QipMw-W2_yghlqdtaQTxKWwnjA2jQPZ4rec8kTtiRGnDvSvFkHie9t4jmlkD6DbqUew/photo/AF1QipP-iad9obvVcQWHpvmsAPZyX3KbM1zKZRuPzF2N?key=b1kyNl92RG81NVRZeDZ0OHNpYWxYTFNsb0JxVzB3 The the snap ring can be removed so the bearing can come out. https://photos.google.com/share/AF1QipMw-W2_yghlqdtaQTxKWwnjA2jQPZ4rec8kTtiRGnDvSvFkHie9t4jmlkD6DbqUew/photo/AF1QipNQZ0TLCCj8o23Lv9pwIDEbXyNElAG_KQhZnsnP?key=b1kyNl92RG81NVRZeDZ0OHNpYWxYTFNsb0JxVzB3" rel="nofollow - https://photos.google.com/share/AF1QipMw-W2_yghlqdtaQTxKWwnjA2jQPZ4rec8kTtiRGnDvSvFkHie9t4jmlkD6DbqUew/photo/AF1QipNQZ0TLCCj8o23Lv9pwIDEbXyNElAG_KQhZnsnP?key=b1kyNl92RG81NVRZeDZ0OHNpYWxYTFNsb0JxVzB3 And the rest of the pins and linkages can be disassembled. https://photos.google.com/share/AF1QipMw-W2_yghlqdtaQTxKWwnjA2jQPZ4rec8kTtiRGnDvSvFkHie9t4jmlkD6DbqUew/photo/AF1QipO6UI3JjVWiaMR9PEhgkNV8ACeVHfM2szIgqfcd?key=b1kyNl92RG81NVRZeDZ0OHNpYWxYTFNsb0JxVzB3" rel="nofollow - https://photos.google.com/share/AF1QipMw-W2_yghlqdtaQTxKWwnjA2jQPZ4rec8kTtiRGnDvSvFkHie9t4jmlkD6DbqUew/photo/AF1QipO6UI3JjVWiaMR9PEhgkNV8ACeVHfM2szIgqfcd?key=b1kyNl92RG81NVRZeDZ0OHNpYWxYTFNsb0JxVzB3 ------------- Jacob Swanson 1920 6-12; 1925,1926 20-35 longfenders; 1925,1926 15-25's; 1927,1929 20-35 shortfenders; C; B's; IB; WC's; WD; WD45 |
Posted By: Jacob (WI,ND)
Date Posted: 01 May 2016 at 4:57pm
|
Ok, now I'm looking for advice or ideas. The clutch collar and shifter are rather worn. There is about a 1/4" of play front to back, where I assume there should be almost none? good side of shifter. https://photos.google.com/share/AF1QipMw-W2_yghlqdtaQTxKWwnjA2jQPZ4rec8kTtiRGnDvSvFkHie9t4jmlkD6DbqUew/photo/AF1QipODTWktjr4HhUVSBaqK7dmYvTrmkL4wI3kxxCb5?key=b1kyNl92RG81NVRZeDZ0OHNpYWxYTFNsb0JxVzB3" rel="nofollow - https://photos.google.com/share/AF1QipMw-W2_yghlqdtaQTxKWwnjA2jQPZ4rec8kTtiRGnDvSvFkHie9t4jmlkD6DbqUew/photo/AF1QipODTWktjr4HhUVSBaqK7dmYvTrmkL4wI3kxxCb5?key=b1kyNl92RG81NVRZeDZ0OHNpYWxYTFNsb0JxVzB3 bad side. https://photos.google.com/share/AF1QipMw-W2_yghlqdtaQTxKWwnjA2jQPZ4rec8kTtiRGnDvSvFkHie9t4jmlkD6DbqUew/photo/AF1QipMxY4RP7Qv2jgBp1Zdww5l1J_iTZEpczP2f3Vo1?key=b1kyNl92RG81NVRZeDZ0OHNpYWxYTFNsb0JxVzB3" rel="nofollow - https://photos.google.com/share/AF1QipMw-W2_yghlqdtaQTxKWwnjA2jQPZ4rec8kTtiRGnDvSvFkHie9t4jmlkD6DbqUew/photo/AF1QipMxY4RP7Qv2jgBp1Zdww5l1J_iTZEpczP2f3Vo1?key=b1kyNl92RG81NVRZeDZ0OHNpYWxYTFNsb0JxVzB3 showing the amount of wear between the two parts. https://photos.google.com/share/AF1QipMw-W2_yghlqdtaQTxKWwnjA2jQPZ4rec8kTtiRGnDvSvFkHie9t4jmlkD6DbqUew/photo/AF1QipNmUmqL9QOnoJCiZixxEeUMdy6iriOPFKXR8VRq?key=b1kyNl92RG81NVRZeDZ0OHNpYWxYTFNsb0JxVzB3" rel="nofollow - https://photos.google.com/share/AF1QipMw-W2_yghlqdtaQTxKWwnjA2jQPZ4rec8kTtiRGnDvSvFkHie9t4jmlkD6DbqUew/photo/AF1QipNmUmqL9QOnoJCiZixxEeUMdy6iriOPFKXR8VRq?key=b1kyNl92RG81NVRZeDZ0OHNpYWxYTFNsb0JxVzB3 Most of the wear appears to be on the shifter. The bronze should be worn more than the steel though. I'm assuming the collar has been replaced in the past? What is the best fix? weld up the shifter and have it turned down to size again? Turn true and install a spacer? Anyone tackled this issue? Thanks for any advice.
------------- Jacob Swanson 1920 6-12; 1925,1926 20-35 longfenders; 1925,1926 15-25's; 1927,1929 20-35 shortfenders; C; B's; IB; WC's; WD; WD45 |
Posted By: Sugarmaker
Date Posted: 01 May 2016 at 5:12pm
|
Jacob, Great documentation on the 25-30 restoration work. I'm surprised that you figured out there was a grease fitting in the end that was peened over! Amazing how the inside of the clutch hosing cleaned up. You have done a lot of good work on this project! Regards, Chris ------------- D17 1958 (NFE), WD45 1954 (NFE), WD 1952 (NFE), WD 1950 (WFE), Allis F-40 forklift, Allis CA, Allis D14, Ford Jubilee, Many IH Cub Cadets, 32 Ford Dump, 65 Comet. |
Posted By: SteveM C/IL
Date Posted: 01 May 2016 at 7:51pm
| I would guess the hole in the flange was once in the center of the width.Don't know how you would build that flange up since I'm guessing it's cast iron.I'll bet you figure something out.The up side is,it will work in the condition it's in. |
Posted By: Dan73
Date Posted: 01 May 2016 at 7:58pm
| I would probably have it turned down then build a 2 peice spacer. Braze the spacer onto the cast then turn it down smooth. Thought about it all afternoon and that is the best solution I could come up with. |
Posted By: Dan73
Date Posted: 01 May 2016 at 8:02pm
|
https://www.italiantractorparts.com/tractor-repair.html" rel="nofollow - https://www.italiantractorparts.com/tractor-repair.html That is off color but a good discussion about repairing cast parts. |
Posted By: Thad in AR.
Date Posted: 01 May 2016 at 8:07pm
| Jacob this has been the best post in a long time. I really enjoy reading on your progress. I know it takes time away from your work to take pics and document things but this is an awesome job all the way around. |
Posted By: Sugarmaker
Date Posted: 01 May 2016 at 8:28pm
|
This looks a lot like the WD hand clutch two piece bushing. And your bushing looks real good (even wear). I would think that it may still work pretty good as is? Your just going to have some slop in the system as it moves from one position to the other. Regards, Chris ------------- D17 1958 (NFE), WD45 1954 (NFE), WD 1952 (NFE), WD 1950 (WFE), Allis F-40 forklift, Allis CA, Allis D14, Ford Jubilee, Many IH Cub Cadets, 32 Ford Dump, 65 Comet. |
Posted By: Jacob (WI,ND)
Date Posted: 01 May 2016 at 8:30pm
|
Chris, thanks! With a little detective work (or a lot) a guy can figure just about anything out. Like I've said for years "If someone was smart enough to originally design, machine, and build these things, then.... I sure should be able to take it apart, figure out what is wrong, how to fix it, and then put it back together!" It really is that simple. Steve, that is my guess too, that the hole was in the center. And yes, it's cast, so that makes things a bit more tricky. Dan, that is a good idea. I had considered a two piece spacer, but I was thinking it just floating in the collar. Brazing it to the shifter might be better. I wonder if the whole amount could be brazed up? Would that be strong enough to wear against? When it comes to metal work and welding/brazing and such, my knowledge is lacking unfortunately. I'm a woodworker by trade Lots of room for learning, LOL!Thad, thanks for the encouragement! Oh I HAVE to take the pics. Not only to show you all, but also for me to reference back to so I know how things go back together, LOL! I enjoy sharing my repairs! If it helps a few people with their projects, it's all worth it then. And that is what this hobby is all about, right? Thanks for the comments, I appreciate them all. ------------- Jacob Swanson 1920 6-12; 1925,1926 20-35 longfenders; 1925,1926 15-25's; 1927,1929 20-35 shortfenders; C; B's; IB; WC's; WD; WD45 |
Posted By: Jacob (WI,ND)
Date Posted: 01 May 2016 at 8:37pm
It is very similar to the WD. It probably WOULD be just fine to use as it is, but the problem is, NOW really is the time to fix it if I guy is EVER going to fix it. This clutch assembly can only come out like this now when the engine is out of the tractor. And I don't want to ever have to take the engine out again, HA! The clutch shoes on the other hand CAN be removed with the tractor together, though the clutch access cover. SO the engineers were thinking there! So I'll probably address this issue now, even though it is again adding to the fast growing cost of such a restoration.... But that is the fun of these projects, right? ------------- Jacob Swanson 1920 6-12; 1925,1926 20-35 longfenders; 1925,1926 15-25's; 1927,1929 20-35 shortfenders; C; B's; IB; WC's; WD; WD45 |
Posted By: Sugarmaker
Date Posted: 01 May 2016 at 8:44pm
|
Jacob, There are some spray welding techniques that might be able to build up the worn side, and then have it re-machined. There is a spray bronze too. Not sure how it would work? Check with one of your local machine / tool shops too. Regards, Chris ------------- D17 1958 (NFE), WD45 1954 (NFE), WD 1952 (NFE), WD 1950 (WFE), Allis F-40 forklift, Allis CA, Allis D14, Ford Jubilee, Many IH Cub Cadets, 32 Ford Dump, 65 Comet. |
Posted By: Jacob (WI,ND)
Date Posted: 14 May 2016 at 5:33pm
|
Hi all! I got my clutch shifter back from the local machine shop yesterday. I had them make a two piece collar and braze it on like was suggested. They are not set up to do spray welding there, so this was the best option to fix this part we thought. There is much less slop in the collar on the shifter now. https://photos.google.com/share/AF1QipMw-W2_yghlqdtaQTxKWwnjA2jQPZ4rec8kTtiRGnDvSvFkHie9t4jmlkD6DbqUew/photo/AF1QipNqM2VJr8idi83TxiWEB_v-7oiqkGkGUykJra1T?key=b1kyNl92RG81NVRZeDZ0OHNpYWxYTFNsb0JxVzB3" rel="nofollow - https://photos.google.com/share/AF1QipMw-W2_yghlqdtaQTxKWwnjA2jQPZ4rec8kTtiRGnDvSvFkHie9t4jmlkD6DbqUew/photo/AF1QipNqM2VJr8idi83TxiWEB_v-7oiqkGkGUykJra1T?key=b1kyNl92RG81NVRZeDZ0OHNpYWxYTFNsb0JxVzB3 https://photos.google.com/share/AF1QipMw-W2_yghlqdtaQTxKWwnjA2jQPZ4rec8kTtiRGnDvSvFkHie9t4jmlkD6DbqUew/photo/AF1QipNOTVwi1UnDMlMqs_owfx-dV3okuuI49s9ulRP-?key=b1kyNl92RG81NVRZeDZ0OHNpYWxYTFNsb0JxVzB3" rel="nofollow - https://photos.google.com/share/AF1QipMw-W2_yghlqdtaQTxKWwnjA2jQPZ4rec8kTtiRGnDvSvFkHie9t4jmlkD6DbqUew/photo/AF1QipNOTVwi1UnDMlMqs_owfx-dV3okuuI49s9ulRP-?key=b1kyNl92RG81NVRZeDZ0OHNpYWxYTFNsb0JxVzB3 Back in WI, Dad has been experimenting with cutting out felt seals for the clutch shaft (which seals the transmission from the clutch area). He had the scrap of 3/8" felt, so we brainstormed the best way to cut it out, and I came up with this idea and it worked pretty good. He screwed some thin plywood on either side of the felt to sandwich it tight. Then using the center of the screw used a compass to draw the lines of the circle. Then took it to the scroll saw and cut the outside first, then the inside. came out looking like this. https://photos.google.com/share/AF1QipMw-W2_yghlqdtaQTxKWwnjA2jQPZ4rec8kTtiRGnDvSvFkHie9t4jmlkD6DbqUew/photo/AF1QipOOAkKXYTwEQnxIPMzrXXJzdxxZevC0UzxrFgyS?key=b1kyNl92RG81NVRZeDZ0OHNpYWxYTFNsb0JxVzB3" rel="nofollow - https://photos.google.com/share/AF1QipMw-W2_yghlqdtaQTxKWwnjA2jQPZ4rec8kTtiRGnDvSvFkHie9t4jmlkD6DbqUew/photo/AF1QipOOAkKXYTwEQnxIPMzrXXJzdxxZevC0UzxrFgyS?key=b1kyNl92RG81NVRZeDZ0OHNpYWxYTFNsb0JxVzB3 He's going to mail it out to me so I can finish putting the clutch back together, so when I go home at the end of the month, it will be ready to put back into the tractor, and hopefully the engine will follow! I also had the machine shop turn off the worn thrust surface of the two worn out king pin bushings, and replaced the space with new heavy duty oilite washers. https://photos.google.com/share/AF1QipMw-W2_yghlqdtaQTxKWwnjA2jQPZ4rec8kTtiRGnDvSvFkHie9t4jmlkD6DbqUew/photo/AF1QipPdWI26h3dpL7zSCz5C1rtAMIfxHM30KncqLj09?key=b1kyNl92RG81NVRZeDZ0OHNpYWxYTFNsb0JxVzB3" rel="nofollow - https://photos.google.com/share/AF1QipMw-W2_yghlqdtaQTxKWwnjA2jQPZ4rec8kTtiRGnDvSvFkHie9t4jmlkD6DbqUew/photo/AF1QipPdWI26h3dpL7zSCz5C1rtAMIfxHM30KncqLj09?key=b1kyNl92RG81NVRZeDZ0OHNpYWxYTFNsb0JxVzB3 So since I had them, I could finish putting the spindles together. New Welsh plugs and new tie rod bushings as well, so the spindles are ready to put back on the tractor! https://photos.google.com/share/AF1QipMw-W2_yghlqdtaQTxKWwnjA2jQPZ4rec8kTtiRGnDvSvFkHie9t4jmlkD6DbqUew/photo/AF1QipNR39bTpPRv-hHd6ml9GT-GjcmfLsnL_Jwfd3MF?key=b1kyNl92RG81NVRZeDZ0OHNpYWxYTFNsb0JxVzB3" rel="nofollow - https://photos.google.com/share/AF1QipMw-W2_yghlqdtaQTxKWwnjA2jQPZ4rec8kTtiRGnDvSvFkHie9t4jmlkD6DbqUew/photo/AF1QipNR39bTpPRv-hHd6ml9GT-GjcmfLsnL_Jwfd3MF?key=b1kyNl92RG81NVRZeDZ0OHNpYWxYTFNsb0JxVzB3 ------------- Jacob Swanson 1920 6-12; 1925,1926 20-35 longfenders; 1925,1926 15-25's; 1927,1929 20-35 shortfenders; C; B's; IB; WC's; WD; WD45 |
Posted By: Sugarmaker
Date Posted: 14 May 2016 at 5:41pm
|
Nice work! Good details and documentation too! Regards, Chris ------------- D17 1958 (NFE), WD45 1954 (NFE), WD 1952 (NFE), WD 1950 (WFE), Allis F-40 forklift, Allis CA, Allis D14, Ford Jubilee, Many IH Cub Cadets, 32 Ford Dump, 65 Comet. |
Posted By: Jacob (WI,ND)
Date Posted: 14 May 2016 at 5:47pm
|
I also cleaned up the radius rods. I got some new lock washers as the originals were broken, so they are ready to go. I also cleaned up the rear pivot bracket and front axle pin. So the front end stuff is about all ready to go back together now. https://photos.google.com/share/AF1QipMw-W2_yghlqdtaQTxKWwnjA2jQPZ4rec8kTtiRGnDvSvFkHie9t4jmlkD6DbqUew/photo/AF1QipPXlhwAlPRZ222-yjXOsVR8H89nBhUpkG2Edpth?key=b1kyNl92RG81NVRZeDZ0OHNpYWxYTFNsb0JxVzB3" rel="nofollow - https://photos.google.com/share/AF1QipMw-W2_yghlqdtaQTxKWwnjA2jQPZ4rec8kTtiRGnDvSvFkHie9t4jmlkD6DbqUew/photo/AF1QipPXlhwAlPRZ222-yjXOsVR8H89nBhUpkG2Edpth?key=b1kyNl92RG81NVRZeDZ0OHNpYWxYTFNsb0JxVzB3 I also cleaned up the oil pan lower cover. This cover can be removed from the oil pan to access the oil pump screen to clean or service it. Got a new oil drain plug for it too, as the original was very rounded off. https://photos.google.com/share/AF1QipMw-W2_yghlqdtaQTxKWwnjA2jQPZ4rec8kTtiRGnDvSvFkHie9t4jmlkD6DbqUew/photo/AF1QipMfzr07xCdv4YaMq_kbFCZEaUr93vylib81im3J?key=b1kyNl92RG81NVRZeDZ0OHNpYWxYTFNsb0JxVzB3" rel="nofollow - https://photos.google.com/share/AF1QipMw-W2_yghlqdtaQTxKWwnjA2jQPZ4rec8kTtiRGnDvSvFkHie9t4jmlkD6DbqUew/photo/AF1QipMfzr07xCdv4YaMq_kbFCZEaUr93vylib81im3J?key=b1kyNl92RG81NVRZeDZ0OHNpYWxYTFNsb0JxVzB3 And I cleaned up the push rod side covers, clutch access covers. Is this hole supposed to be in the center of the clutch cover? https://photos.google.com/share/AF1QipMw-W2_yghlqdtaQTxKWwnjA2jQPZ4rec8kTtiRGnDvSvFkHie9t4jmlkD6DbqUew/photo/AF1QipMN_SXbnwziumeNGLtPrZdOfGsCnlyGT9OcEZ-b?key=b1kyNl92RG81NVRZeDZ0OHNpYWxYTFNsb0JxVzB3" rel="nofollow - https://photos.google.com/share/AF1QipMw-W2_yghlqdtaQTxKWwnjA2jQPZ4rec8kTtiRGnDvSvFkHie9t4jmlkD6DbqUew/photo/AF1QipMN_SXbnwziumeNGLtPrZdOfGsCnlyGT9OcEZ-b?key=b1kyNl92RG81NVRZeDZ0OHNpYWxYTFNsb0JxVzB3 And front hubcap and piece below dash. https://photos.google.com/share/AF1QipMw-W2_yghlqdtaQTxKWwnjA2jQPZ4rec8kTtiRGnDvSvFkHie9t4jmlkD6DbqUew/photo/AF1QipOCPs8x6mmEtawdtQzwPkBl5e2i0C2TdjbLj94z?key=b1kyNl92RG81NVRZeDZ0OHNpYWxYTFNsb0JxVzB3" rel="nofollow - https://photos.google.com/share/AF1QipMw-W2_yghlqdtaQTxKWwnjA2jQPZ4rec8kTtiRGnDvSvFkHie9t4jmlkD6DbqUew/photo/AF1QipOCPs8x6mmEtawdtQzwPkBl5e2i0C2TdjbLj94z?key=b1kyNl92RG81NVRZeDZ0OHNpYWxYTFNsb0JxVzB3 https://photos.google.com/share/AF1QipMw-W2_yghlqdtaQTxKWwnjA2jQPZ4rec8kTtiRGnDvSvFkHie9t4jmlkD6DbqUew/photo/AF1QipO0gPd391If763AmzRSBJBwUNu1br-ifH6LWiT1?key=b1kyNl92RG81NVRZeDZ0OHNpYWxYTFNsb0JxVzB3" rel="nofollow - https://photos.google.com/share/AF1QipMw-W2_yghlqdtaQTxKWwnjA2jQPZ4rec8kTtiRGnDvSvFkHie9t4jmlkD6DbqUew/photo/AF1QipO0gPd391If763AmzRSBJBwUNu1br-ifH6LWiT1?key=b1kyNl92RG81NVRZeDZ0OHNpYWxYTFNsb0JxVzB3 I also cleaned up the good push rods. I need to get three better ones, as the bottom ends of them were really pitted bad. https://photos.google.com/share/AF1QipMw-W2_yghlqdtaQTxKWwnjA2jQPZ4rec8kTtiRGnDvSvFkHie9t4jmlkD6DbqUew/photo/AF1QipMPC9LMcF6-mgZ5h80BGVP-8AQrwuW_P8rwU9sT?key=b1kyNl92RG81NVRZeDZ0OHNpYWxYTFNsb0JxVzB3" rel="nofollow - https://photos.google.com/share/AF1QipMw-W2_yghlqdtaQTxKWwnjA2jQPZ4rec8kTtiRGnDvSvFkHie9t4jmlkD6DbqUew/photo/AF1QipMPC9LMcF6-mgZ5h80BGVP-8AQrwuW_P8rwU9sT?key=b1kyNl92RG81NVRZeDZ0OHNpYWxYTFNsb0JxVzB3 I'm almost out of parts to work on again, that is a good sign! That means it's time for a trip home again...
------------- Jacob Swanson 1920 6-12; 1925,1926 20-35 longfenders; 1925,1926 15-25's; 1927,1929 20-35 shortfenders; C; B's; IB; WC's; WD; WD45 |
Posted By: NEVER green
Date Posted: 15 May 2016 at 9:16am
|
Hell of a job Jacob, thanks for your time posting all this! ------------- 2-8050 1-7080 6080 D-19 modelE & A 7040 R50 |
Posted By: Dan73
Date Posted: 15 May 2016 at 9:37am
| Looks like they did a nice job on the clutch shaft repair. Yes these old tractors are expensive to fix but in the end I think they are worth it. I would much rather hay with my d17 then some of the modern tractors I have used. You and your dad will have tons of pride taking this old girl out to show her off and at the rate you are going that will be alot sooner then I would have guessed when you first posted that you where going to restore it. Every time I look at these posts it makes me want to go work on my stuff. Right now I need to focus on the funding though... Good work and it is really nice to see someone say yes it would probably work the way it is but I want to take the extra effort to make it right. You will be grateful for that later for sure. |
Posted By: Sugarmaker
Date Posted: 15 May 2016 at 5:40pm
|
Awesome transformation of each part! Cleaning and making these ready for assembly will really make the assembly easier and quicker! Regards, Chris ------------- D17 1958 (NFE), WD45 1954 (NFE), WD 1952 (NFE), WD 1950 (WFE), Allis F-40 forklift, Allis CA, Allis D14, Ford Jubilee, Many IH Cub Cadets, 32 Ford Dump, 65 Comet. |
Posted By: JayIN
Date Posted: 15 May 2016 at 7:37pm
|
VERY IMPRESSIVE !!!A friend had a Threshermans Special that I used to drive in parades. It was a hoss! A simular tractor. You have great attention to detail. You should be proud. Your Dad must have taught you well! ------------- sometimes I walk out to my shop and look around and think "Who's the idiot that owns this place?" |
Posted By: Jacob (WI,ND)
Date Posted: 20 May 2016 at 8:04pm
|
Hi everyone! Well I got another piece of the puzzle put together. The clutch is ready to go back into the tractor. The felt seal Dad made worked, it was a touch on the tight side, but since it is felt, I think it will be fine. I smeared it up with grease before assembly. A few tips I learned along the way. Have a big puller handy when you go to disassemble the clutch gear, as it comes off hard. And plan on having a press handy when you go to reassemble that gear. It goes on hard as well. Stubborn me wanted to have it together before I went home with it so I could spend the most amount of time working on getting the tractor back together as possible. Both of our presses are back home so I made due with a piece of pipe and a BFH to drive the gear back on, but life would have been MUCH easier if I had waited for the press. Next time I will know. https://photos.google.com/share/AF1QipMw-W2_yghlqdtaQTxKWwnjA2jQPZ4rec8kTtiRGnDvSvFkHie9t4jmlkD6DbqUew?key=b1kyNl92RG81NVRZeDZ0OHNpYWxYTFNsb0JxVzB3" rel="nofollow - https://photos.google.com/share/AF1QipMw-W2_yghlqdtaQTxKWwnjA2jQPZ4rec8kTtiRGnDvSvFkHie9t4jmlkD6DbqUew?key=b1kyNl92RG81NVRZeDZ0OHNpYWxYTFNsb0JxVzB3 ------------- Jacob Swanson 1920 6-12; 1925,1926 20-35 longfenders; 1925,1926 15-25's; 1927,1929 20-35 shortfenders; C; B's; IB; WC's; WD; WD45 |
Posted By: Dan73
Date Posted: 20 May 2016 at 8:16pm
| I would suggest waiting for the press next time I have a bad habit of breaking things when I put then together with a bh. |
Posted By: Jacob (WI,ND)
Date Posted: 12 Jun 2016 at 8:22pm
|
I have some big progress to report! I made a trip back to WI to spend some time with the family and get some tractor time in over the first weekend of June. With Dad's help we got a lot accomplished. Started by putting all the redone clutch parts back into the tractor. https://photos.google.com/share/AF1QipMw-W2_yghlqdtaQTxKWwnjA2jQPZ4rec8kTtiRGnDvSvFkHie9t4jmlkD6DbqUew/photo/AF1QipMz4Xv8kdRLW-5HVcab8BnEezhoXdi03CaNrPE1?key=b1kyNl92RG81NVRZeDZ0OHNpYWxYTFNsb0JxVzB3" rel="nofollow - https://photos.google.com/share/AF1QipMw-W2_yghlqdtaQTxKWwnjA2jQPZ4rec8kTtiRGnDvSvFkHie9t4jmlkD6DbqUew/photo/AF1QipMz4Xv8kdRLW-5HVcab8BnEezhoXdi03CaNrPE1?key=b1kyNl92RG81NVRZeDZ0OHNpYWxYTFNsb0JxVzB3 Unfortunately we had to take a step backwards. I noticed that one of the clutch lining rivets was mostly pulled through the lining, and needed to be redone. I don't know how we missed that when cleaning it all up, but that is neither here nor there, it needed to be fixed, so we pulled the shoes back off and I'll order up some new lining material and get it fixed up properly. The next thing we tackled was the break band assembly. Got that all back on the tractor, as that was already relined and waiting if you remember from a previous post. https://photos.google.com/share/AF1QipMw-W2_yghlqdtaQTxKWwnjA2jQPZ4rec8kTtiRGnDvSvFkHie9t4jmlkD6DbqUew/photo/AF1QipOqn_VKsBvF6JQFPf20Iyb3LP50078jveMgMfUu?key=b1kyNl92RG81NVRZeDZ0OHNpYWxYTFNsb0JxVzB3" rel="nofollow - https://photos.google.com/share/AF1QipMw-W2_yghlqdtaQTxKWwnjA2jQPZ4rec8kTtiRGnDvSvFkHie9t4jmlkD6DbqUew/photo/AF1QipOqn_VKsBvF6JQFPf20Iyb3LP50078jveMgMfUu?key=b1kyNl92RG81NVRZeDZ0OHNpYWxYTFNsb0JxVzB3 It was kinda a pain in the butt to get it back on and adjusted correctly. The pins were still a snug fit even all cleaned up, and the clevis was slightly bent goofy, so the pin had to go in just right to go in easily and some of it was easier to do while laying under the tractor, which in itself is a pain. But I got it! Everything can't go easily, or everyone would do it ------------- Jacob Swanson 1920 6-12; 1925,1926 20-35 longfenders; 1925,1926 15-25's; 1927,1929 20-35 shortfenders; C; B's; IB; WC's; WD; WD45 |
Posted By: Jacob (WI,ND)
Date Posted: 12 Jun 2016 at 8:25pm
The rest of the stuff we worked on was a kinda bounce around and work on different things all at once based on the weather and focus (or lack there of  ) )Got the heads put back together (mostly). Here I am putting the valves together. Question for you all, is there a trick to getting the safety snap ring back on these new valves? It looks to me like they were machined wrong, as in too high up on the stem. The original valves had a cotter pin a little ways down from where the spring washer sits. So if a spring were to break the valve wouldn't completely drop into the cylinder. But the new valves have a snap ring immediately under where the spring washer sits, so there is no way to put the snap ring on before the spring and washer because you need to push the washer down the stem a bit to get the valve keeper clips installed. And putting the snap rings on after the springs are installed would be near impossible.
Am I missing something?  For now I just didn't put the snap rings on. ------------- Jacob Swanson 1920 6-12; 1925,1926 20-35 longfenders; 1925,1926 15-25's; 1927,1929 20-35 shortfenders; C; B's; IB; WC's; WD; WD45 |
Posted By: Jacob (WI,ND)
Date Posted: 12 Jun 2016 at 8:28pm
|
Then we bounced to the upper engine pan. The hole where the rear radius rod bracket pivot mounts was worn, so we got the handy dandy drill press out and set up a reamer to make the hole round and the correct size for a bushing to be installed to take up the slop. Of course I wasn't in the ball enough to have the bushing on hand, so we had to bounce around again and work on something else. https://photos.google.com/share/AF1QipMw-W2_yghlqdtaQTxKWwnjA2jQPZ4rec8kTtiRGnDvSvFkHie9t4jmlkD6DbqUew/photo/AF1QipMsdQ95aN1PKX95FTTz16K1ckWOsTJl1Mq3d7HG?key=b1kyNl92RG81NVRZeDZ0OHNpYWxYTFNsb0JxVzB3" rel="nofollow - https://photos.google.com/share/AF1QipMw-W2_yghlqdtaQTxKWwnjA2jQPZ4rec8kTtiRGnDvSvFkHie9t4jmlkD6DbqUew/photo/AF1QipMsdQ95aN1PKX95FTTz16K1ckWOsTJl1Mq3d7HG?key=b1kyNl92RG81NVRZeDZ0OHNpYWxYTFNsb0JxVzB3
I then got the timing gears all back together in the front of the engine. https://photos.google.com/share/AF1QipMw-W2_yghlqdtaQTxKWwnjA2jQPZ4rec8kTtiRGnDvSvFkHie9t4jmlkD6DbqUew/photo/AF1QipNBDTWx4OG-L-2YVOCyMFK5Bum13XnnWcc0WcsW?key=b1kyNl92RG81NVRZeDZ0OHNpYWxYTFNsb0JxVzB3" rel="nofollow - https://photos.google.com/share/AF1QipMw-W2_yghlqdtaQTxKWwnjA2jQPZ4rec8kTtiRGnDvSvFkHie9t4jmlkD6DbqUew/photo/AF1QipNBDTWx4OG-L-2YVOCyMFK5Bum13XnnWcc0WcsW?key=b1kyNl92RG81NVRZeDZ0OHNpYWxYTFNsb0JxVzB3 With the gears in, the front cover could then be put on. What I don't show is the hours spent cleaning all of this stuff up to be able to put it back together, but I'm sure we all know that process all to well... https://photos.google.com/share/AF1QipMw-W2_yghlqdtaQTxKWwnjA2jQPZ4rec8kTtiRGnDvSvFkHie9t4jmlkD6DbqUew/photo/AF1QipN41M5qjtWNCr8TLe9bgJzscM5ihVDHMDyeGZ88?key=b1kyNl92RG81NVRZeDZ0OHNpYWxYTFNsb0JxVzB3" rel="nofollow - https://photos.google.com/share/AF1QipMw-W2_yghlqdtaQTxKWwnjA2jQPZ4rec8kTtiRGnDvSvFkHie9t4jmlkD6DbqUew/photo/AF1QipN41M5qjtWNCr8TLe9bgJzscM5ihVDHMDyeGZ88?key=b1kyNl92RG81NVRZeDZ0OHNpYWxYTFNsb0JxVzB3  ------------- Jacob Swanson 1920 6-12; 1925,1926 20-35 longfenders; 1925,1926 15-25's; 1927,1929 20-35 shortfenders; C; B's; IB; WC's; WD; WD45 |
Posted By: Jacob (WI,ND)
Date Posted: 12 Jun 2016 at 8:33pm
|
With the front cover on, we adjusted the cam thrust play. From just a guess we adjusted it to half a turn out from tight, which gives a little play. I talked with a friend after who suggested one full turn out from tight. So we might loosen it up a bit more before we get it going. For those that have done it, what did you all set yours at? Then the mid pan went on the engine, with the crank seals installed. We checked over all the cotter pins for the crankshaft main bearing caps and connecting rod caps, as the machine shop didn't quite finish that job up to snuff. Some were missing and some were not properly installed. Might have been because I was rushing them to pick up the engine on a previous trip, but still a little frustrating  Then I had to turn my attention to cleaning up the oil pan, and the oil pump because it is inside of the oil pan. https://photos.google.com/share/AF1QipMw-W2_yghlqdtaQTxKWwnjA2jQPZ4rec8kTtiRGnDvSvFkHie9t4jmlkD6DbqUew/photo/AF1QipMPYH_bf4EAOHXMkmoS1-DZyHSIbglNAVMZ7od8?key=b1kyNl92RG81NVRZeDZ0OHNpYWxYTFNsb0JxVzB3" rel="nofollow - https://photos.google.com/share/AF1QipMw-W2_yghlqdtaQTxKWwnjA2jQPZ4rec8kTtiRGnDvSvFkHie9t4jmlkD6DbqUew/photo/AF1QipMPYH_bf4EAOHXMkmoS1-DZyHSIbglNAVMZ7od8?key=b1kyNl92RG81NVRZeDZ0OHNpYWxYTFNsb0JxVzB3 I'm still looking for advice on how to set the oil pump relief ball. Silly me didn't measure or take note of how far in the screw was set before I disassembled everything. I just used an educated guess as to where it was when reassembling it. We might have to reach up in there and adjust it later if I can find someone that can tell me how it should be set. But I hear the later 20-35's oil pumps are different, so finding this info might be tricky. Here is the oil pump and drive gear installed in the oil pan. https://photos.google.com/share/AF1QipMw-W2_yghlqdtaQTxKWwnjA2jQPZ4rec8kTtiRGnDvSvFkHie9t4jmlkD6DbqUew/photo/AF1QipMVe4gt2LcU_eWVNWD0-gBtEjWW5pSmmlFbkkve?key=b1kyNl92RG81NVRZeDZ0OHNpYWxYTFNsb0JxVzB3" rel="nofollow - https://photos.google.com/share/AF1QipMw-W2_yghlqdtaQTxKWwnjA2jQPZ4rec8kTtiRGnDvSvFkHie9t4jmlkD6DbqUew/photo/AF1QipMVe4gt2LcU_eWVNWD0-gBtEjWW5pSmmlFbkkve?key=b1kyNl92RG81NVRZeDZ0OHNpYWxYTFNsb0JxVzB3 The lock bolt is safety wired on like it was originally. Another question, how much play should there be in the drive shaft for the pump front to back? There was about 1/8" play in mine, so we put an oilite thrust washer in the front bushing piece that the driveshaft goes into, to take up some of the play. The oil pickup screen was rebuilt next. I got the new brass screen from McMaster Carr, and the rivets were a garage sale score! https://photos.google.com/share/AF1QipMw-W2_yghlqdtaQTxKWwnjA2jQPZ4rec8kTtiRGnDvSvFkHie9t4jmlkD6DbqUew/photo/AF1QipPKlxeG3jxQv70auqeiKeUQUbdzPh52npuL_TRG?key=b1kyNl92RG81NVRZeDZ0OHNpYWxYTFNsb0JxVzB3" rel="nofollow - https://photos.google.com/share/AF1QipMw-W2_yghlqdtaQTxKWwnjA2jQPZ4rec8kTtiRGnDvSvFkHie9t4jmlkD6DbqUew/photo/AF1QipPKlxeG3jxQv70auqeiKeUQUbdzPh52npuL_TRG?key=b1kyNl92RG81NVRZeDZ0OHNpYWxYTFNsb0JxVzB3 ------------- Jacob Swanson 1920 6-12; 1925,1926 20-35 longfenders; 1925,1926 15-25's; 1927,1929 20-35 shortfenders; C; B's; IB; WC's; WD; WD45 |
Posted By: Jacob (WI,ND)
Date Posted: 12 Jun 2016 at 8:35pm
|
Then the oil pan could go back on the engine, along with the oil pickup screen cover. https://photos.google.com/share/AF1QipMw-W2_yghlqdtaQTxKWwnjA2jQPZ4rec8kTtiRGnDvSvFkHie9t4jmlkD6DbqUew/photo/AF1QipNAU0GB5Sr2fvwYQGjh9G_P8RDcwxpWBrCDgFXs?key=b1kyNl92RG81NVRZeDZ0OHNpYWxYTFNsb0JxVzB3" rel="nofollow - https://photos.google.com/share/AF1QipMw-W2_yghlqdtaQTxKWwnjA2jQPZ4rec8kTtiRGnDvSvFkHie9t4jmlkD6DbqUew/photo/AF1QipNAU0GB5Sr2fvwYQGjh9G_P8RDcwxpWBrCDgFXs?key=b1kyNl92RG81NVRZeDZ0OHNpYWxYTFNsb0JxVzB3
Put on the remaining covers I had, and made some plywood temporary covers for the other holes, and got the engine tipped over to get ready to load into the trailer to haul back to the barn where the rest of the tractor is! https://photos.google.com/share/AF1QipMw-W2_yghlqdtaQTxKWwnjA2jQPZ4rec8kTtiRGnDvSvFkHie9t4jmlkD6DbqUew/photo/AF1QipM-Etnbb26jQ-Z-5dM7YvDZTwyTXQf6uAYEt9Iz?key=b1kyNl92RG81NVRZeDZ0OHNpYWxYTFNsb0JxVzB3" rel="nofollow - https://photos.google.com/share/AF1QipMw-W2_yghlqdtaQTxKWwnjA2jQPZ4rec8kTtiRGnDvSvFkHie9t4jmlkD6DbqUew/photo/AF1QipM-Etnbb26jQ-Z-5dM7YvDZTwyTXQf6uAYEt9Iz?key=b1kyNl92RG81NVRZeDZ0OHNpYWxYTFNsb0JxVzB3 Loading it in the trailer was an adventure in itself, as my 1956 Chevy truck I am restoring is sitting in front of this engine, so that had to be pulled out first, so the trailer could be shoe horned into the garage so we could finagle the block up and into the trailer. Oh did I mention it was raining the entire time we were doing this?
 ------------- Jacob Swanson 1920 6-12; 1925,1926 20-35 longfenders; 1925,1926 15-25's; 1927,1929 20-35 shortfenders; C; B's; IB; WC's; WD; WD45 |
Posted By: Jacob (WI,ND)
Date Posted: 12 Jun 2016 at 8:38pm
|
Things went a lot smoother once we got to the woods. With the D15 moving the engine around was a piece of cake. Picked it up, pulled the trailer ahead, and brought the engine into the barn. Fortunately it was mostly done raining by then.
Putting the engine back into the tractor! https://photos.google.com/share/AF1QipMw-W2_yghlqdtaQTxKWwnjA2jQPZ4rec8kTtiRGnDvSvFkHie9t4jmlkD6DbqUew/photo/AF1QipOFFnWUz-fEuDb8KmNU_4206Z0jBRfB6CGqGWNv?key=b1kyNl92RG81NVRZeDZ0OHNpYWxYTFNsb0JxVzB3" rel="nofollow - https://photos.google.com/share/AF1QipMw-W2_yghlqdtaQTxKWwnjA2jQPZ4rec8kTtiRGnDvSvFkHie9t4jmlkD6DbqUew/photo/AF1QipOFFnWUz-fEuDb8KmNU_4206Z0jBRfB6CGqGWNv?key=b1kyNl92RG81NVRZeDZ0OHNpYWxYTFNsb0JxVzB3 Being down in the sand, working on rusty old iron, does life get any better?! https://photos.google.com/share/AF1QipMw-W2_yghlqdtaQTxKWwnjA2jQPZ4rec8kTtiRGnDvSvFkHie9t4jmlkD6DbqUew/photo/AF1QipOJidbx02SVrJFTilgy2ynPgZw1HhG51ZRYUGIV?key=b1kyNl92RG81NVRZeDZ0OHNpYWxYTFNsb0JxVzB3" rel="nofollow - https://photos.google.com/share/AF1QipMw-W2_yghlqdtaQTxKWwnjA2jQPZ4rec8kTtiRGnDvSvFkHie9t4jmlkD6DbqUew/photo/AF1QipOJidbx02SVrJFTilgy2ynPgZw1HhG51ZRYUGIV?key=b1kyNl92RG81NVRZeDZ0OHNpYWxYTFNsb0JxVzB3 Then, with the engine in, some of the other assemblies I had previously finished could go back on the tractor. The fan assembly was put on, the front crank pulley was put on, the heads were just set on for now. The front axle was put back on, and once I gather up a few more pieces from some friends I can get the front wheels put back on and it can sit on its own feet for the first time since I got it! ------------- Jacob Swanson 1920 6-12; 1925,1926 20-35 longfenders; 1925,1926 15-25's; 1927,1929 20-35 shortfenders; C; B's; IB; WC's; WD; WD45 |
Posted By: Thad in AR.
Date Posted: 12 Jun 2016 at 8:50pm
| It looks like you guys made good use of time. I'm very impressed. Again thanks for taking time to take pics and share with us. |
Posted By: HD6GTOM
Date Posted: 12 Jun 2016 at 11:08pm
| I went over the whole post again tonight, man keep up the good work looking REAL good |
Posted By: Jacob (WI,ND)
Date Posted: 11 Aug 2016 at 8:15pm
|
Well, all the work we got done a while ago balances out the utter lack of progress lately. I've been busy with other things lately it seems, but I have a couple little things to report. I ordered up the new clutch lining material, and Dad got the clutch shoes relined a while ago. They are still not put in the tractor, but are ready to go. https://photos.google.com/share/AF1QipMw-W2_yghlqdtaQTxKWwnjA2jQPZ4rec8kTtiRGnDvSvFkHie9t4jmlkD6DbqUew/photo/AF1QipOrg3YZlArEv0JU8itvB1qwtXRw0t5s84c6C9rc?key=b1kyNl92RG81NVRZeDZ0OHNpYWxYTFNsb0JxVzB3" rel="nofollow - https://photos.google.com/share/AF1QipMw-W2_yghlqdtaQTxKWwnjA2jQPZ4rec8kTtiRGnDvSvFkHie9t4jmlkD6DbqUew/photo/AF1QipOrg3YZlArEv0JU8itvB1qwtXRw0t5s84c6C9rc?key=b1kyNl92RG81NVRZeDZ0OHNpYWxYTFNsb0JxVzB3 We also got a bushing installed in the mid pan and the rear pivot point for the front axle all put together. Everything is nice and tight like it should be now. https://photos.google.com/share/AF1QipMw-W2_yghlqdtaQTxKWwnjA2jQPZ4rec8kTtiRGnDvSvFkHie9t4jmlkD6DbqUew/photo/AF1QipNSKRZEgCyvTIQb911sl9WVekkpiL87MoGxdBl4?key=b1kyNl92RG81NVRZeDZ0OHNpYWxYTFNsb0JxVzB3" rel="nofollow - https://photos.google.com/share/AF1QipMw-W2_yghlqdtaQTxKWwnjA2jQPZ4rec8kTtiRGnDvSvFkHie9t4jmlkD6DbqUew/photo/AF1QipNSKRZEgCyvTIQb911sl9WVekkpiL87MoGxdBl4?key=b1kyNl92RG81NVRZeDZ0OHNpYWxYTFNsb0JxVzB3 I met up with some forum members at Hutch a few weeks back, and got the rest of the parts I should need to complete this tractor. One of which, and the hardest to find, was the throttle quadrant. I got that all taken apart and cleaned up and working properly and put back together. https://photos.google.com/share/AF1QipMw-W2_yghlqdtaQTxKWwnjA2jQPZ4rec8kTtiRGnDvSvFkHie9t4jmlkD6DbqUew/photo/AF1QipNqFa-D1lHK26YD0ONoY5y6kimFd54jBoFcYRum?key=b1kyNl92RG81NVRZeDZ0OHNpYWxYTFNsb0JxVzB3" rel="nofollow - https://photos.google.com/share/AF1QipMw-W2_yghlqdtaQTxKWwnjA2jQPZ4rec8kTtiRGnDvSvFkHie9t4jmlkD6DbqUew/photo/AF1QipNqFa-D1lHK26YD0ONoY5y6kimFd54jBoFcYRum?key=b1kyNl92RG81NVRZeDZ0OHNpYWxYTFNsb0JxVzB3 https://photos.google.com/share/AF1QipMw-W2_yghlqdtaQTxKWwnjA2jQPZ4rec8kTtiRGnDvSvFkHie9t4jmlkD6DbqUew/photo/AF1QipP9gOsvdBlUJZdsz-eKl83ASXwbNiN7AMby0G3f?key=b1kyNl92RG81NVRZeDZ0OHNpYWxYTFNsb0JxVzB3" rel="nofollow - https://photos.google.com/share/AF1QipMw-W2_yghlqdtaQTxKWwnjA2jQPZ4rec8kTtiRGnDvSvFkHie9t4jmlkD6DbqUew/photo/AF1QipP9gOsvdBlUJZdsz-eKl83ASXwbNiN7AMby0G3f?key=b1kyNl92RG81NVRZeDZ0OHNpYWxYTFNsb0JxVzB3 The only thing I need to do is find/make a spring for the flipper on the lever. https://photos.google.com/share/AF1QipMw-W2_yghlqdtaQTxKWwnjA2jQPZ4rec8kTtiRGnDvSvFkHie9t4jmlkD6DbqUew/photo/AF1QipNvOpc8qALHlIS-yirBFyOoW2SsH1_JhJOTEMsb?key=b1kyNl92RG81NVRZeDZ0OHNpYWxYTFNsb0JxVzB3" rel="nofollow - https://photos.google.com/share/AF1QipMw-W2_yghlqdtaQTxKWwnjA2jQPZ4rec8kTtiRGnDvSvFkHie9t4jmlkD6DbqUew/photo/AF1QipNvOpc8qALHlIS-yirBFyOoW2SsH1_JhJOTEMsb?key=b1kyNl92RG81NVRZeDZ0OHNpYWxYTFNsb0JxVzB3 Does anyone have a good pic of what it should be originally? I figure it must circle around a couple times and have an end in each hole, but want to get it right. Other than that, not much has been happening. Not looking good to have it going for our local show in mid Sep unfortunately... ------------- Jacob Swanson 1920 6-12; 1925,1926 20-35 longfenders; 1925,1926 15-25's; 1927,1929 20-35 shortfenders; C; B's; IB; WC's; WD; WD45 |
Posted By: HD6GTOM
Date Posted: 12 Aug 2016 at 8:35am
| Dog gone good work Jacob Looks like you are making excellent progress. |
Posted By: AC7060IL
Date Posted: 12 Aug 2016 at 9:15am
|
GO Jacob! You are doing an awesome job!! I read your entire post, for the first time today. Your dedication is amazing. The casting repair that involved brazing in two spacers then machining it, was most interesting. |
Posted By: orange
Date Posted: 12 Aug 2016 at 9:21am
|
Jacob I also have just purchased a 20-35 1927 s. n. 9766 lot of work on mine to do also nothing like yours. I live in Watertown .s. d. Maybe will meet up sometime . Terry |
Posted By: truckerfarmer
Date Posted: 12 Aug 2016 at 11:21pm
|
Terry,was that you I saw headed east on 212 with it this morning? I was at Prairie Stop putting on gas to head to Peever to get Dad's WD cultivator. Must have been the day to haul Orange today. ------------- Looking at the past to see the future. '53 WD, '53 WD45, WD snap coupler field cultivator, #53 plow,'53 HD5B dozer Duct tape.... Can't fix stupidity. But will muffle the sound of it! |
Posted By: Brendan (AB)
Date Posted: 13 Aug 2016 at 12:43am
|
Hi Jacob, Thanks for posting all of the information on your restoration. I have a 1927 20-35 also, which I hope to restore one day. Here are some of pictures of my spring. It's badly pitted, but shows what it should look like. The inside diameter is about 11/16". Hope that helps! 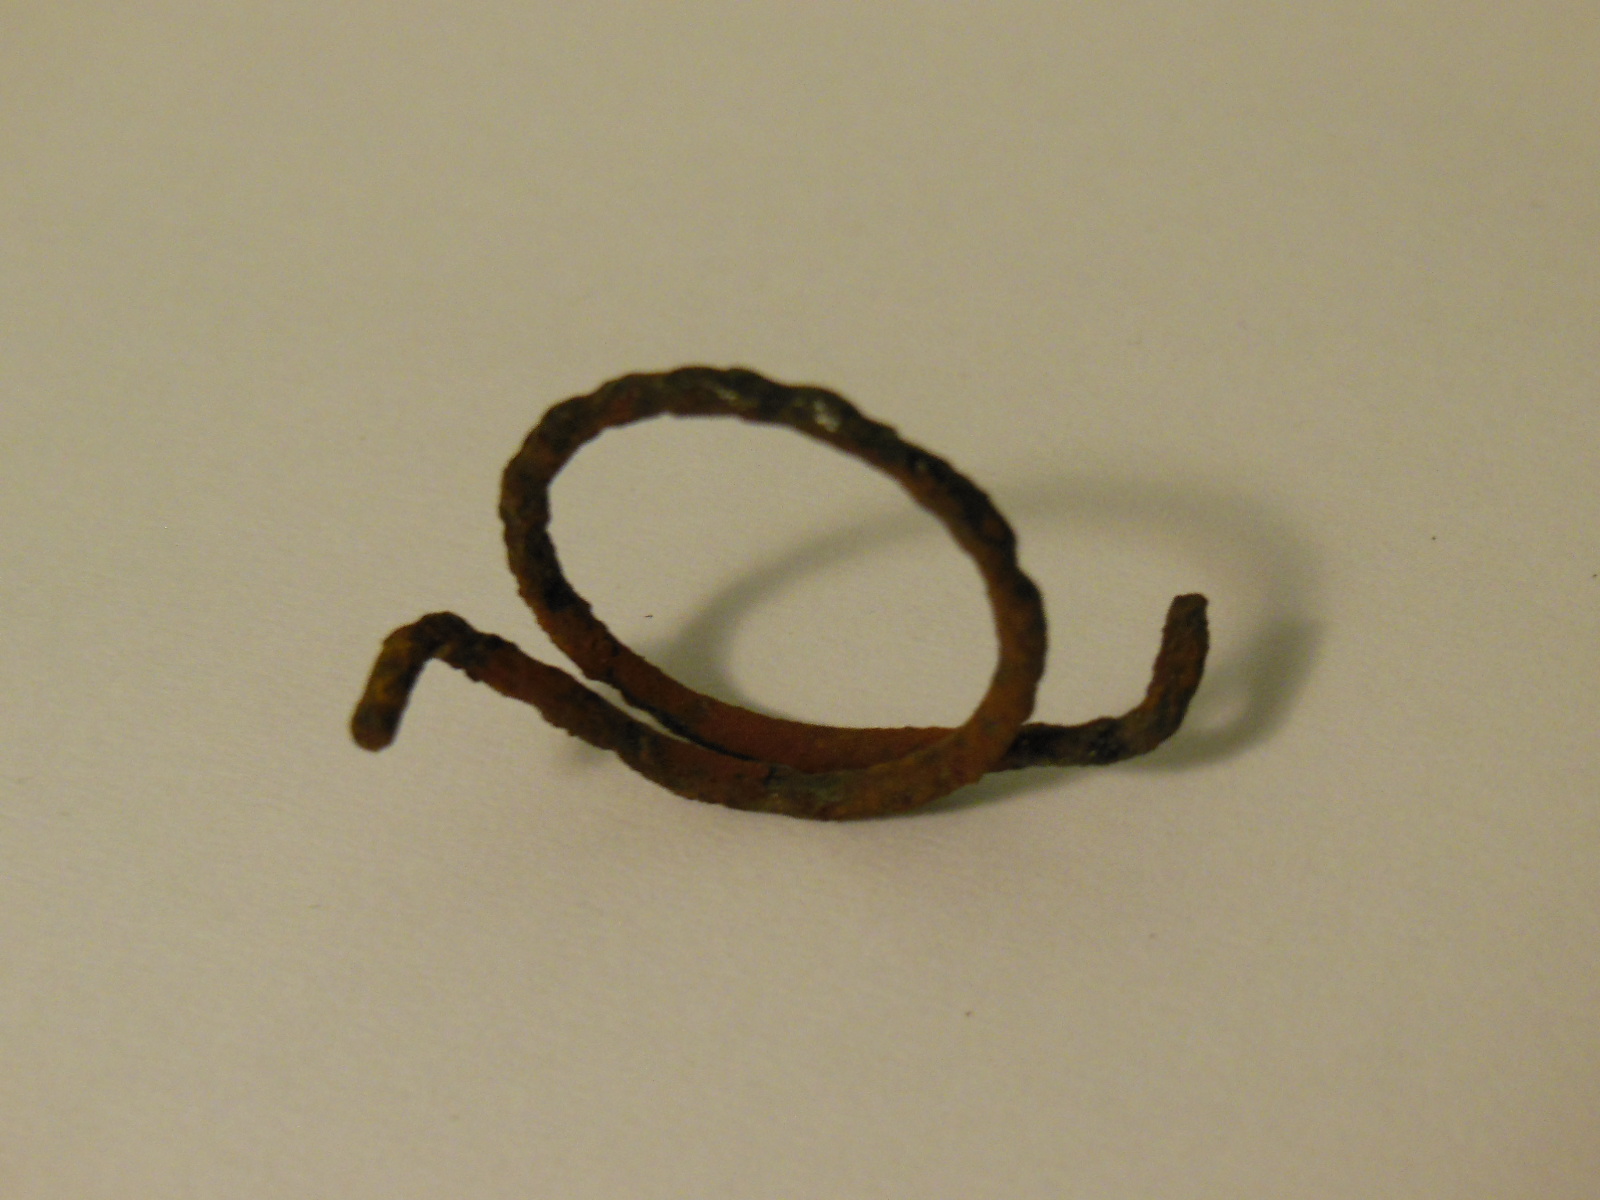 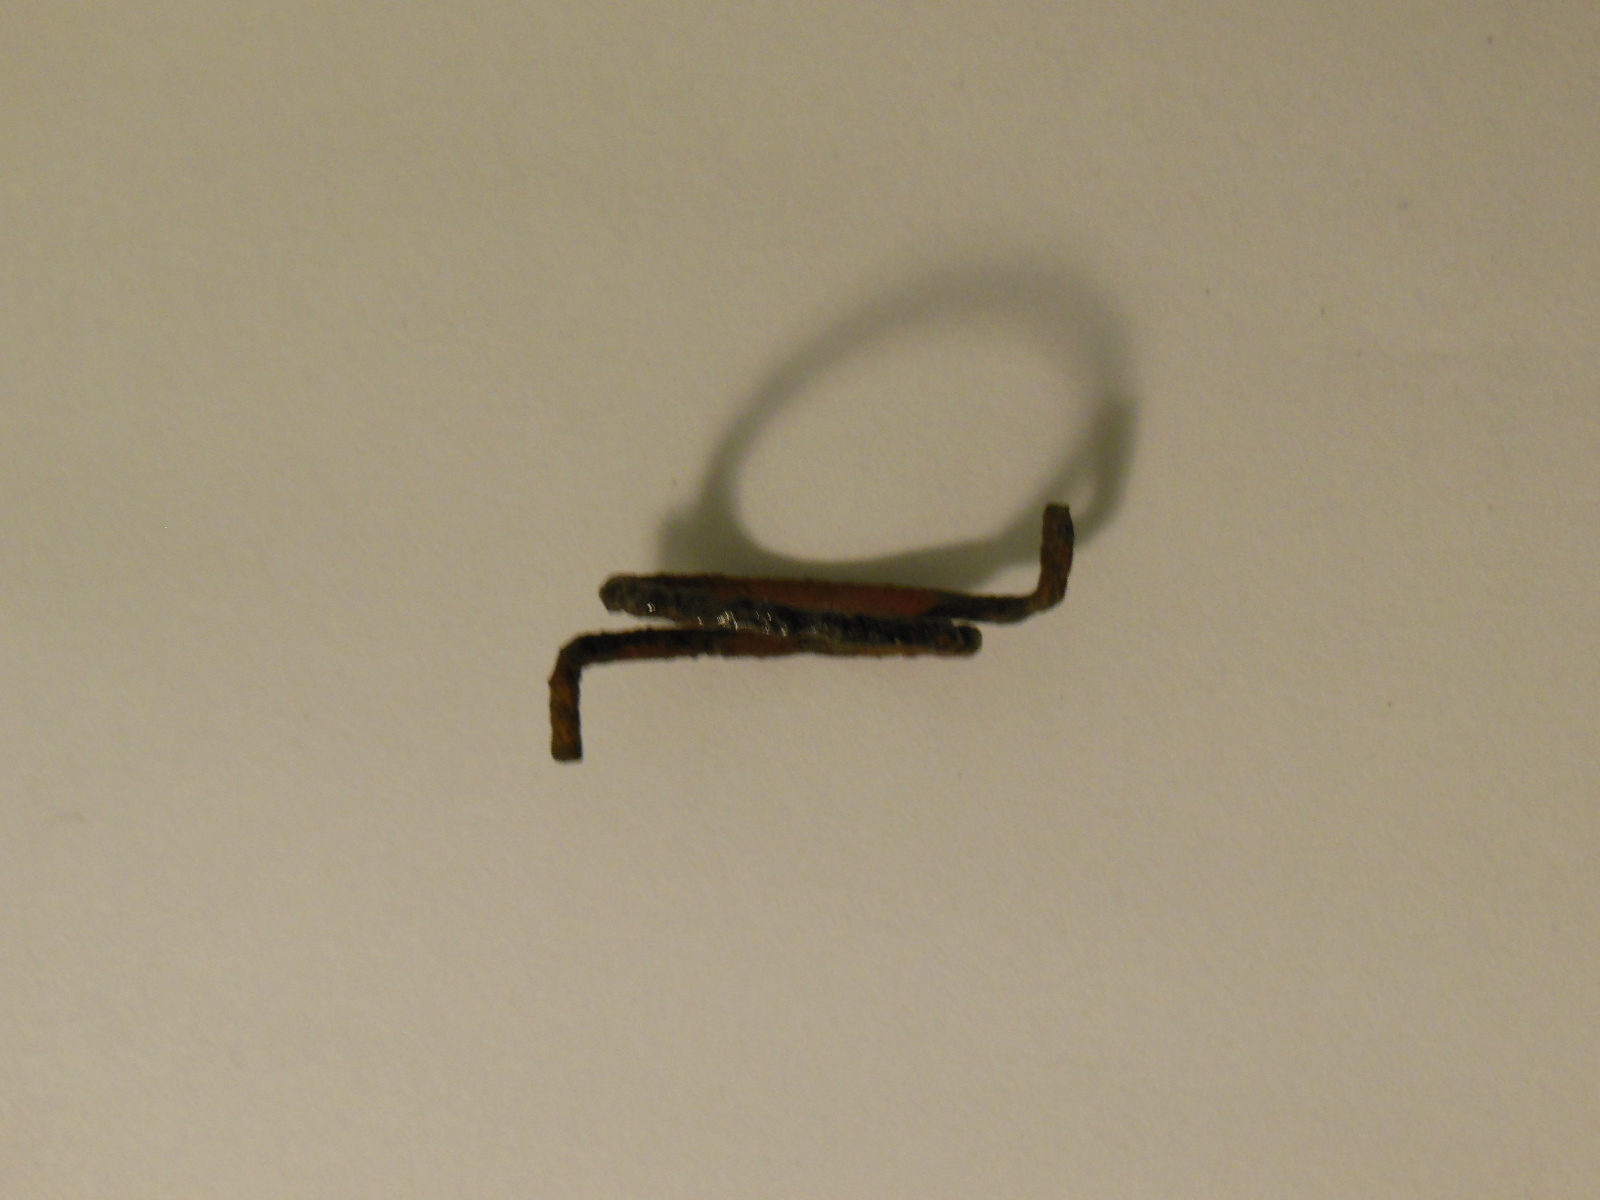 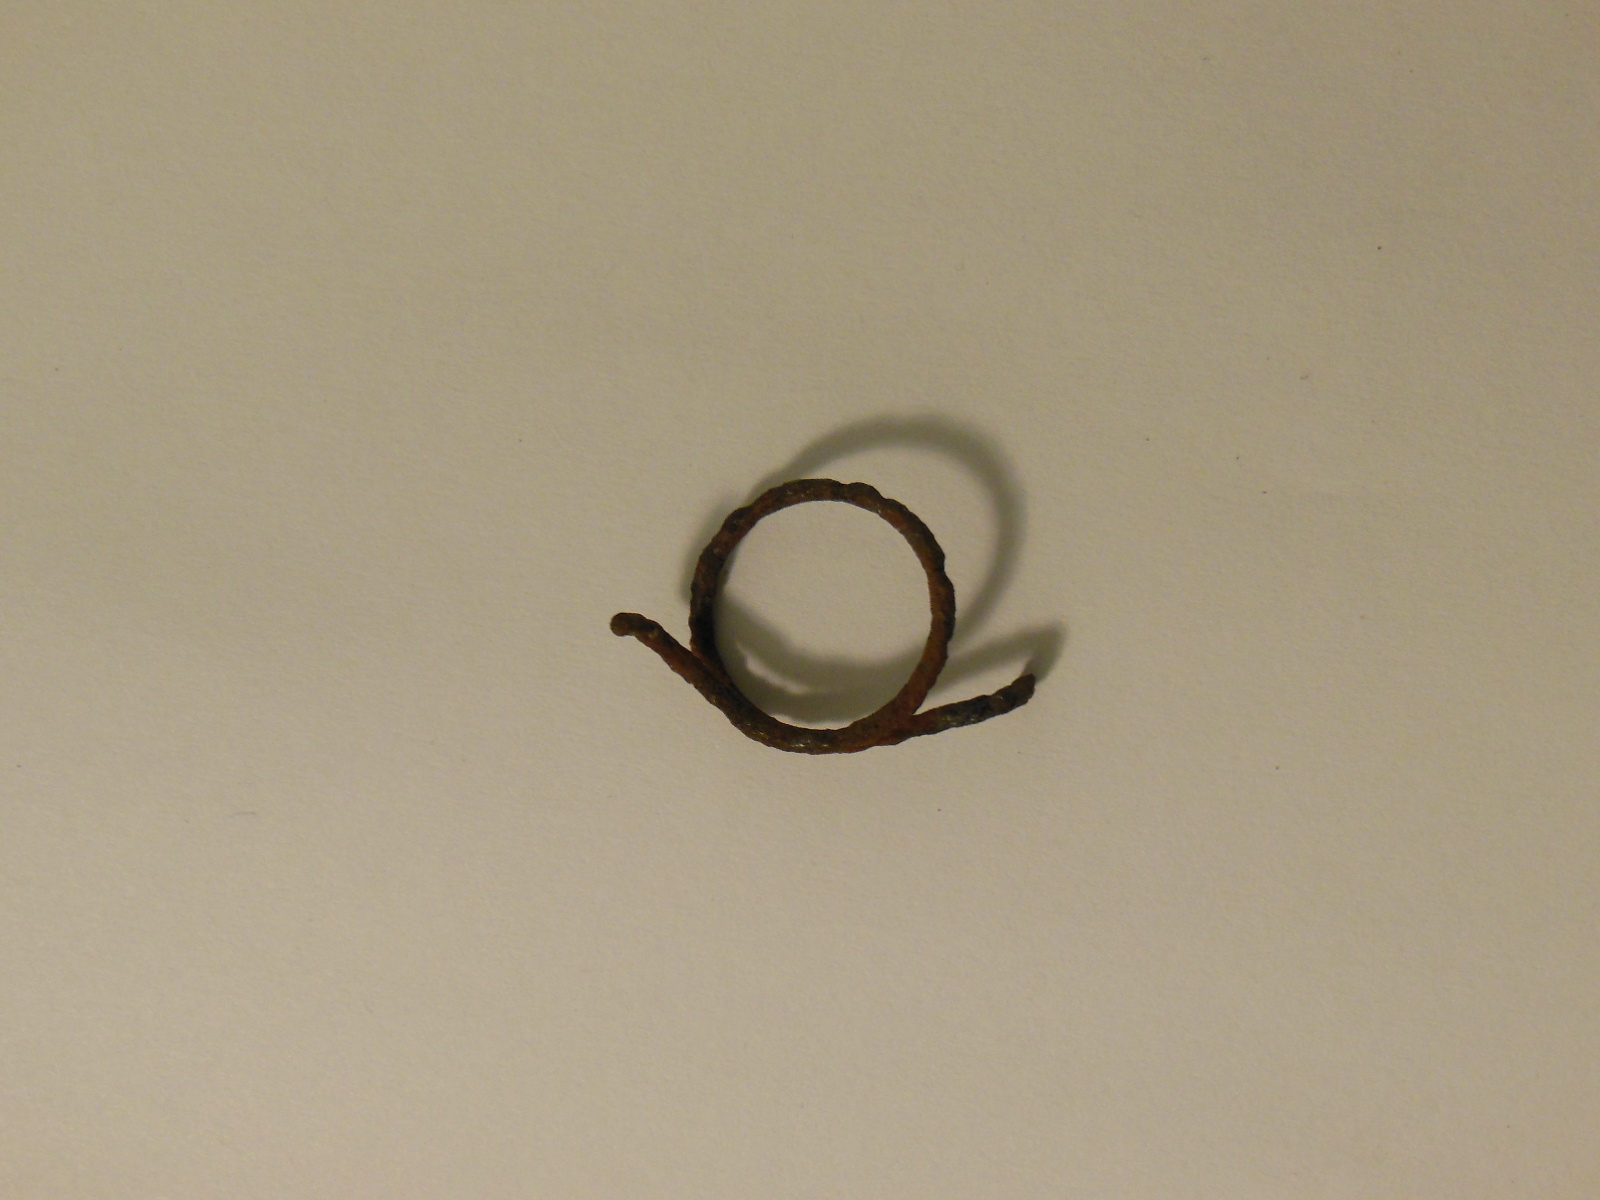
|
Posted By: Alberta Phil
Date Posted: 13 Aug 2016 at 9:19am
|
Good for a pattern, Brendan, but I wouldn't want to put much torque on that particular spring! LOL Looks like an easy one to make. Have you made much progress on your '27? |
Posted By: Jacob (WI,ND)
Date Posted: 13 Aug 2016 at 11:05am
|
Thanks Brendan! That is EXACTLY what I was looking for, now I just need to find something to make it out of. I've heard piano wire works good for this sort of think, but don't know where to find any of that? I'd love to see some pics of your tractor and hear a little more about it Brendan, and if I can be of any assistance just holler. Same goes for you Terry. Yeah Phil, I've run into a couple springs like this, where looking at them too hard would snap them  Thanks again everyone for the encouragement, advice, help, and compliments along the way! Really shows how the AC bunch really is a family ------------- Jacob Swanson 1920 6-12; 1925,1926 20-35 longfenders; 1925,1926 15-25's; 1927,1929 20-35 shortfenders; C; B's; IB; WC's; WD; WD45 |
Posted By: Jacob (WI,ND)
Date Posted: 13 Aug 2016 at 12:52pm
|
It took a couple (OK maybe several ) attempts, but I got a spring made up. I ended up digging through my junk drawer and found some misc springs from who knows what. Took one with about that 11/16" ID and about the correct thickness wire, and got after it with my pliers. I ended up making it with a little less of a "loop" from end to end to get the right tension on the flipper, but it works good now! PS- starting with a spring "wound" the right way helps, don't ask....  The true test will be to see how it works when on the tractor in operation, but if nothing else I'll make a new one slightly different. Thanks again for the quick reply! One more thing checked off the list of things to do ------------- Jacob Swanson 1920 6-12; 1925,1926 20-35 longfenders; 1925,1926 15-25's; 1927,1929 20-35 shortfenders; C; B's; IB; WC's; WD; WD45 |
Posted By: JayIN
Date Posted: 13 Aug 2016 at 7:35pm
|
WOW! I am continually impressed! What great work ethic! I will last another 80 years EASILY!!!!! ------------- sometimes I walk out to my shop and look around and think "Who's the idiot that owns this place?" |
Posted By: Sugarmaker
Date Posted: 13 Aug 2016 at 8:48pm
|
Very nice to see your project being assembled! Regards, Chris ------------- D17 1958 (NFE), WD45 1954 (NFE), WD 1952 (NFE), WD 1950 (WFE), Allis F-40 forklift, Allis CA, Allis D14, Ford Jubilee, Many IH Cub Cadets, 32 Ford Dump, 65 Comet. |
Posted By: Brendan (AB)
Date Posted: 18 Aug 2016 at 12:09am
Here is a picture of my '27 when I got it a few of years ago. The engine was stuck, and I have since got it loose, but one of the sleeves is cracked. I think I should have something usable in one of my parts tractors. Beyond that, I haven't done much to it yet. Thanks for the offer of advice, I may have to take you up on that at some point! Glad you were able to get the spring made for the pawl on the throttle lever. And as far as where to get piano wire, I think that McMaster Carr sells it.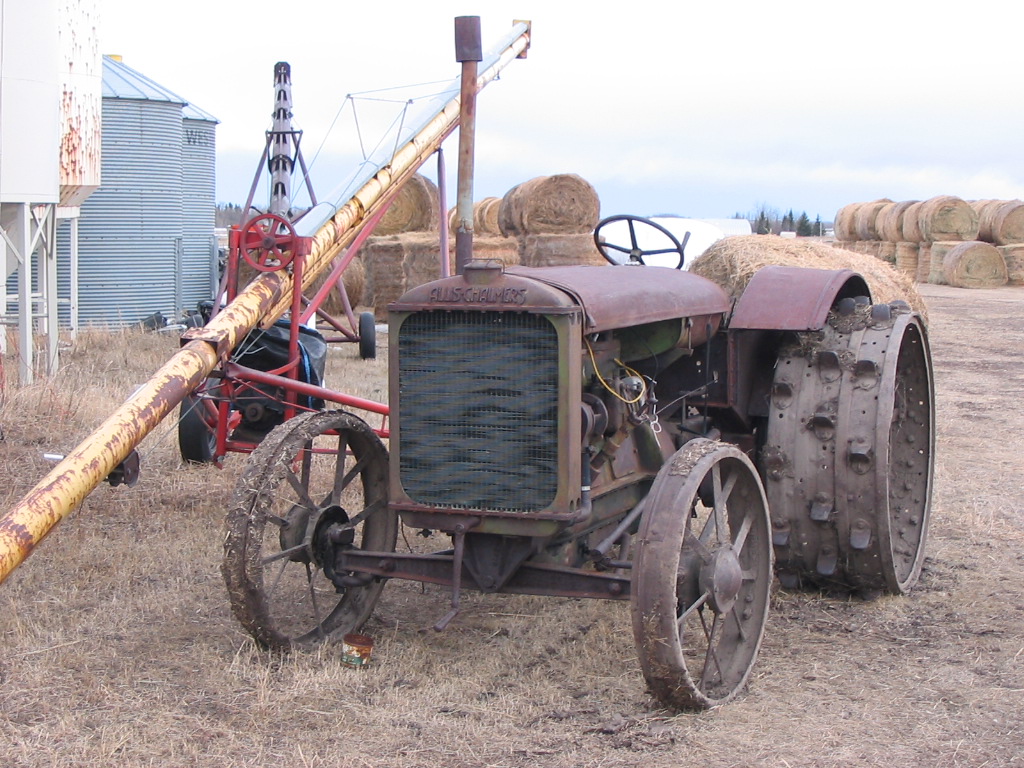 |
Posted By: Jacob (WI,ND)
Date Posted: 18 Aug 2016 at 7:15pm
|
Looks like a very good starting point Brendan! Much more complete than what I began with. Be sure to keep us updated on your progress, I love looking at these old beauties. ------------- Jacob Swanson 1920 6-12; 1925,1926 20-35 longfenders; 1925,1926 15-25's; 1927,1929 20-35 shortfenders; C; B's; IB; WC's; WD; WD45 |
Posted By: Jacob (WI,ND)
Date Posted: 14 Jan 2017 at 1:52pm
|
WOW has it been too long since I've updated this post! I spent a bunch of the summer chasing after my other old 20-35's and getting them home, so progress on the '27 suffered. But I just took a few pics off of my phone and uploaded them to my Photobucket, so I will try to play catch up with this post a bit. I believe I mentioned in the past that I was converting the original oil filter to use a modern canister type filter to replace the original spring and sock setup. While I was home over the holidays I snapped a couple of pics of what we did to convert the original housing. https://photos.google.com/share/AF1QipMw-W2_yghlqdtaQTxKWwnjA2jQPZ4rec8kTtiRGnDvSvFkHie9t4jmlkD6DbqUew/photo/AF1QipOz6zsX04d2EZ2XvHbFDMKj12gyDcp7NzX2TZ1G?key=b1kyNl92RG81NVRZeDZ0OHNpYWxYTFNsb0JxVzB3" rel="nofollow - https://photos.google.com/share/AF1QipMw-W2_yghlqdtaQTxKWwnjA2jQPZ4rec8kTtiRGnDvSvFkHie9t4jmlkD6DbqUew/photo/AF1QipOz6zsX04d2EZ2XvHbFDMKj12gyDcp7NzX2TZ1G?key=b1kyNl92RG81NVRZeDZ0OHNpYWxYTFNsb0JxVzB3 https://photos.google.com/share/AF1QipMw-W2_yghlqdtaQTxKWwnjA2jQPZ4rec8kTtiRGnDvSvFkHie9t4jmlkD6DbqUew/photo/AF1QipM4BLmlNIx8sFBu55vbTcWK_z-HEFrVttm7-M1V?key=b1kyNl92RG81NVRZeDZ0OHNpYWxYTFNsb0JxVzB3" rel="nofollow - https://photos.google.com/share/AF1QipMw-W2_yghlqdtaQTxKWwnjA2jQPZ4rec8kTtiRGnDvSvFkHie9t4jmlkD6DbqUew/photo/AF1QipM4BLmlNIx8sFBu55vbTcWK_z-HEFrVttm7-M1V?key=b1kyNl92RG81NVRZeDZ0OHNpYWxYTFNsb0JxVzB3 First we tapped the original center hole of the cast housing which was untapped. Then we threaded a piece of pipe to go into this new threaded hole. A jamb nut and seal were added to serve two functions, one to hold the pipe in place extra good, and two to give the new filter something to seal against on the top (this assembly is upside down in the pic, the cast housing is on the top when installed). The pipe was then cut to the correct length and tapped on the bottom (top of pic) to accept a bolt. https://photos.google.com/share/AF1QipMw-W2_yghlqdtaQTxKWwnjA2jQPZ4rec8kTtiRGnDvSvFkHie9t4jmlkD6DbqUew/photo/AF1QipPfamlgS1F2sYK44XSu45YvQU12F3jDloDQeuA2?key=b1kyNl92RG81NVRZeDZ0OHNpYWxYTFNsb0JxVzB3" rel="nofollow - https://photos.google.com/share/AF1QipMw-W2_yghlqdtaQTxKWwnjA2jQPZ4rec8kTtiRGnDvSvFkHie9t4jmlkD6DbqUew/photo/AF1QipPfamlgS1F2sYK44XSu45YvQU12F3jDloDQeuA2?key=b1kyNl92RG81NVRZeDZ0OHNpYWxYTFNsb0JxVzB3 The modern filter can now be slid up onto the pipe and with another seal and couple of washers and bolt, can be held in place on the pipe, sealing it off on both ends. A hole still needs to be made in the side of the pipe to allow the oil to go up the pipe and through the housing and back into the engine. The oil enters the housing from the hole next to the center pipe, then goes through the filter and back up the pipe and back into the engine. This way any crud or sludge collects in the bottom of the canister. Also still need to find or make a seal or gasket to seal the canister to the housing. I hope this all makes sense? ------------- Jacob Swanson 1920 6-12; 1925,1926 20-35 longfenders; 1925,1926 15-25's; 1927,1929 20-35 shortfenders; C; B's; IB; WC's; WD; WD45 |
Posted By: Jacob (WI,ND)
Date Posted: 14 Jan 2017 at 1:56pm
|
Another note I'm not sure in which of my threads to post is this, so I'll put it here. By accident I stumbled upon this bit of info. The water manifolds for shortfender 20-35's and longfenders are different in height. Haven't pulled out the tape measure yet, but am thinking the difference comes into play on the different radiators and where there upper neck is located? Just thought it was an interesting difference and worth noting. ------------- Jacob Swanson 1920 6-12; 1925,1926 20-35 longfenders; 1925,1926 15-25's; 1927,1929 20-35 shortfenders; C; B's; IB; WC's; WD; WD45 |
Posted By: Jacob (WI,ND)
Date Posted: 14 Jan 2017 at 1:57pm
|
SO, while I was home over the holidays, my goal was to finally get the heads and manifolds bolted back onto the block of my '27! Sounds easy enough, but sure fought me every step of the way it seemed. The first thing I did was order up the new studs and nuts I needed for all of this from McMaster Carr. While I was waiting for them to arrive I went back to the valve spring clips that we talked about previously in this thread. I went the route that Phil suggested and took everything back apart, put the clip on the valve stem and reassembled the spring and keeper and then took a small screwdriver and slid the clip up into the grove. Talk about a pain in the ass! You can't see what you are doing so it is mainly a hope that everything is right and it is in the groove well. Next tractor I do I will make sure the valves are machined correctly or will drill my own hole for a cotter pin like they had originally! Something so simple really makes the process frustrating!  But once this was done I focused on getting other things ready. They also fought me.... ------------- Jacob Swanson 1920 6-12; 1925,1926 20-35 longfenders; 1925,1926 15-25's; 1927,1929 20-35 shortfenders; C; B's; IB; WC's; WD; WD45 |
Posted By: Jacob (WI,ND)
Date Posted: 14 Jan 2017 at 2:00pm
|
So this past summer I got a good used exhaust manifold which was great. It just needed to be fly cut to clean up the ports where it meets the head as they were a bit pitted and ugly like they usually are. No big deal, I usually just take things like this to our local NAPA and they take care of the machining for me as we don't have the proper equipment to tackle this yet. But do to unfortunate circumstances they no longer do the machining in house and have to send it down to Rice lake WI NAPA to be done. Again, normally this would not be a problem, but this trip I was under a time crunch and didn't plan ahead enough to have this done and get it back in time to get the heads put back on the tractor. I really wanted to get this assembly done this trip, so I improvised. How hard could it be to get this manifold trued up myself? I brainstormed and came up with a plan. First step was to mount the manifold to a piece of large angle iron. After laying out and drilling some holes in the angle iron, and coming up with some spacers and bolts to fasten the manifold to the angle, I had the manifold sitting square with the world. https://photos.google.com/share/AF1QipMw-W2_yghlqdtaQTxKWwnjA2jQPZ4rec8kTtiRGnDvSvFkHie9t4jmlkD6DbqUew/photo/AF1QipP2M2Ay9L4O1R3iNKKWo5urnPxn-bR77OCo6NSl?key=b1kyNl92RG81NVRZeDZ0OHNpYWxYTFNsb0JxVzB3" rel="nofollow - https://photos.google.com/share/AF1QipMw-W2_yghlqdtaQTxKWwnjA2jQPZ4rec8kTtiRGnDvSvFkHie9t4jmlkD6DbqUew/photo/AF1QipP2M2Ay9L4O1R3iNKKWo5urnPxn-bR77OCo6NSl?key=b1kyNl92RG81NVRZeDZ0OHNpYWxYTFNsb0JxVzB3 I fabbed up a jig to clamp to the table saw fence, which would give the bottom edge of the angle iron something to ride against straight and square with the sanding disc I had placed in the table saw. This is a metal disc that you put a self adhesive sanding disc on to use the table saw like a disc sander. Normally used for woodworking, but I break the rules.  I did have to chase all over town to find the correct sanding discs made for sanding metal. I did have to chase all over town to find the correct sanding discs made for sanding metal.So then with light passes back and forth I sanded the ports all smooth and true. With the fence jig carefully set in in small increments more and more could be taken off of the manifold until it was all trued up. Here is the final product. Took me entirely too long to get it all figured out and to work good, (as I tried another attempt first, but that did not work so I won't even tell you about it). But in the end it worked good, and I didn't have to send it out to be done. Would have been more enjoyable to do if the garage the table saw is in were not 0 degrees in though. Stupid winter. ------------- Jacob Swanson 1920 6-12; 1925,1926 20-35 longfenders; 1925,1926 15-25's; 1927,1929 20-35 shortfenders; C; B's; IB; WC's; WD; WD45 |
Posted By: Jacob (WI,ND)
Date Posted: 14 Jan 2017 at 2:01pm
So with my manifold cleaned up and the heads ready, I set it all up on the workbench (in the garage with heat ) to dry fit everything to make sure everything was right and mated up good before I brought them out the barn to put on the tractor. ) to dry fit everything to make sure everything was right and mated up good before I brought them out the barn to put on the tractor.
https://photos.google.com/share/AF1QipMw-W2_yghlqdtaQTxKWwnjA2jQPZ4rec8kTtiRGnDvSvFkHie9t4jmlkD6DbqUew/photo/AF1QipPtsZUDI8m9YX57zgAnfrPcLdSzu5H8zkzu-WoZ?key=b1kyNl92RG81NVRZeDZ0OHNpYWxYTFNsb0JxVzB3" rel="nofollow - https://photos.google.com/share/AF1QipMw-W2_yghlqdtaQTxKWwnjA2jQPZ4rec8kTtiRGnDvSvFkHie9t4jmlkD6DbqUew/photo/AF1QipPtsZUDI8m9YX57zgAnfrPcLdSzu5H8zkzu-WoZ?key=b1kyNl92RG81NVRZeDZ0OHNpYWxYTFNsb0JxVzB3 https://photos.google.com/share/AF1QipMw-W2_yghlqdtaQTxKWwnjA2jQPZ4rec8kTtiRGnDvSvFkHie9t4jmlkD6DbqUew/photo/AF1QipPacfXWhamKbxmCFE0ztJ897nIrOf3HRZt90QMQ?key=b1kyNl92RG81NVRZeDZ0OHNpYWxYTFNsb0JxVzB3" rel="nofollow - https://photos.google.com/share/AF1QipMw-W2_yghlqdtaQTxKWwnjA2jQPZ4rec8kTtiRGnDvSvFkHie9t4jmlkD6DbqUew/photo/AF1QipPacfXWhamKbxmCFE0ztJ897nIrOf3HRZt90QMQ?key=b1kyNl92RG81NVRZeDZ0OHNpYWxYTFNsb0JxVzB3 Everything seemed to be good, so I took it all back apart and loaded everything up in the truck to head to the barn. ------------- Jacob Swanson 1920 6-12; 1925,1926 20-35 longfenders; 1925,1926 15-25's; 1927,1929 20-35 shortfenders; C; B's; IB; WC's; WD; WD45 |
Posted By: Jacob (WI,ND)
Date Posted: 14 Jan 2017 at 2:03pm
It was well below zero when I was out in the barn putting everything together, so I didn't stop for many pictures. One must bundle up and work fast to get anything done in these temps. I was determined to get this done though! A few trip to warm up by the wood stove in the cabin were made that day. It is surprising how much you can do with gloves on when it's that cold, even though it sure is inconvenient. I like this pic, I'm standing on a bench to work on things easier, but it makes the tractor look like a scale model when I'm up that high. It gives a guy crazy ideas like making a half scale tractor some day.... https://photos.google.com/share/AF1QipMw-W2_yghlqdtaQTxKWwnjA2jQPZ4rec8kTtiRGnDvSvFkHie9t4jmlkD6DbqUew/photo/AF1QipO29VmSkyswi1-x96JDlwAc2-kdDP6TEsODthjK?key=b1kyNl92RG81NVRZeDZ0OHNpYWxYTFNsb0JxVzB3" rel="nofollow - https://photos.google.com/share/AF1QipMw-W2_yghlqdtaQTxKWwnjA2jQPZ4rec8kTtiRGnDvSvFkHie9t4jmlkD6DbqUew/photo/AF1QipO29VmSkyswi1-x96JDlwAc2-kdDP6TEsODthjK?key=b1kyNl92RG81NVRZeDZ0OHNpYWxYTFNsb0JxVzB3 And here is the finished product! https://photos.google.com/share/AF1QipMw-W2_yghlqdtaQTxKWwnjA2jQPZ4rec8kTtiRGnDvSvFkHie9t4jmlkD6DbqUew/photo/AF1QipPk1PdSAx0pg4f4o8RDSLkDHrtNQITvnm7AlQu2?key=b1kyNl92RG81NVRZeDZ0OHNpYWxYTFNsb0JxVzB3" rel="nofollow - https://photos.google.com/share/AF1QipMw-W2_yghlqdtaQTxKWwnjA2jQPZ4rec8kTtiRGnDvSvFkHie9t4jmlkD6DbqUew/photo/AF1QipPk1PdSAx0pg4f4o8RDSLkDHrtNQITvnm7AlQu2?key=b1kyNl92RG81NVRZeDZ0OHNpYWxYTFNsb0JxVzB3 Heads torqued down to block. I did 60 lbs on the head nuts, except for the center one which is only 40 lbs because the block is very thin in this area and easy to break something. These are the numbers that were suggested to me from others that have done these tractors. There are no service manuals for these old AC's. I forgot to mention that before I torqued down the heads I first placed everything on the block, then the manifolds on the heads and snugged them up by hand, then once everything was lined up good, the heads were torqued down in increments, then the manifolds were torqued down to the heads last. This way the manifolds and heads are in line and there is no unneeded stress on the manifold or head ears, so hopefully nothing will break. I torqued the manifolds to 25 lbs. I then placed the carb back on the tractor which has previously been rebuilt. I then put a few of the linkages back on the tractor for the carb, and looked at a few more details that will have to be addressed. By then I had spent enough time in the cold, time to go home! I guess that is about it for now. Sure is a long road to bring one of these beauties back to life. But we made a huge step in the right direction getting these things done! ------------- Jacob Swanson 1920 6-12; 1925,1926 20-35 longfenders; 1925,1926 15-25's; 1927,1929 20-35 shortfenders; C; B's; IB; WC's; WD; WD45 |