| Author |
 Topic Search Topic Search  Topic Options Topic Options
|
Dr.Fiero 
Silver Level


Joined: 11 Oct 2013
Location: AB, Canada
Points: 72
|
 Post Options Post Options
") Thanks(0) Thanks(0)
 Quote Quote  Reply Reply
 Posted: 02 Nov 2013 at 11:28pm Posted: 02 Nov 2013 at 11:28pm |
Ok! Back to real stuff...
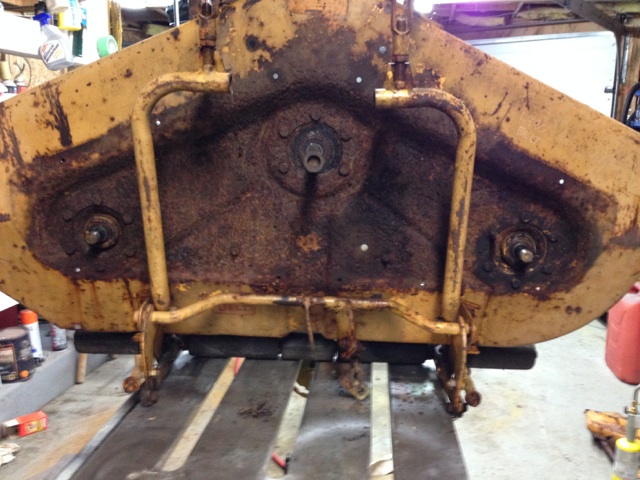
Mower deck was looking pretty sad parked out back, so in it came.
Looks like something might have been living in here the last dozen years 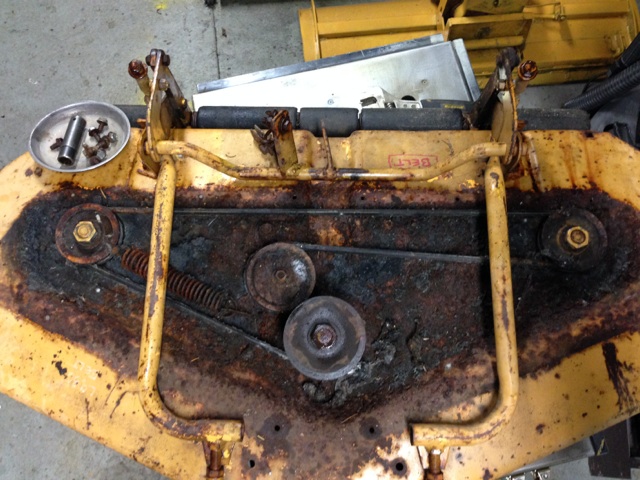
Got things stripped down a bit
Looks like one of the center blades bearings seized up, and the lower pulley spun. Screwed up the shaft in those two places.
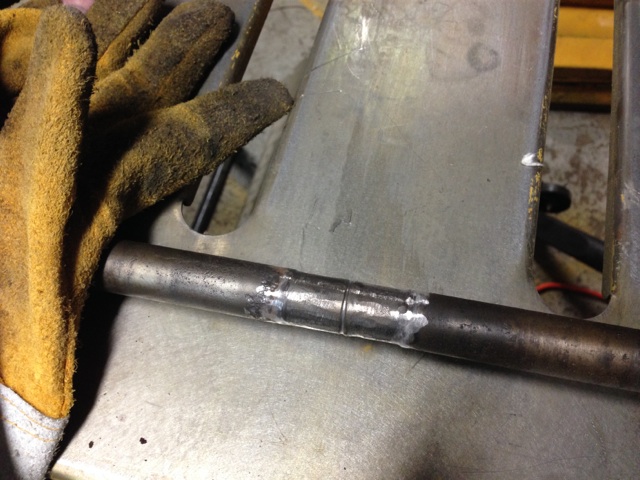
Ground down the nasty area
TIG welded up the area
Then stuck it in the lathe and cut it all back down to 3/4". And promptly forgot to take a picture of it.  Anyhow, pressed out the old bearings, and pressed in a new set. Stuck it all (the bearing/shaft) back together and gave it a shot of paint.
The actual body of the deck (this is the 42" version BTW) is too big to fit in MY blast cabinet (36" wide), so I'll have to run it out out to U-Blast and use his. Went this far... Why not!
Have to go shopping tomorrow for a new tensioner pulley (totally rusted out, and the non replaceable bearing is shot), and a new lower pulley for the center shaft. New belt too of course. Damn that things big!
It's late(ish), and the clocks go back tonight... so... I'm done for the night!
|
|
Current slow rides: '65 Big Ten, '79 JD 317
|
 |
|
Sponsored Links
|
|
|
Alberta Phil
Orange Level


Joined: 13 Sep 2009
Location: Alberta, Canada
Points: 3649
|
Post Options
Thanks(0)
Quote Reply
Posted: 03 Nov 2013 at 9:14am |
|
I just rebuilt my mower deck for my B1, which looks to be the same deck. My center spindle had gone the same way. I got a new one and all the bearings from Sandy Lake for less than $65!
|
|
Dr.Fiero
Silver Level
Joined: 11 Oct 2013
Location: AB, Canada
Points: 72
|
Post Options
Thanks(0)
Quote Reply
Posted: 04 Nov 2013 at 8:19pm |
Well, for the sake of two bearings (about $15), and about an hours work... it was worth just doing it. Being north of the 49'th like yourself, you know how much of a hassle it is having things shipped up here anyhow!
Just for 'records' sake, the bearings used were:
This is the deck, as it went into the cabinet (with a small test blast down in the corner!)
Then out of the cabinet, and with a shot of rust primer on it
The bail and bits are also done in the same fashion.
Things are drying now, then I'll have another go at it tomorrow when I figure I'll get it all painted, then hopefully put back together.
|
|
Current slow rides: '65 Big Ten, '79 JD 317
|
|
Alberta Phil
Orange Level
Joined: 13 Sep 2009
Location: Alberta, Canada
Points: 3649
|
Post Options
Thanks(0)
Quote Reply
Posted: 05 Nov 2013 at 9:42am |
|
I've had no problem with getting parts shipped from Sandy Lake. Granted, parts were small and were shipped Parcel Post, but they are always here in a week to ten days from ordering time. Sandy Lake has excellent service.
Your project is looking good. My deck was not nearly as rusted as yours, but the tensioner pulley was seized solid and took a bit of soaking and disassembly to free it up.
My Homesteader deck is about the same as yours as the tractor sat in a low area that flooded fairly often. Still debating as to restore or part out on that one.
Edited by Alberta Phil - 05 Nov 2013 at 9:46am
|
|
Dr.Fiero
Silver Level
Joined: 11 Oct 2013
Location: AB, Canada
Points: 72
|
Post Options
Thanks(0)
Quote Reply
Posted: 06 Nov 2013 at 10:01am |
That tensioner arm/pulley assembly looks like it could be a real problem in the future (or now!) for others too.
I'm thinking I should make up a CAD file of it now - while it's still in decent shape. Then if someone needs one later I can just mill one out. Mine's even a little flimsy from being thinned out by the rust. At least it's still straight and seems to have the right profile.
Anybody else in need of one?
Oh, I think I found some material for the foot pads I was asking about. It's a ribbed back (good glue grip) rubber material that looks about 1/8" thick, and has that expanded metal looking pattern on it. Cheap too at about $8 for a meter of material (or, enough to do about 10 sets!).
|
|
Current slow rides: '65 Big Ten, '79 JD 317
|
|
Dr.Fiero
Silver Level
Joined: 11 Oct 2013
Location: AB, Canada
Points: 72
|
Post Options
Thanks(0)
Quote Reply
Posted: 06 Nov 2013 at 8:11pm |
Didn't get a huge amount done... but at least parts are going back together, instead of apart. :)
Blades all sharpened, rollers lubed up, new fasteners, etc. Gotta trim down the ends of the carriage bolts so they don't turn into grass hooks.
Can still see the mottling from the rust on top of the deck - at least it's under the cover(s) so you can't normally see it!
I found an idler pulley from an MTD that is... close... but since I'm a sucker for punishment, and just like making things, I'm going to mill one out from scratch. If that fails, I'll just break down and order one online. We'll see how that works out. :)
On an unrelated note: as of today, I'm once again EMPLOYED! Yay!  I start on the 12th. As of the 21st, it would have been one year I'd been out of work.
Hopefully I can get everything on this project wrapped up by then, as my free time will obviously dwindle.
|
|
Current slow rides: '65 Big Ten, '79 JD 317
|
|
Dr.Fiero
Silver Level
Joined: 11 Oct 2013
Location: AB, Canada
Points: 72
|
Post Options
Thanks(0)
Quote Reply
Posted: 07 Nov 2013 at 12:51pm |
Did some more assembly last night - was having a bit of trouble getting things back together, as they just didn't seem "right".
Started looking at the parts diagram, and realized that at some point in the last ~50 years, someone has messed with things! The adjuster assemblies had been moved from inside the bail to the outside. Then they moved the rectangular plate (the one with one square and two round holes), and put some weird bends in it!
So, a bit of quality time with a club hammer and anvil... and now there's two flat plates. Also back where they belong. Things all fit MUCH better now. Though I'm missing the 'ears' or 'wings' that appeared to be at the top of the adjusting bolts. No biggy.
|
|
Current slow rides: '65 Big Ten, '79 JD 317
|
|
ACmowerguy
Orange Level
Joined: 20 Apr 2010
Location: Winfield, MO
Points: 1199
|
Post Options
Thanks(0)
Quote Reply
Posted: 07 Nov 2013 at 6:52pm |
Looking good. Just an FYI, the carriage bolts (3/4" are about the right length) go with the nut to the outside of the deck or inside of the baffle away from the blades. This allows the grass to slide off the rounded heads of the bolts rather than stick and build up on the nut. Also not sure why but your bail assembly has been cut. Sould be solid across the front, not two pieces.
Edited by ACmowerguy - 07 Nov 2013 at 6:54pm
|
|
10 various B-series garden tractors, AC Homesteader8, 416 hydro,710 gt, 914, 916H, 917H, 920D, and many misc attachments
|
|
Dr.Fiero
Silver Level
Joined: 11 Oct 2013
Location: AB, Canada
Points: 72
|
Post Options
Thanks(0)
Quote Reply
Posted: 07 Nov 2013 at 8:06pm |
 ACmowerguy wrote: ACmowerguy wrote:
the carriage bolts (3/4" are about the right length) go with the nut to the outside of the deck or inside of the baffle away from the blades.Also not sure why but your bail assembly has been cut. Sould be solid across the front, not two pieces.
|
Ah, good call on the bolts! I'll make sure to flip those around.
So someone actually cut out a chunk of pipe across the front?! Ugh. Was it straight? Bent? Maybe a picture of what it was supposed to look like? At least that's something I can fix! Thanks!
|
|
Current slow rides: '65 Big Ten, '79 JD 317
|
|
Dr.Fiero
Silver Level
Joined: 11 Oct 2013
Location: AB, Canada
Points: 72
|
Post Options
Thanks(0)
Quote Reply
Posted: 08 Nov 2013 at 9:01am |
Ok, got it now... watched a video by ZippoVarga on youtube of him installing the mower deck. Can clearly see what it USED TO look like.
Well, there's another project for today! :D
|
|
Current slow rides: '65 Big Ten, '79 JD 317
|
|
Dr.Fiero
Silver Level
Joined: 11 Oct 2013
Location: AB, Canada
Points: 72
|
Post Options
Thanks(0)
Quote Reply
Posted: 08 Nov 2013 at 10:34am |
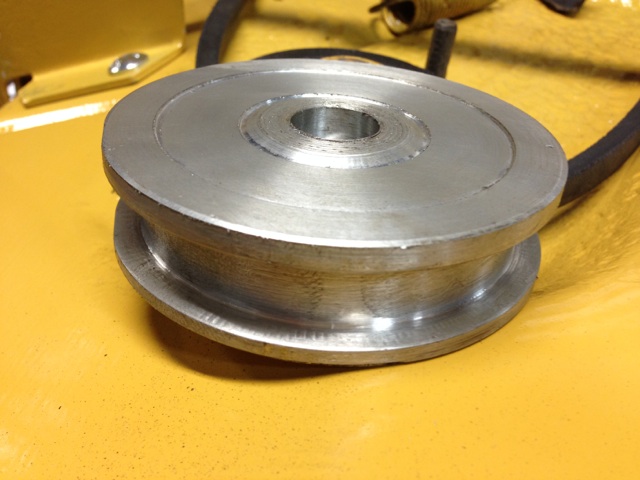
Oh, and from yesterday.... I decided to try and make that tensioner pulley.
Not perfect, but: The photo is doing funny things with perspective. It's 3.75" at both the widest points! (also, there's a bearing pressed in on the underside)
From an economy standpoint - this would have been ludicrous. But, it's a hobby, and I like challenging myself to make stuff. This started off as a 4*4*1.5" block BTW.
|
|
Current slow rides: '65 Big Ten, '79 JD 317
|
|
Dr.Fiero
Silver Level
Joined: 11 Oct 2013
Location: AB, Canada
Points: 72
|
Post Options
Thanks(0)
Quote Reply
Posted: 08 Nov 2013 at 8:10pm |
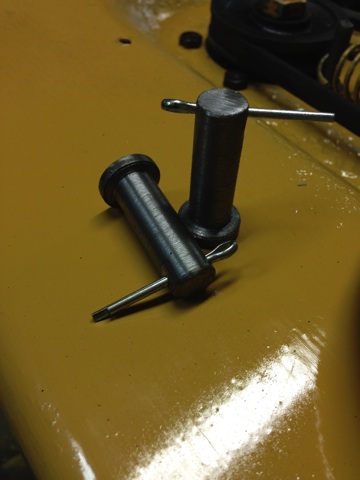
Took ACMG's advise above, and started to replace the missing chunk of bail. Noticed the pins at the front of it weren't really "right" (since one was an old bolt!). Off to the store, but they didn't have anything bigger than 5/16. Needed 1/2".
What EVER shall I do?!  There... that's better. Got my lathe fix in too. ;)
Smacked some 3/4" tubes inside the bail tubes, then slipped a bit of 1" over it. There's those pins too!
Here's the belt, pulley etc all in place:
Anyhow - enough for the day.
|
|
Current slow rides: '65 Big Ten, '79 JD 317
|
|
JohnCO
Orange Level

Joined: 11 Sep 2009
Location: Niwot Colo
Points: 8992
|
Post Options
Thanks(0)
Quote Reply
Posted: 09 Nov 2013 at 12:24am |
|
Great work! I hope you aren't valuing your mower with the amount of work, makes that deck awfully expensive!
|
|
"If at first you don't succeed, get a bigger hammer"
Allis Express participant
|
|
Dr.Fiero
Silver Level
Joined: 11 Oct 2013
Location: AB, Canada
Points: 72
|
Post Options
Thanks(0)
Quote Reply
Posted: 09 Nov 2013 at 11:15am |
JohnCO wrote:
I hope you aren't valuing your mower with the amount of work, makes that deck awfully expensive!
|
Oh great... NOW you tell me!!! 
Nah, this is just a hobby. I like making stuff. I like fixing stuff. And it's gotta be good looking when it's done! I can't really draw, or paint a picture, so this is my version of art.
Besides, most of what I've got into this is time. Bear in mind I've been out of work and job hunting for just short of a year!
Nearly everything you see is stuff I've had laying around the shop. Even the paint; was left over from a paying job I did about 3 years ago! Had to lay out for belts, tires, fluids (some), fasteners I didn't already have... stuff like that... but I'm still FAR less than what it would have cost me to go buy some imported POS lawn tractor (that would no doubt fall apart and be unrepairable after a few years). Not to mention there's no attachments available for them like there is these.
|
|
Current slow rides: '65 Big Ten, '79 JD 317
|
|
Steve in NJ
Orange Level Access

Joined: 12 Sep 2009
Location: Andover, NJ
Points: 11548
|
Post Options
Thanks(0)
Quote Reply
Posted: 09 Nov 2013 at 8:59pm |
Great job Doc! She's shapin' up! 
|
|
39'RC, 43'WC, 48'B, 49'G, 50'WF, 65 Big 10, 67'B-110, 75'716H, 2-620's, & a Motorhead wife
|
|
B10Dave
Bronze Level

Joined: 24 Oct 2010
Location: Aylmer Ontario
Points: 9
|
Post Options
Thanks(0)
Quote Reply
Posted: 17 Nov 2013 at 2:10pm |
|
So far you have done a great job on your restore. Lots of rework on the deck to get it correct. The inner baffle should be a smooth curve close to the blade ends to get proper air flow to move clippings. The carbs on Briggs singles will sometimes seep where they seat in the carb body. Most guys add an inline fuel shutoff and don't frustrate themselves trying to eliminate the small leak. Having said that; the flowjet on my BigTen is one of the few gastight ones I have ever seen. Keep up the progress and pics on this very interesting thread.Thanks for posting it all...Dave
|
|
Dr.Fiero
Silver Level
Joined: 11 Oct 2013
Location: AB, Canada
Points: 72
|
Post Options
Thanks(0)
Quote Reply
Posted: 17 Nov 2013 at 9:29pm |
I did the little stunt that was mentioned on a small engine forum... took my old emulsion tube, knocked the threads off it, then put some valve lapping compound on the taper, and used it to refine the seat of the carb body. I've left the air filter assy off so I can see down into the body easily. I'll check in the morning, and see if it's still leaking fuel. So far so good!
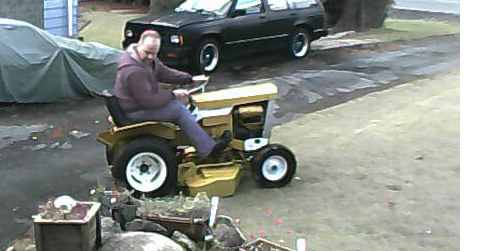
I actually took it out today though! Maiden voyage! Weather is getting really crappy here, and it's supposed to rain for like a week. Figured I'd get a cut in before it gets wet.
Not really a planned shot - just happened to drive in the path of one of my security cameras. :)
Well, ended up having so much fun, I cut it like 3 times! Ha ha! First time this machine has seen the lawn in at least a dozen years. Need to do some mods (I'll make some stand off blocks to get the blades another 1/2 - 3/4" lower) I think, as I've got it cranked as low as the deck will go, and it's still up too high. Does leave a really nice pattern though!
It's been a fun run to here -- I'll keep using it over the winter with the plow blade. No more manually shoveling the driveway if/when it snows!
|
|
Current slow rides: '65 Big Ten, '79 JD 317
|
|
Dr.Fiero
Silver Level
Joined: 11 Oct 2013
Location: AB, Canada
Points: 72
|
Post Options
Thanks(0)
Quote Reply
Posted: 19 Nov 2013 at 11:30pm |
Minor update: it's late tuesday night now. Haven't run her since sunday.
Checked the carb, and there's no fuel in the body! Either the seating trick worked, or it's all drained out. ;) I'll hope for the former.
(with regard to fixing up these pesky carbs)
|
|
Current slow rides: '65 Big Ten, '79 JD 317
|
|
Dr.Fiero
Silver Level
Joined: 11 Oct 2013
Location: AB, Canada
Points: 72
|
Post Options
Thanks(0)
Quote Reply
Posted: 05 Jan 2014 at 8:14pm |
Hey ya'll...
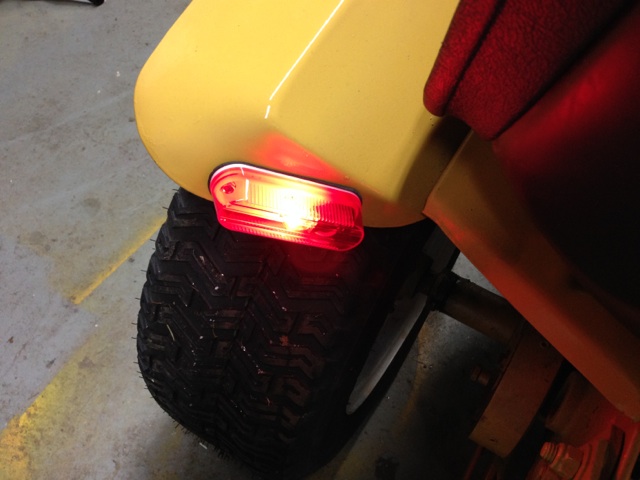
So, I was out plowing the driveway, and a bit into the street.. would seem that it's rather hard to see me after the sun goes down! Nope - no hits - but I could feel the stares from people (though it could be of jealousy, since they all knew they'd be shoveling when THEY got home! )
Anyhow, went out tonight and hooked up some running lights.
Nice and bright! Found a running light kit at a "harbour freight" type place for $10, and it gave me about 10 spares to boot. Only took about an hour. Totally worth it.
|
|
Current slow rides: '65 Big Ten, '79 JD 317
|
|
rdmanone
Bronze Level
Joined: 18 Jan 2014
Location: Florida
Points: 42
|
Post Options
Thanks(0)
Quote Reply
Posted: 27 Jan 2014 at 7:24am |
|
Very nice job on the clean up. I've got several of these old Allis chalmers and Simplicity tractors. I am currently cleaning my B110 and posting on another sight, My tractor forum. I'll have to post some pics up here. Again super job on yours.
|
|
macvette
Orange Level

Joined: 13 Jun 2011
Location: nekoosa, wi
Points: 1656
|
Post Options
Thanks(0)
Quote Reply
Posted: 27 Jan 2014 at 11:22am |
What a fantastic job of restoring. Would be a real blessing to have machine tools like you have, and the skill to use them. Maybe I should ship my 1968 B-207 north of the border for you to spruce up! Just kidding.
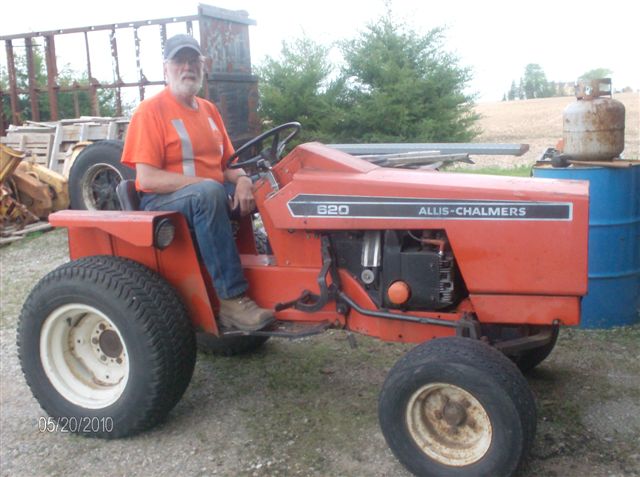
I have an AC 620 for cutting lawn, but I do get out the B-207 every once in a while, just cause its fun to use. Don't put my 32" snowblower on the 207 cause I have a 60" front blade on the 620.
|
|
Dr.Fiero
Silver Level
Joined: 11 Oct 2013
Location: AB, Canada
Points: 72
|
Post Options
Thanks(0)
Quote Reply
Posted: 27 Jan 2014 at 11:14pm |
Thanks for the kind words.
Didn't mention - I tied the lights into the ignition relay circuit, so as soon as the key goes on, the lights come on (that way I can't forget to turn them on, or off!).
Still haven't done the decals. Just too damn cold out. Guy who does them recommended it be at least 10C before applying, I've probably got another 2 months to wait. Or I break out the IR heater!
|
|
Current slow rides: '65 Big Ten, '79 JD 317
|
|
Steve in NJ
Orange Level Access
Joined: 12 Sep 2009
Location: Andover, NJ
Points: 11548
|
Post Options
Thanks(0)
Quote Reply
Posted: 18 Feb 2014 at 7:24am |
I put tailights tied into a 4 way flasher knob/switch on my 716H a few years back when I lived on a busy county road just so when I was out at the end of the driveway plowin' people would see me better with the flashers flashin'. Don't use em' as much now at the new house being we're back in a quiet development where there's just the local neighbors that roll through on occasions. Here's a pic of the tailights. Nothin' trick, just a pair of side marker lamps tied into a flasher circuit. Weight box out back sports a diesel battery that adds a little more weight to the ATV tires, and powers the up/down on the plow. Takes the load off the Stator charging system... 
|
|
39'RC, 43'WC, 48'B, 49'G, 50'WF, 65 Big 10, 67'B-110, 75'716H, 2-620's, & a Motorhead wife
|
|
Dr.Fiero
Silver Level
Joined: 11 Oct 2013
Location: AB, Canada
Points: 72
|
Post Options
Thanks(0)
Quote Reply
Posted: 09 May 2014 at 11:17pm |
She's sinking cap'n!!
Well, my float was sinking anyhow.
Went out to cut the lawn today (did it REALLY need it? Of course not), and had a bit of grief getting her going. Started sputtering and chugging black. Then died and wouldn't relight. Then saw gas puking out the drain in the bottom of the carb.
Figured I had some gunk in the bowl and it had made the needle/seat stick. So, popped off the carb (I'm getting FAR too good at doing that!) and yanked it apart. Needle looked good, but noticed the float felt a bit heavy! Gave it a shake, and sure enough... slosh slosh. Damn.
So, being a Friday night and not wanting to have to go get a new one... out came the soldering gun etc! But first, had to get the gas out of the float. REALLY should have done a video! Ha ha! Took a butane torch to it to warm it up. Then tipped it to get the gas flowing a tiny bit out (one of the) holes in it. Of course it lit right off. Put it down on the shop floor, and as it heated itself up, the pressure kept building, and the jet of flame kept growing! Yeah, I started stepping back thinking... hmmmm.. maybe this wasn't such a great idea! :D
Anyhow, it burnt itself out after about 20 seconds with no major drama. Made for a cool flame show though.
Plugged up what I could see, then sunk it in a cup, found a few more holes and plugged them too. All back together, and so far so good. So, if you ever have a flooding situation, there's another possible fix!
|
|
Current slow rides: '65 Big Ten, '79 JD 317
|
|
Dr.Fiero
Silver Level
Joined: 11 Oct 2013
Location: AB, Canada
Points: 72
|
Post Options
Thanks(0)
Quote Reply
Posted: 18 Dec 2015 at 8:56am |
Wow, time flies. And no updates. I suck.
So, needed to do some tilling. Have a tiller. It hadn't seen dirt in at least 20 years. This can't be good. Nope, wasn't. Seized up almost everywhere!
Well, after several days of cursing, torching, hammering - then the required remachining of now smashed parts (!).... I got it all moving.
Didn't have any of the linkage parts though, just a lot of pictures to go from. Had to guess on a lot of the dimensions. At least I had the pulleys to go from. So I could take the dimension of the pulley I had, scale the drawings I found, then extrapolate the size of some of the other bits.
Not my prettiest work! But functional.
Ditto. ;) Got the yard tilled anyhow, so it was a succesful mission.
-----
Needed to move a trailer around, and got tired of hauling it by hand, so I made a trailer hitch attachment.
(ok, I swear I took pictures, but can't find them now! If anyone cares, I'll take some more next time it actually stops raining)
|
|
Current slow rides: '65 Big Ten, '79 JD 317
|
|
john(MI)
Orange Level

Joined: 12 Sep 2009
Location: SE MI
Points: 9263
|
Post Options
Thanks(0)
Quote Reply
Posted: 18 Dec 2015 at 11:25am |
Very nice job Doc! All of the pics really help show all you have done, thank you. I have a friend that has all the tools you have but he's having an auction. so I gotta start looking for a new source. Maybe I'll just start mailing to you Doc! 
Edited by john(MI) - 18 Dec 2015 at 11:26am
|
|
D14, D17, 5020, 612H, CASE 446
|
|
Glockhead SWMI
Orange Level
Joined: 12 Sep 2009
Location: South West Mich
Points: 2657
|
Post Options
Thanks(0)
Quote Reply
Posted: 18 Dec 2015 at 11:57am |
|
In Mr Swinfords book it says the big 10 was only made in 1965. I just picked one up myself.
|
|
wdtom
Silver Level
Joined: 08 Dec 2015
Location: Foster, R.I.
Points: 74
|
Post Options
Thanks(0)
Quote Reply
Posted: 27 Feb 2016 at 3:30pm |
|
Yes, a lathe and milling machine make working on old tractors a lot more fun and you can improve on a lot of things. Like making pins oversize to fit worn holes.
|
|
Dr.Fiero
Silver Level
Joined: 11 Oct 2013
Location: AB, Canada
Points: 72
|
Post Options
Thanks(0)
Quote Reply
Posted: 06 Aug 2016 at 11:10pm |
Well, been running it almost year round for 3 years now. Mows in the summer, for the few times we HAD a winter, it plowed.
While not 100% (only 90!), it looks like I'll be moving to a larger place, and have outgrown this guy. So, it will at that point be going up for sale.
With it how it is (turn key and go!), and having the blade, tiller, mower deck, trailer hitch... what would be a reasonable price?
|
|
Current slow rides: '65 Big Ten, '79 JD 317
|
|
Dr.Fiero
Silver Level
Joined: 11 Oct 2013
Location: AB, Canada
Points: 72
|
Post Options
Thanks(0)
Quote Reply
Posted: 01 Feb 2017 at 9:37am |
Any interest in this?
We've moved to our larger place, and have picked up something bigger. Would like to see the whole package go to a good home.
Offers??
|
|
Current slow rides: '65 Big Ten, '79 JD 317
|
|